
If you love woodworking, you know how important it is to stay safe while creating your projects. Dust, fumes, and tiny particles can harm your lungs and eyes without you even realizing it.
That’s where a full-face respirator comes in. This guide will show you exactly how to use a full-face respirator to protect yourself every time you work. By the end, you’ll feel confident and ready to tackle your next project without worrying about harmful dust or chemicals.
Keep reading to learn how to keep your health intact and enjoy your woodworking even more.
Choosing The Right Respirator
Using a full-face respirator protects your lungs and eyes during woodworking. Choosing the right one helps keep you safe and comfortable. This guide explains how to pick the best respirator for your needs.
Look for a respirator that fits well, uses proper filters, and matches the work you do. Understanding different types and features is key to making a good choice.
Types Of Full-face Respirators
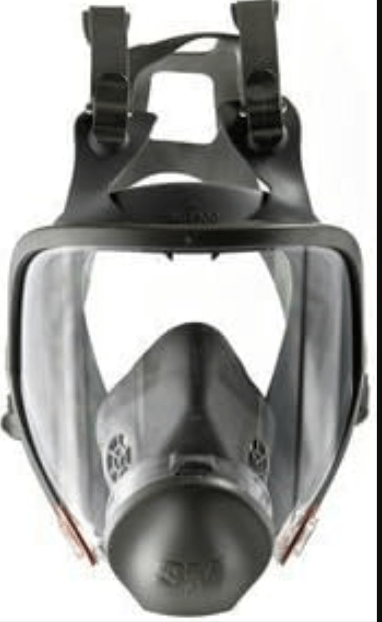
Full-face respirators cover your eyes, nose, and mouth. They come in different styles based on the design and materials. Choose one that fits your face shape and is easy to wear for long periods.
- Half-mask respirators cover the nose and mouth only.
- Full-face respirators include a clear visor for eye protection.
- Powered air-purifying respirators have a battery-powered blower.
- Supplied-air respirators connect to an external air source.
Filter Options For Woodworking
Filters block harmful dust, fumes, and chemicals. Woodworking creates fine dust and sometimes harmful gases. Use filters designed to handle these hazards.
| Filter Type | Protection | Recommended Use |
| P100 Particulate | Removes 99.97% of dust | Wood dust and fine particles |
| Combination (P100 + Organic Vapor) | Blocks dust and fumes | Wood dust plus finishing chemicals |
| Gas/Vapor Cartridge | Filters harmful gases | Use with solvent-based finishes |
Size And Fit Considerations
A respirator must fit your face well to work properly. Poor fit lets dust and fumes enter. Check the size and adjust straps for a tight seal.
- Measure your face width and length before buying.
- Try on different sizes and models if possible.
- Perform a fit test by covering the filter and breathing in.
- Adjust straps to prevent gaps around the edges.
- Replace the respirator if it feels uncomfortable or leaks air.
Credit: treecarezone.com
Preparing Your Respirator
A full-face respirator protects you from dust and fumes while woodworking. Proper preparation ensures it works well and keeps you safe.
Before wearing your respirator, take time to inspect and clean it. Replace any parts needed to keep it effective.
Inspecting For Damage
Look over every part of your respirator for cracks, tears, or worn spots. Check the face seal, straps, and valves carefully.
- Examine the face mask for cracks or holes.
- Check straps for stretching or tears.
- Test valves to make sure they open and close smoothly.
- Inspect the filter holders for damage or dirt.
Cleaning Before Use
Clean your respirator before each use to avoid breathing in dust or chemicals from previous jobs.
| Part | Cleaning Method |
|---|---|
| Face mask | Wipe with mild soap and warm water, then air dry |
| Straps | Wash with mild detergent and rinse well |
| Valves | Rinse gently and dry completely |
| Filter holders | Remove dust with a dry cloth or soft brush |
Replacing Filters
Filters must be replaced often to keep your air clean. Old filters block air flow and reduce protection.
- Check filter condition before each use.
- Remove the old filter carefully to avoid dust release.
- Install a new filter that matches your respirator model.
- Ensure the filter fits tightly with no gaps.
- Dispose of used filters following local safety rules.
Proper Wearing Techniques
Wearing a full-face respirator properly keeps you safe while woodworking. It protects your lungs and eyes from dust and fumes.
Learn the right way to wear your respirator for the best protection and comfort.
Strapping And Adjusting
Start by placing the respirator over your face. Make sure the straps are loose before you adjust them.
Tighten the straps slowly. The respirator should fit snugly but not cause pain or leave marks.
- Adjust the top strap to hold the mask firmly on your forehead
- Tighten the side straps evenly for a secure fit
- Ensure the chin is fully covered by the mask
- Do not over-tighten to avoid discomfort
Performing A Seal Check
Check the seal every time you wear the respirator. A good seal stops dust and fumes from entering.
Cover the filters and breathe in gently. The mask should pull inwards without air leaks.
- If air leaks, adjust the straps and mask position
- Repeat the test until you feel a tight seal
- Perform a positive pressure check by breathing out gently
- Look for any air escaping around the edges
Comfort Tips For Extended Use
Wearing a respirator for hours can be uncomfortable. Use simple tips to stay comfortable.
Take breaks and adjust straps to reduce pressure on your face.
- Use a soft cloth or foam liner inside the mask
- Keep your skin clean and dry before wearing the mask
- Shift the respirator slightly during breaks to ease pressure points
- Drink water regularly to stay hydrated

Credit: parcilsafety.com
Maintaining Safety While Woodworking
Woodworking creates dust and fumes that can harm your lungs. Using a full-face respirator helps keep you safe. This guide covers key safety tips.
Learn how to protect yourself with the right gear and proper ventilation. Follow these steps to work safely every time.
Protecting Against Dust And Fumes
Dust and fumes from wood and finishes can irritate your eyes and lungs. A full-face respirator blocks harmful particles and gases. Make sure your respirator fits well and uses the right filters.
- Choose filters designed for wood dust and chemical fumes
- Check the seal around the mask for leaks before each use
- Replace filters regularly according to manufacturer instructions
- Clean the respirator after every use to avoid buildup
Combining Respirators With Other Gear
Wear additional safety gear to protect your body. Gloves, ear protection, and safety glasses work well with your respirator. Layering gear keeps you safe from many hazards.
| Gear | Purpose |
| Gloves | Protect hands from splinters and chemicals |
| Safety Glasses | Shield eyes from flying debris |
| Ear Protection | Reduce noise from power tools |
| Respirator | Filter dust and fumes |
Ventilation Best Practices
Good airflow lowers dust and fumes in your workspace. Use fans and open windows to move air outside. Ventilation helps your respirator work better.
- Place a fan near a window to blow dust outside
- Open doors and windows to create cross-ventilation
- Use dust collection systems on power tools
- Take breaks outside fresh air to reduce exposure
Cleaning And Storing Your Respirator
Using a full-face respirator in woodworking keeps you safe from dust and fumes. Proper cleaning and storage help the respirator work well every time.
Taking care of your respirator will extend its life and keep it ready to protect you on the job.
Post-use Cleaning Routine
Clean your respirator right after use. This removes dust, dirt, and sweat that build up during work.
Use warm water and mild soap. Avoid harsh chemicals that can damage the mask.
- Remove filters and cartridges before cleaning
- Wash the facepiece gently with soap and water
- Rinse well to remove all soap
- Dry with a clean cloth or air dry in a clean place
- Do not use heat or direct sunlight to dry
Safe Storage Methods
Store your respirator in a clean, dry spot. This keeps it free from dust and damage.
Keep it away from direct sunlight and chemicals. Avoid places with high heat or moisture.
- Use a sealed container or plastic bag
- Keep filters and cartridges separate if not reusable
- Store parts flat to avoid bending or warping
- Place the respirator where it won’t get crushed
Regular Maintenance Schedule
Check your respirator often. Regular maintenance finds problems before they get worse.
Replace filters and parts based on the manufacturer’s advice or when damaged.
- Inspect straps and seals for cracks or wear
- Test the facepiece for leaks before each use
- Replace filters after each use or as needed
- Clean valves and speaking diaphragms regularly
- Keep a log of maintenance and part changes
Troubleshooting Common Issues
Using a full-face respirator during woodworking keeps you safe from dust and fumes. Sometimes, problems can make the respirator less effective or uncomfortable. It is important to fix these issues quickly.
This guide helps you solve common problems like fogging, fit issues, and filter clogs. Fixing these ensures your respirator works well every time.
Dealing With Fogging
Fogging happens when warm breath meets the cold face shield. It blocks your view and can be dangerous. Keep the shield clean and dry before use.
Try these tips to reduce fogging:
- Use an anti-fog spray or wipes made for respirators
- Check if the respirator has a built-in vent or fan
- Ensure the face seal is tight to stop breath from escaping upward
- Wear a sweatband to reduce moisture inside the mask
Addressing Fit Problems
A poor fit lets dust and fumes enter the mask. It also makes wearing the respirator uncomfortable. Adjust the straps to get a snug fit without pain.
Follow these steps for a better fit:
- Adjust all straps evenly on both sides
- Check for gaps around the nose and chin
- Replace worn or damaged seals and straps
- Test the fit by covering the filters and breathing in; the mask should collapse slightly
Handling Filter Clogs
Filters can clog with dust and debris over time. This reduces airflow and makes breathing hard. Replace filters regularly based on use and manufacturer advice.
To spot filter clogs:
- Notice if breathing feels more difficult
- Look for visible dust buildup on the filter surface
- Check for changes in mask pressure or sounds
- Keep spare filters ready for quick changes

Credit: www.amazon.com
Frequently Asked Questions
What Is A Full-face Respirator For Woodworking?
A full-face respirator covers your eyes, nose, and mouth. It protects against dust, fumes, and harmful particles during woodworking. It ensures clean air intake and shields your face from debris, improving safety and comfort.
How Do I Properly Fit A Full-face Respirator?
To fit a full-face respirator, adjust the straps snugly around your head. Make sure the mask seals tightly against your face without gaps. Perform a fit check by inhaling and exhaling to confirm no air leaks.
When Should I Replace Respirator Filters In Woodworking?
Replace filters when breathing becomes difficult or after heavy use. Check manufacturer guidelines for filter lifespan. Regular replacement ensures effective protection from dust, chemicals, and fumes generated during woodworking tasks.
Can Full-face Respirators Protect Against Wood Dust Allergens?
Yes, full-face respirators with P100 filters effectively block wood dust allergens. They prevent inhalation of harmful particles that may cause respiratory issues or allergic reactions in sensitive individuals.
Conclusion
Using a full-face respirator keeps you safe from dust and fumes. It fits snugly and protects your eyes and lungs. Always check the mask before starting your work. Clean it after each use to keep it effective. Remember, safety matters more than speed or comfort.
Protect yourself well for better woodworking results. Breathe clean air and work with confidence. Stay safe, stay healthy, and enjoy your craft.
