If you want smooth, professional-looking finishes on your projects, mastering the orbital sander is a must. But using this tool the right way can save you time, effort, and frustration.
Imagine finishing your work faster and with less hassle—sounds great, right? You’ll discover simple yet powerful tips that will help you operate your orbital sander efficiently and get the best results every time. Keep reading to unlock the secrets that pros don’t always share!
Choosing The Right Orbital Sander
Using the right orbital sander makes your work easier and faster. It helps you get smooth and even surfaces.
Many factors affect your choice of sander. This guide covers types, grit selection, and power needs.
Types Of Orbital Sanders
Orbital sanders come in several types. Each type suits different sanding tasks and materials.
- Random Orbital Sanders:These have a round pad that moves in random orbits. They reduce swirl marks and work well on wood and metal.
- Finishing Sanders:Smaller and lighter, these are good for fine sanding and detail work.
- Sheet Sanders:These use rectangular sandpaper sheets. They work best on flat surfaces.
Selecting The Appropriate Grit
Sandpaper grit affects the finish quality. Lower grit numbers remove more material, higher numbers smooth surfaces.
| Grit Number | Use Case |
| 40-60 | Heavy material removal, rough shaping |
| 80-120 | General sanding, smoothing rough surfaces |
| 150-220 | Final sanding before finishing |
| 320+ | Polishing and very fine sanding |
Power And Size Considerations
Choose a sander with enough power for your projects. Size matters for control and comfort during work.
- Smaller sanders are lighter and easier to handle for detail work.
- Larger sanders cover more area quickly but may tire your hands faster.
- Electric models offer constant power but need a power source.
- Battery-powered sanders give freedom of movement but check battery life.
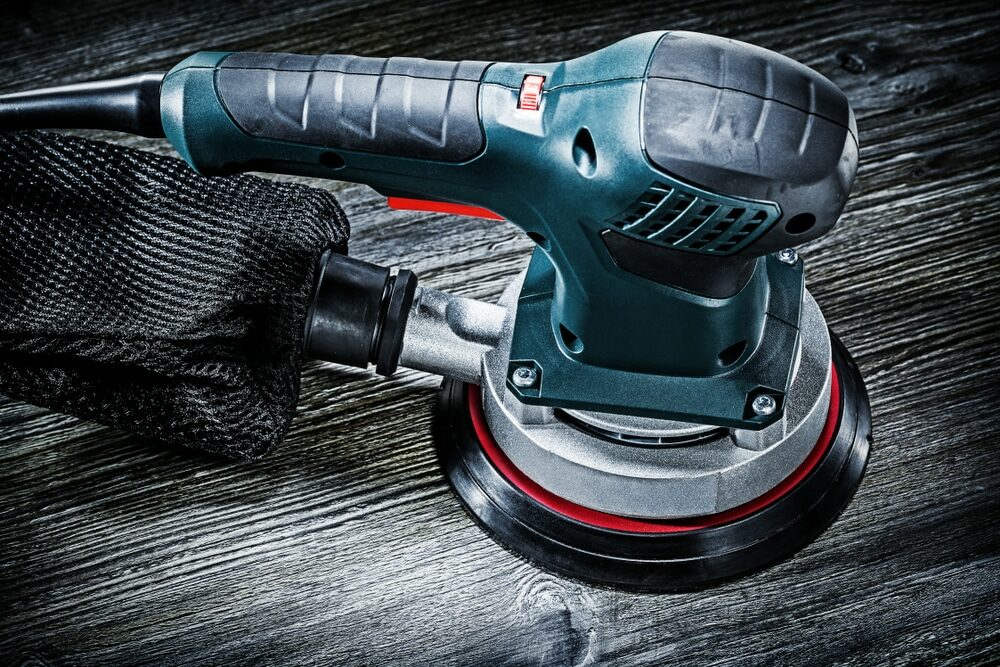
Credit: mrsander.co.uk
Preparing The Workspace
Setting up your workspace is key for safe and efficient sanding. A clean and well-lit area helps you work better with an orbital sander.
Before starting, prepare your area to avoid accidents and get good results from your sanding job.
Clearing The Area
Remove all clutter and objects that can block your movement or cause tripping. A tidy space helps keep your focus on sanding.
- Clear the floor of tools and debris
- Keep cords and hoses away from the sander path
- Arrange materials within easy reach
- Make sure there is enough space to move around safely
Ensuring Proper Lighting
Good lighting helps you see the surface clearly. It shows imperfections and guides your sanding evenly.
| Lighting Type | Best Use |
| Natural Light | Daytime work near windows |
| Overhead Lights | General workspace illumination |
| Task Lights | Focus on small or detailed areas |
| Portable Lamps | Adjustable for tight spaces |
Using Safety Equipment
Wear safety gear to protect yourself from dust and debris. Safety equipment lowers the risk of injury.
- Wear safety goggles to protect your eyes
- Use a dust mask or respirator to avoid breathing dust
- Wear ear protection to reduce noise impact
- Use gloves to improve grip and protect hands
Sanding Techniques
Using an orbital sander correctly helps you get smooth surfaces fast. Good sanding techniques make your work look neat and last longer.
Learn how to control your sander well. This guide covers pressure, strokes, and avoiding damage from sanding too much.
Maintaining Consistent Pressure
Keep steady pressure on the sander. Too much pressure can cause uneven sanding or damage the surface.
Light, even pressure helps the sander work efficiently. Let the tool do the work, not your hands pushing hard.
- Hold the sander firmly but gently
- Keep pressure steady across the entire sanding area
- Do not press down hard; the sander’s weight is enough
Using Smooth, Even Strokes
Move the sander in smooth, even strokes. Avoid stopping in one spot to prevent marks or uneven sanding.
Keep a consistent speed and direction. Overlapping your strokes slightly helps cover the surface evenly.
- Use slow, steady movements
- Overlap each stroke by about 50%
- Move the sander in a circular or back-and-forth pattern
Avoiding Over-sanding
Stop sanding as soon as the surface is smooth and even. Over-sanding can damage the wood or remove too much material.
Check your progress often. Sand a little, then pause to inspect the surface under good light.
- Sand in short bursts, then check the surface
- Use finer grit sandpaper for final smoothing
- Replace sandpaper when it gets worn out
Maintaining The Orbital Sander
Keeping your orbital sander in good shape helps it work better and last longer. Proper care avoids damage and saves money on repairs.
Regular maintenance is simple. It takes only a few minutes but keeps the tool running smoothly every time you use it.
Cleaning The Tool Regularly
Dirt and dust build up on the sander and inside its vents. This can cause the motor to overheat or slow down.
- Unplug the sander before cleaning.
- Use a soft brush to remove dust from vents and surfaces.
- Wipe the tool with a damp cloth to clear grime.
- Blow compressed air inside to clear stubborn dust.
Replacing Sanding Pads
Sanding pads wear out with use and lose their grip. Old pads can cause uneven sanding or damage the surface.
- Check the pad before each use.
- Replace pads that show cracks, tears, or worn hooks.
- Use pads that fit your sander model for best results.
- Store pads in a dry place to prevent damage.
Checking For Wear And Tear
Inspect all parts of your sander regularly. Look for loose screws, damaged cords, or worn brushes.
| Part | Signs of Wear | Action Needed |
| Power Cord | Frays or cuts | Replace immediately |
| Sanding Pad | Cracks or missing hooks | Replace with new pad |
| Motor Brushes | Excessive wear | Have serviced or replaced |
| Screws and Fasteners | Loose or missing | Tighten or replace |
Troubleshooting Common Issues
Orbital sanders are useful tools for smooth sanding. Sometimes, issues happen during use. Knowing how to fix these problems saves time and effort.
This guide covers common problems and easy fixes. Follow these tips to keep your orbital sander working well.
Dealing With Uneven Surfaces
Uneven surfaces can cause rough sanding or damage to your project. The sander may skip or leave marks if not handled right.
Check if the sanding pad is flat and firmly attached. Use light, even pressure and move the sander smoothly across the surface.
- Replace worn or damaged sanding pads
- Keep the sander flat on the surface
- Use consistent, gentle pressure
- Sand in overlapping motions
Reducing Dust Build-up
Dust can block air flow and reduce sanding performance. It also makes your work area messy and unsafe.
Empty the dust bag often or connect the sander to a vacuum. Clean dust from vents and pads to keep air flowing.
- Use a dust collection bag or vacuum
- Empty the dust bag before it fills
- Clean vents and sanding pads regularly
- Wear a mask to avoid breathing dust
Handling Motor Overheating
Overheating can stop the sander from working. It happens if you press too hard or use it for too long.
Turn off the sander and let the motor cool down. Avoid blocking air vents and do not press down too hard while sanding.
- Take breaks to let the motor cool
- Do not cover air vents during use
- Use light pressure to reduce strain
- Check power cord and plug for damage

Credit: mrsander.co.uk
Enhancing Efficiency
Using an orbital sander can save time and effort in your sanding projects. Working smart helps you finish jobs faster and better.
Focus on key tips that make your sanding smoother and cleaner. This guide covers dust control, speed settings, and planning your work.
Using Dust Collection Systems
Dust collection keeps your workspace clean and your air clear. It also helps you see the sanding area better.
Most orbital sanders come with a dust bag or port for a vacuum. Attach these to reduce dust while you work.
- Empty dust bags regularly to keep suction strong.
- Use a vacuum attachment for better dust removal.
- Wear a mask if dust levels get high.
Optimizing Speed Settings
Adjust your sander’s speed to match the material and sanding task. Too fast can damage wood, too slow wastes time.
Start with a medium speed for most projects. Change it if you need smoother finishes or faster removal.
- Use low speed for fine sanding and finishing.
- Medium speed works well for general sanding.
- High speed helps remove old paint or rough spots.
Planning The Sanding Sequence
Plan your sanding steps before starting. This prevents over-sanding and saves time.
Begin with coarse grit sandpaper to remove rough areas. Move to finer grits for smooth finishes.
- Start sanding with 60-80 grit for rough surfaces.
- Follow with 120-150 grit for smoothing.
- Finish with 180-220 grit for a fine surface.
- Sand along the wood grain to avoid scratches.
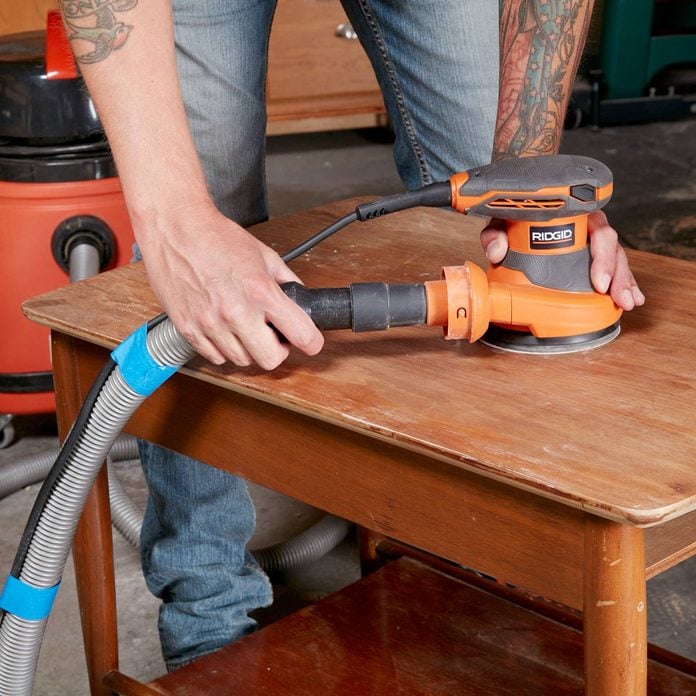
Credit: www.familyhandyman.com
Frequently Asked Questions
How Do I Choose The Right Grit For Orbital Sanding?
Select grit based on your project. Coarse grits remove material fast, fine grits smooth surfaces. Start with 80-120 grit for rough sanding, then use 220+ grit for finishing.
What Is The Proper Technique For Using An Orbital Sander?
Hold the sander flat and move it in slow, overlapping circles. Avoid applying too much pressure to prevent uneven sanding or gouges.
How Often Should I Replace The Sanding Pads?
Replace sanding pads when they become clogged, torn, or lose abrasiveness. Regularly changing pads ensures efficient sanding and better surface finish.
Can Orbital Sanders Be Used On Curved Surfaces?
Yes, orbital sanders work well on gentle curves. Use light pressure and a finer grit to avoid damaging delicate contours.
Conclusion
Using an orbital sander correctly makes your work smoother and faster. Keep the sander moving to avoid marks on your surface. Choose the right sandpaper grit for each task. Always apply gentle, even pressure for best results. Clean the sander often to keep it working well.
Practice these tips to save time and effort. Enjoy better finishes on your projects with ease. Small changes can bring big improvements to your sanding.