Is your hand drill acting up just when you need it most? Don’t let a simple malfunction slow down your project or force you to buy a new tool.
You can fix your hand drill yourself, saving time and money. In this guide, you’ll learn easy steps to diagnose and repair common problems. By the end, you’ll feel confident handling your drill like a pro and avoid future breakdowns.
Ready to get your tool back in perfect working order? Let’s dive in!
Common Hand Drill Issues
Hand drills are useful tools, but they can have problems over time. Knowing common issues helps you fix them yourself.
This guide covers common problems like worn out chucks, motor troubles, trigger malfunctions, and battery issues.
Worn Out Chuck
The chuck holds the drill bit in place. A worn out chuck can slip or fail to hold bits tightly.
Check for cracks or worn teeth inside the chuck. Clean dirt and grease to improve grip.
- Remove the chuck and clean it with a brush
- Lubricate moving parts with light oil
- Replace the chuck if teeth are damaged
Motor Problems
The motor powers the drill. If it stops working, the drill will not spin or work weakly.
Motor issues include worn brushes, burned coils, or loose wires. Test the motor with a multimeter if possible.
- Replace worn carbon brushes
- Check and fix loose wire connections
- Clean dust and debris from motor vents
Trigger Malfunctions
The trigger controls power to the motor. If it sticks or does not work, the drill won’t start or stop properly.
Triggers can wear out or get dirty. Cleaning or replacing the switch often solves this problem.
- Remove the trigger switch and clean contacts
- Use compressed air to clear dust inside
- Replace the trigger if it is broken
Battery Troubles
For cordless drills, battery problems cause power loss or no power at all. Batteries lose capacity over time.
Check battery charge level and connections. Replace old or damaged batteries for best results.
- Charge the battery fully before use
- Clean battery contacts with a cloth
- Replace battery if it does not hold charge

Credit: www.youtube.com
Essential Tools For Repair
Repairing hand drills needs some basic tools. These tools help you open, test, and fix the drill parts.
Using the right tools makes repair easier and safer. Let’s look at the main tools you will need.
Screwdrivers And Wrenches
Screwdrivers and wrenches help you open the drill case. They also let you remove or tighten screws and bolts.
Different drills use different screw types. You need a set of screwdrivers with flat, Phillips, and hex heads.
- Flathead screwdriver for slotted screws
- Phillips screwdriver for cross-shaped screws
- Hex wrench or Allen key for hex bolts
- Adjustable wrench for nuts and bolts
Multimeter Usage
A multimeter checks if the drill’s electrical parts work well. It measures voltage, current, and resistance.
You can find broken wires or bad switches with a multimeter. It helps you know which parts need fixing or replacing.
- Set the multimeter to the right mode
- Test battery voltage to check power
- Check continuity to find broken wires
- Measure resistance to test switches and motors
Lubricants And Cleaners
Lubricants reduce friction in moving parts. Cleaners remove dust, dirt, and old grease from the drill.
Using the right lubricants and cleaners keeps the drill working smoothly and lasts longer.
- Use light machine oil for drill gears and bearings
- Use spray lubricant for tight spots
- Use compressed air or brush to clean dust
- Use alcohol or electrical cleaner for contacts
Step-by-step Repair Process
Repairing a hand drill can save money and extend its life. This guide shows simple steps anyone can follow. You will learn how to open the drill safely, check parts, and fix problems.
Each step is clear and easy to understand. Take your time and use the right tools. Let’s start fixing your hand drill.
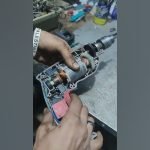
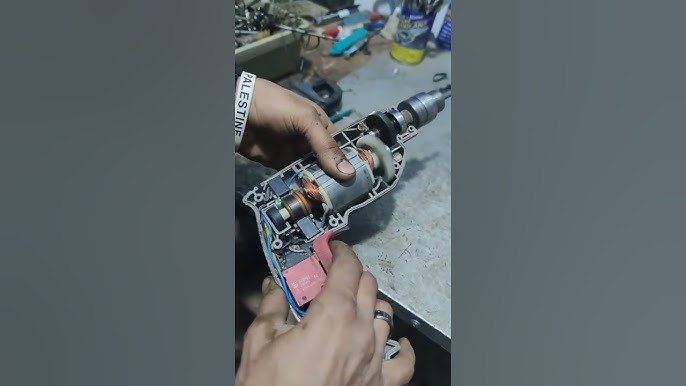
Disassembling The Drill
Begin by unplugging the drill or removing the battery. Use a screwdriver to remove all screws. Keep the screws in a container to avoid losing them. Gently separate the drill parts without forcing them.
Look out for small springs or washers that can fall out. Lay all parts on a clean surface. This will make reassembly easier.
Inspecting Internal Components
Check the drill parts for damage or wear. Look at the motor, gears, and wiring. Clean dust and dirt with a soft brush. Look for broken wires or burnt spots.
| Component | What to Check | Signs of Damage |
|---|---|---|
| Motor | Brushes and armature | Worn brushes, burnt smell |
| Gears | Teeth and lubrication | Broken teeth, dry gears |
| Wiring | Connections and insulation | Frayed wires, loose connections |
| Switch | Function and contacts | Does not click, corrosion |
Replacing Faulty Parts
Order replacement parts that fit your drill model. Remove broken parts carefully. Use tools like pliers or a soldering iron if needed. Insert new parts and secure them properly.
- Identify the faulty part
- Remove the damaged part
- Clean the area around the part
- Install the new part carefully
- Check for tight connections
Reassembling And Testing
Put all parts back in reverse order. Tighten screws but do not over-tighten. Insert the battery or plug in the drill. Turn it on and listen for smooth operation.
If the drill runs well, the repair is complete. If not, check connections and parts again. Repeat steps if needed until the drill works properly.
Maintenance Tips For Longevity
Hand drills last longer with proper care and attention. Regular upkeep keeps them working smoothly.
Follow simple maintenance steps to avoid damage and costly repairs. Clean, store, and lubricate your drill right.
Regular Cleaning
Remove dust and dirt after each use. Wipe the drill with a dry cloth. Use a small brush to clean crevices.
- Unplug or remove the battery before cleaning
- Use compressed air to clear dust inside vents
- Clean the chuck and moving parts carefully
- Check for rust and wipe with a rust remover if needed
Proper Storage
Store hand drills in a dry, cool place to avoid rust. Keep them away from moisture and dust.
| Storage Tip | Reason |
| Use a tool box or case | Protects from dust and damage |
| Keep away from damp areas | Prevents rust and corrosion |
| Store upright if possible | Keeps parts aligned and safe |
| Separate from heavy tools | Avoids accidental damage |
Lubrication Practices
Keep moving parts smooth by applying oil or grease. Lubricate the chuck and gears regularly.
Follow these steps for lubrication:
- Choose light machine oil or grease recommended for tools.
- Apply a few drops to the chuck and gear areas.
- Operate the drill briefly to spread the lubricant evenly.
- Wipe off any excess oil to prevent dirt build-up.
When To Seek Professional Help
Hand drills can sometimes break in ways that are hard to fix at home. Knowing when to call a professional saves time and money.
If the drill has problems beyond simple fixes, a trained repair person can help safely and correctly.
Complex Electrical Issues
Electrical problems inside a hand drill can be tricky and dangerous. Faulty wiring or motor issues need special tools to fix.
Trying to repair electrical parts without experience can cause more damage or injury. A professional has the skills to find and fix these problems.
- Burnt wires or smells
- Drill does not start or stops suddenly
- Unusual sparks or noises
- Motor runs but drill bit does not turn
Severe Mechanical Damage
Severe damage to gears, the chuck, or the drill body needs expert repair. Broken parts may need replacing or realignment.
Fixing mechanical damage requires special tools and knowledge about drill parts. Attempting this repair can make the drill unsafe.
- Cracked or broken drill casing
- Worn or stripped gears
- Chuck that won’t hold bits
- Loose or broken handles

Credit: www.youtube.com

Credit: www.youtube.com
Frequently Asked Questions
How Do I Fix A Hand Drill That Won’t Turn?
Check for jammed debris or rust in the chuck. Lubricate moving parts. Tighten or replace worn gears to restore rotation.
Why Is My Hand Drill’s Chuck Not Gripping?
Inspect the jaws for wear or dirt. Clean and lubricate them. Replace the chuck if it no longer holds drill bits securely.
How Can I Repair A Loose Handle On A Hand Drill?
Tighten screws securing the handle. Use wood glue for wooden handles. Replace broken handles to ensure safe and efficient use.
What Causes A Hand Drill To Make Grinding Noises?
Grinding sounds often indicate worn gears or lack of lubrication. Clean and oil the gears or replace damaged components.
Conclusion
Repairing hand drills saves money and extends tool life. Regular checks keep drills working well. Simple fixes often solve common problems fast. Understanding parts helps you fix issues confidently. Taking care of your drill avoids bigger repairs later. Try small repairs before replacing the tool.
Keep your drill clean and dry for best results. With patience, anyone can maintain their hand drill. Stay safe and follow instructions during repairs. Your drill will serve you longer with proper care.