Are your chisels scattered all over your workspace, making it hard to find the right one when you need it? Imagine opening your drawer and instantly spotting the perfect chisel without digging through a mess.
Organizing chisels in drawers can save you time, protect your tools, and make your projects flow smoothly. In this guide, you’ll discover simple, effective ways to arrange your chisels so they stay sharp, accessible, and ready for action. Keep reading to transform your drawer into a neat, efficient tool haven you’ll love using every day.
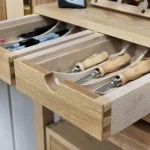
Credit: www.amazon.com
Choosing The Right Drawer
Organizing chisels properly helps keep your workspace neat and safe. Choosing the right drawer is the first step to storing chisels effectively.
Selecting a drawer that fits your chisels prevents damage and makes them easy to find. Consider size, depth, material, and durability before deciding.
Drawer Size And Depth
The drawer should be wide and deep enough to hold all your chisels comfortably. Too small a drawer can cause tools to overlap and get damaged.
- Measure the longest chisel before buying or building a drawer.
- Choose a drawer depth that allows chisels to lie flat without crowding.
- Make sure the drawer width fits your collection with some extra space.
- Consider drawer dividers to separate chisels by size or type.
Material And Durability
Strong materials protect chisels and last longer under daily use. Wood and metal are common choices for durable drawers.
| Material | Benefits | Drawbacks |
|---|---|---|
| Wood | Gentle on chisels, classic look, easy to customize | Can warp if wet, may need maintenance |
| Metal | Very durable, resists damage and moisture | Can scratch chisels if not lined properly |
| Plastic | Lightweight, often inexpensive | Less durable, can crack or wear out fast |
Preparing The Drawer
Getting your drawer ready is the first step to organizing chisels. A clean, lined drawer keeps tools safe and easy to find. This guide explains how to clean and prepare the drawer before adding your chisels.
Proper preparation helps protect your chisels from damage. It also prevents rust and keeps the drawer tidy.
Cleaning And Lining
Start by removing everything from the drawer. Wipe it out with a dry cloth to remove dust and dirt. If the drawer is sticky or grimy, use a mild cleaner and a damp cloth. Let it dry completely before lining it.
- Remove old liners or papers
- Vacuum loose dirt and debris
- Wipe all surfaces with a damp cloth
- Use mild soap for tough stains
- Dry the drawer thoroughly
Choose a liner that is soft but firm. Felt or rubber sheets work well. Cut the liner to fit the drawer bottom and sides. A good liner cushions your chisels and stops them from sliding.
Adding Non-slip Surfaces
Non-slip surfaces keep chisels from moving around when you open the drawer. You can add strips or mats made of rubber or silicone. These materials hold the chisels firmly in place.
| Material | Benefits |
|---|---|
| Rubber mat | Strong grip, easy to cut to size |
| Silicone strips | Flexible, durable, and easy to clean |
| Foam pads | Soft cushioning, absorbs shocks |
Place non-slip surfaces on the drawer bottom or in sections where chisels will rest. This arrangement helps keep your tools organized and protected.
Organizing By Type And Size
Keeping chisels organized helps you find the right tool fast. Sorting them by type and size is a smart way.
This guide shows easy ways to arrange chisels in drawers. You will learn how to group similar chisels and sort by blade width.
Grouping Similar Chisels
Start by sorting chisels by their type. Group bench chisels, mortise chisels, paring chisels, and others separately.
Grouping helps you avoid mixing different chisels. It also protects the blades from damage.
- Place all bench chisels together
- Keep mortise chisels in one section
- Group paring chisels nearby
- Store specialty chisels separately
Arranging By Blade Width
Within each type group, arrange chisels by blade width. Put the narrowest blades on one side and wider blades on the other.
This order makes it easy to spot the right size quickly. It also keeps your drawer neat and tidy.
| Blade Width | Example Use |
|---|---|
| 1/4 inch (6mm) | Fine detail work |
| 1/2 inch (12mm) | General carving |
| 3/4 inch (19mm) | Shaping larger pieces |
| 1 inch (25mm) and wider | Heavy chopping |
Using Dividers And Holders
Organizing chisels in drawers keeps them safe and easy to find. Using dividers and holders helps separate each tool.
Well-organized chisels prevent damage and save time during projects.
Diy Divider Ideas
You can make simple dividers using materials at home. Cardboard, wood scraps, or foam board work well.
Cut pieces to fit your drawer size. Arrange them to create slots for each chisel.
- Use thin wood strips glued to the drawer bottom
- Cut cardboard into strips and tape edges for strength
- Foam board pieces can be shaped to hold chisels snugly
- Recycle old plastic containers as small holders inside the drawer
Commercial Organizer Options
Stores sell organizers made specifically for tools. These can fit inside drawers or lay on top.
Look for plastic or wooden trays with slots sized for chisels. Some have foam inserts to protect blades.
- Adjustable plastic dividers that snap into place
- Wooden chisel racks that fit inside drawers
- Foam tool organizers cut to fit blade shapes
- Magnetic strips to hold metal chisels securely
Labeling For Easy Access
Organizing chisels in drawers saves time and keeps your workspace tidy. Proper labeling helps you find tools fast.
Clear labels reduce confusion and prevent damage to your chisels. Use simple methods to keep your tools in order.
Label Placement Tips
Place labels where you can see them without moving the chisels. This helps you quickly identify each tool.
- Attach labels on the drawer front near each chisel slot.
- Use clear and large fonts for easy reading.
- Keep labels consistent in size and style.
- Place labels on both the drawer and the tool handle if possible.
- Use waterproof labels to avoid smudging.
Using Color Codes
Color codes make it simple to sort chisels by size or type. You can spot the right chisel with just a glance.
| Color | Meaning |
| Red | Large chisels |
| Blue | Medium chisels |
| Green | Small chisels |
| Yellow | Specialty chisels |

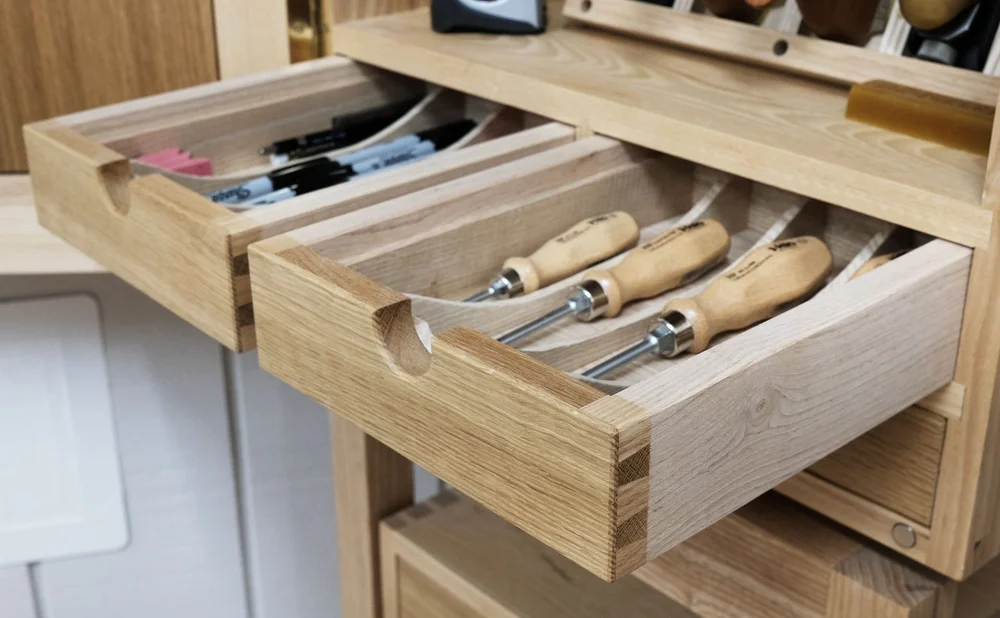
Credit: spaceaidhome.com
Maintaining Chisel Condition
Keeping chisels in good shape helps them last longer and work better. Proper care protects them from wear and damage.
This guide explains how to stop rust and damage and how to clean and sharpen chisels regularly.
Preventing Rust And Damage
Rust weakens chisels and makes them unsafe. To prevent rust, store chisels in dry places away from moisture.
- Keep chisels in a drawer with a moisture absorber, like silica gel.
- Apply a thin layer of oil on metal parts to block rust.
- Use blade guards to protect edges from knocks and scratches.
- Handle chisels carefully to avoid dropping or bending.
Regular Cleaning And Sharpening
Clean chisels after each use to remove dirt and wood residue. This keeps blades sharp and safe to use.
| Cleaning Step | Description |
| Wipe | Use a dry cloth to remove dust and chips. |
| Wash | Clean with mild soap and water if needed, then dry immediately. |
| Oil | Apply light oil to metal to stop rust forming. |
| Sharpen | Use a whetstone or sharpening tool to keep edges sharp. |
Maximizing Drawer Space
Organizing chisels in drawers helps save space and keeps tools easy to find. Good storage keeps chisels safe from damage.
Using smart techniques can fit more chisels in a small drawer. This guide shows ways to use drawer space well.
Stacking Techniques
Stack chisels carefully to use vertical space without causing damage. Place the largest chisels at the bottom to support smaller ones.
Use soft cloth or foam between layers to stop chisels from scratching each other. Keep sharp edges facing up or sideways.
- Lay chisels flat in layers
- Place padding between layers
- Stack heavy chisels below lighter ones
- Keep sharp edges away from contact points
Using Vertical Storage
Vertical storage saves space by holding chisels upright inside the drawer. Use small compartments or dividers to keep them separated.
Vertical holders stop chisels from rolling and make it easy to see each tool. This method also protects edges from getting dull.
- Use dividers to create slots
- Place chisels standing up with handles down
- Label slots for quick identification
- Choose sturdy materials to hold chisels firmly

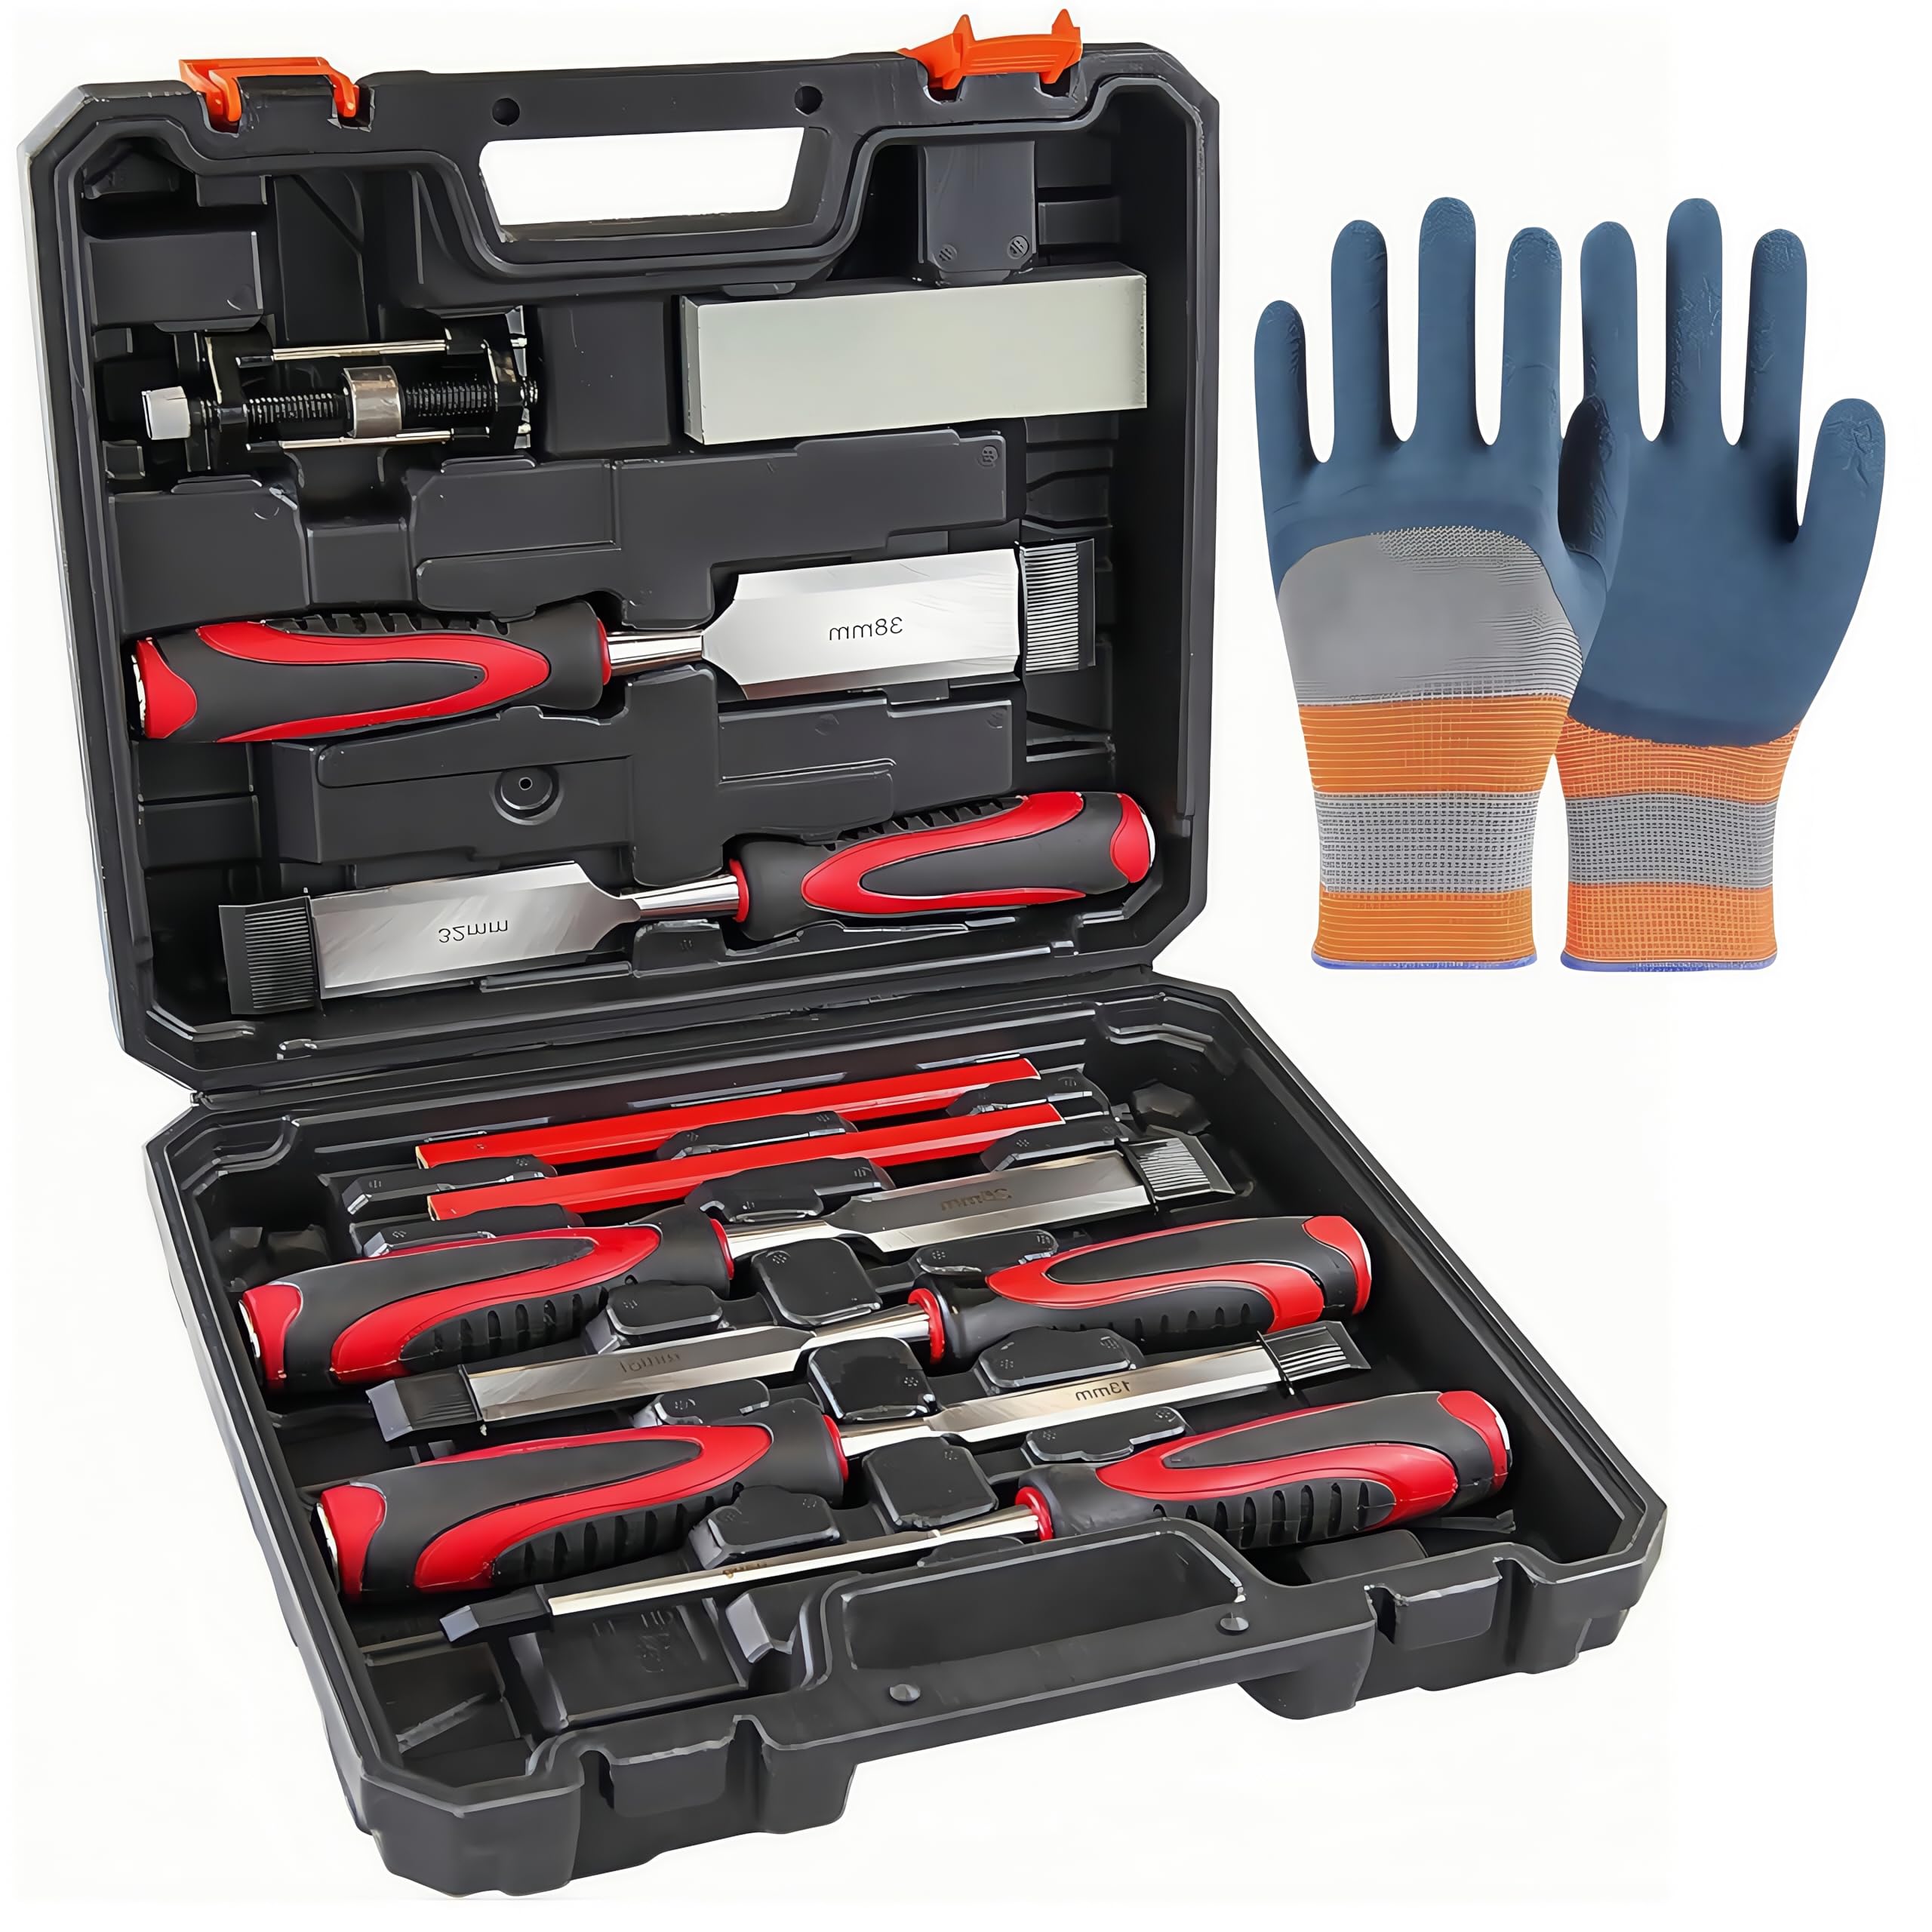
Credit: www.familyhandyman.com
Frequently Asked Questions
How Can I Organize Chisels In Drawers Efficiently?
Use drawer dividers or foam inserts to separate chisels by size and type. Label each section for easy access and prevent damage by keeping chisels from touching.
What Materials Work Best For Chisel Drawer Organizers?
Wood, foam, and plastic inserts work well. Foam cushions protect blades, while wood dividers offer durability. Choose materials that fit your drawer size and usage frequency.
How Do I Prevent Chisels From Dulling In Storage?
Store chisels blade-down or in protective sleeves. Avoid stacking chisels directly on each other to prevent blade damage and maintain sharpness.
Can I Customize A Drawer Organizer For Chisels?
Yes, custom organizers can be built or purchased. Tailor compartments to chisel sizes and shapes for optimal protection and organization.
Conclusion
Organizing chisels in drawers saves time and keeps tools safe. Use dividers or foam inserts for neat separation. Label each section to find chisels quickly. Keep blades covered to prevent damage and injury. A tidy workspace helps maintain focus and work quality.
Regularly check and clean chisels for longer use. Small steps lead to big improvements in tool care. Start organizing today for easier, safer woodworking projects tomorrow.