Are you looking to make your wood surfaces perfectly smooth and even? Using a belt sander can be the fastest way to level wood, but only if you know the right techniques.
In this guide, you’ll learn how to handle a belt sander like a pro, avoid common mistakes, and achieve professional results every time. Whether you’re working on a small project or preparing a large piece of wood, mastering this tool will save you time and effort.
Keep reading, and soon you’ll have the confidence to transform rough wood into a flawless surface.

Credit: www.familyhandyman.com
Choosing The Right Belt Sander
Using a belt sander can make leveling wood surfaces easier and faster. Picking the right tool helps you get smooth results without damage. Knowing the types, grit, and safety features helps you choose well.
This guide explains key points about belt sanders. It covers the kinds of sanders, sanding belt grits, and what safety features to check.
Types Of Belt Sanders
Belt sanders come in different styles for various tasks. Each type fits certain jobs better. Knowing these types helps you pick one that matches your work.
- Handheld Belt Sanders:Portable and good for small to medium jobs.
- Stationary Belt Sanders:Fixed to a bench for precise control on larger pieces.
- Detail Belt Sanders:Small and narrow belts for tight or curved spaces.
- Floor Belt Sanders:Large and powerful for sanding big floor areas.
Selecting The Correct Grit
The sanding belt’s grit affects how smooth or rough the wood becomes. Choosing the right grit avoids damage and saves time.
| Grit Number | Use |
|---|---|
| 40-60 | Remove old finish or rough wood quickly |
| 80-100 | Level wood and smooth out scratches |
| 120-150 | Prepare wood for finishing and fine sanding |
| 180+ | Final sanding for very smooth surfaces |
Safety Features To Look For
Safety is important when using a belt sander. Look for features that protect you and make the tool easier to use.
- Dust Collection:Helps keep the work area clean and reduces breathing dust.
- Lock-On Switch:Keeps the sander running without holding the trigger.
- Adjustable Speed:Lets you control sanding speed for different woods.
- Ergonomic Handles:Provides a firm, comfortable grip during use.
- Thermal Protection:Prevents motor overheating during long work.
Preparing The Wood Surface
Preparing the wood surface is key before using a belt sander. Proper prep helps you get smooth and even results.
This section covers cleaning, marking, and securing the wood for safe and effective sanding.
Cleaning And Inspecting The Wood
Remove dust, dirt, and debris from the wood surface. Check for nails, screws, or glue spots that can damage the sander.
- Use a brush or vacuum to clear loose dirt
- Wipe the surface with a damp cloth to remove sticky residue
- Look carefully for metal or hard objects embedded in the wood
- Sand or scrape away any rough patches or old finishes
Marking High And Low Spots
Identify uneven areas on the wood to guide your sanding. Mark these spots clearly for better leveling.
| Type of Spot | How to Mark | Purpose |
|---|---|---|
| High Spots | Use a pencil or chalk | Focus sanding here to lower the surface |
| Low Spots | Draw circles or cross marks | Avoid sanding these areas too much |
Securing The Wood
Fix the wood firmly in place before sanding. This stops movement and helps you work safely.
- Place the wood on a stable workbench
- Use clamps to hold the wood tightly
- Check that the wood does not wobble or shift
- Make sure clamps do not block the sanding area
Setting Up The Belt Sander
Setting up your belt sander properly makes your work safer and easier. It helps you get smooth and even wood surfaces.
This guide covers installing the sanding belt, adjusting tension and tracking, and choosing the right speed for your project.
Installing The Sanding Belt
First, unplug the sander to keep safe. Open the belt cover by releasing the latch or screws.
Place the sanding belt on the rollers. Make sure the arrows on the belt match the sander’s rotation direction.
- Check belt size matches the sander’s specifications.
- Center the belt on the rollers before closing the cover.
- Close and lock the cover securely.
Adjusting Belt Tension And Tracking
Tension keeps the belt tight so it does not slip. Locate the tension knob or lever on your sander.
Turn the knob or move the lever until the belt feels firm but not too tight. Check the user manual for correct tension.
Tracking controls the belt’s path. Use the tracking dial to move the belt left or right.
- Turn on the sander briefly to check belt movement.
- Adjust tracking slowly until the belt stays centered.
- Turn off the sander before making big adjustments.
Choosing The Right Speed
Different woods need different speeds. Softwoods work well at higher speeds.
Hardwoods need slower speeds to avoid burning the wood surface.
- High speed: fast material removal on soft wood.
- Medium speed: good balance for most wood types.
- Low speed: fine sanding or working with hardwoods.
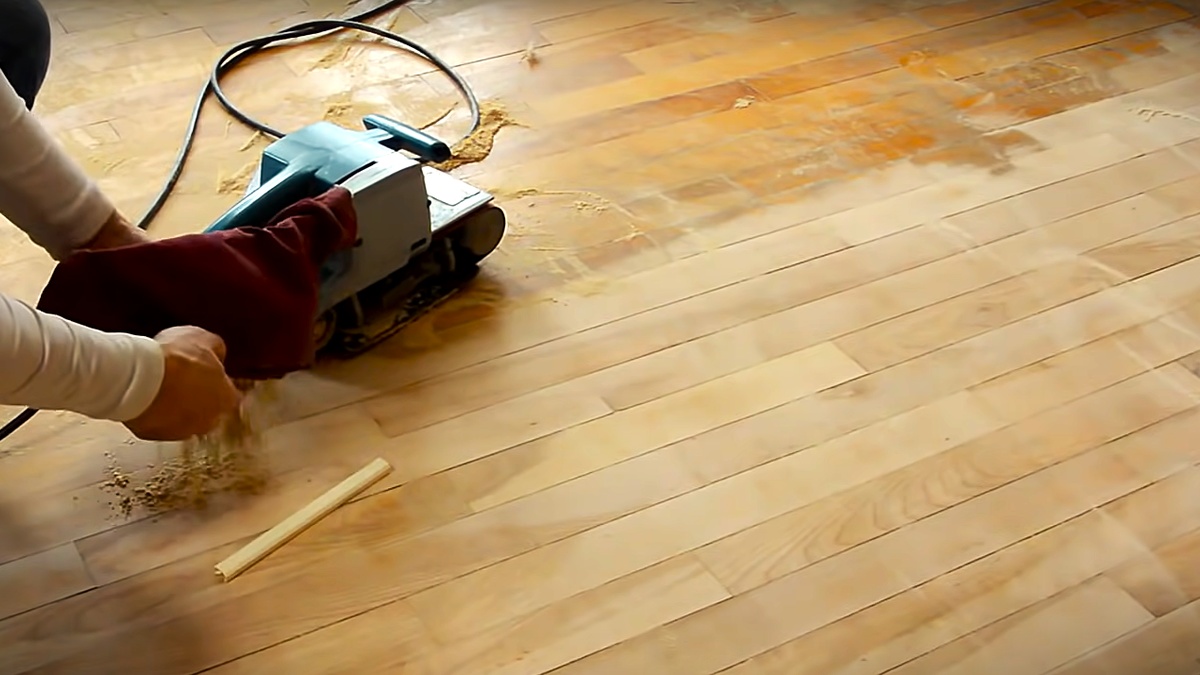
Credit: www.ecohome.net
Techniques For Leveling Wood
Leveling wood surfaces with a belt sander takes skill and care. Using the right techniques helps create smooth, even wood.
These tips will guide you to sand wood evenly and avoid damage.
Maintaining Consistent Pressure
Pressing too hard can leave marks or uneven spots. Pressing too lightly wastes time. Keep steady pressure for smooth results.
Let the belt sander do the work. Hold it firm but do not force it down on the wood.
Sanding With The Grain
Always sand in the direction of the wood grain. Sanding across the grain can cause scratches and rough patches.
Follow the natural lines of the wood for a cleaner, smoother finish.
Using Overlapping Strokes
Move the sander in long, even strokes. Overlap each stroke slightly to avoid lines or dips.
- Start each stroke a little before the last ended
- Keep the sander moving at a steady speed
- Check your progress often to catch uneven spots
Avoiding Common Mistakes
Using a belt sander can make wood surfaces smooth and even. Many beginners make mistakes that hurt their projects.
Learning to avoid these errors helps you get better results faster and safer.
Preventing Gouges And Dips
Gouges happen when you press the sander too hard or stay too long in one spot. Dips form if you sand unevenly.
Keep the sander moving smoothly and use light pressure to avoid these problems.
- Hold the sander flat and steady
- Move the sander in long, even strokes
- Do not press down too hard
- Check your work often to spot mistakes early
Managing Heat Buildup
Heat builds up when the belt sander runs on one spot too long. This can burn the wood or damage the sandpaper.
Keep the sander moving and take breaks to let it cool down if needed.
- Move the sander continuously over the surface
- Use the correct grit sandpaper for your task
- Replace sandpaper before it gets too worn
- Stop and let the tool rest if it gets hot
Avoiding Uneven Surfaces
Uneven sanding creates bumps or low spots in wood. This happens if you do not sand the entire surface evenly.
Sand in a pattern that covers the whole area and check your progress often.
- Sand in the direction of the wood grain
- Overlap your sanding passes slightly
- Use a sanding block for flat areas if needed
- Stop frequently to feel the surface by hand
Finishing Touches
After using a belt sander to level wood, finishing touches improve the surface quality. These steps help prepare wood for painting or staining.
Take time to refine the surface for a smooth and even finish. Small details make a big difference in your project.
Switching To Finer Grits
Start with coarse grit to remove rough spots. Then, switch to finer grits to smooth the wood surface.
Use finer sandpaper to reduce scratches left by coarser grits. This step creates a softer, cleaner finish.
- Begin with 60 or 80 grit for leveling
- Move to 120 grit for smoothing
- Finish with 180 or 220 grit for fine polishing
Cleaning The Sanded Surface
Remove dust and debris before applying any finish. Clean surfaces help paints and stains stick better.
Use a brush, vacuum, or tack cloth to clear dust. Make sure the wood is dry and clean.
- Brush off large dust particles
- Vacuum tight spaces and corners
- Wipe surface with a damp cloth or tack cloth
Inspecting For Smoothness
Check the wood surface by touch and sight. Look for rough spots, scratches, or uneven areas.
Fix any problems with additional sanding using finer grit paper. Repeat cleaning after sanding.
- Run your hand across the surface to feel bumps
- Look for visible scratches or dents
- Sand problem spots lightly again if needed
Maintenance Tips For Belt Sanders
Keeping your belt sander in good shape helps it work better and last longer. Regular care prevents problems and makes your sanding smoother.
Simple maintenance steps can save you time and money. Follow these tips to keep your tool ready for use.
Cleaning The Tool After Use
After each use, clean dust and debris from the belt sander. This keeps the motor cool and prevents damage.
- Unplug the sander before cleaning.
- Use a brush or compressed air to remove dust from vents.
- Wipe the surface with a dry cloth.
- Check the belt and rollers for stuck particles.
Replacing Worn Belts
Replace the sanding belt when it shows signs of wear. A fresh belt sands wood evenly and avoids damage.
| Signs of Worn Belt | Effect on Sanding |
| Frayed edges | Uneven sanding |
| Tears or holes | Damage to wood surface |
| Loss of grit | Slow sanding |
Follow these steps to change the belt safely:
- Unplug the sander.
- Release the tension lever to remove the old belt.
- Place the new belt on the rollers in the correct direction.
- Tighten the tension lever to secure the belt.
- Check belt alignment before use.
Storing Your Belt Sander
Store your belt sander in a dry, clean place. Proper storage protects it from dust and moisture.
- Keep the sander in its case or a sturdy box.
- Wrap the power cord loosely to avoid damage.
- Store away from direct sunlight and damp areas.
- Keep sanding belts in a separate, dry container.
Credit: www.routerforums.com
Frequently Asked Questions
How Do I Prepare Wood For Belt Sanding?
Start by cleaning the wood surface from dust and debris. Secure the wood firmly to avoid movement. Choose the right grit sandpaper for leveling. Always wear safety gear before starting the sander.
What Grit Sandpaper Is Best For Leveling Wood?
Use coarse grit (40-60) for heavy leveling. Medium grit (80-120) works well for smoothing rough areas. Finish with fine grit (150-220) for a smooth surface. Change grit progressively for best results.
How To Avoid Gouging Wood With A Belt Sander?
Keep the sander moving steadily without staying in one spot. Apply light pressure to avoid deep scratches. Use even, overlapping strokes for uniform sanding. Practice on scrap wood before working on the project.
Can A Belt Sander Remove Old Finishes?
Yes, a belt sander effectively removes old paint, varnish, or stains. Use coarse grit sandpaper initially to strip finishes. Follow up with finer grits to smooth the surface. Always sand in the direction of the wood grain.
Conclusion
Using a belt sander for leveling wood surfaces takes practice and care. Always keep the sander moving to avoid uneven spots. Choose the right grit sandpaper for smooth results. Wear safety gear to protect your eyes and hands. Start with coarse grit, then finish with fine grit for a clean surface.
Take your time and check your progress often. This tool can make woodwork easier and faster. Enjoy the process and create smooth, flat wood every time.