
When you’re tackling DIY projects, protecting your hands is key. Cut-resistant gloves can be a game changer, but only if you use them the right way.
Imagine finishing your project without a single injury—sounds great, right? You’ll discover simple tips that make using cut-resistant gloves easy and effective. Keep reading to learn how to boost your safety and confidence every time you work with sharp tools.
Your hands will thank you.
Choosing The Right Gloves
Cut-resistant gloves protect your hands during DIY projects. Picking the right gloves helps you stay safe and work well.
Knowing about glove materials, size, and cut resistance makes choosing easier. Use these tips to find good gloves.
Material Types
Gloves come in different materials that affect comfort and protection. Some materials are better for certain tasks.
- Kevlar: strong and heat resistant
- Steel mesh: very cut-resistant but less flexible
- HPPE: lightweight and flexible for fine work
- Nitrile coated: good grip and cut protection
- Leather: durable but less cut resistant
Sizing And Fit
Gloves should fit snugly without being too tight. A good fit helps you work safely and comfortably.
Check glove sizes carefully. Measure your hand width and length for the best match.
- Too loose gloves reduce control
- Tight gloves can cause hand fatigue
- Try gloves on before buying if possible
- Consider gloves with stretch for better fit
Cut Resistance Ratings
Cut resistance ratings show how well gloves protect against cuts. Higher ratings mean better protection.
Look for standards like ANSI or EN388. These ratings help compare gloves clearly.
| Rating System | Range | Protection Level |
|---|---|---|
| ANSI | 1 to 9 | Low to high cut resistance |
| EN388 | A to F | Low to high cut resistance |
:max_bytes(150000):strip_icc()/nocry-premium-cut-resistant-gloves-93e58cffe14a4bb488d7409dc0b5b481.jpg)
Credit: www.allrecipes.com
Proper Glove Care
Cut-resistant gloves protect your hands during DIY projects. Taking care of them keeps them effective and safe.
Proper care extends glove life and keeps their strength. Learn simple ways to clean, store, and know when to replace gloves.
Cleaning Techniques
Keep gloves clean by washing them regularly. Use mild soap and cold water to avoid damage. Rinse well to remove all soap.
- Hand wash gloves gently instead of machine washing
- Do not use bleach or harsh chemicals
- Air dry gloves away from direct sunlight or heat
- Check gloves for tears or wear after cleaning
Storage Tips
Store gloves in a cool, dry place to keep their shape and strength. Avoid folding or crushing them. Keep gloves away from sharp objects.
| Storage Condition | Advice |
| Temperature | Room temperature, avoid heat |
| Humidity | Dry environment |
| Position | Flat or hung up |
| Exposure | No sunlight or chemicals |
When To Replace Gloves
Gloves lose protection if they get worn out. Replace gloves if you see cuts, holes, or thinning material. Also change gloves if they feel stiff or uncomfortable.
- Inspect gloves before each use
- Replace gloves after heavy use or damage
- Do not use gloves with broken fibers
- Follow manufacturer guidelines on lifespan
Maximizing Safety
Cut-resistant gloves help protect your hands during DIY projects. Using them the right way keeps you safe and comfortable.
Follow simple tips to get the best protection from your gloves. This guide shows how to use them safely and effectively.
Layering With Other Ppe
Wear cut-resistant gloves with other personal protective equipment (PPE). This adds more safety to your hands and body.
For example, wear gloves with safety glasses and long sleeves. This protects your eyes and arms from injury.
- Use gloves under thick work gloves for extra cut resistance
- Wear safety glasses to protect eyes from flying debris
- Long sleeves protect your arms from cuts and scratches
- Wear a dust mask if you work with harmful dust or chemicals
Using Gloves For Different Tasks
Choose gloves based on the task you do. Not all cut-resistant gloves fit every job well.
Use lightweight gloves for fine work and thicker ones for heavy cutting. This helps keep your hands safe and lets you work well.
- Light gloves for handling small tools or sharp objects
- Thick gloves for using knives, saws, or glass
- Water-resistant gloves for wet or oily tasks
- Check gloves for damage before starting each task
Avoiding Common Mistakes
Using cut-resistant gloves wrong can cause injuries. Avoid mistakes to keep your hands safe.
Don’t wear damaged gloves or use the wrong size. Keep gloves clean and replace them when needed.
- Do not use gloves with holes or tears
- Choose the correct glove size for a snug fit
- Keep gloves clean and dry to keep their strength
- Replace gloves after heavy use or damage
- Do not touch moving machines with gloves on if it’s unsafe

Credit: www.reddit.com
Diy Safety Hacks
Cut-resistant gloves protect your hands during DIY projects. They reduce cuts and scrapes from sharp tools and materials.
Using these gloves properly helps you stay safe and work with confidence. Here are some useful tips to get the most from your gloves.
Enhancing Grip
Good grip keeps tools steady and prevents accidents. Cut-resistant gloves often have textured surfaces to improve hold.
- Clean gloves regularly to keep grip strong.
- Dry gloves completely after washing to avoid slipping.
- Choose gloves with rubber or silicone patterns for better friction.
- Avoid oily or wet gloves as they reduce grip quality.
Customizing Fit
A snug fit makes gloves more comfortable and safer. Loose gloves can catch on tools or materials.
| Tip | How to Do It |
| Trim excess fabric | Carefully cut any loose threads or edges |
| Use adjustable straps | Tighten straps around the wrist for a secure fit |
| Try glove liners | Wear thin liners inside for a tighter feel |
| Choose correct size | Measure your hand and pick gloves that match |
Repairing Minor Damage
Small tears or holes reduce glove protection. Fix these issues quickly to keep gloves safe to use.
- Use fabric glue to seal small cuts or holes.
- Sew minor tears with thick thread to strengthen weak spots.
- Apply patches designed for fabric repair on worn areas.
- Inspect gloves before each use to catch damage early.
Glove Limitations
Cut-resistant gloves help protect your hands during DIY projects. They reduce the risk of cuts and scrapes. Still, these gloves have limits and do not protect against all dangers.
It is important to know what cut-resistant gloves can and cannot do. Understanding their limits helps you stay safe while working.
What Gloves Can’t Protect Against
Cut-resistant gloves stop cuts and minor punctures. They do not protect against all risks in DIY work. For example, gloves cannot stop crushing injuries from heavy tools.
These gloves also do not protect from chemicals, extreme heat, or electrical shocks. You need special gloves for those hazards.
- They do not prevent crushing or impact injuries
- No protection from chemicals or liquids
- Not heat resistant for hot surfaces
- Do not protect against electrical hazards
Recognizing Wear And Tear
Cut-resistant gloves lose their strength after regular use. Wear and tear reduce their ability to protect your hands. Check gloves often for damage.
Look for holes, thinning fabric, or broken fibers. If gloves show these signs, replace them. Using worn gloves can lead to injuries.
- Holes or tears in the gloves
- Frayed or loose threads
- Thinner or worn-out areas
- Loss of grip on the gloves
Safe Handling Practices
Use cut-resistant gloves with care to get the best protection. Avoid sharp edges that can cut through gloves quickly. Handle tools carefully and do not force cuts.
Clean gloves after use and store them in a dry place. Do not use gloves for tasks they are not designed for. Follow safety rules and always stay alert.
- Handle sharp tools with steady hands
- Do not use gloves for heat or chemical tasks
- Clean and dry gloves before storing
- Replace gloves if damaged or worn
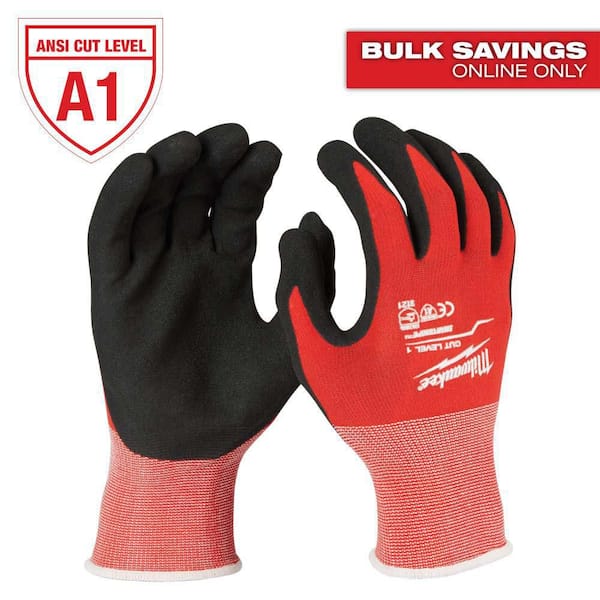
Credit: www.homedepot.com
Frequently Asked Questions
What Are Cut-resistant Gloves Used For In Diy Projects?
Cut-resistant gloves protect your hands from sharp tools and materials. They reduce injury risks during cutting, sawing, or handling sharp objects. Using these gloves improves safety and confidence while working on various DIY tasks involving blades or rough materials.
How Do I Choose The Right Cut-resistant Gloves?
Choose gloves based on cut resistance level, fit, and material type. Consider your project’s sharpness risk and dexterity needs. Proper fit ensures comfort and safety. Look for gloves with certifications like ANSI or EN388 for reliable protection.
Can Cut-resistant Gloves Be Reused For Multiple Projects?
Yes, many cut-resistant gloves are reusable if undamaged. Inspect gloves before each use for wear or tears. Proper cleaning and storage extend glove life. Replace gloves immediately if compromised to maintain maximum protection.
Are Cut-resistant Gloves Comfortable For Long Diy Sessions?
Modern cut-resistant gloves balance protection and comfort with breathable materials. Look for gloves with flexible fibers and ergonomic design. Properly fitted gloves reduce hand fatigue and allow better grip during extended DIY work.
Conclusion
Cut-resistant gloves protect your hands during DIY tasks. Always choose the right size for comfort and safety. Keep gloves clean to maintain their strength. Replace gloves if they show signs of wear. Use gloves alongside other safety gear for best results.
Stay focused and work carefully to avoid accidents. Small steps help keep your hands safe every time. Safety first, always.