If you want to add a professional, eye-catching touch to your woodworking projects, learning how to use a router for decorative edges is a game-changer. Imagine turning plain wood into something unique and beautiful with just a few simple moves.
You don’t need to be an expert or spend hours mastering complicated tools. This guide will show you exactly how to create stunning edges that make your pieces stand out. Ready to transform your work and impress everyone who sees it?
Let’s dive in and unlock the full potential of your router.
Choosing The Right Router Bit
A router bit shapes the edges of wood to add style and detail. Picking the right bit makes your work look neat.
Different bits create different edge styles. Knowing which bit to use helps you get the best results.
Types Of Router Bits For Edges
Many router bits cut decorative edges. Each bit has a unique shape and style for your wood edges.
- Round-over bits make smooth, curved edges.
- Chamfer bits cut angled edges for a sharp look.
- Ogee bits add an S-shaped curve to edges.
- Beading bits create small rounded beads on edges.
- Cove bits carve a concave curve into the wood.
Selecting Based On Wood Type
Hard and soft woods need different bits for clean cuts. Hard woods need sharper bits to avoid tearing.
Soft woods can use bits with less sharp edges. Always check bit material to match your wood type.
- Carbide bits work well on hard wood.
- High-speed steel bits are fine for soft wood.
- Use sharp bits to reduce splintering.
Bit Size And Profile
Bit size changes the edge shape size. Larger bits create bigger curves or angles on your wood.
Choose bit profiles that suit your design style. Simple profiles suit modern looks; complex ones fit classic styles.
- Small bits for fine, detailed edges.
- Medium bits for standard edge shaping.
- Large bits for bold, deep profiles.
- Match profile to your project’s style.

Credit: www.reddit.com
Setting Up Your Router
Using a router to create decorative edges adds detail to your wood projects. Proper setup helps you get clean and smooth edges.
Before starting, prepare your router and workspace carefully. This makes your work easier and safer.
Adjusting Depth And Speed
Set the router bit depth to control how deep the cut will be. Start with a shallow depth for better control.
Choose the right speed for your router. Harder wood needs slower speeds to avoid burning or chipping.
- Check the router manual for speed settings
- Use multiple shallow passes instead of one deep cut
- Adjust depth by loosening the depth adjustment ring or lever
Securing The Workpiece
Keep your wood piece firm and steady. Movement can cause mistakes or injury.
Use clamps or a workbench to hold the wood in place. Check that it will not shift during routing.
- Use quick-release clamps for easy adjustment
- Place clamps far from the routing area
- Double-check that the workpiece is stable before starting
Safety Precautions
Always wear safety glasses to protect your eyes from wood chips. Hearing protection can help with loud noise.
Keep hands away from the router bit. Use push blocks or guides if needed.
- Unplug the router before changing bits
- Check that the router base is secure
- Work in a clean, well-lit area
- Wear a dust mask to avoid inhaling sawdust
Techniques For Smooth Edges
Using a router can create beautiful, smooth edges on wood. It takes practice to get clean, even cuts.
Focus on how you feed the router and control pressure. These steps help avoid rough or uneven edges.
Feeding The Router Correctly
Feed the router against the bit’s rotation. This gives better control and a cleaner cut.
Move the router at a steady speed. Too fast can cause rough edges. Too slow can burn the wood.
- Always start the router before touching the wood
- Push the router forward steadily and smoothly
- Keep the router flat on the wood surface
Maintaining Consistent Pressure
Apply firm and even pressure on the router. This helps the bit cut smoothly without chatter marks.
Do not press too hard. Let the router do the work. Too much force can cause damage or uneven edges.
- Hold the router handles firmly but relaxed
- Keep pressure steady from start to finish
- Adjust your grip if the router feels unstable
Handling Corners And Curves
Slow down when you reach corners or curves. This prevents mistakes and rough spots.
Use a smaller bit for tight curves. You can also make several shallow passes instead of one deep cut.
- Take your time on sharp corners
- Make light passes for curved edges
- Check your progress often to stay smooth
Advanced Edge Designs
Using a router for decorative edges lets you add style and detail to wood projects. Advanced edge designs go beyond simple shapes.
These techniques help create complex and unique profiles that stand out on furniture or trim work.
Layered Edge Profiles
Layered edge profiles use multiple passes with different router bits. This builds a rich, dimensional look on the wood edge.
- Start with a base profile using a large bit.
- Add smaller details with secondary bits.
- Sand between passes for smooth transitions.
- Finish with a fine detail bit for sharp accents.
Using Templates And Guides
Templates and guides help keep your router steady and accurate. They are essential for repeating complex shapes.
| Tool | Purpose | Material |
| Wood Template | Shape tracing | Hardwood |
| Metal Guide | Edge control | Aluminum |
| Router Base Plate | Stability | Plastic or metal |
Combining Different Bits
Mixing different router bits creates unique edge profiles. Each bit adds a distinct shape or detail.
Try these combinations for varied effects:
- Round-over bit followed by a cove bit for soft, curved layers.
- Ogee bit paired with a chamfer bit for elegant, sharp edges.
- Beading bit combined with a straight bit for classic trim details.
Finishing Touches
After routing decorative edges, finishing touches help your project look smooth and polished. These steps protect the wood and highlight its beauty.
Proper finishing improves durability and gives a professional look. Focus on sanding, applying color, and adding protective layers.
Sanding And Smoothing
Sanding removes rough spots left by the router. Use fine-grit sandpaper to smooth the edges gently.
Always sand along the grain to avoid scratches. Check the edges with your hand to find any rough areas.
- Start with 120-grit sandpaper for rough parts
- Use 220-grit sandpaper for a smooth finish
- Wipe off dust with a clean cloth before the next step
Applying Stain Or Paint
Stain or paint adds color and style to your wood project. Choose a product that fits your project’s look and use.
Apply thin, even coats with a brush or cloth. Let each coat dry fully before adding another.
- Test stain or paint on scrap wood first
- Follow the product’s drying time instructions
- Use light coats to avoid drips and uneven color
Protective Coatings
Protective coatings keep your decorative edges safe from damage. They add shine and resist water and dirt.
Common coatings include polyurethane, varnish, and shellac. Apply thin layers and let each dry well.
- Use a clean brush for smooth application
- Sand lightly between coats for better adhesion
- Allow full curing time before use

Credit: www.amazon.com
Common Mistakes To Avoid
Using a router for decorative edges can give your project a professional look. Avoiding common errors helps you get smooth and clean results.
This guide covers mistakes like chipping, uneven edges, and router bit damage. Learn what to watch for and how to prevent these issues.
Chipping And Tear-out
Chipping and tear-out happen when wood splinters or breaks along the edge. This spoils the smooth finish you want on your decorative edges.
- Use sharp router bits to make clean cuts.
- Cut with slow, steady passes instead of rushing.
- Try using a backing board to support the wood fibers.
- Feed the router against the bit’s rotation for better control.
- Consider scoring the edge first to reduce splintering.
Uneven Edges
Uneven edges make your work look sloppy. They usually happen when the router is not steady or the guide is not set correctly.
| Cause | How to Fix |
|---|---|
| Router moves too fast | Slow down and keep a steady pace |
| Guide not secure | Clamp the guide firmly to the wood |
| Router bit loose | Tighten the collet before routing |
| Uneven pressure | Apply even pressure along the cut |
Router Bit Damage
Damaged router bits can cause rough cuts and unsafe conditions. Bits wear out or chip if used wrong.
- Do not force the router through hard wood.
- Clean bits regularly to remove resin build-up.
- Replace bits if they become dull or chipped.
- Store bits safely to avoid damage.
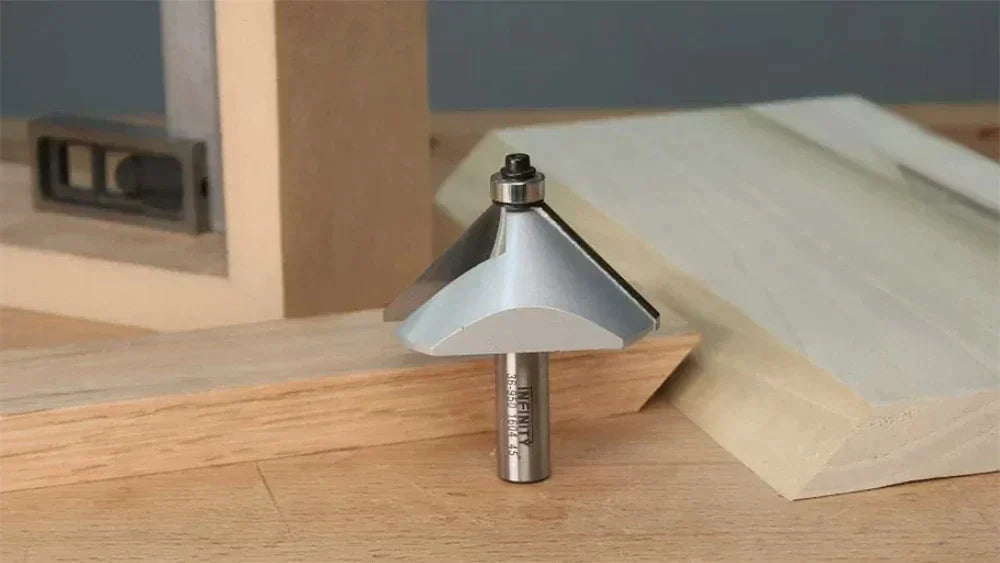
Credit: infinitytools.com
Frequently Asked Questions
What Router Bit Is Best For Decorative Edges?
The best router bit depends on the edge style you want. Common bits include round-over, ogee, and chamfer. Choose bits made of carbide for durability and smooth cuts. Always match the bit size to your project’s wood thickness for optimal results.
How Do I Set Up A Router For Edge Detailing?
Secure the router base firmly and adjust the bit height to match the desired edge profile. Use a guide or fence for straight cuts. Test on scrap wood first to ensure accuracy and prevent mistakes on your final piece.
Can Beginners Use A Router For Decorative Edges?
Yes, beginners can use a router with practice. Start with simple profiles like round-over edges. Use safety gear, work slowly, and follow tutorials. Gradually, you’ll gain confidence to try more complex designs.
What Safety Tips Should I Follow When Routing Edges?
Always wear safety glasses and hearing protection. Keep hands clear of the bit and use push sticks if needed. Work in a well-lit area, secure your workpiece, and never force the router. Follow manufacturer instructions for safe operation.
Conclusion
Creating decorative edges with a router adds charm to your projects. With practice, you achieve professional-looking results. Choose the right bit for the design you desire. Always prioritize safety while handling the router. Secure your workpiece firmly before starting. Consistent speed and steady hands ensure smooth edges.
Mistakes can happen, but practice refines skills. Experiment with different wood types for varied effects. Be patient and enjoy the process of learning and creating. With each project, your confidence and craftsmanship grow. Soon, you’ll have beautifully finished pieces to admire and share.