Are you ready to transform a simple piece of wood into a stunning work of art? Whether you’re a beginner or looking to sharpen your skills, these wood carving tips will help you carve with confidence and ease.
Imagine holding your carving tools smoothly, creating detailed shapes that bring your ideas to life. By the end of this article, you’ll have practical advice that makes every cut feel precise and satisfying. Let’s dive in and unlock your full wood carving potential!
Credit: www.familyhandyman.com
Choosing The Right Wood
Choosing the right wood is key to good carving results. Wood type affects how easy it is to carve and the final look. This guide helps you pick the best wood for your project.
Understanding wood types, grain, and quality makes carving smoother. Let’s explore important factors to consider before you start.
Softwoods Vs Hardwoods
Softwoods and hardwoods have different features that affect carving. Softwoods are easier to shape but may be less durable. Hardwoods are tough but can be harder to carve.
- Softwoods:Pine, cedar, fir. Good for beginners and quick projects.
- Hardwoods:Oak, maple, cherry. Best for detailed work and lasting pieces.
- Softwoods carve faster with softer tools.
- Hardwoods give a smooth finish but need sharper tools.
Grain Patterns And Texture
Grain and texture affect how the wood cuts. Straight grain is easier to carve and less likely to split. Complex grain adds beauty but can be tricky.
| Grain Type | Description | Carving Impact |
|---|---|---|
| Straight Grain | Lines run parallel along the wood | Smooth carving, less splitting |
| Interlocked Grain | Grain fibers twist in layers | Harder to carve, uneven cuts |
| Cross Grain | Grain runs in different directions | Can cause chipping, needs care |
Wood Quality And Condition
Good wood quality makes carving easier and safer. Check for cracks, knots, and moisture content before buying.
- Look for dry wood with no cracks.
- Avoid wood with large knots or holes.
- Test moisture by pressing your finger; it should feel dry.
- Choose wood that feels solid and heavy for its size.

Credit: www.youtube.com
Essential Tools For Carving
Wood carving needs specific tools to shape and detail wood. Using the right tools helps you work faster and safer.
This guide covers the main tools you need to start carving wood with ease and care.
Knives And Gouges
Knives and gouges are the main cutting tools in wood carving. Knives cut straight lines and small details.
Gouges have curved blades that scoop out wood and create rounded shapes.
- Detail knives for fine cuts
- Chip carving knives for patterns
- U-gouges for deep curves
- V-gouges for sharp lines
Mallets And Sharpeners
Mallets help push gouges into the wood with controlled force. Sharpeners keep your tools sharp and safe to use.
| Tool | Purpose |
| Mallet | Apply force to gouges |
| Sharpening Stone | Sharpen blades evenly |
| Leather Strop | Polish blade edges |
| Honing Oil | Protect sharpening stones |
Safety Equipment
Safety gear protects your hands, eyes, and body while carving. Always use safety equipment to prevent injury.
- Cut-resistant gloves to protect hands
- Safety glasses to shield eyes
- Dust mask to avoid breathing wood dust
- Apron to keep clothes clean
Basic Carving Techniques
Wood carving is a fun way to create shapes and designs from wood. Learning basic techniques helps you carve safely and well. These techniques give you good control over your tools and wood.
This guide explains three main carving styles. Each style uses different tools and ways to shape the wood. Understanding these will improve your carving skills.
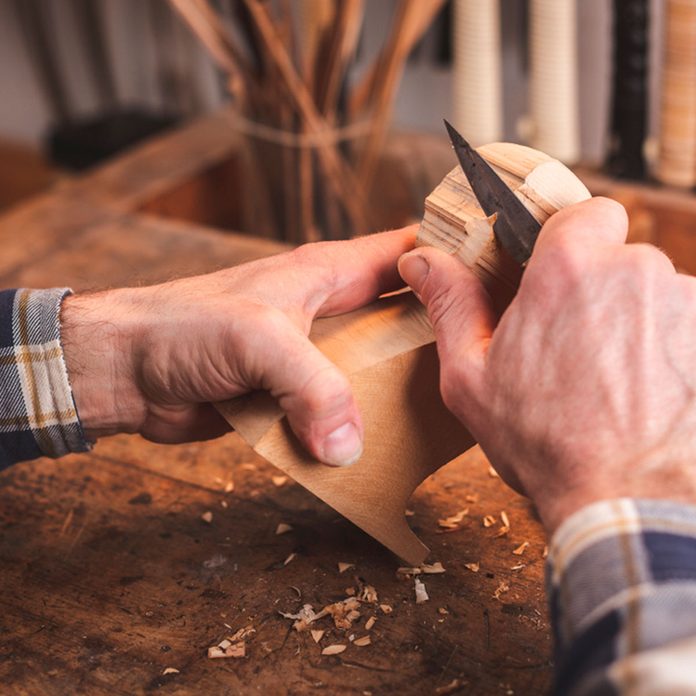
Whittling And Chip Carving
Whittling uses a small knife to cut thin slices from wood. It is the simplest way to carve small objects or shapes. Chip carving cuts small chips out of the wood surface to make patterns.
Both techniques need sharp tools and steady hands. Whittling shapes the wood, while chip carving creates decorative designs.
- Use softwood for easy cutting
- Hold the knife safely to avoid cuts
- Cut away from your body
- Start with simple shapes and patterns
Relief Carving
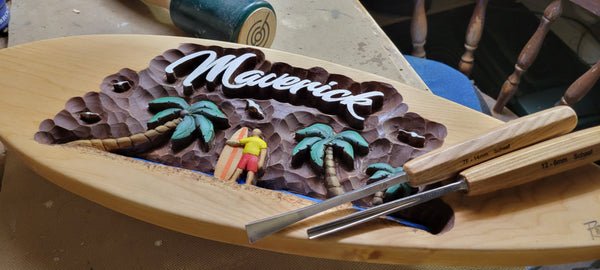
Relief carving means carving a design that stands out from a flat background. The background wood is cut away to make the design look raised. It is often used for decorative panels and signs.
This technique needs careful planning. You carve the background deeper and keep the design parts higher. It gives a 3D effect on a flat surface.
- Draw your design on the wood first
- Remove wood around the design carefully
- Use gouges and chisels for shaping
- Work slowly to avoid mistakes
Carving In The Round
Carving in the round means making a fully 3D sculpture. You carve all sides of the wood piece. This technique creates figures, animals, or objects that you can hold and view from all angles.
This style needs patience and many tools. You start with rough shaping and then add fine details. It allows the most creative freedom in wood carving.
- Use a block of wood bigger than the final size
- Start by removing large parts with a mallet and chisel
- Use knives and small tools for details
- Sand the surface smooth after carving
Sharpening And Maintaining Tools
Wood carving needs sharp tools to cut cleanly and safely. Keeping tools sharp helps you work faster and get better shapes.
Proper care of your tools keeps them ready to use and lasts longer. This guide shows how to sharpen and maintain your carving tools.
Sharpening Methods
Sharpening tools means making the blade edge smooth and sharp again. Use stones or strops to fix dull edges.
Start with coarse sharpening stones to shape the blade. Then use fine stones or leather strops to polish the edge.
- Use water or oil stones depending on your tool type
- Keep a steady angle while sharpening the blade
- Use a leather strop with polishing compound for a sharp edge
- Clean the tool after sharpening to remove metal dust
Tool Care Tips
Clean tools after every use to stop rust and dirt build-up. Wipe blades with a dry cloth and apply oil.
Store tools in a dry place. Use a tool roll or box to protect edges from damage.
- Remove wood chips and dust before storage
- Apply light oil on metal parts to prevent rust
- Keep handles dry and smooth to avoid cracks
- Check tools regularly for damage or wear
Extending Tool Life
Use the right tool for each carving task. Avoid forcing tools or using them on hard materials.
Sharpen tools often before they get very dull. Dull tools need more force and can break.
- Keep blades sharp with regular sharpening sessions
- Use protective covers to avoid accidental damage
- Handle tools gently to prevent dropping or bending
- Replace worn parts like handles or screws when needed
Design And Planning
Good wood carving starts with careful design and planning. This step helps you avoid mistakes later.
Planning your work lets you create better shapes and details in your carving.
Sketching Your Ideas
Begin by drawing your ideas on paper. Sketching helps you see the shape and details clearly.
Keep your sketches simple. Use light lines to change parts easily.
- Use a pencil and eraser for easy changes
- Draw the front and side views
- Focus on main shapes first
Transferring Designs To Wood
After sketching, you need to put your design on the wood. This guides your carving.
Use tracing paper or carbon paper to copy your design onto the wood surface.
- Secure the paper on wood to avoid slipping
- Trace lines firmly but do not press too hard
- Check the design is clear before carving
Choosing Patterns And Styles
Select patterns that match your skill level and project. Simple designs are best for beginners.
Popular styles include geometric shapes, floral patterns, and animals. Pick one that fits your idea.
- Geometric: straight lines and shapes
- Floral: flowers and leaves
- Animal: birds, fish, or mammals
- Abstract: freeform and creative shapes
Carving With Precision
Wood carving is a skill that needs careful attention. Precision helps you create clean and detailed designs.
Using the right techniques makes your cuts smooth and safe. Focus on control to avoid mistakes.
Controlling Your Cuts
Hold your carving tools firmly but not too tight. This gives you better control over each cut.
Make slow and steady movements. Quick or forceful cuts can cause slips and uneven shapes.
- Use the right tool for each type of cut
- Keep your hands steady and supported
- Cut away from your body for safety
- Practice with scrap wood to improve control
Working With Grain Direction
Wood grain affects how your tools move through the wood. Always notice the grain direction before cutting.
Cutting with the grain gives smooth results. Cutting against the grain can cause splinters and rough edges.
- Look at the lines in the wood before carving
- Plan your cuts to follow the grain
- Use gentle pressure when cutting against grain
- Sand rough edges after carving
Avoiding Common Mistakes
Many beginners carve too quickly. Taking your time helps prevent errors and accidents.
Using dull tools makes carving harder and less precise. Always keep your tools sharp and clean.
- Do not force the tool through hard wood
- Wear safety gear like gloves and glasses
- Check your wood for knots or cracks before carving
- Rest your hands often to avoid fatigue
Finishing Techniques
Finishing a wood carving is key to its final look and protection. This process includes smoothing the surface, adding color, and protecting the wood.
Good finishing makes your carving last longer and look better. Let’s explore some common finishing techniques.
Sanding And Smoothing
Sanding removes rough spots and helps the wood feel smooth. Start with coarse sandpaper and move to finer grits for a soft finish.
- Use 80-120 grit sandpaper to shape rough areas
- Switch to 220-320 grit for a smooth surface
- Sand along the grain to avoid scratches
- Clean dust with a soft brush or cloth before finishing
Applying Stains And Sealants
Stains add color and bring out the wood grain. Sealants protect the wood from water and dirt.
| Finish Type | Purpose | Application Tips |
| Oil-based stain | Deep color and grain highlight | Apply with cloth, wipe excess |
| Water-based stain | Fast drying, less odor | Use brush or spray, even coats |
| Polyurethane sealant | Strong protection and shine | Use brush, apply thin layers |
| Wax finish | Soft shine and smooth feel | Rub on with cloth, buff after drying |
Adding Decorative Details
Decorative details make your carving unique. You can add color, texture, or small designs.
Try these decorative ideas:
- Use a woodburning tool to add patterns
- Paint small areas with acrylic paint
- Apply gold or silver leaf for shine
- Carve fine lines or dots for texture
Troubleshooting Common Issues
Wood carving can be rewarding but comes with challenges. Knowing how to fix common problems helps keep your work smooth.
This guide covers how to handle splits, tool slips, and design mistakes. Use these tips to improve your carving experience.
Fixing Splits And Cracks
Splits and cracks happen when wood dries or is cut too hard. Fixing them early stops damage from getting worse.
- Use wood glue to fill small cracks. Press pieces together tightly.
- For larger splits, insert thin wood shims with glue for support.
- Clamp the area and let glue dry fully before carving again.
- Sand the surface smooth to hide repairs.
- Keep wood moist during carving to prevent new cracks.
Dealing With Tool Slips
Tool slips can cause dents or cuts that spoil your design. They happen from poor grip or dull blades.
| Cause | Fix |
| Dull blade | Sharpen tools often |
| Wrong grip | Hold tools firmly and control pressure |
| Wood knots | Carve slowly and change angle |
| Fatigue | Take breaks to stay focused |
Correcting Design Errors
Design errors can ruin your carving shape. Fix these mistakes with care to save your work.
Try these options to fix design errors:
- Remove wood around the mistake to reshape the area.
- Use a carving knife or chisel to carefully correct lines.
- Add wood filler to small gaps and sand smooth after it dries.
- Adjust your design by changing the pattern to hide flaws.
- Practice on scrap wood before making big changes.
Advanced Carving Projects
Advanced wood carving projects offer a chance to improve skills and create unique pieces. These projects require patience, precision, and creativity.
Focus on detailed designs and combining different techniques to make your work stand out.
Creating Sculptures
Sculptures bring wood carving into three dimensions. Choose hardwood for durability and fine detail.
- Start with a clear sketch or model of your sculpture.
- Use carving knives and gouges to shape the wood slowly.
- Sand the surface for smoothness after carving.
- Apply finishes like oil or wax to protect the wood.
Incorporating Mixed Media
Mixed media adds texture and color to wood carvings. Combine materials carefully to enhance your design.
| Material | Use | Tips |
|---|---|---|
| Metal | Detail accents | Attach with small nails or glue |
| Glass | Inlays | Use epoxy for secure fixing |
| Leather | Texture areas | Choose thin, flexible pieces |
| Stone | Base or stand | Ensure stable balance |
Customizing Furniture
Carving furniture creates personalized, artistic pieces. Plan your designs to fit the furniture’s style and function.
- Select areas like chair backs, table legs, or drawer fronts for carving.
- Use templates to keep designs consistent.
- Work with fine tools for delicate details.
- Protect your carving with sealants suited for furniture.

Credit: www.youtube.com
Frequently Asked Questions
What Tools Are Essential For Wood Carving Beginners?
Basic tools like carving knives, gouges, and chisels are essential for beginners. Quality tools ensure better control and precision. Start with a small set and add specialized tools over time. Proper tools improve safety and carving results.
How Do I Choose The Best Wood For Carving?
Softwoods like basswood and pine are ideal for beginners due to ease of carving. Hardwoods like oak and walnut offer durability but require more skill. Choose wood based on project complexity and your experience level.
What Safety Tips Should I Follow While Wood Carving?
Always carve away from your body to avoid injuries. Use sharp tools to reduce slipping risks. Wear protective gloves and goggles. Keep your workspace clean and well-lit to maintain focus and safety.
How Can I Improve My Wood Carving Skills Quickly?
Practice regularly on simple projects to build confidence. Study different carving techniques through tutorials and workshops. Analyze your work to identify areas for improvement. Patience and persistence are key to mastering wood carving.
Conclusion
Wood carving brings joy and creativity to many people. Start with simple projects to build your skills. Always use sharp tools for safer, cleaner cuts. Take your time and enjoy the process. Practice helps improve your technique and confidence. Remember to work in a well-lit, clean space.
Keep learning by watching videos or reading guides. Most of all, have fun creating your own wood art. Your patience will show in every carved detail. Keep carving and see how far you can go!