Sanding inside corners can be tricky. You might find it hard to get a smooth finish without damaging the edges or missing spots.
But what if you had simple tips that make this task easier and faster? Imagine your corners looking flawless, just like the rest of your project. Keep reading, because these easy tricks will change the way you handle inside corners forever—and save you time and frustration.
Choosing The Right Sandpaper
Sanding inside corners needs care and the right tools. Picking the proper sandpaper helps you get a smooth finish without damage.
This guide covers grit levels and materials to consider for sanding tight spaces effectively.
Grit Levels For Corners
Different grit levels work for different sanding stages. Inside corners need gentle sanding to avoid rounding the edges.
- Coarse grit (60-80):Use only if paint or heavy layers need removal. It may be too rough for corners.
- Medium grit (100-150):Good for shaping and smoothing edges after rough sanding.
- Fine grit (180-220):Best for final sanding to get a smooth surface without removing too much material.
Materials To Consider
| Material | Best Use | Advantages |
|---|---|---|
| Aluminum Oxide | Wood and painted surfaces | Durable and affordable |
| Garnet | Soft wood and fine finishing | Sharp cutting, smooth finish |
| Silicon Carbide | Metal and plastic | Very hard, good for wet sanding |
Choosing sandpaper material depends on the surface you work on. Soft woods need softer abrasives, while metals require harder ones.
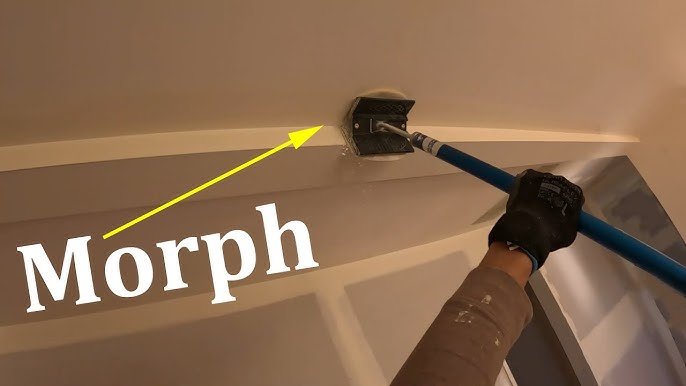
Essential Tools For Inside Corners
Sanding inside corners can be tricky without the right tools. Using proper sanding tools helps you reach tight spaces and get smooth finishes.
Here are two key tool types that make sanding inside corners easier and more effective.
Sanding Blocks And Sponges
Sanding blocks and sponges come in many shapes and sizes. They provide a firm grip and even pressure on surfaces.
- Small blocks fit well into tight corners
- Flexible sanding sponges can bend to the shape of the corner
- Use fine-grit sponges for finishing touches
- Coarse blocks remove rough material faster
Specialty Corner Sanders
Specialty corner sanders are made to fit perfectly inside corners. They save time and reduce sanding errors.
| Tool | Description | Best Use |
| Triangle Sanding Block | Triangular shape with flat sides | Sharp inside corners |
| Corner Sanding Pad | Flexible pad with a pointed tip | Curved or angled corners |
| Detail Sander | Powered tool with small sanding tip | Precise sanding in tight corners |
Techniques For Smooth Corners
Sanding inside corners can be tricky. The goal is to create smooth, even edges without rounding off the shape.
Using the right methods helps you avoid damage and get a clean finish. This guide covers hand sanding and power sander tips.
Hand Sanding Tips
Hand sanding gives you control in tight spaces. Use sanding blocks or folded sandpaper to reach corners well.
- Fold sandpaper to fit the corner snugly.
- Use light pressure to keep edges sharp.
- Sand in small, circular motions for evenness.
- Check progress often to avoid over-sanding.
- Use fine grit paper last for a smooth finish.
Using Power Sanders Safely
Power sanders save time but need care near corners. Use small, precise movements to avoid rounding edges.
| Power Sander Type | Best Use in Corners | Safety Tip |
| Detail Sander | Small, tight corners | Use low speed |
| Orbital Sander | Edges near corners | Keep moving constantly |
| Belt Sander | Not recommended for corners | Avoid using in tight spots |

Credit: www.amazon.ca
Avoiding Common Mistakes
Sanding inside corners is tricky but important for a smooth finish. Many people make mistakes that damage the surface or shape. This guide helps you avoid those errors.
Focus on careful sanding to keep the corner sharp and clean. Use the right tools and methods for best results.
Preventing Over-sanding
Over-sanding can round off sharp corners and ruin your work. It also weakens the structure, making it less durable.
- Use fine-grit sandpaper to avoid removing too much material.
- Sand lightly with gentle pressure in small, controlled strokes.
- Check your progress often to stop before the corner fades.
- Use a sanding sponge that fits into tight spaces without bending.
- Avoid power sanders inside corners as they remove too much quickly.
Maintaining Corner Shape
Keep the original shape of the corner by sanding carefully and evenly. Uneven sanding can cause bumps or dips that show after painting.
| Tip | How to Do It | Why It Helps |
| Use a corner sanding block | Choose a block shaped to fit corners | Ensures even sanding on both sides |
| Sand along the edges | Move sandpaper along the corner, not across it | Prevents rounding off the corner |
| Check with a straightedge | Place a ruler on the corner to check flatness | Detects uneven areas early |
| Use light coats of sanding sealer | Apply sealer before final sanding | Protects wood and keeps shape |
Finishing Touches For A Flawless Look
Sanding inside corners can be tricky but is important for a smooth finish. Proper cleaning and sealing help the corners look perfect.
Taking time with final steps ensures your work lasts and looks neat. Let’s explore how to clean dust and apply sealants or paint.
Cleaning Dust From Corners
Dust in corners stops paint and sealant from sticking well. Use a small brush or vacuum to clear out dust after sanding.
Wipe the corners with a damp cloth to remove leftover particles. Make sure the area is dry before moving on.
- Use a soft brush to loosen dust
- Vacuum the corner for full removal
- Wipe with a clean, damp cloth
- Allow the corner to dry completely
Applying Sealants Or Paint
Choose the right sealant or paint for inside corners to protect and finish the surface. Apply thin, even coats for best results.
Use a small brush to reach tight corners. Let each coat dry fully before adding another layer to avoid drips.
- Select sealant or paint suited for your material
- Use a small brush for precise application
- Apply thin layers for even coverage
- Wait for drying between coats

Credit: www.familyhandyman.com

Credit: www.familyhandyman.com
Frequently Asked Questions
What Tools Work Best For Sanding Inside Corners?
Use small sanding sponges, detail sanding blocks, or folded sandpaper. These tools fit tight spaces and provide control. Avoid large sanders that can’t reach corners properly.
How Do You Avoid Rounding Edges When Sanding Corners?
Sand gently with light pressure to maintain sharp edges. Use precise, back-and-forth strokes along the corner. Avoid excessive sanding that can soften the corner shape.
Can Sanding Inside Corners Improve Paint Adhesion?
Yes, sanding removes rough spots and old finishes. This creates a smooth surface for better paint bonding. Proper sanding ensures longer-lasting, even paint coverage in corners.
What Grit Sandpaper Is Best For Inside Corners?
Start with 120- to 150-grit sandpaper for initial smoothing. Finish with 220-grit for a fine, smooth surface. Use finer grits to avoid scratches and prepare for painting.
Conclusion
Sanding inside corners can seem tricky. But with practice, it gets easier. Use the right tools to save time. Always prioritize safety. Wear a mask and goggles to protect yourself. Sand patiently for smoother results. Remember, less pressure avoids damage.
Check your work often to ensure even sanding. Experiment with different techniques. Find what works best for you. Perfecting these skills takes time. So, don’t rush the process. Enjoy learning and improving. Your efforts will show in the finished project.
Keep practicing and stay patient. Happy sanding!