Are you ready to take your woodworking skills to the next level? Mastering the best table saw techniques can make all the difference between a rough cut and a perfect finish.
Whether you’re just starting out or looking to build confidence, these simple tips will help you work safer, faster, and with greater precision. Keep reading, and you’ll discover how to turn your table saw into a powerful tool that brings your projects to life.
Your path to becoming a skilled woodworker starts here.
Choosing The Right Table Saw
Picking the right table saw is important for beginners. It helps you cut wood safely and accurately.
There are many types of table saws. Each one has features that suit different needs and skills.
Types Of Table Saws
Table saws come in different styles. Each type fits certain projects and spaces better.
- Benchtop Table Saws:Small and portable. Good for light work and small spaces.
- Contractor Table Saws:Bigger and heavier. Offers more power and stability.
- Cabinet Table Saws:Large and strong. Best for serious woodworking and big projects.
- Hybrid Table Saws:Mix of contractor and cabinet saws. Good balance of power and price.
Features To Look For
Some features make a table saw easier and safer to use. Beginners should focus on these features.
- Safety Features:Look for blade guards and anti-kickback pawls.
- Adjustable Fence:Helps guide wood straight for accurate cuts.
- Power:A motor with enough power for your projects is important.
- Size and Weight:Choose a saw that fits your workspace and can be moved if needed.
- Dust Collection:Helps keep your workspace clean and safe.
- Easy Blade Change:Allows quick blade swaps without tools.
Setting Up Your Workspace
Setting up your workspace correctly helps you work safely and efficiently with a table saw. A clean and well-organized area reduces mistakes and accidents.
Focus on having enough room and good lighting. Keep your tools and materials ready and easy to reach.
Proper Lighting And Space
Good lighting lets you see your work clearly. Bright light reduces shadows and helps you cut straight lines.
- Use bright overhead lights or LED lamps
- Keep the area free of clutter to allow movement
- Make sure there is enough space around the saw for long wood pieces
- Position your saw so natural light helps you without glare
Organizing Tools And Materials
Keep your tools and materials close to your table saw. This saves time and keeps your workspace tidy.
| Tool or Material | Suggested Storage |
| Measuring tape | Wall hook near the saw |
| Push sticks | Drawer or side shelf |
| Safety glasses | Clear container on bench |
| Wood pieces | Stack rack close to saw |
Basic Table Saw Parts And Functions
A table saw is a tool used to cut wood and other materials. It has several parts that work together to make accurate cuts.
Knowing these parts helps beginners use the saw safely and correctly.
Blade Types And Uses
The blade is the part that does the cutting. Different blades cut different materials and make different types of cuts.
- Rip blades cut along the wood grain. They have fewer teeth.
- Crosscut blades cut across the grain. They have more teeth for smooth cuts.
- Combination blades can do both rip and crosscut work.
- Dado blades cut wide grooves or dados in wood.
Fence And Miter Gauge
The fence helps guide wood for straight cuts. It stays parallel to the blade.
The miter gauge guides wood for angled cuts. It slides in a slot on the table.
- Use the fence for rip cuts to keep wood straight.
- Use the miter gauge for crosscuts at an angle.
- Adjust both parts carefully for accurate cuts.
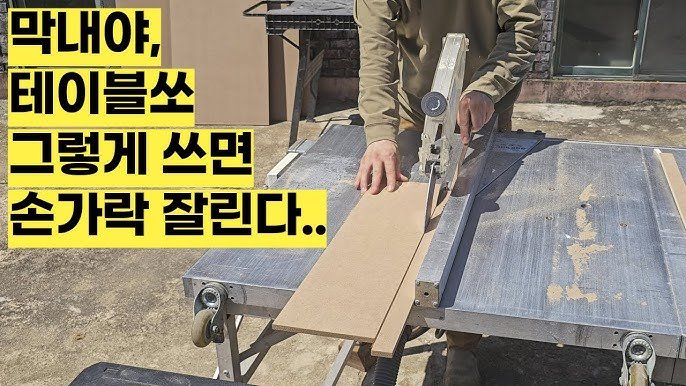
Credit: www.youtube.com
Essential Safety Gear
Using a table saw can be dangerous without the right safety equipment. Wearing proper gear protects your eyes and ears from harm. It also helps you stay focused on your work.
Safety gear is a must for every beginner. It reduces accidents and keeps you comfortable while cutting wood.
Eye And Ear Protection
Protect your eyes with safety goggles or glasses. Sawdust and small wood chips can fly into your eyes and cause injury. Ear protection like earmuffs or earplugs helps lower loud noise levels from the saw.
- Always wear safety goggles or glasses
- Use earmuffs or earplugs for hearing protection
- Check that your gear fits well and is comfortable
- Replace damaged or scratched goggles immediately
- Keep your ear protection clean and in good condition
Using Push Sticks And Guards
Push sticks keep your hands away from the blade. Use them to guide wood safely through the cut. Blade guards cover the sharp blade, helping prevent accidental contact.
| Safety Tool | Purpose | When to Use |
|---|---|---|
| Push Stick | Keeps hands clear of the blade | When cutting narrow pieces of wood |
| Blade Guard | Covers the blade during cutting | Always, unless the cut requires removal |
Preparing Materials For Cutting
Getting your materials ready is important for safe and accurate cutting. Take your time to prepare wood or other materials before using the table saw.
Proper preparation helps you avoid mistakes and keeps your work steady. It also protects you from accidents.
Measuring And Marking
Measure your material carefully before cutting. Use a tape measure or ruler to get exact lengths and widths.
Mark the cutting line clearly with a pencil. Make sure the line is straight and easy to follow.
- Double-check measurements to avoid errors
- Use a square tool for perfect right angles
- Draw lines on the side that will be cut off
Securing Workpieces
Keep your material steady to get smooth cuts. Use clamps or a fence to hold the workpiece firmly.
Never hold the material with your hands near the blade. Secure it well to avoid kickback and mistakes.
- Use clamps to hold small or thin pieces
- Align workpieces against the saw fence for straight cuts
- Check stability before starting the saw
Common Cutting Techniques
Using a table saw safely and effectively means knowing the right cutting methods. Beginners should focus on learning simple cuts that fit many projects.
This guide covers three common cutting techniques: rip cuts, crosscuts, and bevel cuts. Each has its own uses and tips to get clean results.
Rip Cuts
Rip cuts run along the wood grain. This cut splits boards into narrower pieces. Use the saw’s fence to guide the wood straight. Always keep your hands clear of the blade path.
- Set the fence to the desired width
- Push the board steadily along the fence
- Keep firm pressure on the board to avoid kickback
- Use a push stick for small pieces
Crosscuts
Crosscuts cut across the wood grain. These cuts shorten boards to length. Use a miter gauge or crosscut sled for accuracy. Always support the wood firmly to prevent binding.
| Tip | Reason |
| Use a sharp blade | Clean cuts with less tear-out |
| Secure wood tightly | Prevent wood movement during cut |
| Keep blade height just above wood | Reduce splintering and kickback |
| Push wood steadily | Ensure smooth, even cut |
Bevel Cuts
Bevel cuts angle the blade to cut wood edges. These cuts add decorative edges or join angled pieces. Adjust the saw blade angle before cutting. Use a guide to keep the wood steady.
- Set blade angle carefully and lock it in place
- Check blade height to match wood thickness
- Use clamps or guides to hold wood
- Wear eye protection for angled cuts
Maintaining Control During Cuts
Using a table saw safely means keeping control of the wood and the tool. Good control helps you make clean cuts and stay safe.
Beginners need to focus on how they hold the wood and feed it through the blade. These actions keep the cut steady and prevent accidents.
Proper Hand Placement
Place your hands in the right spots to keep control. One hand should push the wood forward, and the other should guide it from the side.
Keep your hands away from the blade. Use push sticks for small pieces to keep your fingers safe.
- Push wood with your dominant hand
- Guide wood with your other hand on the side
- Never place hands in line with the blade
- Use push sticks for narrow cuts
Feeding Wood Steadily
Feed the wood into the blade at a steady speed. Moving too fast can cause rough cuts or kickback.
Keep pressure against the fence to guide the wood straight. This helps you make accurate cuts and stay safe.
- Push wood steadily, not too fast or slow
- Keep wood pressed against the fence
- Watch for any resistance and adjust speed
- Stop feeding if the blade binds

Credit: www.popularmechanics.com
Preventing Kickback
Kickback is a sudden and dangerous movement of wood from a table saw. It can cause serious injury. Learning how to prevent it keeps you safe and confident.
This guide covers the main causes of kickback and easy ways to avoid it. Follow these tips to work more safely with your table saw.
Causes Of Kickback
Kickback happens when the wood catches or binds on the saw blade. The wood can then be thrown back toward the user at high speed.
- Wood pinching the blade due to poor fence alignment
- Using dull or damaged saw blades
- Feeding wood too fast or unevenly
- Improper use of the riving knife or splitter
- Wood twisting or moving during the cut
How To Avoid It
Take simple steps to reduce the risk of kickback. These safety tips help you keep control of your workpiece and the saw.
| Safety Tip | Reason |
| Check fence alignment | Prevents wood from pinching blade |
| Use sharp blades | Allows smooth cutting without binding |
| Feed wood steadily | Reduces sudden movements and kickback |
| Use riving knife or splitter | Keeps cut wood pieces apart |
| Hold wood firmly | Stops twisting or slipping |
Routine Maintenance And Blade Care
Keeping your table saw in good shape is important. Regular care helps it work safely and last longer.
Taking care of the blade and the saw itself makes your cuts better. It also reduces risks while using the tool.
Cleaning The Table Saw
Cleaning your table saw removes dust and debris. This keeps the machine running smoothly and safely.
Use a brush or compressed air to clear sawdust from the table, blade, and motor area. Wipe the surface with a damp cloth.
- Unplug the saw before cleaning
- Remove large debris by hand or brush
- Use compressed air for hard-to-reach spots
- Wipe the table surface with a damp cloth
- Check and clean the blade guard and riving knife
Sharpening And Replacing Blades
Dull blades make cuts rough and can be dangerous. Keep blades sharp for clean, safe cuts.
Sharpen blades using a blade sharpener or take them to a professional. Replace blades if they are damaged or worn out.
- Check blade sharpness before every project
- Use a blade sharpener or professional service
- Replace blades with the right size and type
- Always unplug the saw before changing blades
- Tighten the blade securely after installation

Credit: www.youtube.com
Frequently Asked Questions
What Safety Gear Is Essential For Beginners Using A Table Saw?
Wearing safety glasses and hearing protection is crucial. Use a push stick to keep hands safe. Always wear a dust mask to avoid inhaling sawdust. Proper safety gear prevents injuries and promotes focused, safe cutting.
How Do I Choose The Right Blade For My Table Saw?
Select a blade based on the material you cut. For wood, a 40-tooth carbide blade works well. Use fine-tooth blades for smooth cuts and coarse blades for faster cuts. Matching the blade to the task improves cut quality and saw performance.
What Is The Correct Blade Height For Cutting Wood?
Set the blade height so it extends about 1/8 inch above the wood. This ensures clean cuts and reduces kickback risk. Proper blade height improves cut accuracy and safety during use.
How Can I Prevent Wood From Binding On A Table Saw?
Use a sharp blade and keep the fence aligned. Feed the wood steadily without forcing it. Applying wax to the fence or table reduces friction. These steps minimize binding and improve cutting smoothness.
Conclusion
Mastering table saw techniques boosts your woodworking skills. Practice ensures safety and accuracy. Always prioritize using the right tools and techniques. Remember to maintain your equipment regularly. Clean tools work better and last longer. Stay patient and keep learning. Little steps lead to big improvements.
Enjoy the process and watch your confidence grow. By practicing these beginner tips, your projects will shine. Your skills will improve over time. Happy woodworking!