Are you struggling to make precise angled cuts on your woodworking projects? A miter gauge is the tool that can transform your work, giving you clean, accurate cuts every time.
But if you’re unsure how to use it properly, you might be missing out on its full potential. In this guide, you’ll discover simple steps and expert tips to master your miter gauge quickly. By the end, you’ll feel confident tackling any angled cut with ease and precision.
Ready to take your woodworking to the next level? Let’s dive in.
Miter Gauge Basics
A miter gauge helps you cut wood at different angles. It is a useful tool for woodworking projects.
You attach the miter gauge to a table saw or band saw. It guides your wood to make precise angled cuts.
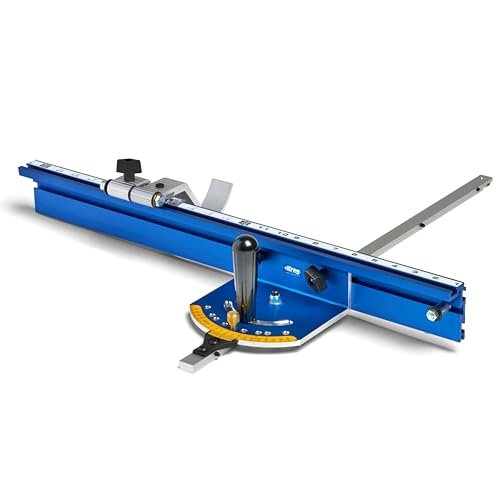
Parts Of A Miter Gauge
A miter gauge has several key parts that work together. Each part helps you adjust and guide your cuts.
- Base:The flat part that slides in the saw’s slot.
- Fence:The straight edge that holds the wood steady.
- Protractor Head:The part with angle markings for setting the cut angle.
- Locking Knob:Tightens the gauge at the chosen angle.
- Handle:Allows you to hold and guide the gauge safely.
Types Of Miter Gauges
There are different types of miter gauges for various needs. Choose one based on your project and saw type.
- Standard Miter Gauge:Basic model with angle adjustment and fence.
- Adjustable Miter Gauge:Offers more precise angle settings and better locking.
- Digital Miter Gauge:Shows angle digitally for exact cuts.
- Universal Miter Gauge:Fits many saw models and has extra features.
Choosing The Right Miter Gauge
Pick a miter gauge that fits your saw and project needs. Consider accuracy, build, and ease of use.
Look for a gauge with clear angle markings and a firm locking system. It should slide smoothly in your saw slot.
- Check compatibility with your saw model.
- Choose a sturdy and durable material.
- Consider extra features like stops or clamps.
- Think about your cutting accuracy needs.
Setting Up Your Miter Gauge
Using a miter gauge helps make precise angled cuts on a table saw. Setting it up correctly ensures safety and accuracy. This guide covers attaching the gauge, calibrating angles, and adjusting the fence.
Take time to follow each step carefully. Proper setup leads to better results and a smoother woodworking experience.
Attaching To The Table Saw
First, slide the miter gauge bar into the slot on the table saw’s surface. Make sure it fits snugly but can still move freely. Tighten the locking knob to hold it in place.
Check that the miter gauge moves smoothly without wobbling. If it is too loose, adjust the locking mechanism or check for debris in the slot.
Calibrating The Angle
Calibrating the angle ensures your cuts are accurate. Use a reliable protractor or angle gauge to check the miter gauge’s setting against the table saw blade.
- Set the blade to 0 degrees (straight up).
- Place the miter gauge at the 0-degree mark.
- Use the protractor to measure the angle between the fence and blade.
- Adjust the miter gauge until it reads exactly 0 degrees.
- Tighten the screws or knobs to lock the angle in place.
Adjusting The Fence
The fence supports your workpiece and guides it during the cut. Adjust it to line up with the miter gauge angle for clean cuts.
| Fence Adjustment | Purpose |
| Loosen fence screws | Allow movement |
| Align fence with miter angle | Guide the workpiece correctly |
| Tighten screws securely | Keep fence in place |
| Test with scrap wood | Check for accuracy |
Cutting Techniques
Using a miter gauge helps you make precise cuts on your woodworking projects. It guides the workpiece at the correct angle for neat edges.
Different cuts need different settings and angles. Learning how to adjust the miter gauge lets you create many shapes and joints.
Making Accurate Crosscuts
Crosscuts cut wood across the grain. The miter gauge holds the wood steady at a right angle to the blade. This stops the wood from moving and gives a clean cut.
Set the miter gauge to 90 degrees. Use a push stick to keep your hands safe. Always check your measurements twice before cutting.
Creating Bevel Cuts
Bevel cuts angle the blade itself, not the wood. Tilt the saw blade to the needed angle. The miter gauge holds the wood steady as you cut.
This technique is great for making angled edges or fitting pieces together tightly. Always lock the blade angle before starting your cut.
Combining Angles For Complex Cuts
Some cuts need both the wood and blade angled. Set the miter gauge for the wood angle. Tilt the blade for the bevel angle. This creates complex shapes.
Use this for making frames, boxes, or decorative edges. Take your time and make test cuts on scrap wood first.
- Adjust miter gauge angle for wood position
- Set blade bevel angle for cutting tilt
- Secure all settings before cutting
- Use scrap wood to test angles

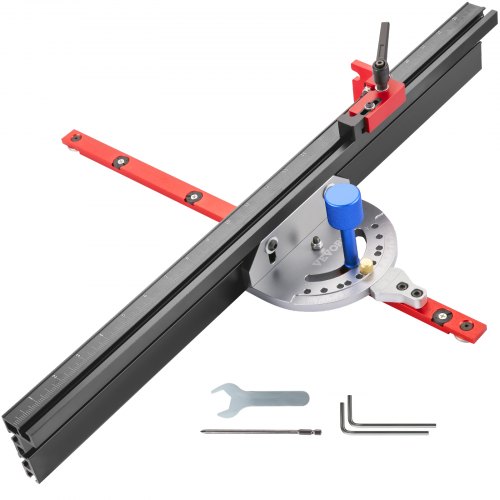
Credit: www.vevor.com
Safety Tips
Using a miter gauge safely helps you avoid accidents. Always follow good safety habits to protect yourself.
Pay close attention to your hand position, use clamps or hold-downs, and keep your workspace clean.
Proper Hand Placement
Keep your hands away from the blade path. Hold the workpiece firmly with both hands.
Do not reach over the blade or the miter gauge. Use push sticks for small or narrow pieces.
- Hold wood firmly on the miter gauge fence
- Keep hands at least 4 inches from the blade
- Use push sticks for small cuts
Using Clamps And Hold-downs
Clamps and hold-downs keep your wood steady during cuts. This reduces slipping and kickbacks.
Attach clamps securely before starting the saw. Check that the miter gauge moves smoothly.
- Use clamps to secure the workpiece to the miter gauge
- Check clamp tightness before cutting
- Ensure clamps do not block the blade path
Maintaining A Clean Workspace
Keep your workspace free of sawdust and scraps. A clean area helps prevent slips and mistakes.
Clear the table and floor around the saw before cutting. Remove any tools or objects that might cause trips.
- Sweep sawdust off the table regularly
- Keep floor clear of debris and cords
- Organize tools away from the cutting area
Common Mistakes To Avoid
Using a miter gauge can improve your cutting accuracy. But some errors can cause problems. Avoid these common mistakes to get better results.
Check each step carefully. Small errors add up and affect your cuts. Focus on alignment, angle settings, and fence stability.
Misalignment Issues
Misalignment can cause uneven cuts and waste material. Make sure the miter gauge fits snugly in the slot. Loose fitting leads to side movement during cutting.
- Check the miter gauge slot for debris or damage.
- Ensure the gauge slides smoothly but without wiggle.
- Verify the fence is square to the blade before each use.
- Use a square tool to confirm alignment regularly.
Improper Angle Settings
Setting the wrong angle leads to poor fit and weak joints. Take time to set the angle carefully on your miter gauge. Avoid guessing or rushing this step.
| Angle Setting Mistake | Effect on Cut | How to Fix |
| Not zeroing the gauge | Inaccurate baseline angle | Reset gauge to zero before measuring |
| Misreading angle scale | Wrong cut angle | Use a reliable protractor or digital angle finder |
| Not tightening angle lock | Angle shifts during cut | Secure the lock firmly before cutting |
Ignoring Fence Stability
An unstable fence causes wobbly cuts and safety risks. Make sure your fence is secure and does not move. Check all screws and locks before starting.
- Tighten all screws and bolts on the fence.
- Inspect for cracks or damage on the fence surface.
- Use clamps if your fence allows extra securing.
- Test fence stability by applying light pressure before cutting.
Maintenance And Care
Keeping your miter gauge in good shape helps it work better and last longer. Regular care prevents damage and keeps cuts accurate.
Simple maintenance steps can protect your tool from wear and tear. These include cleaning, lubrication, and proper storage.
Cleaning The Gauge
Remove dust and debris from your miter gauge after each use. Dirt can cause the parts to stick or wear out faster.
Use a soft cloth or brush to clean the surface and moving parts. Avoid harsh chemicals that can damage the finish.
- Wipe off sawdust and wood chips
- Brush small crevices and slots
- Use mild soap and water for tough dirt
- Dry completely to prevent rust
Lubricating Moving Parts
Lubricate the sliding and pivot points to keep your miter gauge moving smoothly. This reduces friction and wear.
Use a light machine oil or dry lubricant. Avoid heavy grease as it can attract dust and dirt.
- Apply lubricant to the sliding bar
- Oil the pivot joint for easy angle adjustments
- Wipe off excess oil to prevent buildup
Storing For Longevity
Store your miter gauge in a dry and clean place. Proper storage stops rust and damage from moisture.
Keep it away from heavy tools or objects that can bend or scratch it. Use a protective case if available.
- Store in a toolbox or drawer
- Keep away from damp areas
- Use protective covers or cases
- Check it regularly for any signs of damage
Advanced Tips And Tricks
Using a miter gauge can improve your woodworking projects. Advanced tips help you get better accuracy and speed.
These tricks focus on customizing, repeating cuts, and using other jigs with your miter gauge.
Customizing The Fence
Adjust the fence to fit your project needs. A longer or taller fence gives better support for large pieces.
Adding a stop block to the fence helps keep cuts consistent. You can also add a non-slip surface to hold wood firmly.
- Extend the fence with plywood or hardwood
- Attach rubber or cork strips for grip
- Use clamps to secure stop blocks
Using Stop Blocks For Repetitive Cuts
Stop blocks make repetitive cuts faster and more precise. Fix a block on the fence or table to limit wood movement.
This setup helps you cut the same length multiple times without measuring each time.
- Clamp a wooden block on the fence at the desired cut length
- Check the block position with a test cut
- Use multiple blocks for different lengths
- Mark blocks for easy identification
Integrating With Other Jigs
Combine your miter gauge with other jigs for complex cuts. This can improve safety and accuracy.
For example, use a sled jig for crosscuts or a taper jig for angled cuts along the wood length.
- Attach the miter gauge to a sled jig for better support
- Use a taper jig with the miter gauge for angled cuts
- Combine with featherboards to hold wood tight
- Test each setup before cutting valuable wood
Credit: www.vevor.com
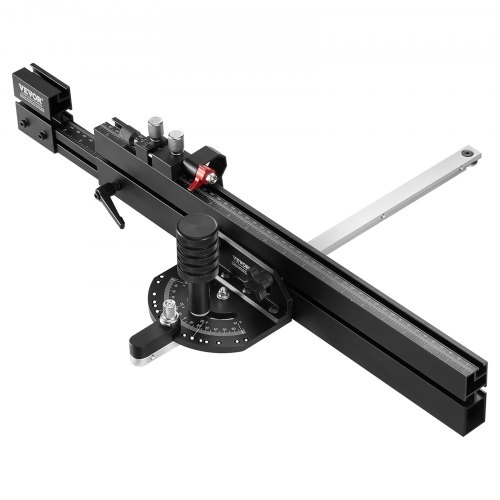
Credit: eur.vevor.com
Frequently Asked Questions
What Is A Miter Gauge Used For?
A miter gauge helps make precise angled cuts on woodworking tools like table saws. It ensures accurate crosscuts at various angles, improving project quality and safety.
How Do I Adjust A Miter Gauge Angle?
Loosen the angle lock, rotate the gauge to the desired angle, and retighten the lock. Use a protractor or built-in scale for accuracy.
Can A Miter Gauge Cut Angles Beyond 45 Degrees?
Most miter gauges adjust up to 45 degrees both left and right. Some specialized models allow wider angles, but standard gauges typically limit cuts to 45 degrees.
How Do I Maintain And Clean A Miter Gauge?
Regularly wipe the miter gauge with a dry cloth to remove dust. Lubricate moving parts lightly and check for wear to keep it functioning smoothly.
Conclusion
Using a miter gauge improves your woodworking skills. It ensures precise cuts every time. Practice makes perfect, so keep trying. Always prioritize safety while working. Double-check your measurements before cutting. A steady hand helps in achieving accuracy. Remember to maintain your tools regularly.
Clean and store your miter gauge properly. This guide is your first step. Soon, you’ll cut wood like a pro. Enjoy the satisfaction of perfect angles. Keep learning and experimenting. Happy woodworking!
