Are you ready to transform plain furniture into stunning works of art? Learning how to carve intricate furniture details can bring a unique charm and personality to your pieces.
Imagine the satisfaction of turning a simple chair or table into something truly special—something that catches every eye in the room. You’ll discover easy-to-follow techniques that will boost your confidence and skills, even if you’re just starting out. Keep reading, and soon you’ll be creating beautiful, detailed designs that make your furniture stand out like never before.

Credit: www.freepik.com
Essential Carving Tools
Carving intricate details in furniture requires the right set of tools. Using proper tools makes your work easier and more precise.
In this guide, learn about choosing chisels and gouges, keeping tools sharp, and setting up a safe workspace.
Choosing The Right Chisels And Gouges
Select chisels and gouges based on the detail and shape you want to carve. Each tool has a unique shape and size for different cuts.
- Bevel-edge chisels:Good for straight cuts and cleaning corners.
- Gouges:Used for scooping and curved cuts; come in various sweep sizes.
- V-tools:Create fine lines and sharp angles.
- Skew chisels:Ideal for smooth finishing cuts and trimming.
Sharpening And Maintaining Tools
Sharp tools cut better and reduce the risk of slipping. Regular sharpening and care keep your tools in top shape.
| Tool | Sharpening Method | Maintenance Tip |
| Chisels | Use a whetstone or sharpening stone | Hone edges often to keep sharpness |
| Gouges | Use slipstones or curved sharpening stones | Clean after use to prevent rust |
| V-tools | Sharpen carefully with small stones | Store with blade guards |
Safety Equipment And Workspace Setup
Wear protective gear and keep your workspace clean. A safe area helps avoid accidents during carving.
- Wear safety glasses to protect your eyes.
- Use a carving glove on your non-dominant hand.
- Keep tools sharp to reduce force and slipping.
- Work on a sturdy bench with good lighting.
- Keep your workspace free of clutter.
Selecting Wood For Carving
Choosing the right wood is key for carving fine furniture details. The wood must be easy to shape and hold small cuts well.
Different woods offer different textures and hardness. This affects how detailed your carving can be.
Best Woods For Fine Details
Softwoods are easy to carve but may not hold sharp details well. Hardwoods provide better detail but need sharper tools.
- Basswood: Soft, fine grain, easy to carve
- Butternut: Light, soft, good for beginners
- Cherry: Harder, smooth grain, holds detail well
- Walnut: Dense, fine texture, great for intricate work
- Maple: Hard and strong, good for fine details
Preparing Wood Surfaces
Start with clean, smooth wood surfaces. Remove any dirt or rough patches before carving.
Sanding the wood lightly helps tools move smoothly. Use fine-grit sandpaper for the best finish.
- Check for knots and cracks that may affect carving
- Trim wood to manageable size
- Use a block plane to flatten uneven areas
- Sand with 150 to 220 grit paper before carving
Handling Wood Grain And Texture
Wood grain affects how the carving tools cut. Cut with the grain to avoid splintering.
Some woods have tight grain, which holds detail better. Others have open grain, which may need extra care.
- Observe the direction of the grain before carving
- Use sharp tools to follow the grain smoothly
- Avoid carving across the grain to reduce tear-out
- Practice on scrap wood to understand grain behavior
Basic Carving Techniques
Carving furniture adds beautiful details to wood pieces. It uses simple tools and careful skills.
Learning basic carving techniques helps create intricate designs. Each technique shapes the wood in different ways.
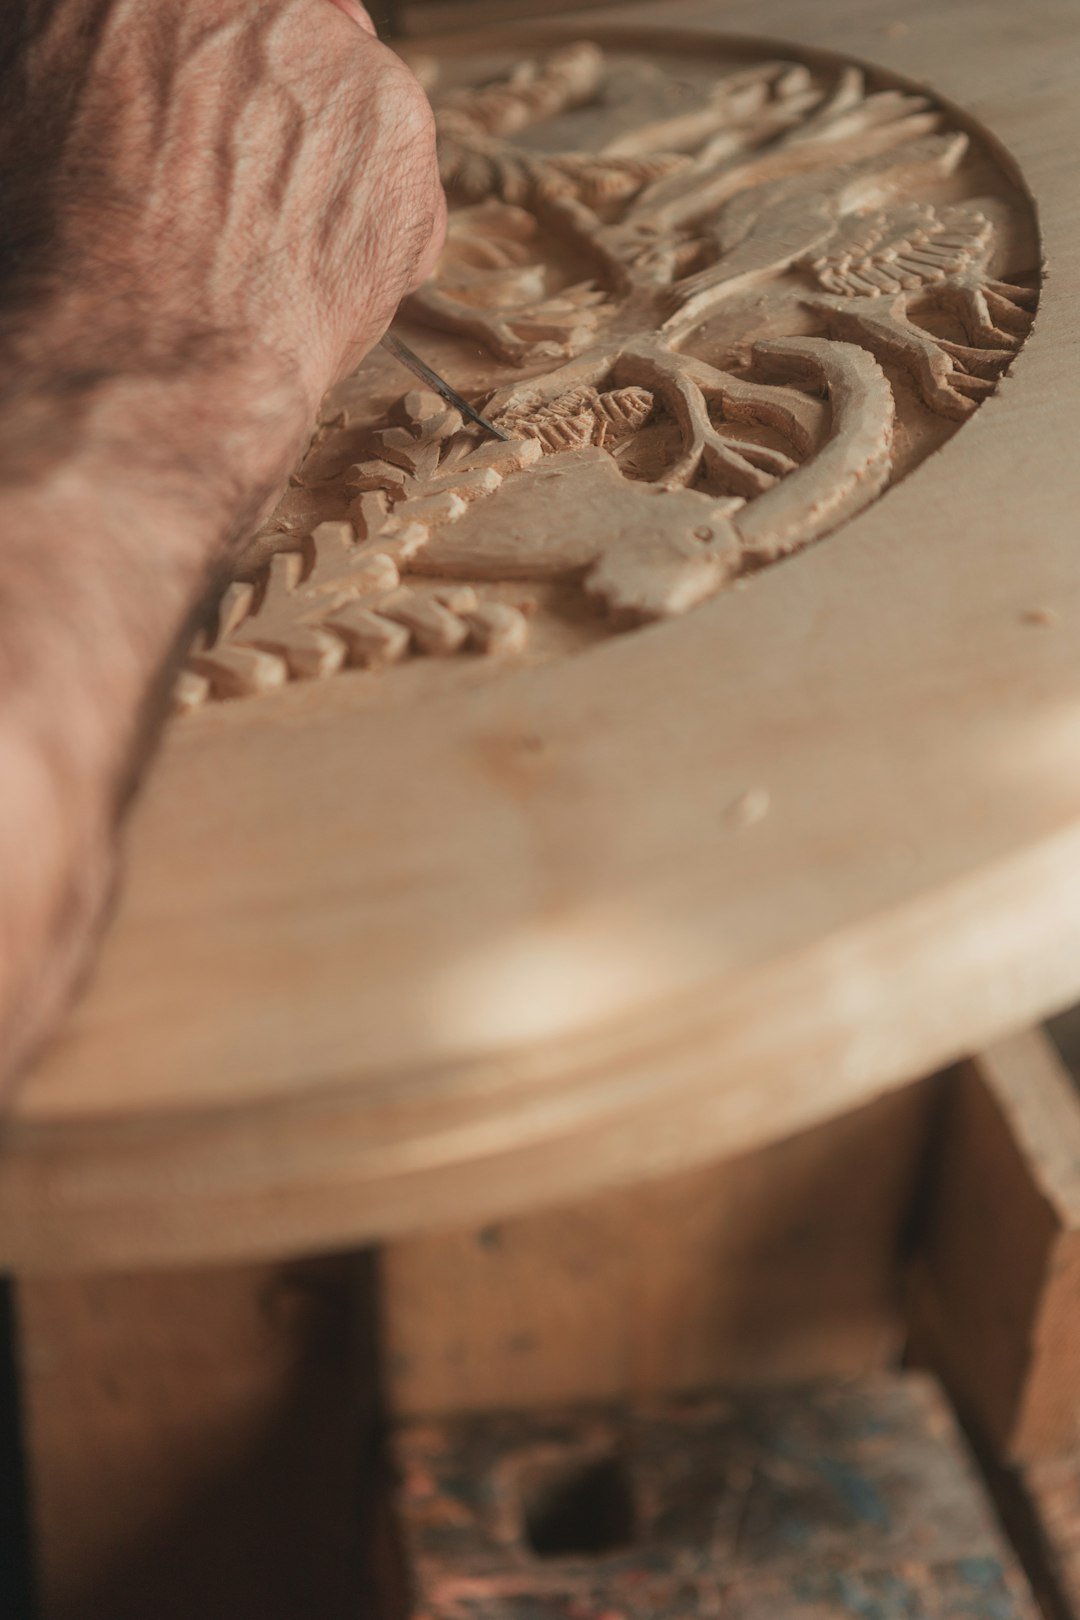
Relief Carving Basics
Relief carving means carving shapes that stand out from a flat background. It gives a 3D look on flat wood.
Start by drawing your design on the wood. Use gouges and chisels to remove wood around the design.
- Cut around the design to create depth
- Work slowly to keep smooth edges
- Use different tools for curves and straight lines
- Sand the final piece for a clean finish
Incised Carving Methods
Incised carving cuts lines and shapes into the wood surface. It does not remove large wood areas.
This method uses knives or V-shaped tools. Carve along your drawn lines for clear, sharp details.
- Draw fine lines on the wood
- Use steady hands to cut clean lines
- Make shallow cuts for delicate designs
- Clean chips away often to see your work
Chip Carving Tips
Chip carving removes small chips from the wood surface. It creates geometric patterns and textures.
Use a sharp knife to cut small V shapes. Work carefully to keep the pattern even and balanced.
- Plan your pattern before carving
- Cut small, clean chips from the wood
- Keep your knife sharp for smooth cuts
- Practice simple shapes before complex designs

Credit: www.dreamstime.com
Advanced Detailing Methods
Carving intricate details in furniture takes skill and patience. Using advanced techniques helps create beautiful designs.
These methods add depth and texture. They make your work stand out with fine, precise details.
Layering And Depth Control
Layering means carving in steps to build a 3D effect. Control the depth to avoid cutting too deep or too shallow.
Start with light cuts. Gradually add deeper layers for shadows and highlights. This creates a natural look.
- Use gouges for broad cuts
- Switch to veiners for fine lines
- Check depth often with a ruler
- Smooth edges between layers
Creating Textures And Patterns
Textures add interest to flat surfaces. Patterns give your design rhythm and style. Use different tools for varied effects.
Try cross-hatching, stippling, or parallel lines. These create rough, smooth, or detailed textures on wood.
- Use small chisels for fine textures
- Try a veiner for thin grooves
- Use a V-tool for sharp lines
- Test patterns on scrap wood first
Using Templates And Stencils
Templates and stencils help keep designs consistent. They guide your carving for symmetrical and repeated details.
Trace the pattern lightly on wood. Follow the lines carefully while carving to avoid mistakes.
- Make templates from cardboard or plastic
- Use pencils to trace shapes
- Secure stencil to wood with tape
- Carve inside or outside stencil lines
Designing Intricate Patterns
Creating detailed designs is key to carving beautiful furniture. The process starts with careful planning and drawing. This helps you see the final look before carving.
Focus on shapes, balance, and style. Good design guides your carving tools and brings life to wood surfaces.
Sketching And Transferring Designs
Start by sketching your pattern on paper. Use simple lines and shapes. This makes it easy to adjust your design.
- Draw several versions of your design
- Choose the best sketch for your project
- Use carbon paper to transfer the design to wood
- Trace the design with a pencil on the wood surface
- Check for clear and visible lines before carving
Symmetry And Proportion In Carvings
Symmetry creates balance and beauty in your carving. Proportion makes sure all parts fit well together.
| Aspect | Importance |
| Symmetry | Makes design look balanced and neat |
| Proportion | Keeps all parts sized correctly |
| Repetition | Creates rhythm and unity in pattern |
Incorporating Traditional Motifs
Traditional motifs add cultural and historical value to your carving. They give your furniture a classic look.
Common traditional motifs:
- Floral patterns
- Geometric shapes
- Animal figures
- Folk art symbols
Study old furniture to find motifs that inspire you. Adapt these to fit your design style.

Credit: www.freepik.com
Finishing Touches
Carving intricate furniture details takes time and care. The finishing touches make your work stand out.
Proper finishing protects your carving and shows off its beauty. Take each step slowly and carefully.
Sanding And Smoothing Edges
After carving, sanding smooths rough edges. It helps prevent splinters and improves the look.
Use fine-grit sandpaper to gently smooth the details. Avoid sanding too hard and losing shape.
- Start with 220 grit sandpaper for rough areas
- Use 320 or 400 grit for delicate parts
- Sand along the grain to keep the wood smooth
- Clean dust with a soft brush or cloth after sanding
Applying Stains And Finishes
Stains add color and highlight wood grain. Choose a stain that fits your style.
Apply finishes like varnish or oil to protect the wood. They add shine and depth.
- Test stain on scrap wood before applying
- Use a brush or cloth to apply stain evenly
- Let stain dry fully before adding finish
- Apply finish in thin coats for best results
- Sand lightly between coats for smooth surface
Protecting And Preserving Carvings
Protect carved furniture from moisture, dust, and sunlight. This keeps wood strong and colors bright.
Use furniture wax or polish to add a protective layer. Clean gently to avoid damage.
- Keep furniture away from direct sunlight
- Use a soft cloth to dust carvings regularly
- Apply wax or polish every few months
- Avoid harsh chemicals on carved surfaces
Common Challenges And Fixes
Carving intricate furniture details is a skill that takes patience and care. You may face some common problems while working on your designs.
Knowing how to fix these issues can save time and improve your final piece. Let’s look at some common challenges and how to handle them.
Repairing Mistakes
Mistakes in carving can happen, especially with detailed work. Small chips or wrong cuts can ruin the look if left untreated.
You can fix small errors by filling them with wood filler or glue and sawdust mix. Let it dry, then sand it smooth to match the surface.
- Use wood filler for small holes or chips
- Mix sawdust with glue for a matching repair
- Sand the repair gently after it dries
- Touch up with stain or finish if needed
Avoiding Wood Splitting
Wood can split when carving too deep or against the grain. Splitting damages the design and weakens the piece.
To avoid splitting, carve slowly and use sharp tools. Always cut in the wood’s grain direction and avoid forcing the tool.
- Use sharp carving tools for clean cuts
- Carve along the grain, not across it
- Make shallow cuts instead of deep ones
- Keep the wood moist if it is too dry
Dealing With Tool Slips
Tool slips can cause unwanted marks or cuts. They happen when tools lose control or the wood is hard to handle.
Hold your tools firmly and keep your hands steady. Use clamps to secure the wood and carve in a comfortable position.
- Keep carving tools sharp and clean
- Hold tools with a steady, firm grip
- Clamp the wood to prevent movement
- Work slowly and carefully to avoid slips
Inspiration And Resources
Carving intricate furniture details needs both skill and good ideas. Finding inspiration helps you create unique designs.
Many resources guide you through carving techniques and styles. Use these to improve your work and learn new methods.
Famous Furniture Carvings
Look at famous furniture carvings to see how artists use shapes and patterns. Classic styles include Baroque, Rococo, and Victorian.
- The intricate leaf patterns on Louis XV chairs
- The scrollwork on Queen Anne tables
- Floral motifs on Chippendale cabinets
- Geometric shapes in Arts and Crafts furniture
Workshops And Courses
Join workshops or courses to practice carving with experts. Hands-on learning helps you gain confidence and technique.
| Course Name | Location | Focus |
| Woodcarving Basics | New York | Beginner skills |
| Advanced Furniture Carving | London | Complex designs |
| Online Carving Workshop | Virtual | Flexible learning |
Recommended Books And Online Tutorials
Books and videos explain carving tools, patterns, and step-by-step guides. Use them to learn at your own pace.
- “The Art of Woodcarving” by Walter J. Anderson
- “Furniture Carving Techniques” by John M. Smith
- Woodworking YouTube channels with carving tutorials
- Online platforms offering free carving lessons
Frequently Asked Questions
What Tools Are Essential For Carving Intricate Furniture Details?
Essential tools include carving knives, gouges, chisels, and a mallet. A sharpening stone is vital to maintain tool edges. These tools provide precision and control for detailed work. High-quality, sharp tools ensure clean cuts and enhance carving accuracy.
How Do I Choose The Right Wood For Detailed Carving?
Select hardwoods like basswood, walnut, or cherry for fine details. These woods have a tight grain and carve smoothly. Softwoods may splinter, while hardwoods hold intricate designs better. Proper wood choice improves carving ease and final appearance.
What Are The Basic Techniques For Carving Fine Furniture Details?
Start with outlining the design using a V-tool or knife. Then, use gouges to remove wood and create depth. Sand gently to smooth edges and enhance detail clarity. Consistent practice helps master control and precision in carving techniques.
How Can I Prevent Mistakes When Carving Detailed Furniture?
Plan your design carefully and work slowly. Use sharp tools and maintain proper hand positioning. Test cuts on scrap wood before working on the piece. Avoid rushing to reduce errors and ensure detailed accuracy.
Conclusion
Creating intricate furniture details requires patience and skill. Start with basic tools and materials. Practice often to improve your technique. Watch tutorials and read guides for new ideas. Always prioritize safety when carving. Keep your tools sharp and clean. This enhances precision and reduces effort.
Enjoy the process of bringing your designs to life. Remember, each piece you create tells a story. It’s a reflection of your dedication and creativity. Keep experimenting and pushing your boundaries. Happy carving!