Are your chisels feeling dull and hard to control? Sharpening them properly can make a huge difference in your woodworking projects.
Imagine slicing through wood with ease, creating clean, precise cuts every time. In this guide, you’ll learn simple, effective steps to bring your chisels back to life. Whether you’re a beginner or have some experience, mastering this skill will save you time, effort, and frustration.
Ready to transform your tools and improve your craft? Let’s dive in and get those chisels razor-sharp!
Choosing The Right Sharpening Tools
Sharpening chisels is important for clean cuts and good work results. The right tools make sharpening easier and better.
Different tools fit different skill levels and needs. Knowing your options helps you pick the best one.
Whetstones And Grit Levels
Whetstones are flat stones used to sharpen chisels by grinding the edge. They come in many grit levels.
Low grit stones remove metal fast. High grit stones polish the edge for a sharp finish.
- Coarse grit (200-400): Fixes chips and shapes the edge
- Medium grit (800-1200): Sharpens the edge for everyday use
- Fine grit (3000+): Polishes and refines the edge
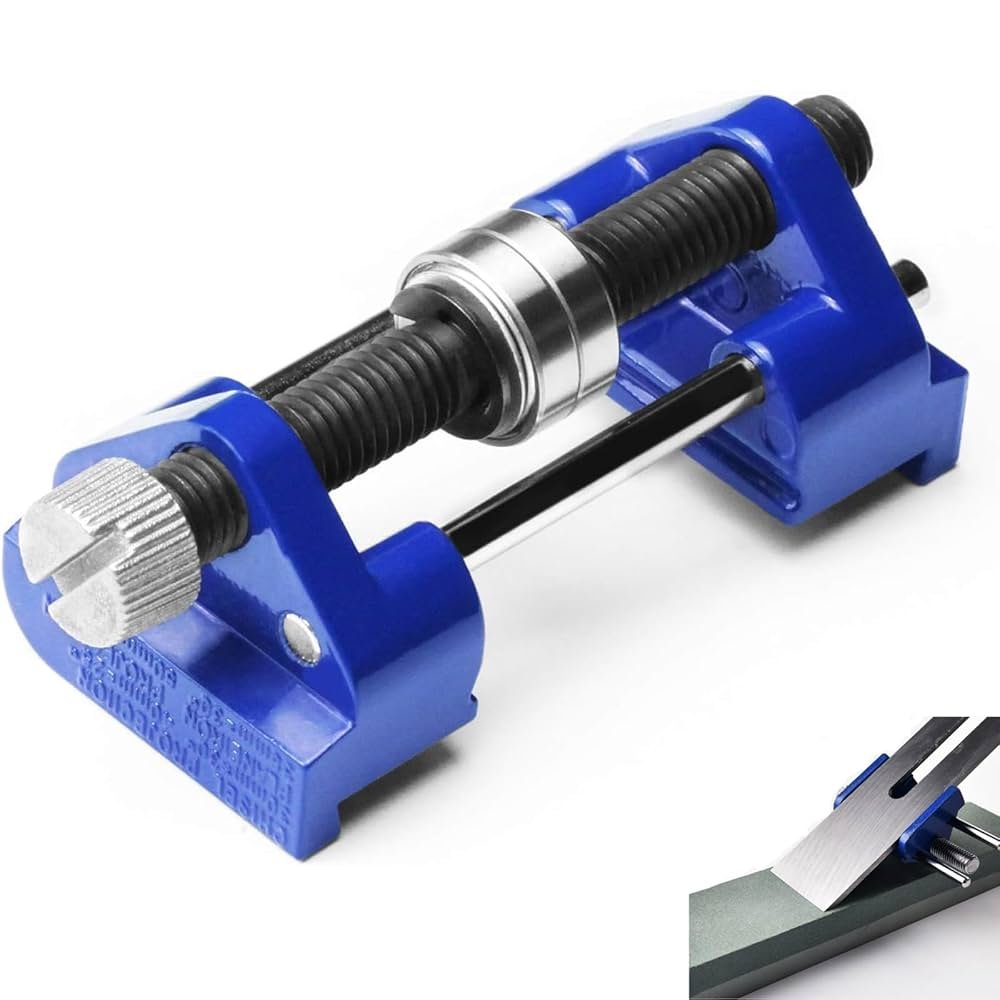
Using Honing Guides
Honing guides hold the chisel at a steady angle while sharpening. They help keep the edge even and straight.
Using a guide is helpful for beginners. It reduces mistakes and speeds up the sharpening process.
- Adjustable guides fit different chisel sizes
- Simple guides hold the chisel flat against the stone
- Consistent angle improves edge sharpness
Alternative Sharpening Methods
Besides whetstones, there are other ways to sharpen chisels. These can be faster or easier for some users.
Some methods need less skill but may not give the finest edge compared to stones.
- Electric sharpeners: Quick and simple but can remove too much metal
- Leather strops: Used after sharpening to polish and refine the edge
- Diamond plates: Durable stones that sharpen fast on any metal

Credit: beavercrafttools.com
Preparing Your Chisel For Sharpening
Sharpening a chisel starts with good preparation. You must clean and inspect the blade carefully. Setting the right bevel angle is also very important.
These steps help you get a sharp edge that lasts longer and works better on wood.
Cleaning And Inspecting The Blade
Before sharpening, clean the chisel blade to remove dirt and rust. Look closely for any damage like chips or cracks. A clean blade lets you see the edge clearly and sharpen it evenly.
- Wipe the blade with a clean cloth to remove dust.
- Use fine steel wool or sandpaper to remove rust.
- Check the blade for nicks, chips, or bends.
- Make sure the blade is dry before sharpening.
Setting The Correct Bevel Angle
The bevel angle is the slant at the blade’s edge. It affects how sharp and strong the chisel will be. Most chisels need a bevel angle between 25 and 30 degrees. A lower angle means a sharper edge but less strength. A higher angle gives a tougher edge but less sharpness.
| Chisel Type | Bevel Angle | Use |
|---|---|---|
| Paring Chisels | 25° | Fine, precise cuts |
| Bench Chisels | 30° | General woodworking |
| Heavy-Duty Chisels | 35° | Rough work and tough wood |
Step-by-step Sharpening Process
Sharpening chisels keeps them effective and safe. A sharp chisel cuts wood cleanly and easily. This guide shows how to sharpen chisels using three grit levels.
Use coarse grit to shape the blade, medium grit to refine the edge, and fine grit to polish it. Each step improves the sharpness and durability of your chisel.
Coarse Grit Sharpening
Start with a coarse grit stone or sandpaper. This removes chips and shapes the bevel. Keep the blade angle steady to get a good edge shape.
- Secure the chisel in a clamp or hold firmly.
- Place the chisel bevel flat on the coarse grit surface.
- Push the blade forward, maintaining the angle.
- Lift the blade and repeat to cover the entire bevel.
- Check the edge for a consistent bevel shape.
Refining The Edge With Medium Grit
Move to medium grit to refine the edge. This step smooths rough marks left by coarse grit. It prepares the blade for polishing and sharpness.
| Task | Tip |
|---|---|
| Keep angle steady | Use a guide or jig if needed |
| Cover the full bevel | Work evenly from heel to tip |
| Check edge regularly | Look for a uniform bevel and no rough spots |
| Use water or oil | Lubricate the stone as required |
Polishing With Fine Grit
Finish sharpening with fine grit. This polishes the edge and makes it very sharp. A polished edge reduces friction in cutting.
Follow these tips for polishing:
- Use a clean fine grit stone or strop.
- Apply light pressure and keep the angle steady.
- Strop the edge on leather with polishing compound.
- Test sharpness on soft wood or paper.

Credit: woodworkersinstitute.com
Honing And Stropping For A Razor Edge
Sharpening chisels is key for clean, precise cuts. Honing and stropping help create a sharp, smooth edge.
These techniques remove tiny burrs and polish the blade. They keep your chisel cutting smoothly and safely.
Using A Leather Strop
A leather strop polishes the chisel blade and removes small burrs. It is the final step in sharpening.
Use light pressure and pull the blade away from the cutting edge. This prevents dulling the sharp edge.
- Hold the strop on a flat surface
- Draw the blade backward along the leather
- Repeat 10 to 20 times for best results
Applying Honing Compounds
Honing compounds improve the stropping process by adding abrasive particles. They polish the blade to a finer finish.
Apply a small amount of compound to the leather strop. Spread it evenly to cover the surface.
- Choose a fine or ultra-fine compound for chisels
- Rub the compound gently into the leather
- Use the strop as usual to sharpen the edge
Maintaining Sharpness Over Time
Keeping your chisels sharp makes your work easier and safer. Dull chisels can cause damage and slow you down. Regular care helps your chisels stay sharp longer.
This guide covers storage, touch-ups, and avoiding dulling causes. Follow these tips to protect your tools and improve your results.
Proper Storage Techniques
Store chisels in a dry place to stop rust. Use a tool roll or box to keep blades from hitting each other. Cover the edges with blade guards or leather sleeves.
- Keep chisels away from moisture
- Use blade covers or guards
- Store chisels flat or hanging safely
- Clean chisels before storing
Regular Touch-ups
Sharpen your chisels often with a whetstone or sharpening system. Small touch-ups fix minor dullness and keep edges crisp. Remove burrs carefully after sharpening.
- Clean the blade before sharpening
- Use the correct grit stone
- Maintain a steady angle while sharpening
- Hone the edge to remove burrs
- Test sharpness on scrap wood
Avoiding Common Dulling Causes
Many factors dull chisels quickly. Avoid hitting nails or hard materials. Do not use chisels as pry bars or screwdrivers. Keep the cutting edge clean and dry.
| Cause | Effect |
| Hitting nails or screws | Chips and dents on edge |
| Using chisel as a pry bar | Bent or broken blade |
| Leaving moisture on blade | Rust and corrosion |
| Cutting very hard wood without sharpening | Fast dulling of edge |

Credit: woodworkersinstitute.com
Troubleshooting Common Sharpening Issues
Sharpening chisels is key for good woodworking. Small problems can affect the edge.
This guide helps fix common sharpening issues. Follow these tips for better results.
Fixing A Rolled Edge
A rolled edge happens when the metal bends over the bevel. It makes the chisel dull quickly.
To fix it, use a fine sharpening stone. Hold the chisel flat and gently rub the edge until straight.
- Check the edge under bright light for any roll.
- Use a leather strop to remove small rolls after sharpening.
- Avoid pressing too hard during sharpening to stop rolling.
Dealing With Nicks And Chips
Nicks and chips are small dents or breaks on the chisel edge. They make cutting rough.
| Problem | Cause | Fix |
| Small nicks | Dropping tool or hitting hard wood | Use coarse stone to reshape edge |
| Large chips | Heavy impact or poor storage | Grind the bevel to remove damage |
| Uneven edge | Sharpening at wrong angle | Check bevel angle and sharpen evenly |
Fix chips by sharpening on a coarse grit first. Then move to finer stones for smoothness.
Adjusting For Uneven Bevels
An uneven bevel means one side is sharper or wider than the other. It affects cutting accuracy.
To correct uneven bevels, follow these tips:
- Place the chisel flat on the stone.
- Apply equal pressure on both sides.
- Sharpen using smooth, even strokes.
- Check the bevel angle regularly with a guide.
- Use a honing guide if needed for consistency.
Frequently Asked Questions
How Often Should I Sharpen My Chisels?
Sharpen chisels whenever you notice dullness or poor cutting performance. Regular sharpening maintains precision and safety. For frequent use, sharpen after every few projects to ensure optimal results and ease of work.
What Tools Are Best For Sharpening Chisels?
Use sharpening stones like whetstones or diamond stones for best results. Honing guides and strops also help refine the edge. Select tools based on your skill level and chisel type.
Can I Sharpen Chisels Without Special Equipment?
Yes, you can use sandpaper on a flat surface for basic sharpening. However, specialized stones offer better precision and durability. Using proper tools ensures a sharper, longer-lasting edge.
What Angle Is Ideal For Sharpening Chisels?
The ideal sharpening angle is usually between 25° to 30°. Maintaining this angle preserves the chisel’s strength and cutting ability. Use guides or angle jigs to keep consistency.
Conclusion
Sharpening chisels brings precision to your woodworking projects. It’s a skill worth learning. With practice, your tools will last longer. Sharp chisels make clean cuts and save time. Regular maintenance keeps them in top condition. Use the right techniques for the best results.
Always prioritize safety during sharpening. Remember, patience is key. Start slow and improve with each attempt. Your projects will reflect your dedication. Happy woodworking with your perfectly sharpened chisels!
