Have you ever wondered how to get the perfect control and precision when carving wood or stone? Using mallets for carving can transform your work, making each cut cleaner and more accurate.
Whether you’re a beginner or looking to improve your technique, understanding how to use a mallet correctly can make a big difference in your results. Keep reading to discover the secrets behind this essential tool and how it can elevate your carving skills to the next level.

Credit: www.youtube.com
Choosing The Right Mallet
Using a mallet properly can make carving easier and safer. Picking the right mallet helps you control your work.
Different mallets suit different materials and carving styles. It is important to know what to look for.
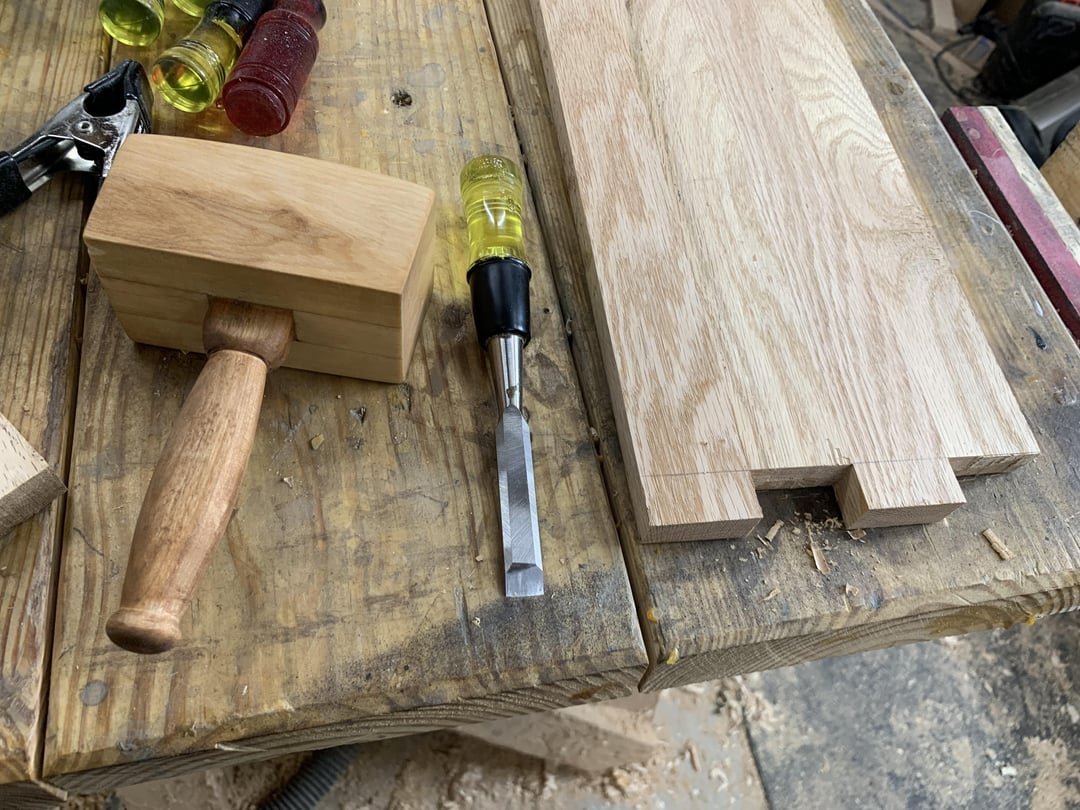
Types Of Mallets
Carving mallets come in various shapes and designs. Some have wooden heads, while others use rubber or rawhide.
- Wooden mallets are traditional and give good control.
- Rubber mallets reduce impact and protect delicate tools.
- Rawhide mallets are softer and work well with fine detail.
- Plastic mallets are lightweight and easy to handle.
Material Considerations
The mallet material affects its weight and impact. Hard materials give strong hits, soft materials prevent damage.
| Material | Impact Level | Best For |
| Hardwood | High | General carving |
| Rubber | Medium | Soft woods and delicate tools |
| Rawhide | Low | Fine detail work |
| Plastic | Medium | Light carving tasks |
Size And Weight Factors
Choose a mallet size that fits your hand and work style. Weight affects how much force you apply.
- Heavier mallets give stronger blows but tire your hand faster.
- Lighter mallets allow more control and less fatigue.
- Long handles give better leverage for hard materials.
- Short handles offer precise control for small carvings.
Credit: www.lorddecor.com
Preparing For Carving
Using mallets for carving requires good preparation. Proper setup helps you work safely and create better art.
Before you start, focus on choosing wood, sharpening tools, and organizing your workspace.
Selecting Suitable Wood
Pick wood that is easy to carve and fits your project. Softer woods work well for beginners.
Hardwoods need sharper tools and more force but last longer.
- Basswood is soft and good for detailed work
- Pine is affordable and easy to find
- Oak is hard and durable for strong carvings
- Cherry has a smooth finish and rich color
Sharpening Your Tools
Sharp tools cut wood smoothly and reduce accidents. Dull tools need more force and can slip.
Use a sharpening stone or a honing guide to keep your chisels and gouges sharp.
- Clean tools before sharpening
- Maintain the original bevel angle
- Use water or oil as lubricant on stones
- Check sharpness by carefully feeling the edge
Setting Up Your Workspace
Arrange a clean, stable area with good light for carving. This helps you see details and work safely.
Secure your wood piece using clamps or a bench vise to prevent it from moving.
- Use a sturdy table or carving bench
- Keep tools within easy reach
- Wear safety glasses and gloves
- Have a trash bin nearby for wood chips
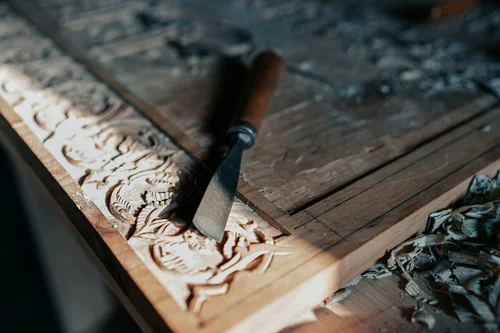
Basic Techniques For Mallet Use
Using a mallet correctly helps in carving wood with better control. The right technique reduces mistakes and improves safety.
Focus on your grip, stance, and the way you strike. These basics form the foundation of good carving skills.
Proper Grip And Stance
Hold the mallet firmly but not too tight. Your grip should allow some movement for a natural swing. Stand with feet shoulder-width apart for balance.
- Keep your wrist straight to avoid strain
- Use your whole arm, not just the wrist, to strike
- Face your work directly to keep control
- Bend knees slightly for better stability
Controlling Force And Impact
Control the strength of your hits to match the wood and chisel size. Too much force can cause damage. Too little slows progress.
| Force Level | Use Case |
| Light | Detail carving and soft woods |
| Medium | General carving and hardwoods |
| Strong | Removing large wood chunks |
Maintaining Consistent Rhythm
A steady rhythm helps keep carving smooth and even. Try to strike at a regular pace to avoid slips and mistakes.
- Start slow to find a comfortable speed
- Keep your arm relaxed between strikes
- Focus on timing, not just power
- Practice regularly to build muscle memory
Advanced Control Methods
Using mallets for carving needs skill and control. Advanced methods help you shape wood precisely.
These methods focus on how you move your body and adjust your strikes. They help improve your carving details.
Using Wrist And Arm Movement
Wrist movement gives fine control for small cuts. Use your wrist to guide the mallet softly.
Arm movement adds power for bigger cuts. Move your whole arm smoothly to keep control and avoid mistakes.
- Use wrist for small, detailed strokes
- Use arm for strong, broad strikes
- Combine both for better control
Adjusting Strikes For Detail Work
Light strikes help you carve small shapes. Tap gently to avoid breaking thin wood parts.
Hard strikes remove more wood fast. Use them only when you need to cut deep or clear big areas.
- Use soft strikes for delicate areas
- Use strong strikes for rough shaping
- Change strike force based on carving needs
Balancing Speed And Precision
Carving fast can save time but may reduce accuracy. Slow down to make clean, detailed cuts.
Work at a steady pace that feels comfortable. Balance speed and care to get good results.
- Go slower for detailed or tricky parts
- Speed up for large, simple areas
- Find a rhythm that suits your skill
Common Mistakes To Avoid
Using mallets for carving can be tricky if you do not use the right technique. Avoiding common mistakes helps you carve better and safer.
Understanding these errors will improve your work and protect your tools and hands.
Overstriking And Its Effects
Overstriking happens when you hit the chisel with the mallet too hard or too many times. This can damage the wood and the chisel.
It may cause deep marks that are hard to fix or break the chisel handle. Overstriking wastes effort and can ruin your work.
- Use controlled, firm strikes instead of hard blows
- Stop once the chisel moves smoothly through wood
- Check the chisel and wood after each strike
Improper Tool Alignment
Holding the mallet or chisel at the wrong angle can cause uneven cuts or slips. This makes carving harder and less precise.
Always align the chisel with the wood grain and the mallet with the chisel handle. This helps control the tool and avoid mistakes.
- Keep the chisel blade flat against the wood
- Hold the mallet straight to hit the chisel center
- Adjust your grip to keep tools steady
Ignoring Safety Measures
Carving without safety can cause injuries. Not wearing gloves or eye protection puts you at risk from slips and flying chips.
Keep your workspace clean and use clamps to hold wood. These steps help prevent accidents and keep your carving safe.
- Wear safety glasses to protect eyes
- Use gloves to avoid cuts and blisters
- Secure wood with clamps or a vise
- Keep hands behind the cutting edge

Credit: www.reddit.com
Maintaining Your Mallet
Using a mallet for carving takes care and regular upkeep. A well-maintained mallet lasts longer and works better.
This guide covers cleaning, storage, repair, and replacement advice for your mallet.
Cleaning And Storage Tips
Clean your mallet after each use to remove dirt and wood chips. Avoid soaking it in water to protect the wood.
- Wipe with a dry or slightly damp cloth
- Use mild soap if necessary, then dry immediately
- Keep mallets in a dry place to prevent warping
- Store away from direct sunlight and heat sources
- Apply wood oil occasionally to keep the wood healthy
Repairing Damage
Small cracks or dents can be fixed to extend your mallet’s life. Sand rough spots lightly with fine sandpaper.
- Use wood glue to fix small splits or cracks
- Clamp glued parts until dry for a strong hold
- Replace broken handles if needed
- Check regularly for loose parts and tighten if possible
When To Replace Your Mallet
| Condition | Reason to Replace |
|---|---|
| Deep cracks | Can break during use and cause injury |
| Severe warping | Reduces control and accuracy |
| Loose or broken handle | Unsafe to use and hard to repair |
| Worn striking face | Less effective impact on carving tools |
Frequently Asked Questions
What Type Of Mallet Is Best For Carving Wood?
A wooden mallet with a comfortable grip is ideal for wood carving. It offers control and reduces hand fatigue. Hard rubber mallets are also useful for delicate tasks, preventing damage to carving tools and the wood surface.
How Do Mallets Improve Carving Precision?
Mallets deliver controlled, consistent force to carving tools. This helps achieve finer details and smoother cuts. Using a mallet reduces strain on your hands, allowing longer carving sessions with better accuracy.
Can Mallets Damage Carving Tools Or Wood?
When used correctly, mallets protect both tools and wood. Avoid excessive force to prevent tool damage or wood splitting. Choose a mallet material suited to your carving type to minimize impact damage.
How To Maintain A Carving Mallet For Longevity?
Keep your mallet clean and dry after use. Store it in a cool, dry place to prevent warping or cracking. Periodically check for cracks or loose parts and repair or replace as needed.
Conclusion
Choosing the right mallet makes carving easier and more enjoyable. Different mallets suit different materials and styles. Wooden mallets are lightweight and gentle. Rubber mallets offer control and precision. Metal mallets provide power for harder materials. Consider your project needs and tool compatibility.
Always prioritize safety. Use proper techniques to avoid injury. Regular practice improves skills and confidence. Enjoy the art of carving with the right tools. Create beautiful pieces with patience and care. Let your creativity shine through each chisel stroke. Happy carving!