Do you often find yourself frustrated with rough edges ruining your woodworking or DIY projects? Those uneven surfaces can turn a great piece into something unfinished or even unsafe.
But don’t worry—sanding rough edges is easier than you think. In this guide, you’ll discover simple, effective techniques to smooth out those tough spots quickly and confidently. By the end, your projects will look sharper, feel better, and stand out for all the right reasons.
Ready to transform your work and avoid common mistakes? Let’s dive in!
Credit: www.ecohome.net
Choosing The Right Sandpaper
Sanding rough edges is important for smooth surfaces. Choosing the right sandpaper makes the job easier and better.
Different sandpapers work for different materials and tasks. Knowing which one to use helps save time and effort.
Grit Levels And Their Uses
Sandpaper comes in many grit sizes. The grit number shows how rough or smooth the sandpaper is.
Lower grit numbers mean rough sandpaper. Higher numbers mean fine sandpaper for smooth finishes.
- Coarse grits (40-60) remove rough material fast
- Medium grits (80-120) smooth out surfaces
- Fine grits (150-220) prepare surfaces for painting
- Very fine grits (320 and up) polish surfaces
Materials And Durability
Sandpaper is made from different materials. Some are better for wood, others for metal or plastic.
Durability depends on the backing and abrasive material. Stronger sandpaper lasts longer and works better on hard surfaces.
- Aluminum oxide is good for wood and metal
- Silicon carbide works well on metal and plastic
- Garnet is softer and best for wood finishing
- Paper backing is common but less durable
- Cloth backing lasts longer and resists tearing
Wet Vs Dry Sandpaper
Some sandpapers are made for wet sanding. Wet sanding uses water to reduce dust and heat.
Dry sandpaper is simpler and works without water. Wet sanding gives a smoother finish and lasts longer.
- Wet sandpaper has waterproof backing
- Wet sanding reduces clogging and dust
- Dry sandpaper is cheaper and easier to use
- Wet sanding is best for paint and metal
- Dry sanding is good for quick jobs and wood

Credit: fastplus.eu
Preparing The Surface
Sanding rough edges starts with a clean and ready surface. Preparation helps you see problem areas clearly. It also makes sanding easier and safer.
Take time to clean, inspect, and mark rough spots before you sand. Follow safety rules to protect yourself during the process.
Cleaning And Inspecting
Remove dust, dirt, and grease from the surface. Use a damp cloth or mild cleaner. Check the edges carefully for splinters or uneven spots.
- Wipe down the surface with a clean cloth
- Use mild soap if needed, then dry the area
- Look for cracks, bumps, or loose fibers
- Note spots that need extra sanding
Marking Rough Areas
Mark rough edges with a pencil or chalk. This helps you focus on problem spots while sanding. Clear marks prevent missing any rough parts.
| Marking Tool | Use |
| Pencil | Good for light marks on wood |
| Chalk | Works well on darker surfaces |
| Colored Marker | Easy to see on all materials |
Safety Precautions
Protect your eyes, lungs, and hands before sanding. Use safety gear to avoid injury and dust inhalation. Prepare your workspace for safe sanding.
- Wear safety goggles to protect your eyes
- Use a dust mask or respirator to avoid breathing dust
- Put on gloves to protect your hands
- Ensure good ventilation in your work area
- Keep your workspace clean and free of hazards
Sanding Techniques
Sanding rough edges is key to smooth, safe finishes. Using the right technique improves the look and feel of your project.
This guide covers hand sanding, power sanders, and tips on keeping pressure even. Each method helps shape and smooth edges effectively.
Hand Sanding Tips
Hand sanding works well for small areas and delicate edges. It gives control and helps avoid over-sanding.
- Use fine grit sandpaper for a smooth finish
- Sand along the edge, not across it
- Keep your hand steady and move slowly
- Check your progress often to avoid removing too much
- Wear a dust mask to protect your lungs
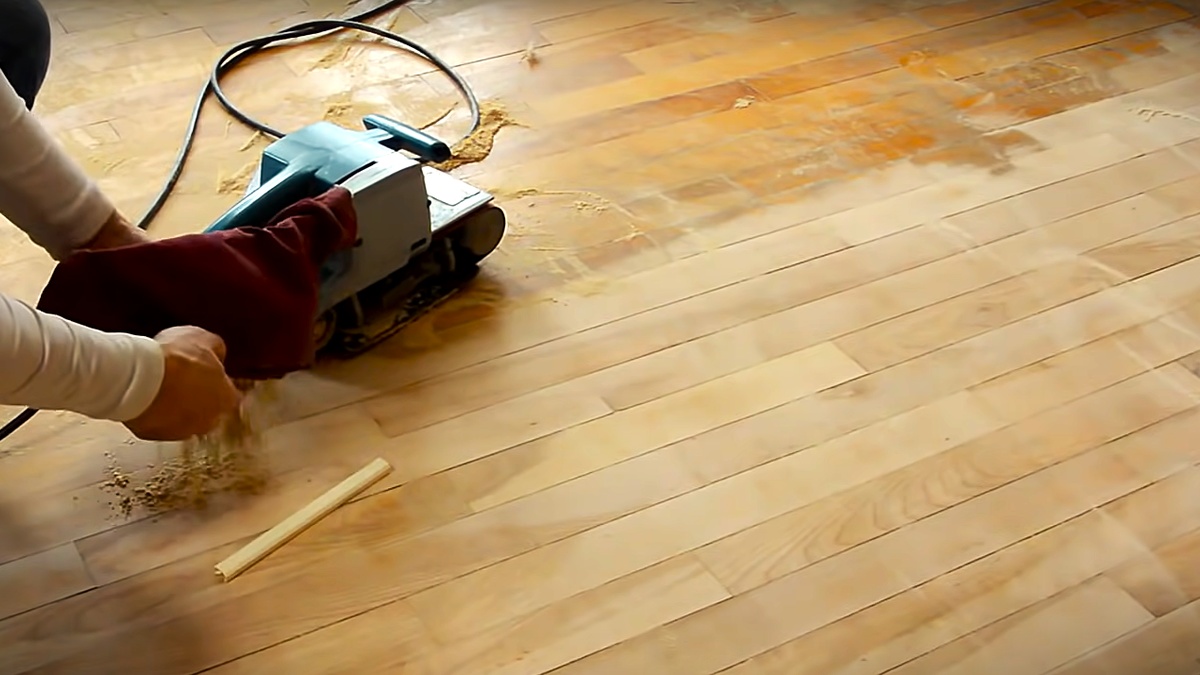
Using Power Sanders
Power sanders speed up the sanding process on large edges. They work best with consistent, light passes.
| Type of Sander | Best Use | Sandpaper Grit |
| Orbital Sander | General smoothing on flat edges | 120–220 grit |
| Belt Sander | Removing rough material fast | 60–100 grit |
| Detail Sander | Tight corners and small edges | 150–220 grit |
Maintaining Even Pressure
Even pressure keeps sanding smooth and prevents damage. Too much force can create uneven surfaces.
Follow these tips for even pressure:
- Hold the sander or sandpaper with a relaxed grip
- Use your body weight, not just your arms
- Move in steady, overlapping strokes
- Check the surface often for flatness
- Change sandpaper when it wears out
Sanding Different Materials
Sanding rough edges helps create a smooth and safe finish. Different materials need different sanding methods.
Knowing how to sand wood, metal, and plastic can improve your project’s look and feel.
Wood Edges
Wood is easy to sand but needs care to avoid damage. Use coarse grit sandpaper to start, then finer grit to smooth.
- Use 80-grit sandpaper for rough edges.
- Move to 120-grit for smoothing.
- Finish with 220-grit for a fine surface.
- Sand along the grain to prevent scratches.
Metal Edges
Metal edges need tougher tools to remove burrs and sharp points. Use sanding blocks or files before sandpaper.
| Material | Tool | Grit |
| Aluminum | Sanding block | 150-220 |
| Steel | File and sandpaper | 120-320 |
| Brass | Fine sandpaper | 220-400 |
Plastic And Composite Materials
Plastic and composites can melt or scratch easily. Use light pressure and fine sandpaper.
Tips for sanding plastic and composites:
- Use 220-grit sandpaper or finer.
- Sand slowly to avoid melting.
- Keep the surface clean of dust.
- Use water to cool the surface if needed.
Finishing Touches
Sanding rough edges is only part of the process. Finishing touches help make your project look clean and polished. These steps improve durability and appearance.
Pay close attention to each step after sanding. This will ensure a smooth and long-lasting finish on your wood or other materials.
Checking Smoothness
After sanding, feel the edges with your fingers. Look for any rough spots or uneven areas. Run your hand gently over the surface to check for smoothness.
- Use your fingers to feel for bumps or rough patches.
- Look closely at the edges under good light.
- Resand any spots that still feel rough.
- Repeat the check until the surface feels even and smooth.
Cleaning After Sanding
Dust and debris from sanding can stop finishes from sticking well. Clean the surface before applying any sealants or paint.
- Use a soft brush or cloth to remove dust.
- Wipe the surface with a damp cloth to catch fine particles.
- Let the surface dry completely before moving on.
- Use compressed air to clean hard-to-reach areas.
Applying Sealants Or Finishes
Sealants protect your project from damage and wear. Finishes add color and shine. Choose the right product for your material and purpose.
| Finish Type | Purpose | Dry Time |
| Polyurethane | Durable, water-resistant coating | 4-6 hours |
| Varnish | Glossy look, protects from UV | 6-8 hours |
| Oil Finish | Enhances wood grain, natural look | 24 hours |
| Paint | Color and protection | 2-4 hours |
Common Mistakes To Avoid
Sanding rough edges is key for a smooth finish. Many beginners make mistakes that cause damage or waste time.
Knowing what to avoid helps you get better results and stay safe. Here are common errors to watch out for.
Over-sanding
Taking off too much material can ruin your project. Over-sanding weakens edges and changes the shape you want.
- Use light pressure and check often.
- Stop sanding once edges feel smooth.
- Don’t rush; patience prevents mistakes.
Ignoring Safety Gear
Many skip safety gear and risk injury. Sanding creates dust and small particles that harm your eyes and lungs.
- Safety glasses or goggles
- A dust mask or respirator
- Hearing protection if using power sanders
- Gloves to protect your hands
Using Incorrect Grit
Choosing the wrong sandpaper grit wastes effort and can damage the surface. Coarse grit removes too much, fine grit takes too long.
| Grit Type | When to Use |
| Coarse (40-60) | Remove rough edges and old finishes |
| Medium (80-120) | Smooth edges and prepare for finishing |
| Fine (150-220) | Final sanding before painting or staining |

Credit: www.wikihow.com
Frequently Asked Questions
What Is The Best Sandpaper Grit For Rough Edges?
Start with coarse grit (60-80) to remove roughness quickly. Progress to finer grits (120-220) for smooth finishes. This method ensures edges become even and polished without damage.
How Do I Prevent Splintering When Sanding Edges?
Use a sanding block for even pressure. Sand in the wood grain direction. Avoid excessive force to reduce splintering risks and create a clean, smooth edge.
Can I Use A Power Sander For Rough Edges?
Yes, power sanders speed up the process. Use appropriate grit sandpaper and control speed carefully. Power sanding is efficient but requires caution to avoid over-sanding.
How Long Should I Sand Rough Edges?
Sanding time depends on edge roughness and material type. Typically, 5-10 minutes per edge suffices. Check progress frequently to avoid over-sanding or uneven surfaces.
Conclusion
Sanding rough edges transforms projects, making them smooth and safe. This guide provides clear steps to achieve the best results. Always choose the right sandpaper for the job. Start with coarse grit, then move to finer options. Keep your movements steady and consistent.
Ensure to wear protective gear for safety. Practice patience, as rushing can cause mistakes. Regular maintenance of tools ensures efficiency. Your finished piece will look polished and professional. Remember, attention to detail makes a big difference. Enjoy the satisfaction of a job well done.
Happy sanding!