Are you ready to make your wood cutting projects smoother and more precise? Aligning wood properly before cutting is the key to getting clean, accurate results every time.
Whether you’re a beginner or looking to improve your skills, knowing how to line up your wood can save you time, reduce mistakes, and boost your confidence. In this guide, you’ll discover simple, effective steps to align wood perfectly for cutting.
Keep reading, and you’ll never struggle with crooked cuts again!
Choosing The Right Wood
Choosing the right wood is important for clean and safe cutting. Different types of wood behave differently when cut.
This guide helps you pick wood that cuts well and gives good results.
Types Of Wood For Cutting
Softwoods and hardwoods are common types for cutting projects. Softwoods like pine are easier to cut but may dent easily.
Hardwoods like oak and maple are tougher but give a strong finish. Choose wood based on your project needs.
- Softwoods: pine, cedar, fir
- Hardwoods: oak, maple, cherry
- Composite woods: plywood, MDF
Checking Wood Grain Direction
Wood grain shows the direction of fibers. Cutting along the grain is easier and cleaner than cutting across it.
Look closely at the wood to find the grain. Align your cut to follow the grain direction for best results.
Selecting Straight And Flat Boards
Choosing straight and flat boards helps your cuts stay accurate. Warped or twisted boards can cause mistakes.
| Board Condition | How to Check |
| Straightness | Place board on a flat surface |
| Flatness | Look for gaps under the board |
| Warp | Check for bends along the length |
| Twist | Hold ends and see if edges align |
Credit: www.jlconline.com
Tools For Accurate Alignment
Cutting wood accurately needs careful alignment. Using the right tools helps make straight and clean cuts.
Good alignment tools save time and reduce mistakes. They keep your wood steady and your cuts precise.
Essential Measuring Tools
Measuring tools help you mark exact cutting lines on wood. They ensure your pieces are the right size.
- Tape Measure: Measures length quickly and easily.
- Combination Square: Checks angles and marks straight lines.
- Ruler or Straight Edge: Draws clear, straight lines for cutting.
- Speed Square: Measures and marks 90° and 45° angles fast.
Using Clamps And Guides
Clamps hold wood firmly to stop it from moving during cutting. Guides help keep the saw straight along the cut line.
- Bar Clamps: Secure large pieces of wood tightly.
- C-Clamps: Hold smaller pieces steady.
- Saw Guides: Attach to wood to guide the saw blade.
- Fence Guides: Use on saws to keep cuts straight and even.
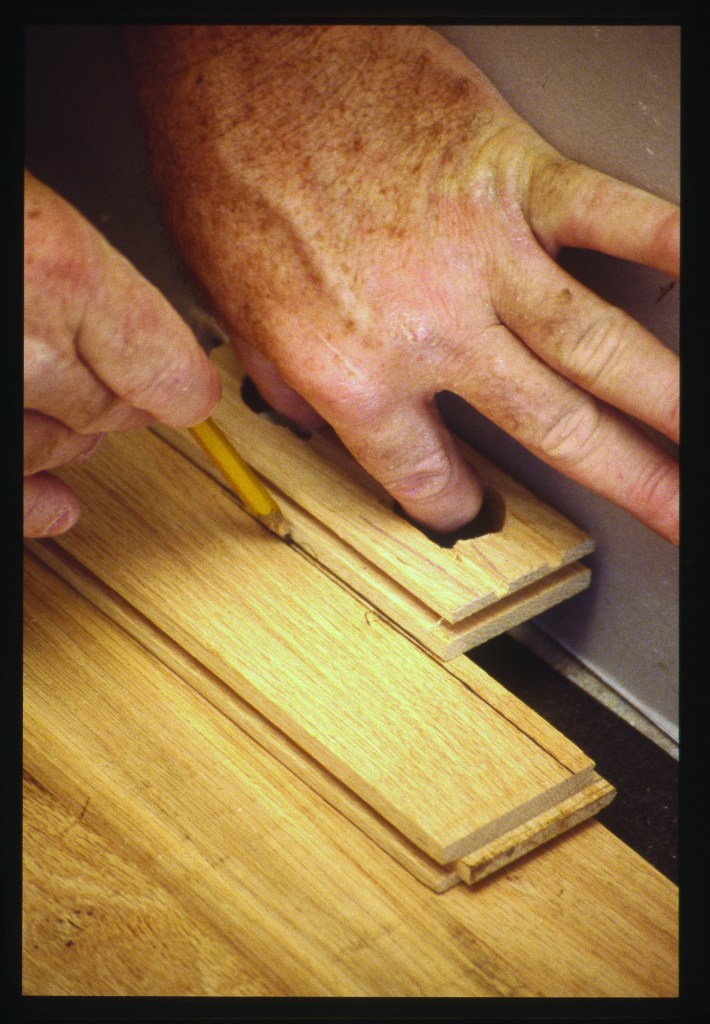
Marking Tools For Precision
Marking tools create clear, visible lines on wood. These lines show exactly where to cut.
- Pencil: Common and easy to erase if needed.
- Marking Knife: Makes thin, sharp lines for exact cuts.
- Chalk Line: Draws long, straight lines on large surfaces.
- Awl: Marks small points for drilling or cutting starts.
Preparing The Wood Surface
Aligning wood properly starts with preparing its surface. This ensures clean, accurate cuts every time.
Taking time to clear and smooth the wood helps keep tools sharp and work safe.
Removing Debris And Imperfections
Clear the wood surface of dirt, dust, and loose fibers. Check for nails, screws, or knots that may affect cutting.
- Use a stiff brush to remove dust and debris
- Check both sides of the wood for hidden nails or staples
- Fill small cracks or holes with wood filler and let dry
- Remove any loose bark or splinters carefully
Sanding For Smoothness
Sanding creates an even surface and removes minor flaws. It also helps the wood align better during cutting.
| Sandpaper Grit | Purpose |
|---|---|
| 80-100 grit | Remove rough areas and large imperfections |
| 120-150 grit | Smooth the surface for better alignment |
| 180-220 grit | Prepare wood for finishing or sealing |
Ensuring Stability On Workbench
Keep the wood steady to avoid mistakes and accidents. A stable setup makes cutting easier and more precise.
- Place wood flat on the workbench surface
- Use clamps to hold wood firmly in place
- Check that the workbench is level and clean
- Support longer pieces with extra stands or blocks
Credit: www.woodworkingtalk.com
Aligning Wood For Different Cuts
Cutting wood requires careful alignment to get clean and accurate results. Different cuts need different setups to ensure precision.
Understanding how to align wood properly helps avoid mistakes and waste. It also improves safety while using cutting tools.
Straight Cuts Alignment
For straight cuts, use a straight edge or guide to line up the wood. Clamp the wood firmly to prevent movement during cutting.
- Measure and mark the cut line clearly.
- Place the wood on a stable surface.
- Use a square tool to check the angle is 90 degrees.
- Secure the wood with clamps on both ends.
- Align the saw blade with the marked line before cutting.
Angled Cuts Setup
Angled cuts need precise angle measurement and support. Set your saw or guide to the exact angle needed for the cut.
| Angle Type | Setup Tool | Tip |
| 45 Degrees | Miter Saw or Protractor | Double-check angle before cutting |
| 30 Degrees | Adjustable Bevel Gauge | Clamp wood to avoid shift |
| 60 Degrees | Angle Finder | Use support blocks for stability |
Curved And Irregular Shapes
Cutting curves or odd shapes requires flexible alignment methods. Trace the shape clearly and use guides that follow the curve.
- Draw the curve on the wood with a pencil or stencil.
- Use clamps and blocks to hold the wood steady.
- Choose a jigsaw or band saw for smooth curved cuts.
- Cut slowly, following the traced line carefully.
- Sand edges after cutting to smooth any rough spots.
Tips For Maintaining Precision
Cutting wood with accuracy is important for good results. Aligning wood correctly helps make clean, precise cuts. This guide shows simple tips to keep your cuts exact every time.
Using the right techniques can save wood and time. Small checks and adjustments lead to better outcomes in woodworking projects.
Double-checking Measurements
Always measure your wood twice before cutting. Use a reliable tape measure or ruler for the best results. Mark the cut line clearly with a pencil.
Check both the length and angle of your marks. Confirm measurements from different points to avoid mistakes.
- Measure wood length carefully
- Mark the exact cut line
- Verify angles with a square tool
- Repeat measurements for safety
Securing Wood Before Cutting
Hold the wood firmly in place before cutting. Use clamps or a vise to stop the wood from moving. This keeps cuts straight and safe.
Make sure clamps do not cover the cut line. Position the wood so you can cut without obstruction.
- Use clamps to hold wood steady
- Check that clamps do not block the saw path
- Place wood on a flat, stable surface
- Test stability by gently pushing the wood
Adjusting Techniques For Accuracy
Adjust your cutting technique based on the wood type and saw. Slow and steady cuts help keep lines straight. Use guides or fences for better control.
Check the saw blade alignment often. Make small changes if cuts start to drift off the mark.
- Cut slowly to maintain control
- Use straight edges as guides
- Check saw blade alignment regularly
- Make small adjustments when needed
Common Mistakes To Avoid
Aligning wood correctly is key for safe and precise cuts. Many people make simple errors that affect their results.
Knowing what to watch out for helps you avoid these common alignment mistakes. This guide covers three major issues.
Ignoring Wood Movement
Wood changes size with temperature and moisture. Ignoring this causes poor cuts and gaps in projects.
- Do not clamp wood too tightly before cutting.
- Allow wood to acclimate to the workshop’s environment.
- Check for warping or twisting before aligning.
Rushing Alignment Process
Hurrying the alignment can cause uneven or unsafe cuts. Take your time to measure and position the wood.
| Common Rushing Errors | Consequences |
| Skipping measuring twice | Wrong cut length |
| Not using guides | Crooked cuts |
| Ignoring tool setup | Safety risks |
Overlooking Tool Calibration
Tools that are not calibrated lead to poor alignment. Check and adjust your tools regularly.
Key calibration checks:
- Verify blade alignment with the fence.
- Ensure the measuring tape is accurate.
- Test the saw’s angle settings before cutting.

Credit: www.reddit.com
Frequently Asked Questions
How Do I Properly Align Wood Before Cutting?
To align wood correctly, use a straight edge or square to mark your cut line. Clamp the wood securely. Ensure the saw blade aligns perfectly with the mark. This prevents uneven cuts and ensures precision for a clean finish.
What Tools Help Align Wood For Accurate Cutting?
Common tools include a carpenter’s square, straight edge, clamps, and measuring tape. These tools help mark straight lines and hold the wood steady. Using them ensures precise alignment and prevents mistakes during cutting.
Why Is Wood Alignment Important Before Cutting?
Proper alignment ensures clean, straight cuts and prevents wood wastage. It improves safety by reducing the risk of wood shifting during cutting. Accurate alignment saves time and enhances the quality of your woodworking project.
How Can I Avoid Wood Movement While Cutting?
Use clamps to firmly hold the wood in place. Check the alignment before cutting. Avoid forcing the saw; let it cut smoothly. Proper clamping and steady cutting prevent the wood from shifting and ensure a precise cut.
Conclusion
Aligning wood properly makes cutting easier and more accurate. It saves time and reduces mistakes. Always check your measurements twice. Use clamps to keep the wood steady. Safety should be your top priority. Wear protective gear when cutting. Practice improves skill and confidence.
Follow these simple steps for better results. Your projects will turn out great. Remember, each piece of wood is unique. Treat it with care and attention. Happy cutting!