
Have you ever started a home project, only to hit a hidden pipe and cause a costly leak? It’s frustrating, risky, and can turn a simple task into a big headache.
What if you could avoid that stress altogether? Using a pipe locator helps you find those hidden pipes before you dig or drill. This tool gives you the confidence to work safely and save money. Keep reading to discover how a pipe locator works and why it should be your go-to device for any project involving underground pipes.
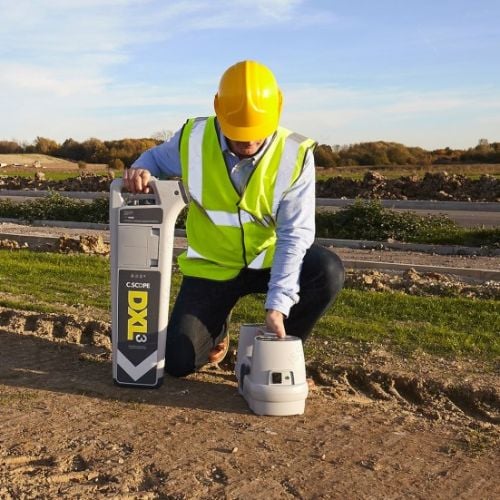
Credit: www.altitudesafety.co.uk
Types Of Pipe Locators
Finding hidden pipes is important for safety and repair work. Different tools help detect pipes underground. These tools use various technologies to locate pipes without digging.
Choosing the right pipe locator depends on the pipe type and ground conditions. Here are some common types of pipe locators.
Electromagnetic Locators
Electromagnetic locators use signals to find metal pipes underground. They send a current through the pipe or nearby cable. The device detects the magnetic field created by this current.
These locators work well on metal pipes like steel or iron. They can detect pipes that carry electricity or have a conductive path. Electromagnetic locators are common for utility pipes.
- Detect metal pipes easily
- Require contact or signal induction
- Not effective on plastic pipes
- Useful for mapping pipe routes
Ground Penetrating Radar
Ground penetrating radar (GPR) uses radar pulses to scan below the surface. It sends radio waves into the ground and receives signals reflected by objects. This helps create an image of underground features.
GPR works on many pipe types, including plastic and metal. It can detect pipes even if they are not conductive. This tool is useful for locating different buried objects together.
- Detects metal and non-metal pipes
- Shows pipe depth and position
- Works in different soil types
- Needs clear ground for best results
Acoustic Locators
Acoustic locators use sound waves to find hidden pipes. They listen for noises made by water or gas moving inside the pipes. These devices can also detect leaks by picking up unusual sounds.
This method works well for plastic or metal pipes carrying fluids. It helps find pipe locations without digging. Acoustic locators are useful for maintenance and leak detection.
- Detects sounds from fluid flow or leaks
- Works on plastic and metal pipes
- Requires quiet environment for accuracy
- Good for locating leaks and pipe routes
Choosing The Right Locator
Using a pipe locator helps find hidden pipes safely and quickly. Choosing the right locator is key for accurate results.
This guide covers factors to consider and matching locators to pipe materials. It helps you pick the best device for your needs.
Factors To Consider
Several factors affect which pipe locator you should use. Consider the environment, pipe depth, and pipe material before choosing.
- Type of pipes you need to locate
- Depth and size of the pipes
- Ground conditions like soil type and moisture
- Locator’s range and accuracy
- Ease of use and features
Matching Locators To Pipe Materials
Different locators work better for certain pipe materials. Knowing the pipe type helps select the right technology.
| Pipe Material | Best Locator Type | Notes |
| Metal Pipes | Electromagnetic Locator | Detects metal by magnetic fields |
| Plastic Pipes | Radio Frequency Locator | Needs tracer wire or signal transmitter |
| Concrete Pipes | Ground Penetrating Radar (GPR) | Works well in various soils |
| Ceramic Pipes | GPR or Electromagnetic (if metal-lined) | Depends on pipe lining |
Preparing For Detection
Finding hidden pipes needs good preparation. This helps avoid damage and saves time.
Before using a pipe locator, gather all important information and set up the device carefully.
Gathering Site Information
Start by collecting details about the area where pipes may be hidden. Check maps and plans.
Look for signs of previous digging or repairs. Ask workers or owners if possible.
- Review site maps and blueprints
- Note any known pipe locations
- Mark areas with past digging activity
- Identify materials around the site
- Check for electrical or metal objects nearby
Setting Up The Locator
Make sure the pipe locator is fully charged or has fresh batteries. Read the user manual carefully.
Adjust the settings based on pipe type and soil conditions. Use the correct frequency for better detection.
- Power on the device and check battery level
- Select the right frequency mode
- Calibrate the locator if needed
- Test the device on a known pipe or metal object
- Wear protective gear during setup

Credit: www.iars.co.in
Step-by-step Detection Process
Finding hidden pipes is important before digging or drilling. Using a pipe locator helps you detect pipes underground safely.
This guide explains how to use a pipe locator in simple steps. Follow these steps to find pipes quickly and accurately.
Calibrating The Device
Before using a pipe locator, you must calibrate it. Calibration adjusts the device to work well in the area you are checking.
Calibration ensures the locator gives accurate signals and avoids false readings. Always do this step first.
- Turn on the pipe locator device.
- Set the device to the correct mode for the pipe type.
- Place the locator on a clear ground area without pipes.
- Adjust sensitivity until the device shows a stable baseline.
- Check the device manual for specific calibration instructions.
Tracing Pipe Paths
After calibration, start tracing the path of the hidden pipe. Move the locator slowly over the ground surface.
The locator will beep or show signals when it detects a pipe. Follow the strongest signals to track the pipe’s route.
- Hold the locator close to the ground.
- Walk slowly along the area where pipes might be.
- Watch the device display or listen for beeps.
- Mark points with the strongest signals to map the path.
- Repeat the tracing in different directions for accuracy.
Marking Detected Pipes
Once you find the pipe path, mark it clearly on the surface. This helps avoid damage during construction or repairs.
Use spray paint or flags to show the pipe’s location. Mark both ends and bends if possible.
- Use bright colors for clear visibility.
- Mark every few feet along the pipe’s path.
- Note pipe depth if your device shows it.
- Keep a record of the marked area for future reference.
Common Challenges
Using a pipe locator helps find hidden pipes underground. This tool faces several common challenges during use.
Understanding these challenges can improve accuracy and safety when locating pipes.
Interference Issues
Signals from other devices can affect the pipe locator’s accuracy. Nearby power lines, radio signals, or metal objects cause interference.
This interference can make it hard to detect the exact pipe location or create false signals.
- Electric cables create strong signal noise
- Metal fences or buried scrap metal confuse readings
- Radio signals from phones or radios overlap the locator signal
Depth Limitations
Pipe locators have a maximum depth they can scan. Pipes buried too deep may not be detected clearly.
Soil type also affects depth. Wet or rocky soil reduces signal reach.
- Clay soil weakens locator signals
- Wet soil may cause signal loss
- Deeper pipes need stronger or specialized locators
Identifying Multiple Pipes
Multiple pipes close together can confuse the locator. Signals may overlap and cause unclear results.
It is hard to tell which signal belongs to which pipe, especially if pipes run parallel or cross.
- Closely spaced pipes create mixed signals
- Crossing pipes may look like one pipe
- Different pipe materials affect signal strength differently
Safety Tips During Detection
Using a pipe locator helps find hidden pipes safely. It reduces the risk of accidents. Still, you must follow safety tips during detection.
These tips protect you and the pipes. They help avoid damage and keep the work area safe.
Personal Protective Equipment
Wear the right personal protective equipment (PPE) before starting detection. PPE protects you from injuries and hazards.
Always use gloves, safety glasses, and a hard hat. These protect your hands, eyes, and head from harm.
- Wear sturdy gloves to protect your hands from sharp objects.
- Use safety glasses to shield your eyes from debris.
- Put on a hard hat to guard against falling objects.
- Wear steel-toed boots for foot protection.
- Use hearing protection if working near loud equipment.
Avoiding Damage To Utilities
Detect pipes carefully to avoid damage. Damaging pipes can cause leaks or electrical hazards.
Use the pipe locator correctly. Mark detected pipes clearly before digging or drilling.
- Check for all types of utilities before starting work.
- Do not dig without locating all pipes first.
- Mark pipes with visible paint or flags.
- Keep heavy tools away from marked pipe areas.
- Inform others on site about pipe locations.
Maintenance And Care Of Locators
Using a pipe locator helps find hidden pipes safely. Taking care of the locator keeps it working well. Regular maintenance extends its life and accuracy.
Proper care reduces errors and saves time during pipe detection. Follow simple steps to inspect and store the device correctly.
Regular Inspections
Check the locator before and after each use. Look for signs of damage or wear that may affect performance. Inspect cables, connectors, and the main unit carefully.
- Test battery levels and replace if low
- Clean the sensor and screen gently
- Look for cracks or loose parts
- Ensure all buttons and controls work properly
Regular inspections help spot problems early. Fix small issues before they cause failure in the field.
Storage Guidelines
Store the locator in a dry, cool place. Avoid direct sunlight or damp areas that can damage the device. Use the original case or a protective cover for safety.
- Keep the device away from extreme temperatures
- Remove batteries if not used for a long time
- Store cables coiled without sharp bends
- Place the locator on a flat surface to avoid pressure
Proper storage prevents corrosion and mechanical damage. It also keeps the locator ready for accurate use when needed.

Credit: papodeautor.com.br
Frequently Asked Questions
What Is A Pipe Locator Used For?
A pipe locator detects hidden pipes underground or inside walls. It helps avoid damage during construction or repairs. Using it ensures safety and accuracy in locating water, gas, or sewer pipes.
How Does A Pipe Locator Work?
A pipe locator emits signals that detect metal or plastic pipes. It uses electromagnetic fields or radio frequencies to trace pipe paths. This technology reveals pipe location, depth, and direction without excavation.
Can A Pipe Locator Detect Plastic Pipes?
Yes, advanced pipe locators detect plastic pipes by tracing tracer wires or using acoustic signals. Specialized devices allow accurate location of non-metallic pipes, preventing accidental damage during digging or renovations.
Why Is Using A Pipe Locator Important?
Using a pipe locator prevents costly pipe damage and service interruptions. It reduces safety risks like gas leaks or water flooding. Accurate detection saves time and money in construction or maintenance projects.
Conclusion
Locating hidden pipes can be challenging. A pipe locator makes it easier. It saves time and reduces potential damage. This tool is practical for both professionals and DIY enthusiasts. Accurate detection prevents costly mistakes. It also ensures safety during construction or repairs.
Easy to use, it provides clear results. Avoid unnecessary digging and guesswork. Understanding your underground layout becomes straightforward. Investing in a reliable pipe locator pays off. Protect your property and work efficiently. Find pipes quickly, maintain peace of mind.
