If you want your drawers to look professional and last for years, using a dovetail jig can be a game changer. You might think making those strong, interlocking joints is tricky, but with the right tool, it becomes simple and even enjoyable.
Imagine building drawers that fit perfectly and hold together tightly without the usual guesswork. You’ll discover how a dovetail jig can save you time, improve your skills, and make your woodworking projects stand out. Keep reading to unlock the secrets of perfect drawer construction and take your craftsmanship to the next level.
Choosing The Right Dovetail Jig
A dovetail jig helps you make strong, neat joints for drawers. Choosing the right jig makes your work easier and more precise.
Many types of dovetail jigs are available. You should think about the wood you use and your budget before buying one.
Types Of Dovetail Jigs
Dovetail jigs come in different styles. Some are simple and good for beginners. Others offer more control for detailed work.
- Manual jigs: Use hand tools or routers with guides.
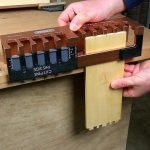
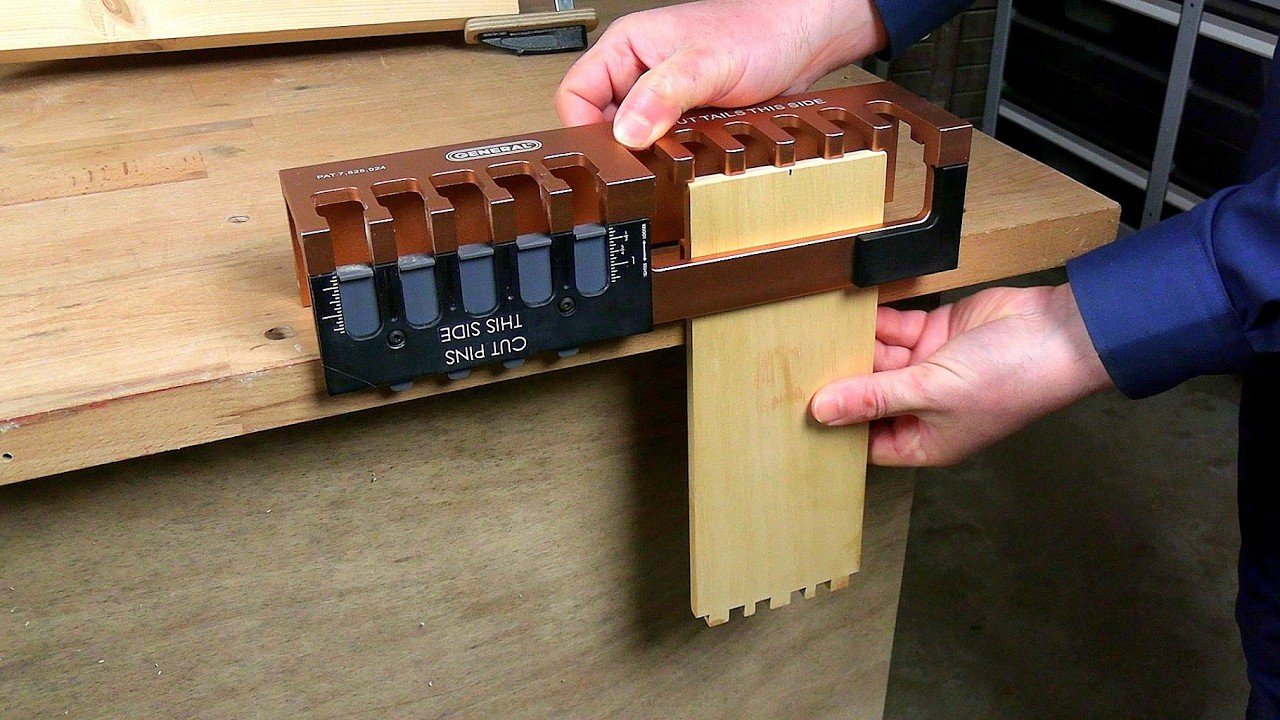
- Pin jigs: Hold the pins and let you cut tails by hand.
- Tail jigs: Hold tails and guide pin cuts.
- Adjustable jigs: Can change spacing and size of pins and tails.
- Template jigs: Use fixed templates for repeat work.
Material Compatibility
Check if the jig works with the wood you want to use. Some jigs fit only certain wood thicknesses.
Softwoods and hardwoods may need different settings. Make sure the jig can handle your drawer materials.
- Thicker wood needs a jig with adjustable guides.
- Thin wood requires precise, small-scale jigs.
- Some jigs are better for hardwoods because they allow slower cuts.
Budget Considerations
Dovetail jigs come at many price points. Set a budget before you shop. This helps you find the best jig within your range.
Cheaper jigs work for simple projects. More expensive jigs offer more features and durability.
- Basic jigs cost less but may have fewer options.
- Mid-range jigs balance price and flexibility.
- High-end jigs provide fine adjustments and sturdier parts.
- Consider long-term use and how often you will make dovetails.
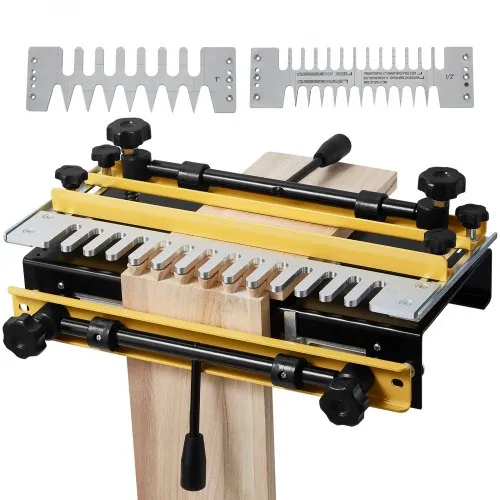
Credit: www.vevor.ca
Essential Tools And Materials
Using a dovetail jig makes drawer construction easier and more precise. You need the right tools and materials for best results.
Choosing quality materials and the correct tools will help create strong and neat drawers. Let’s look at what you need.
Wood Selection
Select wood that is stable and easy to work with. Hardwood like maple or cherry works well for drawers.
Softwoods can be used but may wear out faster. Make sure the wood is dry and free of defects.
- Hardwood: maple, cherry, oak
- Softwood: pine, cedar
- Dry, straight-grained boards
- Boards without knots or cracks
Router And Bits
A good router is necessary for cutting dovetail joints. Choose one with adjustable speed and good control.
You will need special dovetail router bits. These bits match the jig’s guide and make precise cuts.
- Plunge router or fixed base router
- Dovetail router bits (usually 1/4 or 1/2 inch)
- Straight router bits for cleaning edges
- Sharp bits for clean cuts
Clamps And Measuring Tools
Clamps hold your wood pieces tightly while cutting and gluing. Use strong clamps that fit your work size.
Measuring tools help you keep accuracy. Use a good ruler, square, and marking tools for best results.
- Bar clamps or quick-release clamps
- Combination square or try square
- Steel ruler or tape measure
- Pencil or marking knife for lines
Preparing Wood Pieces
Preparing wood pieces is a key part of making drawers with a dovetail jig. Careful preparation helps the joints fit well and the drawer last long.
This step includes measuring, cutting, and smoothing the wood before joining it.
Measuring And Marking
Measure each wood piece carefully to match the drawer size. Use a pencil to mark the cut lines clearly. Accurate marks help the dovetail joints fit tightly.
Double-check measurements before cutting to avoid mistakes.
- Use a ruler or tape measure for precision
- Mark both sides of the wood for guidance
- Label pieces to keep track of sides
Cutting To Size
Cut the wood along the marked lines using a saw. Keep the cuts straight and clean. Proper cutting ensures the pieces fit well in the jig and in the drawer.
Use clamps or guides to hold the wood steady while cutting.
- Use a fine-toothed saw for smooth edges
- Cut slowly to avoid splintering
- Check each piece after cutting for accuracy
Surface Preparation
Sand each wood piece to remove rough spots and splinters. Smooth surfaces help the glue stick better and give a nice finish.
Remove dust and dirt before joining the pieces with the dovetail jig.
- Start sanding with medium grit sandpaper
- Finish with fine grit for a smooth touch
- Use a brush or cloth to clean dust off
Setting Up The Dovetail Jig
Setting up a dovetail jig correctly helps you build strong drawer joints. It makes the cutting process easier and more precise.
Before starting, prepare your jig and materials carefully. This ensures smooth and accurate work.
Adjusting Tail And Pin Templates
Tail and pin templates control the shape of your dovetail joints. Adjust these templates to match your drawer size and wood thickness.
- Choose the tail template based on the joint size needed.
- Align the pin template to fit the tail pattern.
- Secure templates firmly to avoid movement during routing.
- Check spacing to ensure tight-fitting joints.
Securing Wood In The Jig
Hold the wood pieces tightly in the jig. Proper clamping stops the wood from shifting during cutting.
| Clamping Method | When to Use | Tips |
| Toggle Clamps | Quick setups | Check pressure for firm hold |
| Screw Clamps | Thicker wood | Apply even force across the piece |
| Rubber Pads | Delicate surfaces | Prevent marks on wood |
Router Depth And Speed Settings
Set the router depth to match the wood thickness. Too deep cuts can damage the joint.
Use the following tips for router speed and depth:
- Start with a shallow depth and test on scrap wood.
- Increase depth gradually for clean cuts.
- Adjust speed based on wood type; slower for hardwoods.
- Keep router steady to avoid uneven cuts.
Cutting Dovetail Joints
Using a dovetail jig helps you cut strong, precise dovetail joints for drawers. These joints fit tightly and add beauty to your woodworking projects.
This guide covers routing tails, routing pins, and cleaning and fitting joints. Each step is important for creating perfect drawer corners.
Routing Tails
Start by setting your dovetail jig for the tails. Clamp the wood firmly in place. Use a router with the correct bit to cut the tail shapes into the board.
- Set the depth of the router bit to match the jig instructions
- Make slow and steady passes for clean cuts
- Check the tails for consistent size and shape
- Remove the board carefully after cutting
Routing Pins
After cutting tails, switch the jig and router setup to cut the pins on the matching board. The pins lock into the tails to form the joint.
| Tool | Purpose |
| Dovetail Jig | Holds board for pin cuts |
| Router Bit | Shapes pins to fit tails |
| Clamps | Secure board firmly |
| Router | Cuts pins precisely |
Cleaning And Fitting Joints
Once both tails and pins are cut, clean up the joint edges. Remove any small chips or rough spots with a chisel or sandpaper.
- Test fit the joint before gluing
- Trim any high spots carefully
- Use a mallet to gently tap pieces together
- Ensure the joint fits snug without forcing
Assembling The Drawer
Using a dovetail jig helps create tight-fitting joints for your drawer. Assembling the drawer carefully ensures strength and neatness.
This guide covers dry fitting the joints, applying glue, and clamping and drying the drawer parts.
Dry Fitting The Joints
Before gluing, check the fit of each joint by dry fitting. Place the sides, front, and back together without glue.
- Make sure the dovetails slide smoothly.
- Check for gaps or tight spots.
- Adjust with sandpaper or a chisel if needed.
- Confirm all corners fit flush.
Applying Glue
Use wood glue on all dovetail surfaces for a strong bond. Spread glue evenly with a brush or finger.
| Part | Glue Application |
| Dovetail Pins | Apply glue on all pin surfaces |
| Dovetail Tails | Cover all tail surfaces fully |
| Drawer Bottom | Apply glue only on edges if inserting |
Clamping And Drying
After gluing, clamp the drawer to hold parts tightly. Use even pressure to avoid shifting.
- Place clamps on opposite corners.
- Tighten clamps until joints close fully.
- Wipe away excess glue with a damp cloth.
- Let dry for at least 30 minutes to 1 hour.
- Remove clamps and check joint strength.
Finishing Touches
After assembling drawers with a dovetail jig, finishing touches make them smooth and functional. Careful work here improves appearance and durability.
This section covers sanding, checking fit, and applying finish or sealant for best results.
Sanding And Smoothing
Sand all edges and surfaces to remove rough spots and glue residue. Start with medium grit sandpaper and finish with fine grit for a smooth feel.
- Use 120-grit sandpaper to smooth joints
- Switch to 220-grit for final sanding
- Sand drawer faces and sides evenly
- Remove all dust with a tack cloth
Checking For Fit And Alignment
Test the drawer in its opening to ensure it fits well. Check the alignment to avoid sticking or gaps.
| Check Point | What to Look For | Fix If Needed |
| Drawer Slides | Moves smoothly without catching | Adjust runners or sand edges |
| Drawer Front | Flush with cabinet face | Trim edges or adjust joints |
| Drawer Height | Even gap on top and bottom | Shim or plane drawer sides |
Applying Finish Or Sealant
Choose a finish to protect wood and enhance appearance. Apply it evenly and let it dry fully before use.
- Use a brush or cloth for applying finish
- Apply thin coats to avoid drips
- Sand lightly between coats for smoothness
- Allow drying time as per product instructions
- Consider water-based finishes for quick drying

Credit: www.reddit.com
Troubleshooting Common Issues
Using a dovetail jig can make drawer construction easier and more precise. Still, some problems may arise during the process. Knowing how to fix these common issues saves time and improves your results.
Below are tips to solve problems like misaligned joints, router bit tear-out, and loose or tight fits. These fixes help you get clean and strong drawer joints every time.
Misaligned Joints
Misaligned joints happen when the parts do not fit together properly. This can make drawers look uneven or weak. The main causes are incorrect setup or movement during cutting.
Check that the jig is clamped tightly and the wood is secured before cutting. Confirm the settings match the wood thickness. Also, mark parts clearly to keep track of their position.
- Tighten clamps to prevent movement
- Double-check jig settings for wood size
- Use marks to align pieces correctly
- Make shallow test cuts to verify alignment
Router Bit Tear-out
Tear-out happens when the wood fibers break or chip during cutting. This makes rough edges and weak joints. Dull or incorrect router bits often cause tear-out.
Use sharp bits designed for clean cutting. Cut in multiple shallow passes instead of one deep cut. Clamp the wood firmly and cut against the grain if possible.
- Keep router bits sharp and clean
- Make several shallow cuts instead of one deep cut
- Clamp wood tightly to prevent vibration
- Cut slowly and steadily for smooth edges
Loose Or Tight Fits
Loose fits make joints weak and unstable. Tight fits are hard to assemble and may split the wood. Both affect the drawer’s strength and appearance.
Adjust the jig’s guide bushings or templates if the fit is not right. Test cuts on scrap wood help find the perfect size. Sand or trim parts slightly if needed for a better fit.
- Check jig settings for correct fit size
- Test cuts on scrap wood before final cuts
- Slightly sand or trim parts for tight fits
- Use wood glue to strengthen loose joints
Tips For Speed And Precision
Using a dovetail jig can make drawer construction easier and neater. Speed and precision improve with the right methods. Small changes in setup and care help a lot.
We will cover ways to keep your work consistent, maintain your tools, and build skill with practice and patience.
Consistent Setup Techniques
Setting up your dovetail jig the same way every time leads to faster work and better joints. Mark key points and use stops to repeat cuts quickly.
- Measure and mark wood pieces before clamping.
- Use the same fingerboard or template for all cuts.
- Clamp wood firmly to avoid movement during cutting.
- Check the router bit height and position before each run.
- Label jig settings for different drawer sizes.
Tool Maintenance
Sharp and clean tools cut better and faster. Keep your router bit and jig in good shape to save time and get smooth joints.
| Maintenance Task | Frequency | Reason |
| Clean router bit | After every use | Prevents resin build-up |
| Check bit sharpness | Weekly | Ensures clean cuts |
| Lubricate jig clamps | Monthly | Maintains smooth operation |
| Tighten jig screws | Before each project | Keeps setup stable |
Practice And Patience
Skill grows with steady practice. Take your time learning each step. Patience helps avoid mistakes that slow you down later.
- Start with scrap wood to test settings.
- Make small cuts first to check fit.
- Review your work and adjust if needed.
- Work in a quiet space to focus better.
- Build a routine to improve speed naturally.

Credit: www.youtube.com
Frequently Asked Questions
What Is A Dovetail Jig Used For In Woodworking?
A dovetail jig helps create precise, interlocking dovetail joints. It ensures strong, durable drawer corners and improves assembly accuracy. Using this tool speeds up production and enhances the professional look of your woodworking projects.
How Do You Set Up A Dovetail Jig For Drawers?
To set up, clamp the jig to your workbench securely. Adjust the guide fence for your wood thickness. Select the correct template and router bit. Test on scrap wood before cutting your actual drawer pieces.
What Types Of Dovetail Joints Work Best For Drawers?
Through dovetails and half-blind dovetails are popular for drawers. Through dovetails show both sides, while half-blind hide joints on the front. Both provide excellent strength and durability for drawer construction.
Can Beginners Use A Dovetail Jig Easily?
Yes, beginners can use dovetail jigs with practice. Follow instructions carefully and use scrap wood first. This tool simplifies complex joints, making professional results achievable even for novices.
Conclusion
A dovetail jig makes drawer construction easy and efficient. It ensures strong, durable joints. Perfect for both beginners and seasoned woodworkers. Using one saves time and effort. No need for complex tools. Just follow the instructions carefully. Enjoy the satisfaction of crafting quality drawers.
Your projects will look professional. A dovetail jig is a smart investment. It simplifies woodworking tasks. Consider adding it to your toolkit. Experience precise and neat results every time. Practice and patience lead to success. Enhance your woodworking skills with confidence.
Keep creating, keep learning.