If you’ve ever wanted to create strong, beautiful joints for your woodworking projects, a dovetail jig is your best friend. But if you’re new to using one, it can feel tricky and confusing.
Don’t worry—this guide will walk you through everything you need to know. By the end, you’ll feel confident making perfect dovetail joints that impress everyone. Ready to unlock the secret to professional-looking woodwork? Let’s dive in and make your next project truly stand out.

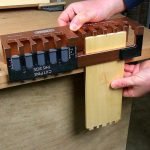
Credit: www.youtube.com
Choosing The Right Dovetail Jig
A dovetail jig helps you create strong, attractive wood joints. Picking the right jig is important for good results.
This guide covers types of jigs, features to check, and how to balance budget with quality.
Types Of Dovetail Jigs
There are three main types of dovetail jigs. Each type works differently and fits different projects.
- Manual Jigs:You move the wood by hand. Good for small projects.
- Automatic Jigs:These control the router automatically. They save time and increase accuracy.
- Template Jigs:Use a fixed pattern for cutting. They are simple and affordable.
Key Features To Consider
Look for features that match your woodworking needs. These features affect ease and quality.
- Material:Metal jigs are strong and last longer than plastic ones.
- Adjustability:Easy-to-adjust jigs let you make different joint sizes.
- Compatibility:Check if the jig fits your router and wood thickness.
- Clamping System:Strong clamps hold wood steady during cutting.
- Guide Bushings:Durable bushings help keep cuts precise.
Budget Vs. Quality
Balancing budget and quality is key when choosing a dovetail jig. Cheaper jigs may save money but might wear out fast.
Higher quality jigs cost more but offer better results and last longer. Think about how often you will use the jig.
- Spend more if you do many projects or want precise joints.
- Choose budget models for occasional or beginner use.
- Check reviews to see if the jig holds up over time.

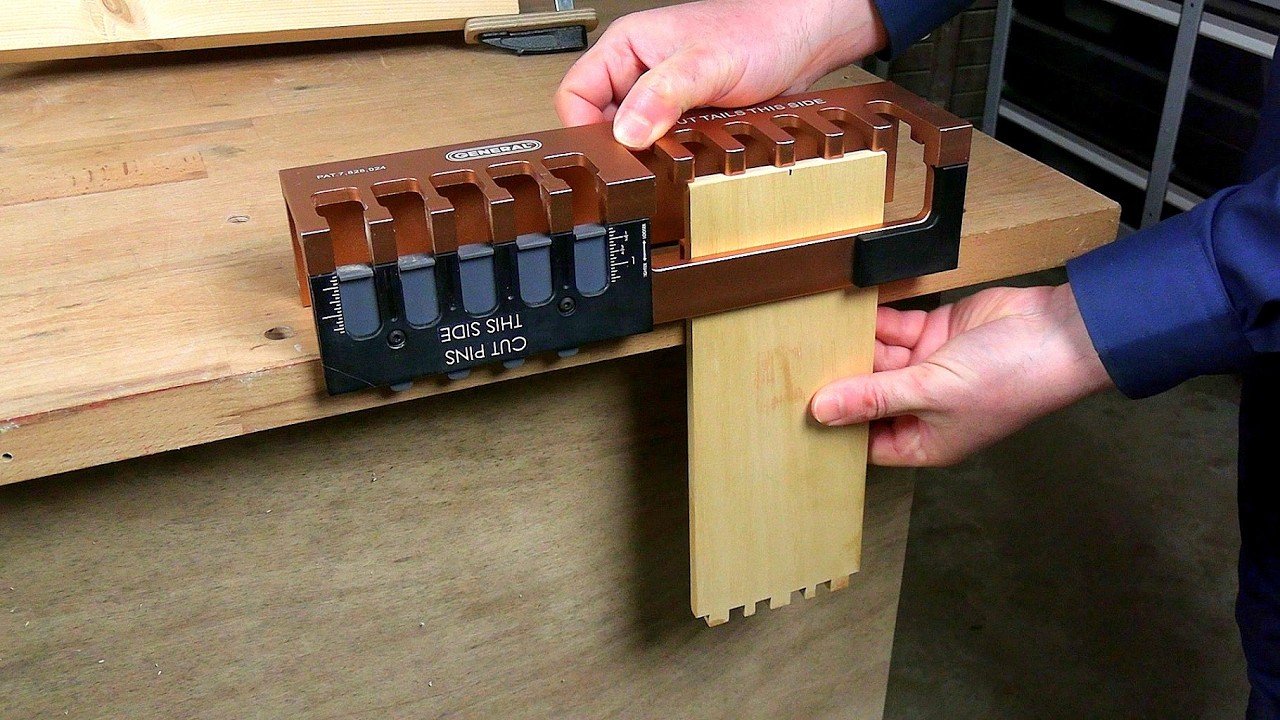
Credit: www.scribd.com
Essential Tools And Materials
Using a dovetail jig helps you create strong and neat wood joints. You need the right tools and materials to get good results. This guide explains the main tools and materials for beginners.
Choosing the right router, bits, and wood type makes your work easier. These parts affect how well your dovetail joints fit and look.
Router Selection
Select a router that fits your dovetail jig well. A fixed-base router is easier to control for beginners. It helps keep the cuts straight and steady.
Look for a router with enough power. A motor of 1.5 to 2 horsepower works for most dovetail tasks. Choose a router with variable speed to adjust cutting speed.
Router Bits For Dovetails
Dovetail router bits have a special angled shape. This shape matches the dovetail joint pattern. Use bits designed for your jig’s size and style.
- Common angles are 7, 8, or 14 degrees
- Choose a bit made of carbide for longer life
- Use a bit size that fits your wood thickness
Sharp bits make cleaner cuts. Change dull bits to avoid rough edges and burning the wood.
Wood Types Suitable For Dovetails
Pick wood that cuts cleanly and holds glue well. Hardwood and softwood both work, but some woods are easier for beginners.
- Hardwoods like maple, cherry, and oak offer strong joints
- Softwoods like pine and cedar are easier to cut
- Avoid very soft or crumbly woods that break easily
Dry wood with stable moisture content helps keep joints tight. Avoid wood that twists or warps quickly.
Setting Up Your Dovetail Jig
Setting up your dovetail jig correctly is key for strong, neat joints. It helps your wood pieces fit well together.
This guide covers clamping techniques, adjusting the jig, and safety tips. Follow these to work safely and accurately.
Clamping Techniques
Secure your wood firmly in the jig using the right clamping method. This stops movement and ensures precise cuts.
- Place the wood flat against the jig fence.
- Tighten the clamp just enough to hold the wood without damage.
- Check the wood is flush and level before cutting.
- Use additional clamps for larger or uneven pieces.
Adjusting The Jig For Different Joint Sizes
Change the jig settings to match the size of the joint you want. Different wood thicknesses need different setups.
| Joint Size | Wood Thickness | Jig Setting |
| Small | 1/2 inch | Position A |
| Medium | 3/4 inch | Position B |
| Large | 1 inch | Position C |
Adjust the guide fingers and stop blocks to fit the wood size. Test with scrap wood before final cuts.
Safety Tips For Setup
Follow safety rules while setting up the jig to avoid injuries. Always stay alert and use protective gear.
- Wear safety glasses to protect your eyes.
- Keep hands clear of the router bit and clamps.
- Make sure the jig is stable and on a flat surface.
- Disconnect power before adjusting the jig or changing bits.
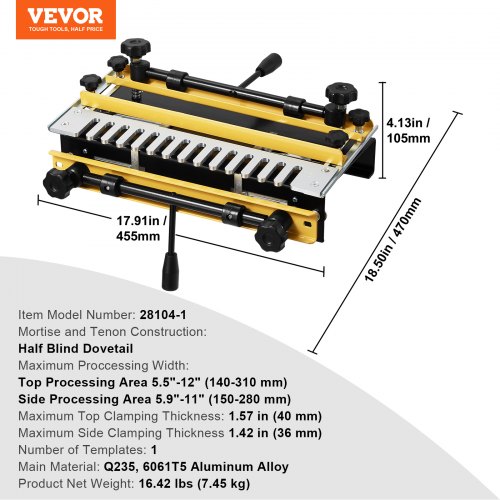
Credit: www.vevor.ca
Step-by-step Dovetail Cutting Process
Dovetail joints are strong and look great in woodworking. Using a dovetail jig helps cut these joints precisely. This guide shows you how to cut dovetails step by step.
Follow each step carefully to make perfect dovetail joints. We will cover marking, routing, and fitting the pieces together.
Marking And Preparing The Wood
Start by selecting wood pieces that fit your project. Make sure the edges are smooth and square. Use a pencil and ruler to mark where the dovetails will go.
Mark the baseline on both pieces. This line shows how deep the cuts will be. Make clear marks to guide your routing.
Routing The Tails
Attach the first wood piece to the dovetail jig. Set your router with the correct bit and depth. Carefully route the tail shapes following the jig’s guide.
Take your time and keep the router steady. Make sure to clean out any wood chips from the cuts before moving on.
Routing The Pins
Clamp the second wood piece in the jig to cut the pins. Use the same router settings as for the tails. Route the pins to match the tail shapes.
Double-check that the cuts line up with the tail marks. Remove any rough edges so the joint fits well.
Fitting And Fine-tuning The Joint
Test fit the two pieces by sliding the tails into the pins. The joint should fit snugly without forcing. If it is too tight, trim the high spots carefully.
Use a chisel or sandpaper to adjust small areas. Keep testing until the joint fits clean and tight. Once done, the dovetail joint is ready for glue and assembly.
Common Mistakes And How To Avoid Them
Using a dovetail jig can be tricky for beginners. Small errors can cause big problems in your joints.
This guide covers common mistakes and tips to avoid them. Follow these tips to get better results.
Misalignment Issues
Misalignment happens when parts do not line up correctly. This can weaken the joint and spoil the look.
- Check the jig setup before cutting.
- Use a square to align boards properly.
- Clamp the wood firmly to avoid movement.
- Measure twice and mark clearly.
Overcutting And Undercutting
Overcutting removes too much wood; undercutting leaves too much. Both cause poor fitting joints.
| Problem | Cause | Fix |
| Overcutting | Wrong depth setting | Adjust router depth correctly |
| Undercutting | Shallow cuts | Make sure cutter reaches full depth |
Clamping Errors
Clamping errors let parts move during cutting. This causes uneven joints and gaps.
- Use clamps that fit your jig size.
- Apply even pressure on all clamps.
- Check clamps hold wood firmly before cutting.
- Do not overtighten; avoid wood damage.
Finishing And Strengthening Dovetail Joints
Dovetail joints are strong and beautiful when finished well. Proper finishing and strengthening help them last longer.
Careful sanding, correct glue use, and extra reinforcement improve joint durability and appearance.
Sanding Techniques
Sanding smooths the wood and removes glue marks. Use fine grit sandpaper for a clean surface.
Sand lightly along the wood grain to avoid scratches. Check the joint edges carefully.
- Start with 120-grit sandpaper for rough areas
- Use 220-grit for finishing
- Sand joint corners gently to keep shape
- Remove all dust before applying finish
Glue Application Tips
Apply glue evenly to all joint surfaces. Too much glue can cause messy squeeze-out.
Use a thin layer to cover the wood well. Clamp the joint firmly while drying to avoid gaps.
- Use wood glue for strong bonds
- Spread glue with a small brush or finger
- Wipe off excess glue before it dries
- Clamp for at least 30 minutes for best hold
Reinforcement Options
Adding reinforcement can make dovetail joints stronger. Choose a method that fits your project.
Common options include splines, pins, or small dowels. These help keep joints tight over time.
- Insert wooden splines into the joint for extra grip
- Use small pins or nails to hold pieces together
- Add dowels across the joint for added strength
- Make sure reinforcements do not split the wood
Advanced Tips For Perfect Joints
Dovetail jigs help make strong, neat joints in woodworking. Using advanced tips can improve your joint quality.
This guide shares ways to customize joints, use templates, and fix common problems. These tips suit beginners ready to improve.
Customizing Joint Styles
You can change joint styles by adjusting the jig’s settings. This lets you create different looks and strengths for your project.
Try changing the spacing and size of the pins and tails. Test cuts on scrap wood before working on your final piece.
- Increase tail size for stronger joints
- Use tighter pin spacing for finer detail
- Adjust the depth for a flush fit
Using Templates And Guides
Templates help keep your cuts consistent. Use guides to align your wood correctly each time.
Mark your wood before cutting. This saves time and reduces errors when placing it in the jig.
- Secure the template firmly to avoid movement
- Use a sharp router bit for clean edges
- Double-check measurements before routing
Troubleshooting Common Problems
Joints that don’t fit well cause weak connections. Check your jig setup and wood condition first.
Fix loose or tight joints by adjusting cut depth or cleaning router bits. Always test on scrap wood after changes.
- Loose joints: reduce cut depth or use thinner wood
- Tight joints: increase cut depth or sand pins slightly
- Burn marks: slow router speed and sharp bits help
- Misaligned cuts: re-check jig alignment and clamps
Maintenance And Care For Your Dovetail Jig
Taking good care of your dovetail jig helps it last longer and work better. Regular maintenance keeps your cuts precise and safe.
This guide covers cleaning, calibration, and part replacement to keep your tool in top shape.
Cleaning And Storage
Keep your jig free from dust and wood chips after each use. Clean the surfaces gently with a soft brush or cloth.
- Remove sawdust with a soft brush or compressed air
- Wipe metal parts with a dry cloth to prevent rust
- Store the jig in a dry place away from moisture
- Cover it with a cloth or plastic to avoid dust buildup
Regular Calibration
Calibration keeps the jig accurate for perfect dovetail joints. Check settings before important projects.
- Check the fence alignment with a square tool
- Adjust the guide fingers to match the desired joint size
- Test cuts on scrap wood before final work
- Recalibrate if the joints do not fit tightly
Replacing Worn Parts
Parts like guide fingers and clamps wear out over time. Replace them to keep your jig working well.
| Part | Signs of Wear | Replacement Tips |
|---|---|---|
| Guide Fingers | Loose fit or damaged edges | Use manufacturer parts for best fit |
| Clamps | Weak grip or bent metal | Check clamp strength before use |
| Fence | Scratches or warping | Replace if alignment is affected |
Frequently Asked Questions
What Is A Dovetail Jig Used For?
A dovetail jig helps create precise dovetail joints in woodworking. It guides the router to cut matching pins and tails. This ensures strong, tight-fitting joints for drawers, boxes, and furniture. Using a jig saves time and improves accuracy compared to freehand cutting.
How Do Beginners Use A Dovetail Jig?
Beginners should start by reading the jig’s manual carefully. Clamp the wood pieces securely, set the correct template, and use a sharp router bit. Practice on scrap wood to master the technique before working on your actual project.
Which Materials Work Best With Dovetail Jigs?
Dovetail jigs work best with hardwoods like maple, oak, or cherry. Softwoods like pine can also be used but may splinter easily. Avoid using plywood or MDF as they don’t hold dovetail joints well and can chip during routing.
Can A Dovetail Jig Improve Woodworking Skills?
Yes, using a dovetail jig enhances precision and joint-making skills. It teaches woodworkers about joint alignment and router control. Regular practice with a jig builds confidence and improves overall craftsmanship in woodworking projects.
Conclusion
Exploring dovetail jigs can enhance your woodworking projects. Start with simple projects. Practice regularly to improve your skills. Patience is essential in mastering dovetail techniques. Choose the right jig for your needs. Ensure tools are in good condition for safety.
Research and follow guides carefully. Experiment with different wood types. Dovetail joints add strength and style. Enjoy the process of learning and creating. Share your projects with fellow enthusiasts. Happy woodworking!