Cutting curves in wood can feel tricky, especially if your lines don’t come out smooth or your cuts aren’t accurate. But what if you could learn a simple way to align your wood perfectly before you start cutting?
When your wood is properly aligned, every curve you cut looks clean and professional, saving you time and frustration. You’ll discover easy steps to set up your wood for cutting curves with confidence. By the end, you’ll feel ready to tackle any curved cut with precision—let’s get started!

Credit: www.reddit.com
Choosing The Right Wood
Choosing the right wood is important for cutting curves. The wood must bend smoothly without breaking. This helps to get clean and accurate cuts.
Not all wood types work well for curves. Some woods are too hard or stiff. Picking the right type makes the work easier and safer.
Types Of Wood Suitable For Curves
Softwoods and some hardwoods bend better for curves. Woods like pine, cedar, and birch are good choices. These woods are easier to shape and cut.
- Pine – soft and flexible
- Cedar – light and easy to bend
- Birch – strong but workable
- Poplar – smooth and steady grain
Grain Direction And Flexibility
Grain direction affects how wood bends. Wood bends easier along the grain than across it. Align the grain with the curve direction for smooth cuts.
Wood with straight grain is more flexible. Avoid wood with twisted or wavy grain. It can cause cracks or uneven bends during cutting.
Avoiding Knots And Defects
Knots make wood weak and hard to cut. They can cause the wood to break or splinter. Choose wood with few or no knots for curves.
Check for cracks, splits, and other defects. Defects reduce wood strength and affect curve cutting. Select clear, smooth boards for best results.
Preparing The Wood Surface
Aligning wood correctly is key to cutting smooth curves. Preparing the wood surface helps you get accurate cuts. This guide covers important steps before cutting.
Focus on sanding, marking, and using tools to guide your cuts. These steps make the wood ready and easier to work with.
Sanding And Smoothing
Start by sanding the wood surface to remove rough spots and splinters. Smooth wood allows for clear marking and better control when cutting curves.
- Use medium-grit sandpaper to even out the surface
- Follow with fine-grit sandpaper for a smooth finish
- Wipe the surface clean with a dry cloth after sanding
Marking Curve Patterns
Marking curves carefully guides your cutting line. Use pencils or markers that show clearly on the wood. Draw smooth, continuous lines for best results.
- Choose the curve shape you want to cut
- Draw the curve lightly at first
- Check the shape and adjust if needed
- Trace over the curve with a darker line
Using Templates And Stencils
Templates and stencils help keep curves consistent. You can buy or make your own. Place them firmly on the wood before tracing the shape.
| Template Type | Best For | Material |
| Plastic Stencil | Simple curves | Flexible and durable |
| Wooden Template | Complex shapes | Rigid and sturdy |
| Metal Template | Repeated use | Long-lasting and precise |
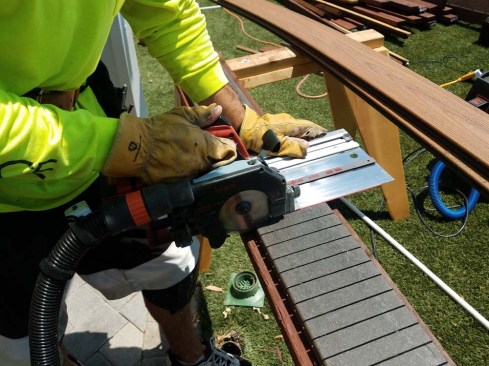
Securing Wood For Cutting
Cutting curves in wood needs careful preparation. Securing the wood keeps it safe and steady.
Good support prevents mistakes and helps you cut smooth curves.
Clamping Techniques
Use clamps to hold wood firmly during cutting. Position clamps where they won’t block your saw.
Try different clamps like C-clamps, bar clamps, or quick-release clamps. Make sure the wood does not move.
- Place clamps on flat areas away from the curve
- Use soft pads to avoid marks on wood
- Tighten clamps evenly for steady hold
- Check clamp positions before cutting
Supporting Thin Or Flexible Pieces
Thin wood can bend or break easily. Support it well to keep it straight.
Use scrap wood or a flat board under thin pieces. This gives extra strength and stops bending.
- Place a flat support under the thin wood
- Clamp both the thin piece and support together
- Use multiple clamps for longer thin pieces
- Avoid forcing the wood to bend while cutting
Preventing Wood Movement
Wood can shift while cutting if not fixed well. Stop any movement to keep cuts accurate.
Use double-sided tape or non-slip mats under wood. Check clamps often and adjust if needed.
- Apply double-sided tape on the work surface
- Place a non-slip mat under the wood piece
- Check clamps regularly during cutting
- Use stop blocks to limit wood movement
Credit: www.lumberjocks.com
Choosing The Right Tools
Cutting curves in wood requires the right tools for smooth and accurate results. Choosing tools that fit your project helps you work safely and easily.
This guide explains how to pick saws and hand tools for cutting curves well. Learn about the best options for your woodwork.
Selecting Saws For Curve Cutting
Saws for curve cutting come in different types. Each saw works better for certain curves and wood thicknesses. Choose the saw that fits your cut.
- Scroll saws offer tight, detailed curves for thin wood.
- Jigsaws can cut larger curves and thick boards.
- Bandsaws handle long, smooth curves on thick wood.
- Hand saws give control for small, precise curves.
Using Jigsaws And Bandsaws
Jigsaws and bandsaws are common for curved cuts. Each tool has strengths for different curve shapes and wood sizes.
| Tool | Best For | Wood Thickness |
| Jigsaw | Sharp or tight curves | Thin to medium |
| Bandsaw | Long, smooth curves | Medium to thick |
Use fine-toothed blades for clean cuts. Adjust speed and blade tension for control.
Hand Tools For Precision
Hand tools add precision to curved cuts. They work well for fine details and small adjustments.
- Copingsaws fit tight curves and small details.
- Spokeshaves smooth edges after cutting.
- Files and rasps refine curves for perfect shapes.
Cutting Techniques For Curves
Cutting curves in wood takes practice and care. You need to guide your saw smoothly along the curve.
Using the right techniques helps you get clean, accurate cuts every time. This guide covers key tips for curved cuts.
Following Marked Lines Accurately
Start by clearly marking the curve on your wood piece. Use a pencil or marker that shows well.
Keep your eyes focused on the line as you cut. Move the saw slowly and adjust your angle to stay on track.
- Use a sharp blade for clean edges
- Keep the saw steady and avoid rushing
- Check your progress often to correct direction
Controlling Speed And Pressure
Cutting curves needs gentle speed and steady pressure. Too fast or hard can cause mistakes or rough edges.
Let the saw do the work. Apply just enough pressure to keep the blade cutting without forcing it.
- Slow down on tight curves to maintain control
- Keep even pressure for smooth cuts
- Pause if the saw feels stuck or uneven
Making Relief Cuts
Relief cuts help remove wood inside tight curves. These are small straight cuts that ease bending the wood.
Make relief cuts before cutting the final curve line. This prevents the wood from pinching your saw blade.
- Space relief cuts evenly along the curve
- Cut only deep enough to help the curve bend
- Remove the waste wood between relief cuts carefully
Credit: www.jlconline.com
Finishing Curved Edges
Cutting curves in wood creates beautiful shapes. Finishing these edges is key to a smooth look.
Careful sanding, shaping, and sealing protect the wood and improve its appearance.
Sanding Curved Surfaces
Sanding curved edges removes rough spots and smooths the surface. Use flexible sanding tools.
- Start with medium grit sandpaper to shape the curve.
- Use finer grit to create a smooth finish.
- Wrap sandpaper around a sponge or foam for better control.
- Sand along the curve, not across sharp edges.
- Check your progress often to avoid over-sanding.
Using Files And Rasps
Files and rasps shape curves by removing wood carefully. They help refine edges before sanding.
| Tool | Use | Best For |
|---|---|---|
| Rasp | Quickly removes wood | Rough shaping of curves |
| Half-round file | Refines curved edges | Medium smoothing |
| Needle file | Detail work | Tight curves and corners |
Applying Sealants Or Paint
Sealants and paint protect curved wood and improve durability. Apply thin, even coats for best results.
- Clean the surface before applying.
- Use a small brush to reach curved areas.
- Apply multiple thin layers, letting each dry fully.
- Lightly sand between coats for smooth finish.
- Choose sealants or paint that suit the wood type.
Common Mistakes To Avoid
Cutting curves in wood requires careful alignment. Small errors can cause big problems.
Knowing common mistakes helps you work safer and get better results.
Misaligning The Grain
Cutting curves without following the wood grain can cause splintering. The grain guides the saw and helps keep the cut smooth.
Ignoring the grain makes the wood weak and rough along the edges.
- Always check the grain direction before cutting.
- Align your curve to follow the grain as much as possible.
- Use sharp blades to reduce splintering.
Improper Clamping
Not clamping wood properly can cause it to move during cutting. This leads to uneven curves and safety risks.
Using the wrong clamp or too few clamps reduces stability and control.
- Use clamps that fit the size and shape of your wood.
- Place clamps where they hold the wood firmly without blocking your cut.
- Check clamps often to make sure they stay tight.
Rushing The Cut
Cutting curves too fast causes mistakes and rough edges. Slow, steady cuts give cleaner results.
Rushing also increases the chance of the saw jumping off the line, ruining the shape.
- Take your time and follow the marked line carefully.
- Use a steady hand and consistent speed.
- Pause if you feel the saw struggling or binding.
Frequently Asked Questions
How Do I Prepare Wood For Cutting Curves?
Start by selecting flexible, thin wood pieces. Mark the curve clearly with a pencil. Secure the wood firmly to avoid movement during cutting.
What Tools Work Best For Cutting Curved Wood?
A jigsaw, bandsaw, or coping saw works best. Choose blades designed for smooth, precise cuts on wood curves.
How To Ensure Smooth Edges After Cutting Curves?
Sand the edges using fine-grit sandpaper. Move in gentle, circular motions to avoid damaging the wood surface.
Can I Use Templates For Cutting Wood Curves?
Yes, templates help maintain consistent shapes. Attach the template securely and trace the curve onto the wood before cutting.
Conclusion
Aligning wood correctly makes cutting curves easier and cleaner. Take your time to mark the lines clearly. Use guides or clamps to keep the wood steady. Practice on scrap wood before cutting your final piece. This helps avoid mistakes and saves materials.
Remember, steady hands and patience improve your results. Keep tools sharp for smooth cuts. Follow these tips for better curve cuts every time. Your woodworking projects will look more professional and neat. Give yourself room to learn and improve gradually.