Are you ready to tackle your plumbing project with confidence? Learning how to solder copper pipe joints safely is a skill that can save you time, money, and frustration.
But if you’re unsure where to start or worried about making mistakes, this guide is made just for you. By following simple, clear steps, you’ll be able to create strong, leak-proof joints without risking injury or damage. Keep reading, and you’ll discover easy tips that protect your home and yourself while mastering this essential DIY skill.
Preparing Copper Pipes
Preparing copper pipes is important for safe and strong joints. You must follow steps carefully before soldering.
This guide explains how to prepare copper pipes for soldering. It covers choosing materials, cutting, cleaning, and fitting pipes.
Choosing The Right Materials
Select good quality copper pipes and fittings made for soldering. Use lead-free solder and suitable flux for plumbing.
Make sure to have a pipe cutter, wire brush, and cleaning cloth ready. These tools help prepare pipes properly.
- Copper pipes with proper wall thickness
- Lead-free solder
- Flux paste or liquid
- Pipe cutter
- Wire brush or sandpaper
- Clean cloth or rag
Cutting And Cleaning Pipes
Cut pipes straight using a pipe cutter. Avoid crushing or denting the pipe ends while cutting.
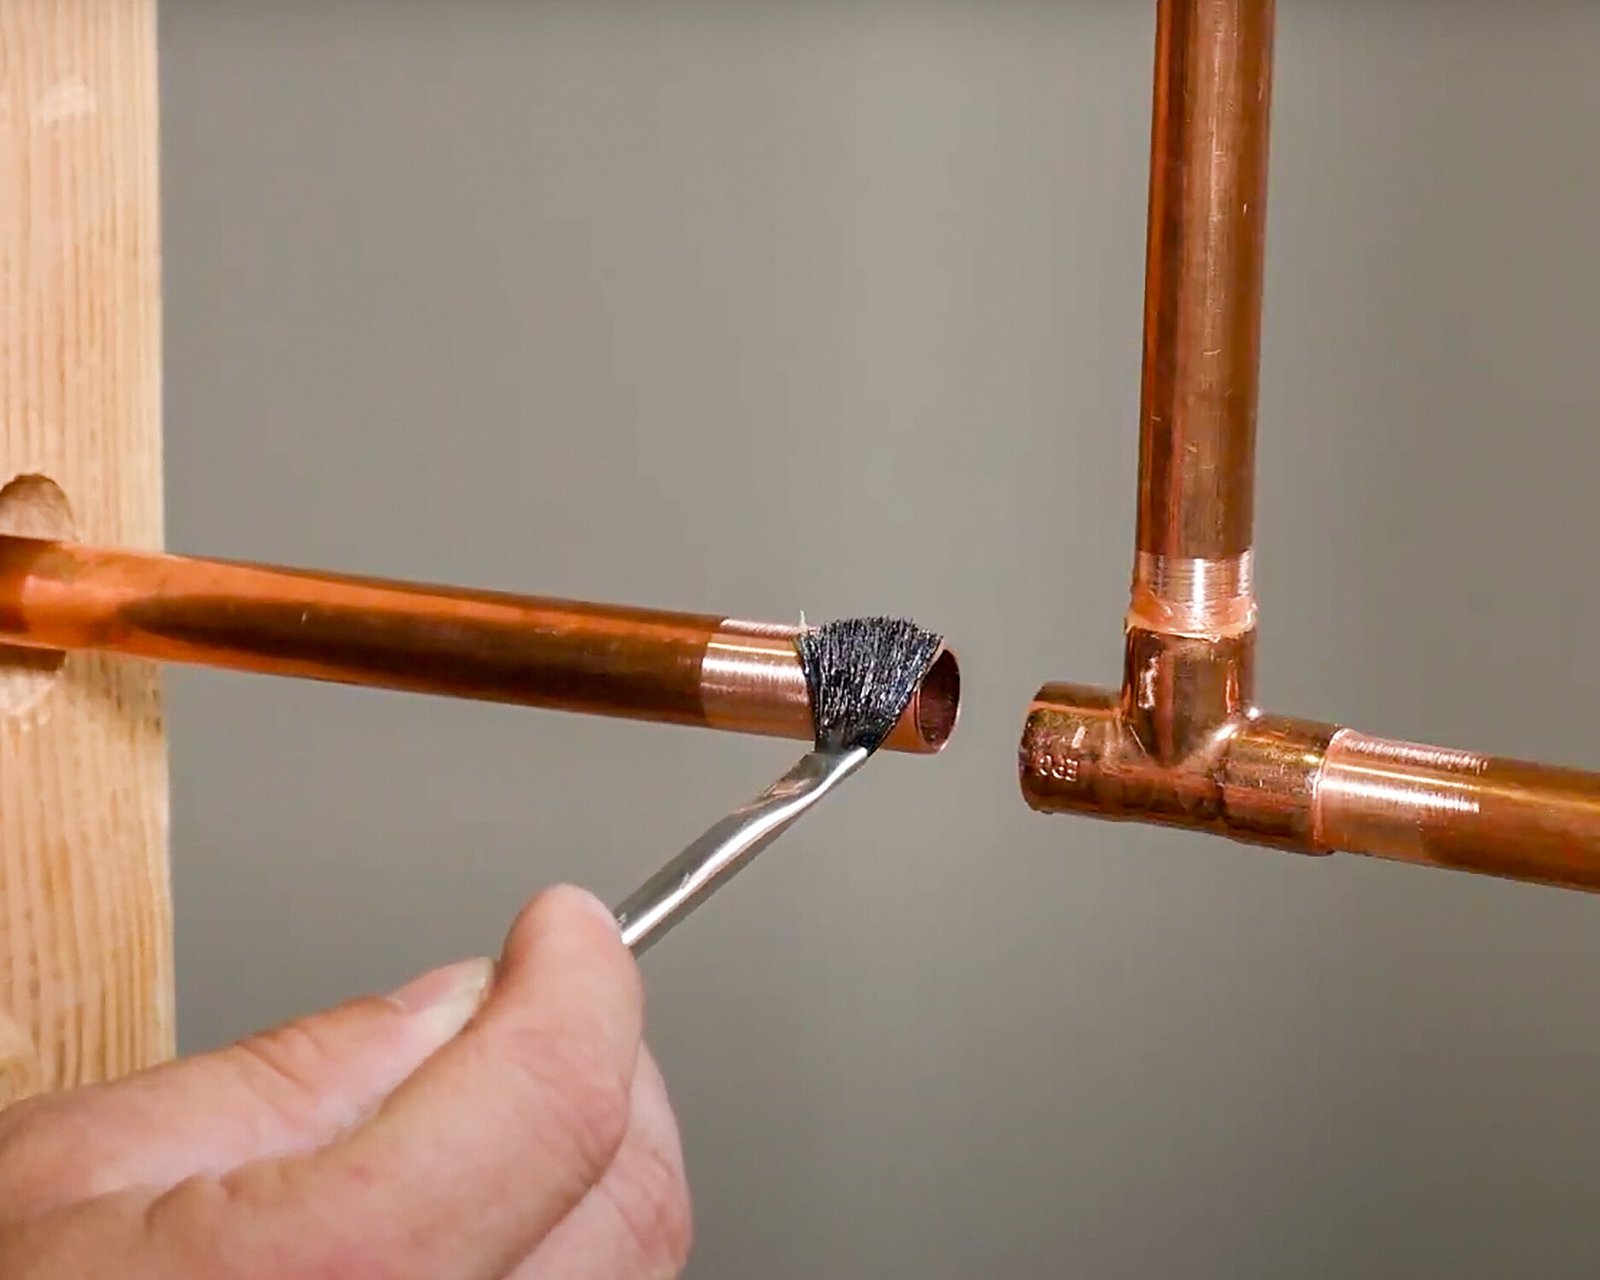
Remove burrs inside and outside the pipe ends. Use a wire brush or sandpaper to clean the pipe surface.
- Cut pipe square with a pipe cutter
- Remove burrs with a deburring tool or file
- Clean outside and inside pipe ends with a wire brush
- Wipe pipe ends dry with a clean cloth
Fitting Pipes Together
Fit pipes and fittings tightly without forcing them. Check pipe ends fit fully into the fittings.
Apply flux evenly on cleaned pipe ends and fitting insides. This helps solder flow and seal the joint.
- Insert pipe fully into fitting
- Twist pipe slightly to spread flux
- Remove excess flux from outside joint
- Ensure tight, clean fit before soldering
Credit: www.oatey.com
Essential Tools And Safety Gear
Soldering copper pipe joints requires the right tools and safety gear. Using proper equipment helps you work safely and efficiently.
This guide explains what tools you need and how to protect yourself during soldering.
Required Soldering Tools
Having the correct tools makes soldering copper pipes easier. Each tool has a specific job to do.
- Propane torch or MAPP gas torch for heating pipes
- Lead-free solder to join the copper pipes
- Flux paste to clean and prepare pipe surfaces
- Wire brush or sandpaper to remove pipe oxidation
- Pipe cutter for clean pipe cuts
- Fire-resistant cloth to protect nearby surfaces
- Heat-resistant gloves to handle hot materials
- Brush or applicator to spread flux evenly
Protective Equipment
Safety gear protects your body from heat, sparks, and fumes. It is important to wear it every time you solder.
- Safety goggles shield your eyes from sparks and debris
- Heat-resistant gloves protect your hands from burns
- Long-sleeve shirts and pants reduce skin exposure
- Respirator mask helps avoid inhaling harmful fumes
- Closed-toe shoes protect your feet from dropped tools
Setting Up A Safe Workspace
Create a clean, organized area before you start soldering. This lowers risks and helps you work faster.
- Work in a well-ventilated space to avoid smoke buildup
- Clear away flammable materials from the work area
- Have a fire extinguisher nearby for emergencies
- Use a heat-resistant mat to protect surfaces
- Keep tools and materials within easy reach
Step-by-step Soldering Process
Soldering copper pipe joints is a useful skill for plumbing. It creates a strong, leak-proof connection.
Follow these steps carefully to solder safely and correctly.
Applying Flux Correctly
Flux cleans the pipe and helps the solder flow. Apply it to both the pipe and fitting.
Use a brush or cloth to spread a thin, even layer over the surfaces.
- Do not use too much flux
- Cover all areas that will join
- Wipe off excess flux if needed
Heating The Joint
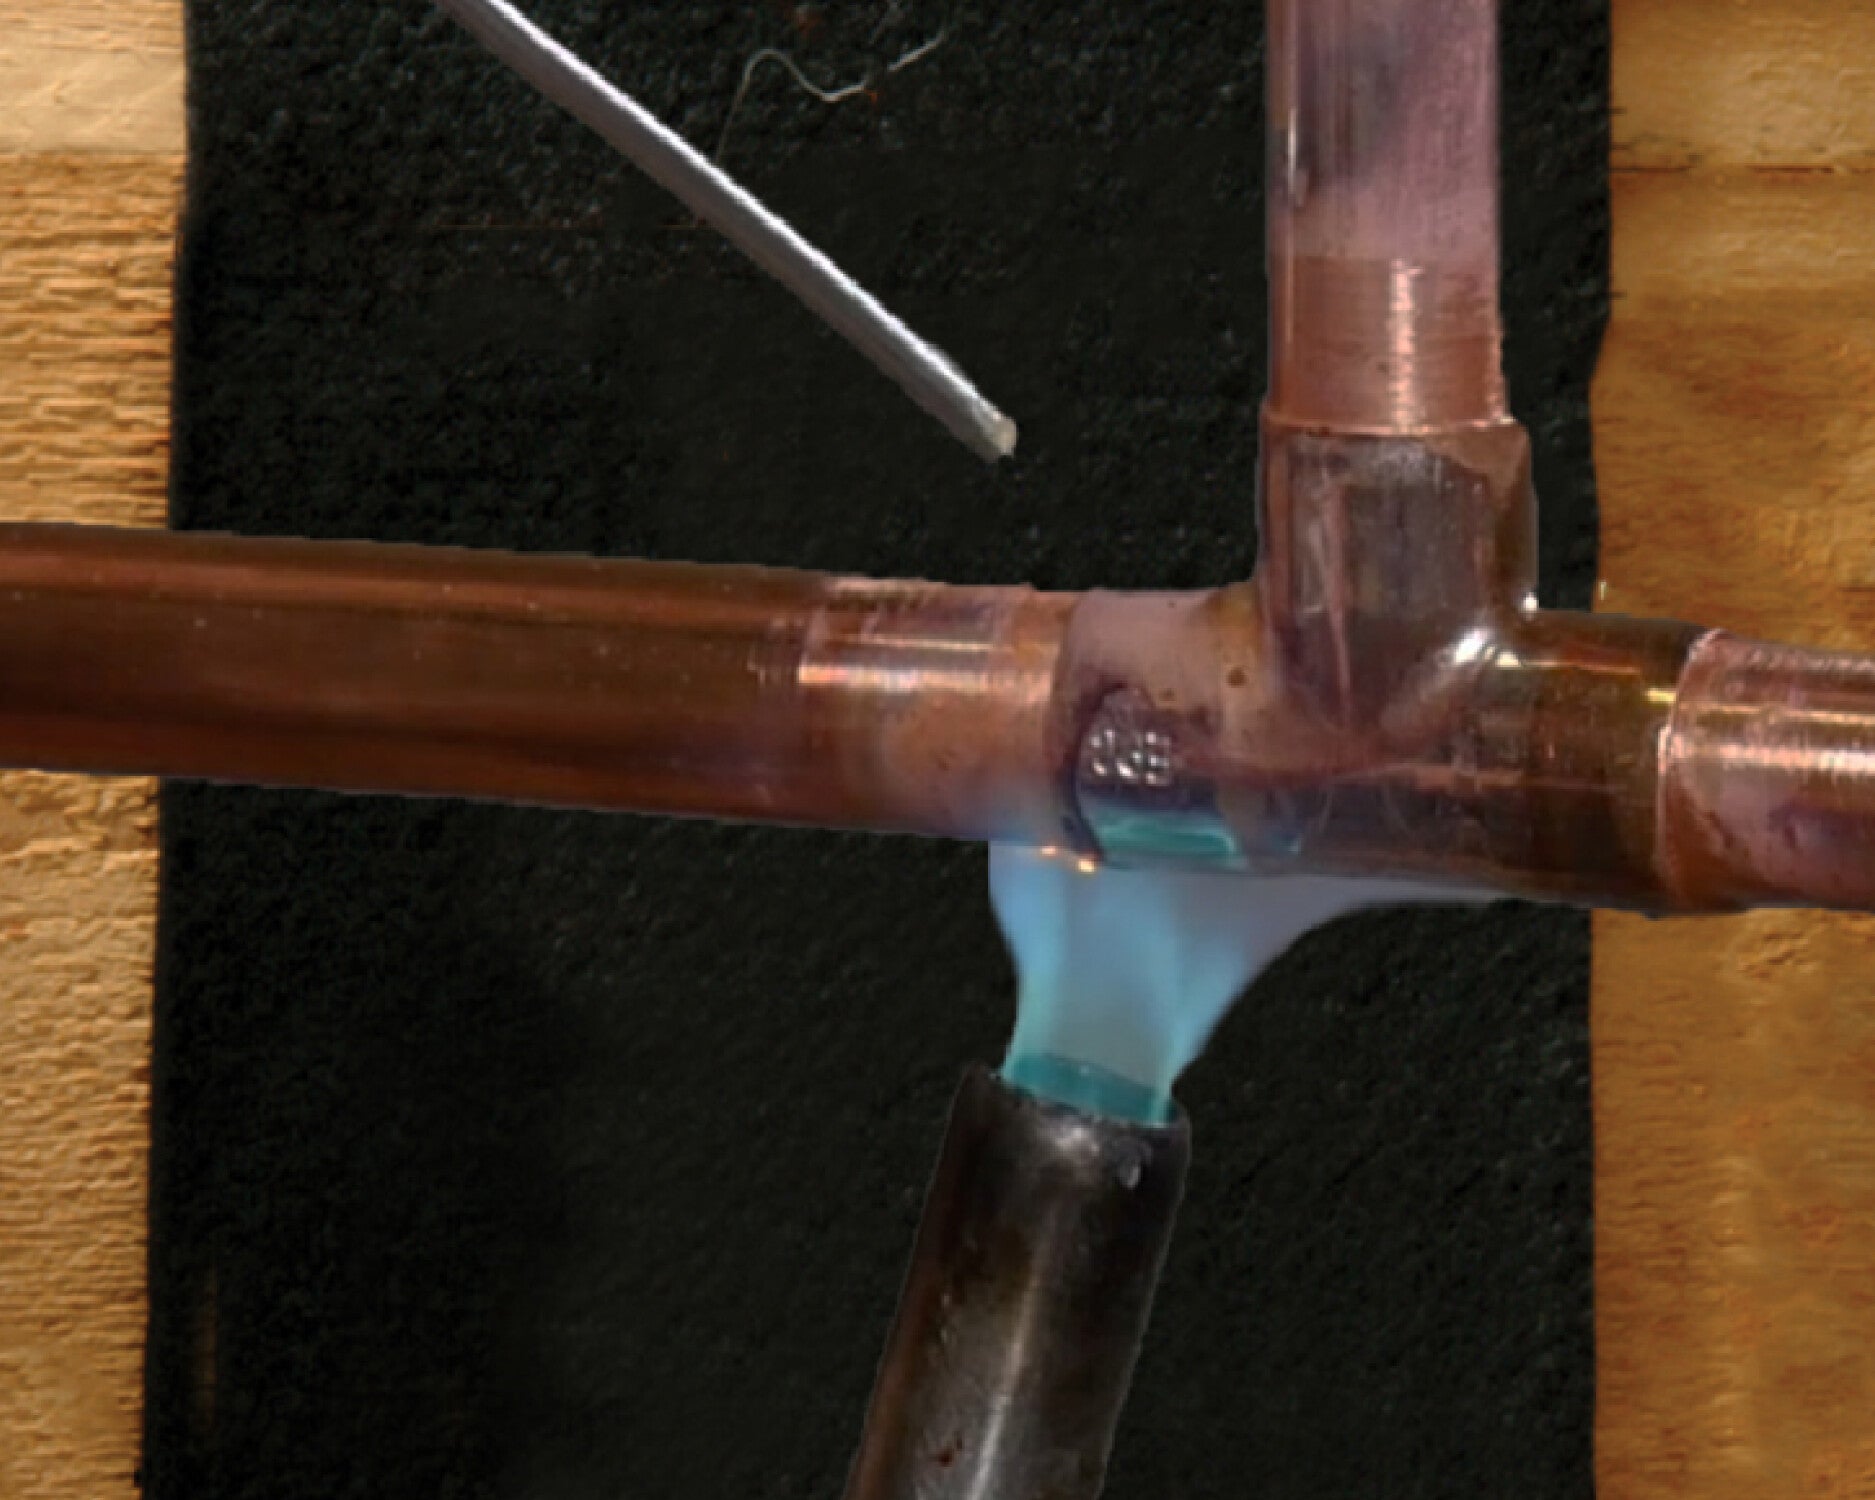
Heat the joint evenly with a propane torch. Move the flame around the pipe and fitting.
Heat until the flux sizzles and the metal glows slightly.
- Keep the flame away from the solder directly
- Do not overheat to avoid damaging the pipe
- Wear safety glasses and gloves
Applying Solder
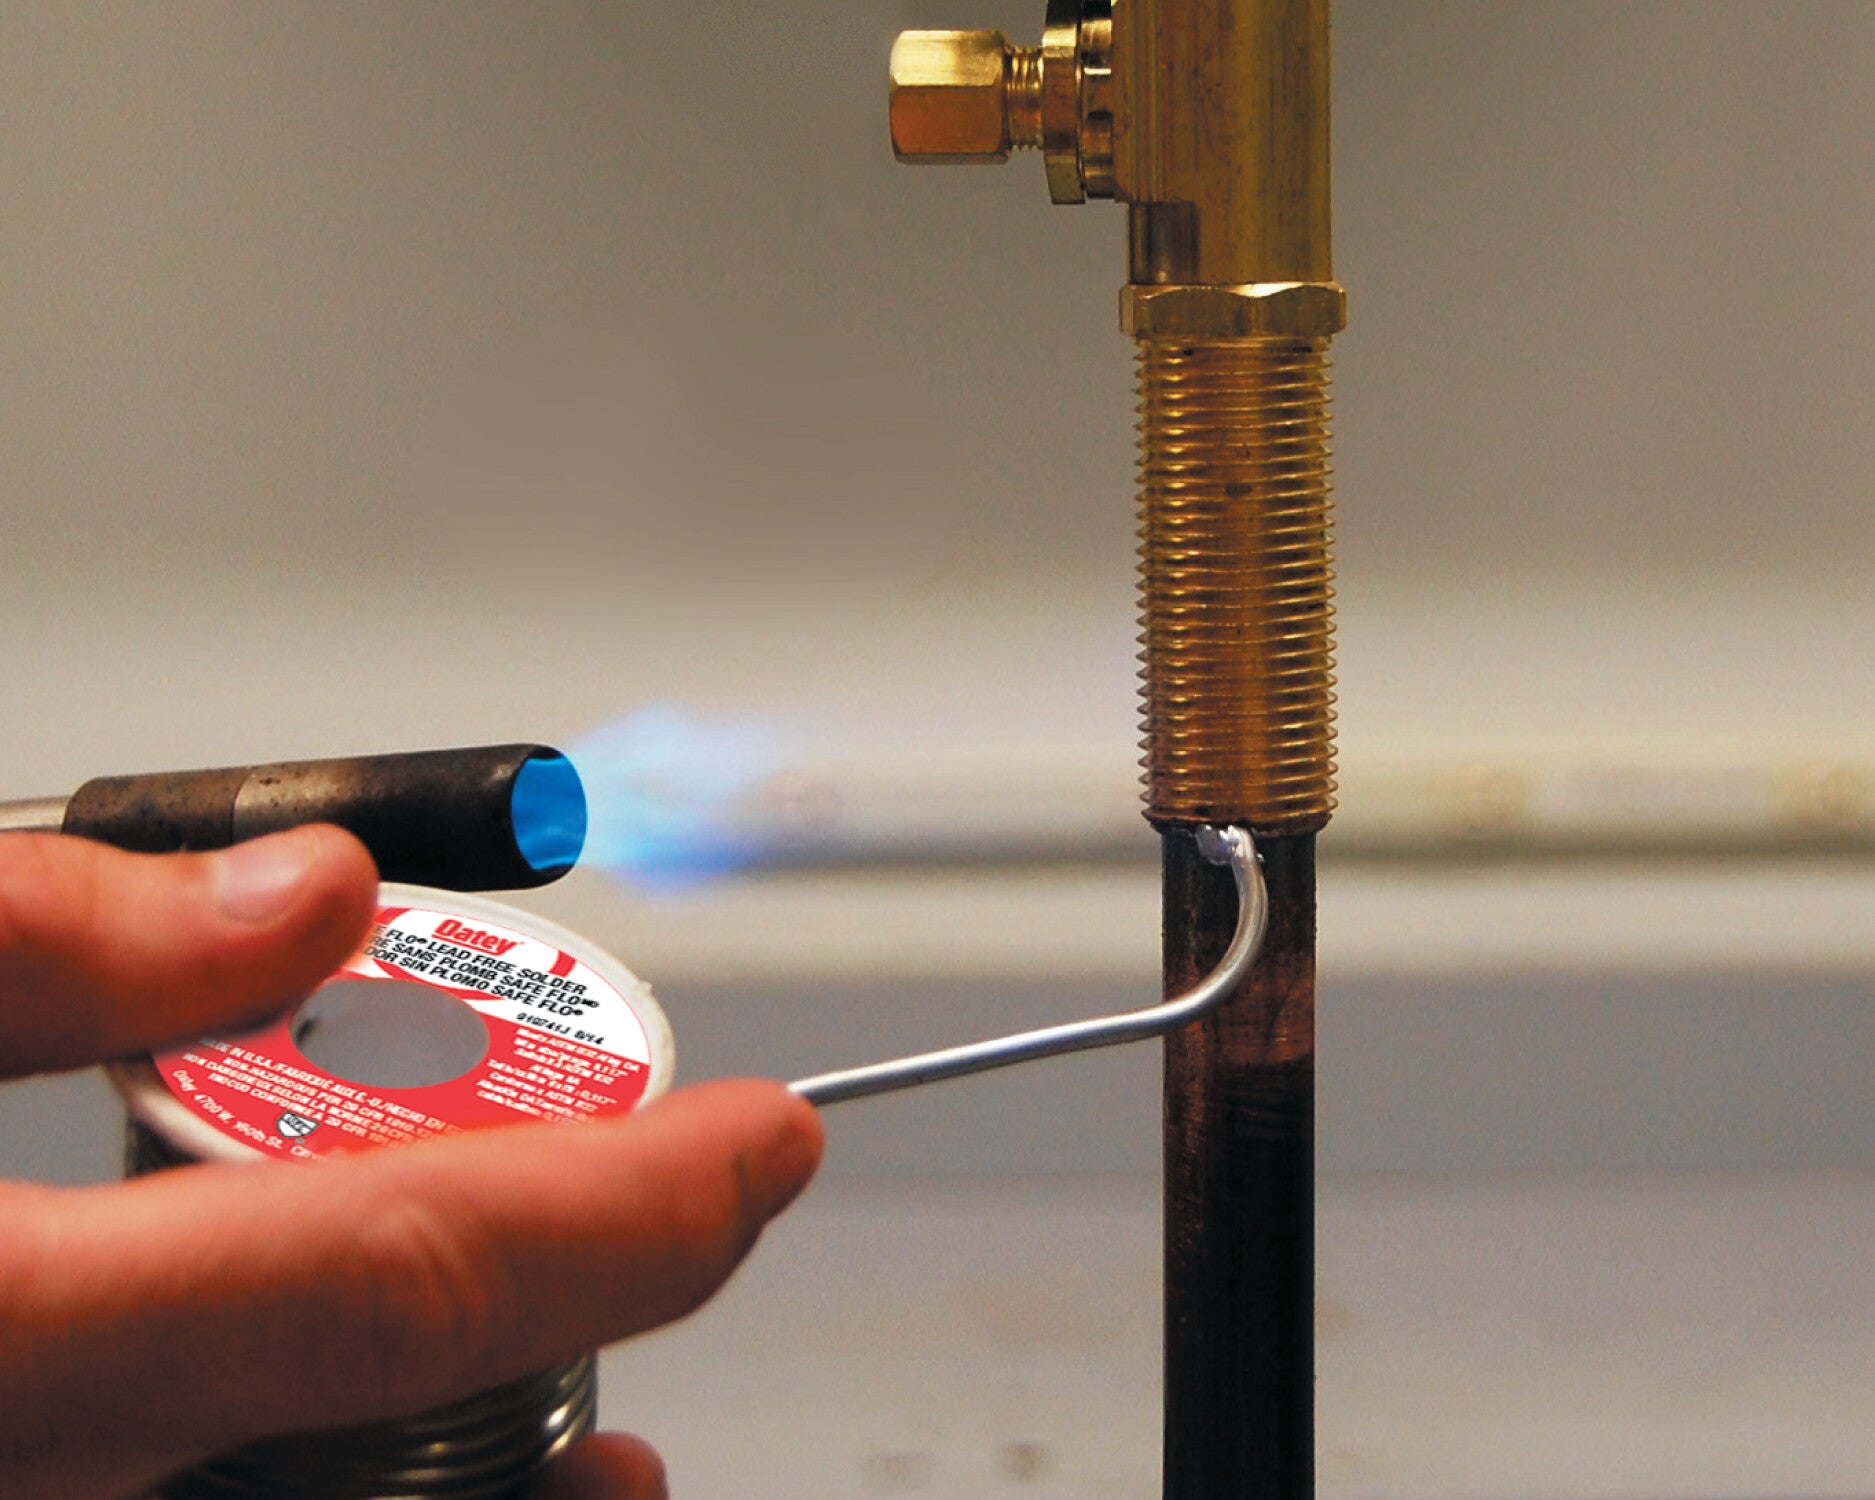
Touch the solder wire to the heated joint. The heat melts the solder into the gap.
Move the solder around the joint to cover evenly. Do not melt solder with the flame.
- Use lead-free solder for drinking water pipes
- Feed solder until a ring forms around the joint
- Remove solder and flame carefully
Cooling And Inspecting
Let the joint cool naturally. Do not touch or move it while cooling.
After cooling, check for shiny, smooth solder and no gaps or cracks.
- Wipe off any leftover flux with a damp cloth
- Test for leaks by running water
- Reheat and add solder if leaks appear

Credit: www.familyhandyman.com
Common Mistakes To Avoid
Soldering copper pipe joints is a useful skill. Doing it safely helps prevent leaks and damage.
Some mistakes can cause weak joints or danger. Avoid these common errors for better results.
Overheating Pipes
Heating copper pipes too much can damage them. It can also burn off the solder’s flux.
Too much heat weakens the pipe and causes leaks later. Keep heat steady and controlled.
- Use a propane torch with gentle flame
- Move the flame around, don’t hold it in one spot
- Heat the pipe, not the solder directly
- Stop heating once solder melts and flows
Using Too Much Solder
Applying too much solder can cause blockages inside the pipe. It may also create weak joints.
Use only a small amount to fill the joint gap. Excess solder can drip and cause problems.
- Apply solder sparingly around the joint
- Let heat draw solder into the connection
- Wipe off extra solder before it hardens
Skipping Cleaning Steps
Not cleaning pipes before soldering causes poor bonding. Dirt and oxidation stop solder from sticking.
Always clean pipe ends and fittings. Use a wire brush or sandpaper to remove grime and rust.
- Clean pipe surfaces until shiny
- Use flux to protect cleaned areas
- Do not skip cleaning even if pipes look clean
Troubleshooting Leaks
Leaks in copper pipe joints can cause water damage and waste. Fixing leaks quickly keeps your plumbing safe.
Knowing how to find and repair leaks helps keep pipes working well. Use these tips to troubleshoot leaks.
Identifying Leak Sources
Look closely at pipe joints and connections for water drops or wet spots. Check where pipes meet fittings and valves.
- Dry the pipe area with a cloth.
- Turn on water and watch for drips.
- Use a flashlight to see small leaks.
- Check for corrosion or green stains on copper pipes.
Fixing Poor Joints
Leaks often come from joints that were not soldered well. Fix poor joints by resoldering to create a strong seal.
| Common Cause | Fix |
|---|---|
| Cold Solder Joint | Reheat and apply fresh solder |
| Dirty Pipe or Fitting | Clean with emery cloth before soldering |
| Excessive Flux | Remove old flux and apply thin layer |
| Insufficient Heat | Use proper torch flame size and heat evenly |
When To Replace Pipes
Sometimes leaks mean the pipe is old or damaged. Replace pipes that show these problems to avoid future leaks.
- Visible cracks or splits in the pipe
- Severe corrosion or pitting on copper
- Repeated leaks at different spots on one pipe section
- Pipe feels soft or brittle when pressed
Maintenance Tips For Longevity
Soldered copper pipe joints last longer with proper care. Regular maintenance keeps pipes strong and leak-free.
Simple checks and cleaning prevent damage. Follow easy tips to extend the life of your copper pipes.
Regular Inspections
Check your copper pipes often for leaks or cracks. Early detection stops bigger problems later.
Look for discoloration or moisture around the joints. These signs show where soldering might fail.
- Inspect pipes every 3 to 6 months
- Look for wet spots or corrosion
- Listen for dripping sounds
- Check water pressure for drops
Preventing Corrosion
Corrosion damages copper pipes and joints. Keep pipes dry and clean to reduce rust and corrosion.
Use protective coatings on exposed pipes. Avoid contact with metals that cause corrosion.
- Apply pipe wrap or paint for protection
- Keep pipes away from steel or iron
- Fix leaks quickly to prevent moisture
- Ensure good ventilation in pipe areas
Handling Repairs Safely
Turn off water before repairing soldered joints. Work in a well-ventilated area to avoid fumes.
Use proper tools and safety gear like gloves and goggles. Follow safe soldering steps to avoid burns.
- Shut off water supply before repair
- Wear heat-resistant gloves and goggles
- Use a fire-resistant cloth around joints
- Keep a fire extinguisher nearby
Credit: www.oatey.com
Frequently Asked Questions
What Safety Gear Is Essential For Soldering Copper Pipes?
Wearing gloves, safety glasses, and a flame-resistant apron is crucial. These protect against burns, sparks, and hot metal exposure during soldering.
How To Prepare Copper Pipes Before Soldering?
Clean the pipe ends with sandpaper or a wire brush. Apply flux to ensure a strong, leak-proof joint before heating.
What Type Of Solder Is Best For Copper Pipes?
Use lead-free, silver-bearing solder for potable water systems. It ensures safe, durable joints and complies with plumbing codes.
How To Avoid Fire Hazards When Soldering Pipes?
Keep a fire extinguisher nearby and clear flammable materials. Work in a well-ventilated area and use a heat shield if needed.
Conclusion
Soldering copper pipes can be safe with the right steps. Always wear protective gear to avoid burns. Clean your pipes thoroughly before beginning. Use the right amount of solder for a strong joint. Practice helps improve your skills over time.
With patience, you can achieve reliable results. Remember to work in a well-ventilated area. This protects you from harmful fumes. Follow these tips to ensure successful and safe soldering. Your plumbing projects will run smoothly with care and attention. Happy soldering!