Are you ready to take your woodworking or DIY projects to the next level? Mastering sanding techniques can make all the difference in achieving smooth, professional-looking results.
Whether you’re working on furniture, walls, or crafts, knowing the right way to sand will save you time and frustration. In this guide, you’ll discover simple, effective sanding tips designed just for beginners like you. By the end, you’ll feel confident handling any sanding task and see your projects transform before your eyes.
Keep reading to unlock the secrets that will make your work shine!
Types Of Sandpaper
Sandpaper is a key tool for smoothing surfaces. It helps prepare wood, metal, and other materials.
Choosing the right sandpaper type makes your work easier and better. Let’s explore the basics.
Grit Sizes Explained
Grit size shows how coarse or fine the sandpaper is. Lower numbers mean rougher grit. Higher numbers mean finer grit.
- Coarse grits (40-60) remove material fast and are rough.
- Medium grits (80-120) smooth surfaces after coarse sanding.
- Fine grits (150-220) prepare surfaces for finishing.
- Very fine grits (240 and above) polish surfaces for a smooth look.
Materials Used
Sandpaper is made with different abrasive materials. Each type works best for certain jobs and surfaces.
| Abrasive Material | Best For | Durability |
| Aluminum Oxide | Wood, metal | Long lasting |
| Garnet | Soft wood | Moderate |
| Silicon Carbide | Metal, plastic, glass | Very hard |
| Ceramic | Heavy sanding | Very durable |
Choosing The Right Sandpaper
Pick sandpaper based on your project and material. The wrong choice can damage the surface or waste time.
- Use coarse grit for removing paint or rough shaping.
- Choose medium grit for smoothing wood or metal.
- Use fine grit for final sanding before painting or staining.
- Consider the abrasive material for the surface type.
- Test on a small area if unsure about the sandpaper.
Essential Sanding Tools
Sanding is a key step in many DIY and woodworking projects. Using the right tools makes the work easier and the finish smoother. Beginners need to understand the basic sanding tools to get started.
This guide covers hand sanding tools, power sanders, and safety gear. Each section helps you pick the right tools and stay safe while working.
Hand Sanding Tools
Hand sanding tools are simple and give you great control. They are perfect for small jobs and delicate surfaces. Common hand sanding tools include sanding blocks and sanding sponges.
- Sanding Blocks:Hold sandpaper firmly for even pressure.
- Sanding Sponges:Flexible and good for curved surfaces.
- Sandpaper Sheets:Available in different grits for rough or fine sanding.
- Detail Sanders:Small handheld tools for tight spaces.
Power Sanders
Power sanders save time and effort on larger projects. They come in different types for various sanding needs. Choosing the right sander depends on the work you plan to do.
| Type | Description | Best For |
| Orbital Sander | Moves in small circles to avoid swirl marks. | General sanding and finishing. |
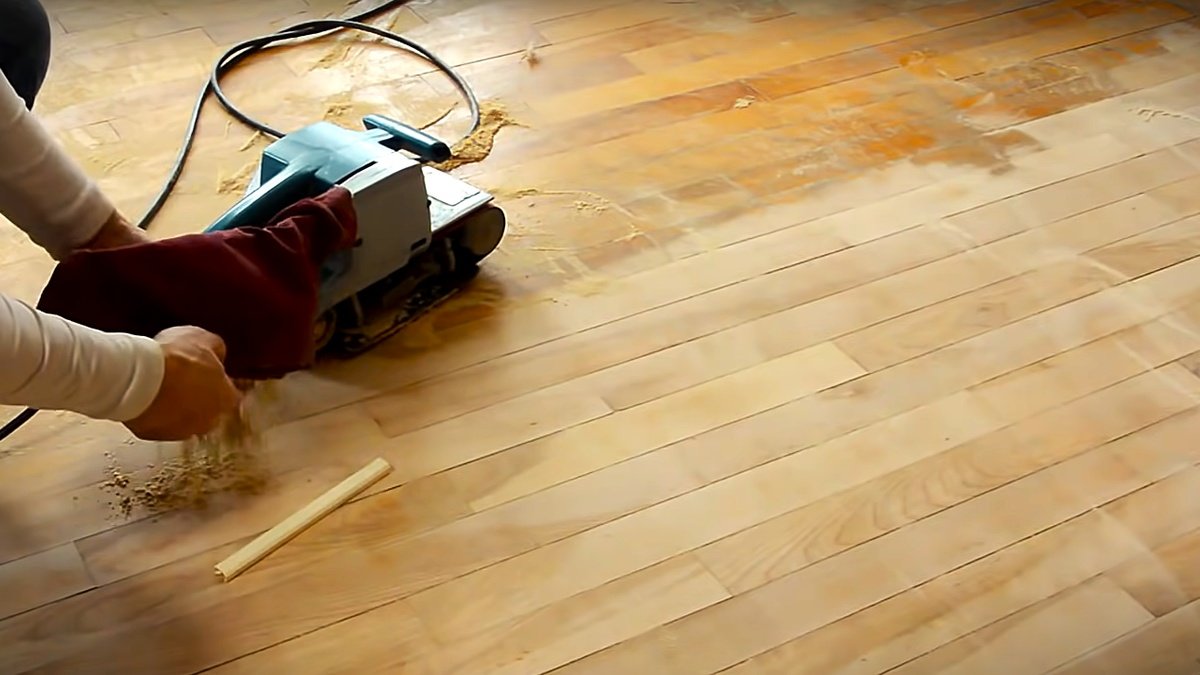
| Belt Sander | Uses a continuous loop of sandpaper for heavy sanding. | Removing rough wood or paint. |
| Detail Sander | Small triangular head for corners and edges. | Tight spaces and detailed work. |
| Random Orbital Sander | Combines spinning and random motion to reduce marks. | Fine finishing and smooth surfaces. |
Safety Gear
Safety gear protects you from dust and injury while sanding. Always wear the right equipment to stay safe. Sanding can create fine dust and flying particles.
- Dust Mask or Respirator: Protects lungs from dust.
- Safety Glasses: Shields eyes from particles.
- Hearing Protection: Reduces noise from power sanders.
- Gloves: Protects hands from abrasions.
Preparing Surfaces For Sanding
Preparing the surface is important for good sanding results. It helps the sandpaper work better and protects the material.
Start by making sure the surface is clean and smooth. This makes sanding easier and more effective.
Cleaning And Inspection
Remove dirt, dust, and grease from the surface. Use a damp cloth or mild cleaner to wipe it down.
Look closely for scratches, dents, or other damage. Mark any problem spots so you can fix them before sanding.
- Wipe surface with a clean cloth
- Use mild soap if needed
- Check for cracks, holes, or bumps
- Note any rough areas or stains
Repairing Imperfections
Fill holes and cracks with wood filler or putty. Let it dry fully before sanding.
Smooth out bumps or rough spots with a putty knife or scraper. This creates an even surface.
- Apply filler to damaged areas
- Allow drying time as per instructions
- Scrape off extra filler for smoothness
- Lightly sand repaired spots before main sanding
Credit: extremehowto.com
Basic Sanding Techniques
Sanding is an important step in finishing wood or other surfaces. It helps to smooth rough areas and prepare the surface for painting or staining.
Using the right sanding methods makes the job easier and gives better results. Below are some basic techniques to help beginners start sanding correctly.
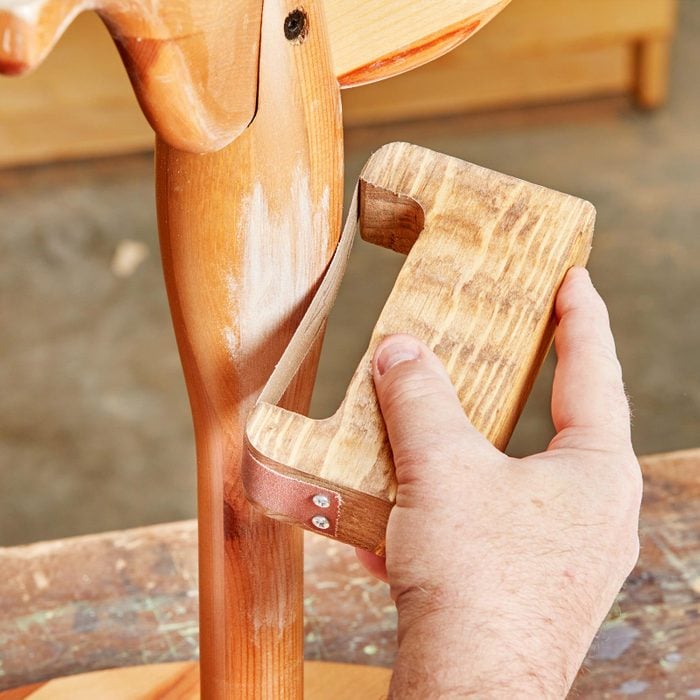
Sanding With The Grain
Sanding with the grain means moving the sandpaper in the same direction as the wood fibers. This helps avoid scratches that go across the wood.
Going against the grain can leave marks that are hard to remove later. Always watch the wood pattern and follow it while sanding.
Circular Vs. Linear Motion
There are two common sanding motions: circular and linear. Each has its uses depending on the surface and tool.
- Circular motion:Moves the sandpaper in small circles. It covers more area quickly but can leave swirl marks on wood.
- Linear motion:Moves sandpaper back and forth in straight lines. It follows the grain better and reduces visible scratches.
For beginners, using a linear motion with the grain usually gives cleaner results.
Pressure Control
Using the right pressure when sanding is important. Pressing too hard can damage the surface or remove too much material.
| Pressure Level | Effect |
| Light | Removes fine roughness and dust |
| Medium | Smooths the surface evenly |
| Heavy | May cause scratches or uneven spots |
Start with light pressure and increase only if needed. Keep the sandpaper moving to avoid damage.
Advanced Sanding Methods
Advanced sanding methods help improve the finish of your project. Using the right technique can prevent scratches and uneven surfaces.
These methods require patience and care. They are useful for both wood and painted surfaces.
Wet Sanding
Wet sanding uses water or a liquid to reduce dust and cool the surface. It helps create a smooth, polished finish.
- Use fine-grit sandpaper designed for wet sanding.
- Keep the sandpaper and surface wet during sanding.
- Sand lightly to avoid removing too much material.
- Wipe the surface clean before drying.
Sanding Between Coats
Sanding between coats improves adhesion and smoothness. This method works well with paint, varnish, or lacquer.
| Coat Type | Sandpaper Grit | Technique |
| Paint | 320-400 | Sand lightly to remove dust nibs |
| Varnish | 400-600 | Use very gentle pressure |
| Lacquer | 600-800 | Wet sanding preferred for a smooth finish |
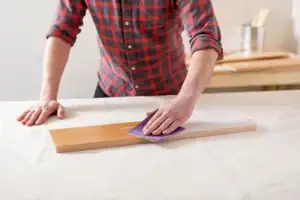
Using Sanding Blocks
Sanding blocks help keep even pressure and flat surfaces. They make sanding easier and more precise.
Tips for using sanding blocks:
- Choose a block that fits your hand comfortably.
- Wrap sandpaper tightly around the block.
- Sand in the direction of the grain.
- Replace sandpaper when worn out.
Common Sanding Mistakes
Sanding is a key step in many projects. It makes surfaces smooth and ready for finishing. Beginners often make mistakes that can hurt the final result.
Knowing common sanding errors helps you avoid them. This guide covers three main mistakes beginners make and how to fix them.
Over-sanding
Removing too much material can damage your project. Over-sanding can leave uneven spots or thin areas. It also wastes time and materials.
- Use light pressure when sanding.
- Check the surface often to avoid sanding too deep.
- Sand with the grain of the wood or material.
- Stop sanding once the surface feels smooth.
Uneven Surfaces
Uneven sanding creates rough patches and dips. This mistake makes painting or staining look bad. It also weakens the surface in some spots.
| Cause | Effect |
|---|---|
| Using the wrong sandpaper grit | Leaves scratches and uneven texture |
| Applying uneven pressure | Creates high and low spots |
| Skipping steps in grit progression | Prevents smooth finish |
Ignoring Safety Precautions
Sanding creates dust and small particles. Ignoring safety can harm your eyes, lungs, and skin. It also increases the risk of accidents.
- Wear a dust mask or respirator to protect your lungs.
- Use safety goggles to shield your eyes.
- Work in a well-ventilated area to reduce dust buildup.
- Keep your workspace clean to avoid slipping hazards.
Tips For Faster Results
Sanding wood can take time, but using smart methods speeds up the work. This guide shares tips to help beginners sand faster.
Knowing how to work efficiently, keep tools ready, and pick the right sandpaper makes a big difference in sanding speed.
Efficient Workflow
Plan your sanding job by breaking it into sections. Work from rough to fine areas in order. This saves time and avoids redoing parts.
- Clear the workspace before starting
- Sand large flat areas first
- Move to detailed or curved parts last
- Use steady, even strokes
- Check your progress often to avoid over-sanding
Tool Maintenance
Keep sanding tools clean and sharp for faster results. Dirty or dull tools slow your work and cause uneven surfaces.
| Tool | Maintenance Tip |
| Sandpaper | Replace when clogged or worn |
| Sanding block | Clean regularly to remove dust |
| Electric sander | Check pads and motor before use |
| Vacuum or dust collector | Empty often to keep suction strong |
Choosing The Right Grit Progression
Start with coarse grit to remove rough areas fast. Then use medium and fine grits to smooth the surface. This order saves time and effort.
- Use 60-80 grit for rough sanding
- Follow with 100-150 grit for smoothing
- Finish with 180-220 grit for a fine surface
- Change grit in order without skipping
- Use clean sandpaper to avoid clogging

Credit: mrsander.co.uk
Credit: www.familyhandyman.com
Frequently Asked Questions
What Is The Best Sandpaper Grit For Beginners?
For beginners, start with 80 to 120 grit sandpaper. It effectively removes surface material without being too aggressive. As you gain experience, you can experiment with finer grits like 220 for smoother finishes. Always choose the right grit for the material you’re working on to ensure optimal results.
How Do I Avoid Sanding Mistakes?
To avoid mistakes, always sand with the grain of the wood. Use even pressure and avoid staying in one spot too long. Regularly check your work to ensure you’re achieving the desired smoothness. Practice on scrap pieces before moving to your main project to build confidence.
Why Is Sanding Important Before Painting?
Sanding creates a smooth surface for paint to adhere to, ensuring a professional finish. It also removes imperfections, old paint, and debris. This process improves paint durability and appearance. Proper sanding can significantly enhance the quality and longevity of your painted projects.
Can I Sand Without A Machine?
Yes, you can sand by hand using sandpaper and a sanding block. Hand sanding gives you more control, especially in tight or intricate areas. It’s ideal for small projects or finishing touches. Ensure you use the right grit and technique to achieve the best results.
Conclusion
Sanding is a key skill for any beginner woodworker. Start with coarse grit and move to finer grit. Always sand along the grain for smooth results. Keep your movements steady and even. Clean the surface between sanding steps. Practice often to build confidence and improve technique.
With patience, sanding becomes easier and more satisfying. Remember, good sanding prepares your project for a great finish. Simple steps lead to better work. Enjoy the process and watch your skills grow.