Are you ready to tackle your copper soldering project but worried about safety? Soldering copper joints can seem tricky, especially if you don’t know the right steps to protect yourself and your work.
What if you could learn simple, clear methods that keep you safe while making strong, reliable connections? In this guide, you’ll discover how to solder copper joints safely, avoid common mistakes, and achieve professional results every time. Keep reading, and you’ll gain the confidence to handle your tools like a pro without risking injury or damage.

Credit: www.familyhandyman.com
Essential Tools And Materials
Soldering copper joints requires the right tools and materials. Using proper equipment helps make strong, lasting connections.
This guide covers how to pick a soldering iron, choose solder and flux, and wear the right safety gear.
Choosing The Right Soldering Iron
Pick a soldering iron with adjustable temperature control. This helps avoid overheating copper joints.
- Choose a 30-60 watt iron for copper work
- Look for a fine tip for precision
- Consider an iron with a fast heat-up time
- Use a stand to hold the iron safely when not in use
Selecting Suitable Solder And Flux
Use solder made for copper pipes or electronics. Flux helps clean metal surfaces for better bonding.
| Type | Use | Notes |
| Rosin-core solder | Electronics | Good for small joints |
| Lead-free solder | Plumbing | Safe and durable |
| Water-soluble flux | General copper joints | Easier to clean |
| No-clean flux | Electronics | No residue left |
Safety Gear And Protective Equipment
Wear safety gear to protect yourself from burns and harmful fumes.
- Heat-resistant gloves to protect your hands
- Safety glasses to shield your eyes
- Work in a well-ventilated area to avoid fumes
- Wear a long-sleeve shirt to protect your arms
Preparing Copper Joints
Preparing copper joints is an important part of soldering pipes safely. Proper preparation helps create strong and leak-free connections.
This guide covers cleaning and degreasing surfaces, cutting and fitting pipes, and applying flux correctly.
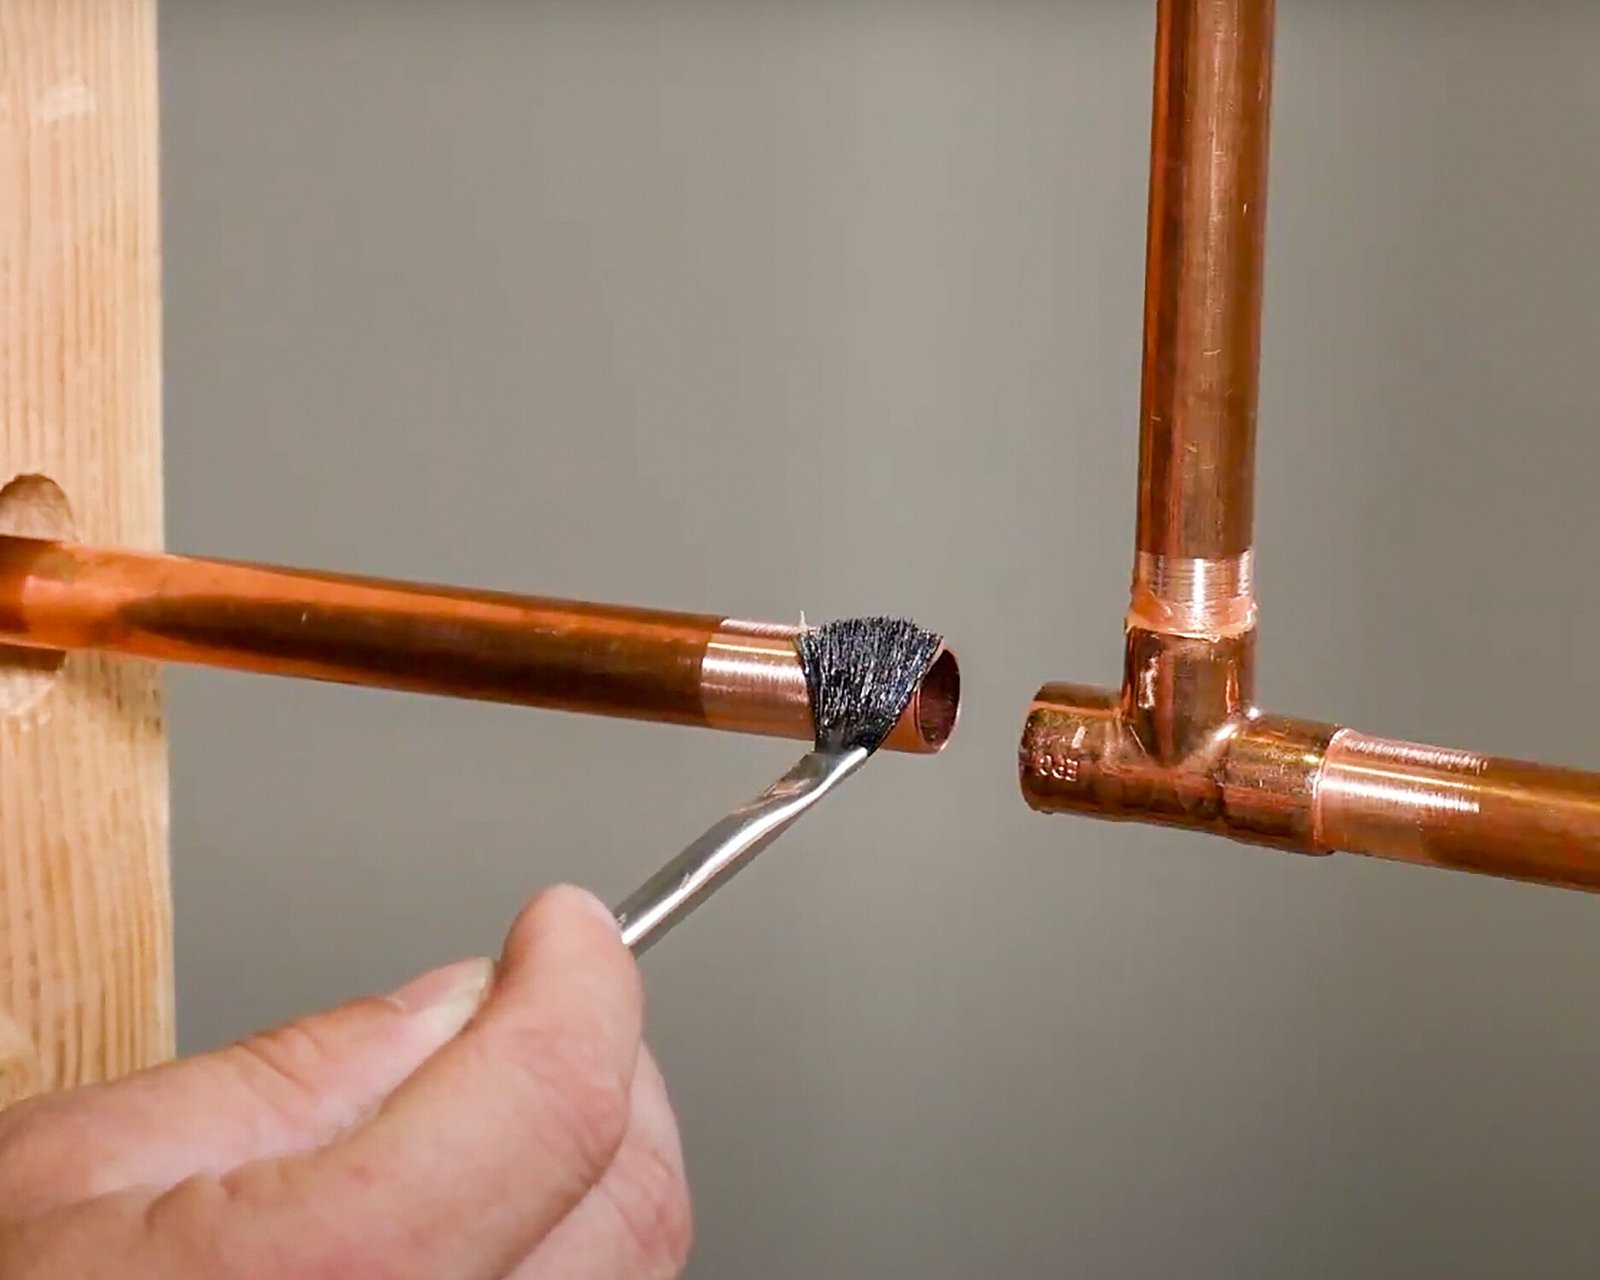
Cleaning And Degreasing Surfaces
Clean surfaces help solder stick better and prevent weak joints. Use a wire brush or sandpaper to remove dirt and oxidation. After cleaning, wipe the pipes with a degreaser or rubbing alcohol to remove grease and oil.
Cutting And Fitting Pipes
Cut pipes squarely using a pipe cutter for the best fit. Avoid angled cuts because they can cause poor joints. After cutting, remove burrs inside and outside the pipe with a deburring tool. Fit pipes and fittings together to check alignment before soldering.
- Mark the pipe where you want to cut.
- Use a pipe cutter to cut cleanly and evenly.
- Remove burrs from the cut edges carefully.
- Dry fit the pipes and fittings to check fit.
Applying Flux Correctly
Flux helps solder flow and prevents oxidation during heating. Use a brush to apply a thin, even layer to both the pipe and fitting surfaces. Avoid over-applying flux because it can cause weak joints and excess residue.
| Flux Application Tips |
|---|
| Use just enough flux to cover the joint surfaces. |
| Do not let flux drip or pool inside the pipe. |
| Apply flux just before soldering to keep it active. |
| Clean off excess flux after soldering to prevent corrosion. |
Soldering Techniques
Soldering copper joints needs care and skill. Using the right techniques makes strong, lasting bonds.
Safety is important during soldering. Proper heating and solder application help avoid weak joints and accidents.
Heating The Joint Properly
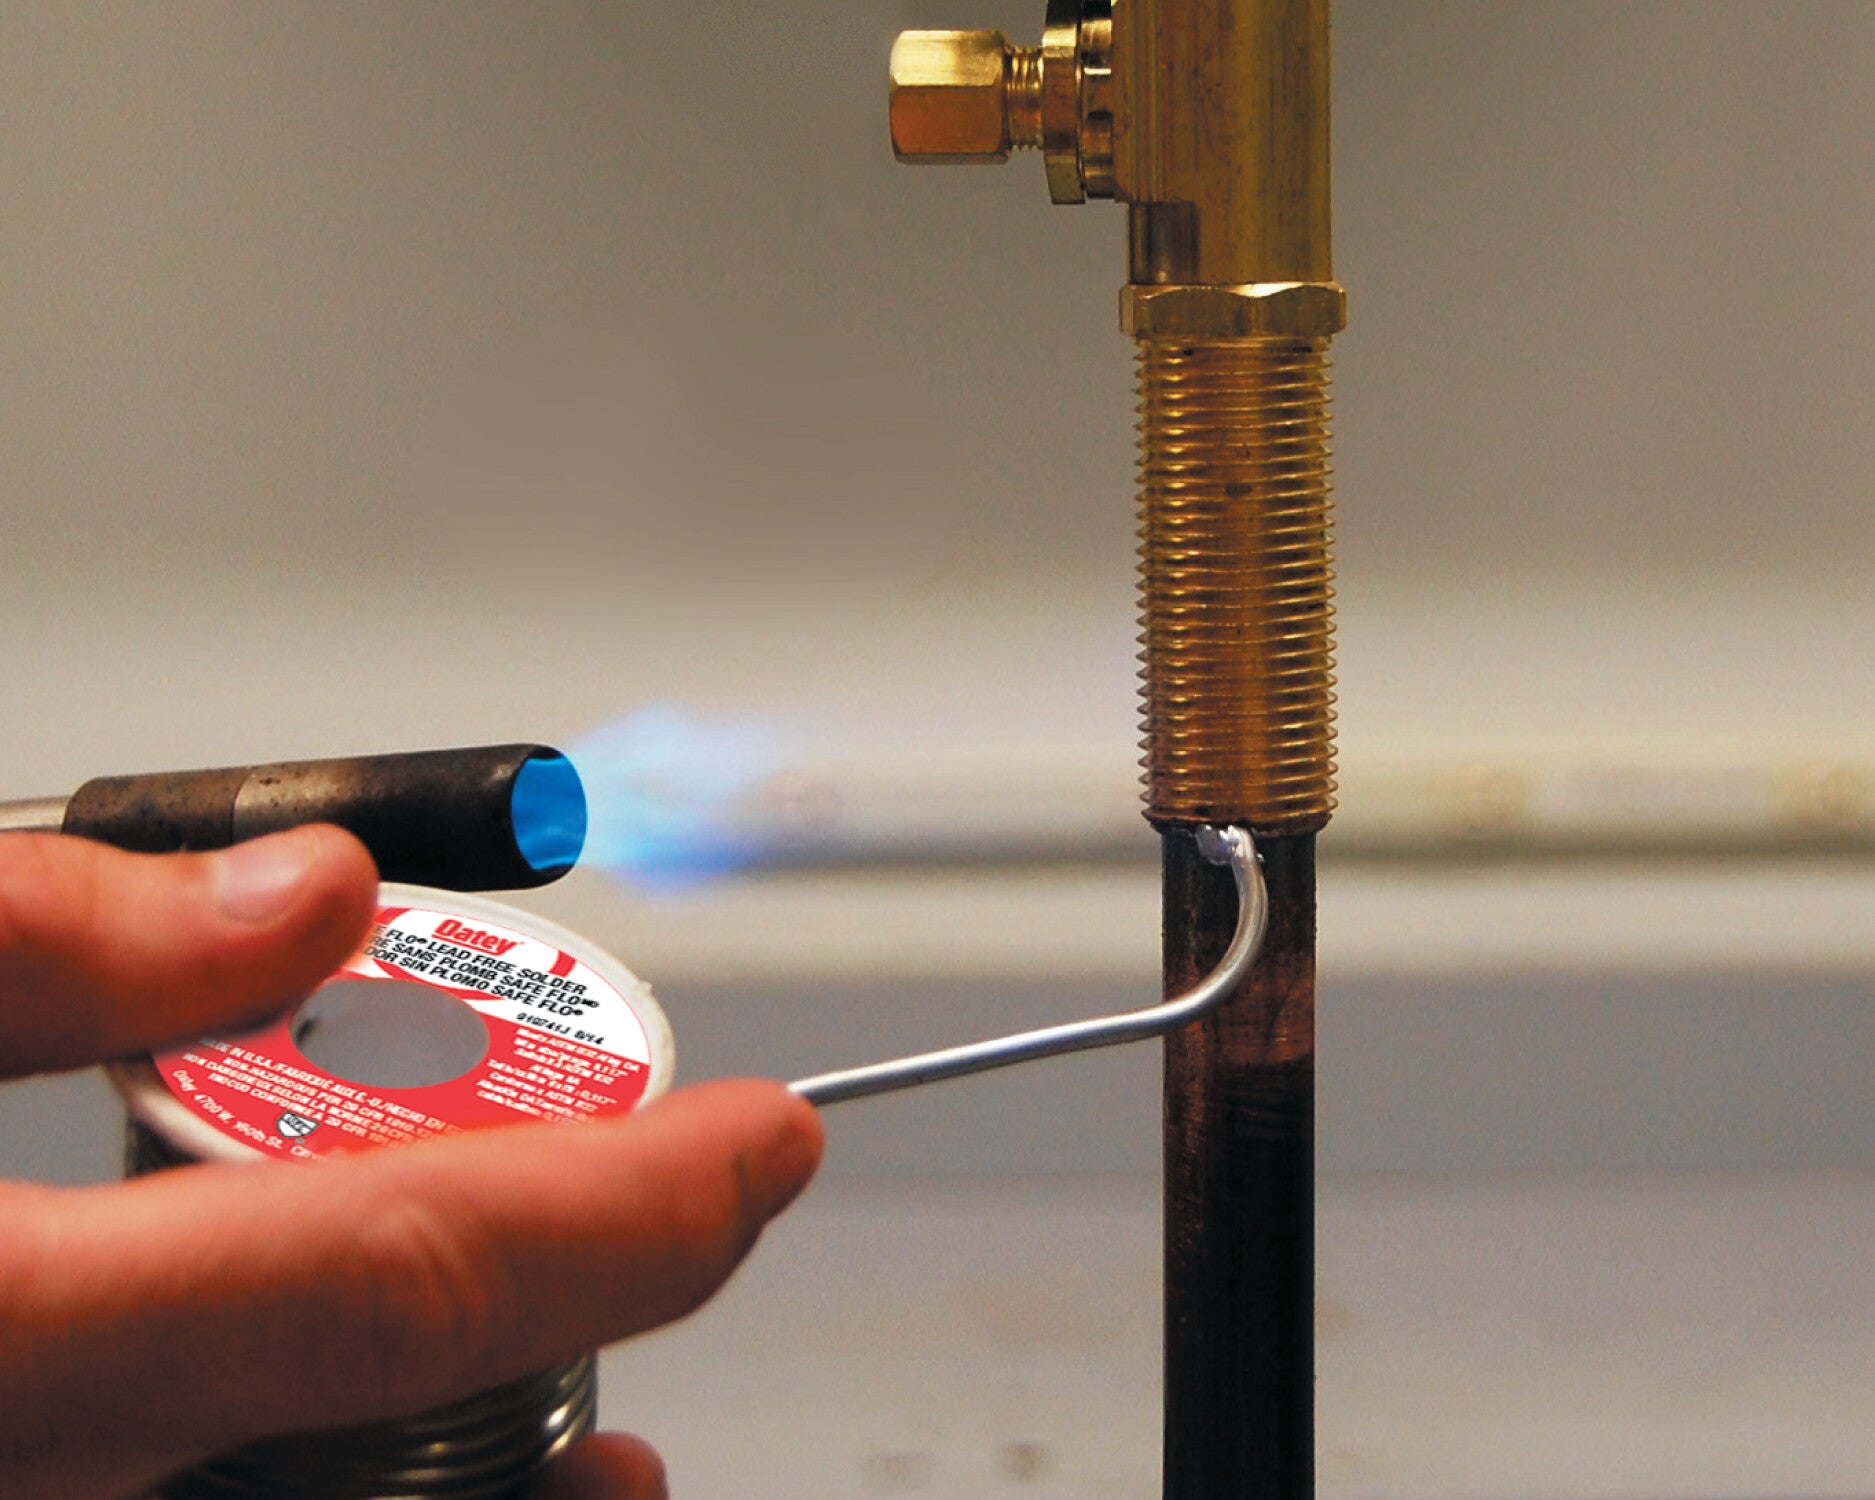
Heat the copper joint evenly with a soldering torch or iron. Focus on the joint, not the solder.
Check that the joint surface is hot enough before applying solder. The solder should melt on contact and flow freely.
Applying Solder For Strong Bonds
Use enough solder to cover the joint without excess. The solder should fill gaps and create a smooth, shiny finish.
- Touch the solder to the heated joint, not the flame.
- Feed solder slowly to let it flow into the joint.
- Stop adding solder once it covers the joint fully.
- Let the joint cool naturally without moving parts.
Avoiding Common Soldering Mistakes
Avoid these common mistakes to keep joints strong and safe:
| Common Mistake | Effect | How to Avoid |
| Overheating | Damages copper and weakens joint | Heat just enough to melt solder |
| Applying solder to cold joint | Poor solder flow and weak bond | Heat joint until solder melts on contact |
| Using dirty surfaces | Poor adhesion of solder | Clean copper with sandpaper or brush |
| Moving joint while cooling | Cracks in solder | Hold parts still until cool |

Credit: www.youtube.com
Safety Precautions
Soldering copper joints involves heat and fire. It is important to stay safe while working. Follow safety rules to avoid accidents.
Using the right tools and methods helps protect you and others around. This guide covers key safety tips for soldering copper.
Handling Heat And Flames Safely
Heat and flames can cause fires or burns. Always handle the soldering torch with care. Keep flammable materials far away from your work area.
Turn off the torch when not in use. Use a stable surface for soldering to avoid accidents. Never leave hot tools unattended.
- Use heat-resistant gloves
- Keep a fire extinguisher nearby
- Wear safety glasses to protect eyes
- Keep flammable items like paper and cloth away
Working In Well-ventilated Areas
Soldering produces fumes that can be harmful if inhaled. Work in a place with good airflow. Open windows or use fans to move air.
If possible, solder outdoors or near an exhaust vent. Avoid breathing in smoke or fumes directly. Protect your lungs by keeping the air fresh.
- Use a fume extractor if available
- Take breaks to get fresh air
- Do not solder in small, closed rooms
Preventing Burns And Injuries
Burns are common risks in soldering. Wear thick gloves to protect your hands. Avoid touching hot metal or tools.
Keep your work area clean and organized. Remove clutter that can cause slips or falls. Use tools like pliers to hold small parts safely.
- Wear long sleeves and closed shoes
- Keep a first aid kit nearby
- Do not rush; work slowly and carefully
- Use proper tools to handle hot joints
Testing And Finishing Joints
After soldering copper joints, it is important to test and finish them properly. This ensures the joints are strong and leak-free.
Proper finishing keeps the joints safe and extends their life. Follow these steps to inspect, clean, and maintain your soldered joints.
Inspecting For Leaks
Check the soldered joints for any leaks before using the pipe. Leaks can cause water damage and reduce pipe life.
Look for signs like wet spots, dripping water, or bubbles in the joint area. Use water pressure or air pressure to test.
- Turn on water and watch joints closely
- Apply soapy water to joints; bubbles show leaks
- Use air pressure with a gauge for a stronger test
Cleaning Residue And Excess Flux
After soldering, clean off any leftover flux and residue. Flux can cause corrosion if left on the joint.
Use a damp cloth or brush to wipe the joint. Make sure to remove all sticky or powdery substances.
- Use warm water and a cloth for cleaning
- Remove all flux to prevent rust and damage
- Dry the joint fully after cleaning
Maintaining Soldered Connections
Keep your soldered joints in good shape by checking them regularly. Maintenance helps avoid leaks and failures.
Inspect joints yearly and clean if needed. Fix any damage or corrosion quickly to extend joint life.
- Check for cracks or corrosion often
- Clean joints to remove dirt and buildup
- Repair or replace damaged joints promptly
Credit: www.oatey.com
Frequently Asked Questions
What Safety Gear Is Essential For Soldering Copper Joints?
Always wear safety goggles, heat-resistant gloves, and a long-sleeve shirt. Use a well-ventilated area to avoid inhaling fumes. These precautions protect your eyes, skin, and lungs from burns and harmful gases during soldering.
How To Prepare Copper Joints Before Soldering?
Clean the copper surfaces with a wire brush or sandpaper. Apply flux to remove oxidation and improve solder flow. Proper preparation ensures a strong, leak-free joint and prevents solder from failing.
What Type Of Solder Works Best For Copper Joints?
Use lead-free, rosin-core solder designed for plumbing or electronics. It melts evenly and adheres well to copper. Avoid using acid-core solder, as it can corrode the joint over time.
How To Avoid Overheating Copper During Soldering?
Heat the joint evenly using a propane or butane torch. Move the flame constantly to prevent damage. Overheating can cause leaks and weaken the copper pipe.
Conclusion
Soldering copper joints safely is crucial. Safety ensures a durable connection. Always wear protective gear. Keep your workspace well-ventilated. Use the right tools for precision. Practice makes perfect, so keep trying. Remember, patience is key. Follow the steps carefully for best results.
Double-check connections to avoid leaks. Clean your tools after each use. A clean joint is a strong joint. With these tips, you can solder confidently. Enjoy your successful copper projects.