If you want your woodworking projects to look sharp and professional, learning how to align wood for precise joinery is a must. Imagine your pieces fitting together so perfectly that the joints almost disappear.
That’s the kind of craftsmanship that turns simple wood into stunning furniture or decor. You’ll discover clear, easy steps to get your wood perfectly aligned every time. No more frustrating gaps or uneven edges—just clean, strong joints that make your work stand out.
Ready to take your skills to the next level? Let’s dive in and make your joinery flawless.
Choosing Quality Wood
Choosing the right wood is important for precise joinery. Quality wood helps parts fit tightly and last longer.
Look carefully at the boards before starting. This saves time and ensures strong joints.
Selecting Straight Boards
Straight boards are easier to work with and make better joints. Avoid boards that bend or twist.
- Place the board on a flat surface to check for warping.
- Look along the edge to see if it curves or bows.
- Choose boards with minimal twist or cup.
- Use a straightedge tool for more accuracy.
Checking For Defects
Defects like knots and cracks can weaken joints. Inspect wood carefully to find these problems early.
| Defect | Effect on Joinery | What to Do |
|---|---|---|
| Knots | Can cause weak spots or splitting | Avoid large or loose knots near joints |
| Cracks | May cause boards to break | Reject boards with visible cracks |
| Warping | Makes fitting parts difficult | Choose only flat boards |
| Insect Damage | Weakens wood structure | Inspect and avoid damaged wood |
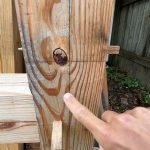
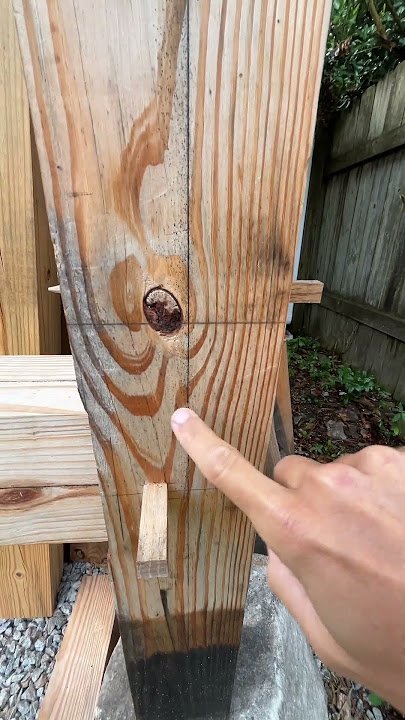
Matching Wood Grain
Wood grain direction affects strength and appearance. Matching grain helps joints hold better and look nice.
Here are tips to match wood grain:
- Align grain patterns on joining edges.
- Use boards from the same tree or batch.
- Match grain direction for bending strength.
- Consider grain color and texture for a good look.

Credit: www.findbuytool.com
Preparing Wood Surfaces
Aligning wood correctly is key for tight, strong joints. Preparing surfaces carefully helps your pieces fit well.
Take time to make wood flat and smooth before joining. This ensures your project looks clean and lasts long.
Planing For Flatness
Use a hand plane or electric planer to remove uneven spots. Move the tool evenly across the wood to keep it flat.
- Check wood with a straight edge before planing
- Plane across the grain for best results
- Remove thin layers slowly to avoid gouges
- Keep the plane blade sharp for smooth cuts
Jointing Edges
Jointing edges means making them straight and square. This step helps the wood pieces fit tightly side by side.
| Tool | Purpose |
| Jointer | Straighten and square edges |
| Hand plane | Fine edge adjustments |
| Sandpaper | Smooth edges after jointing |
Sanding Techniques
Sanding smooths wood and removes small flaws. Use the right grit to avoid scratches and keep the surface even.
Follow these sanding tips:
- Start with coarse grit to remove rough areas
- Use medium grit to even out the surface
- Finish with fine grit for a smooth touch
- Sand along the grain for best results
Measuring And Marking
Accurate measuring and marking are key for precise wood joinery. You need to prepare your wood carefully before cutting or joining. This helps your pieces fit together tightly and look professional.
Using the right tools and clear marks makes your work easier. Take your time to measure and mark each piece correctly. This reduces mistakes and waste of material.
Using Accurate Tools
Select tools that give exact measurements. A good tape measure, combination square, and marking knife are essential. Avoid worn or damaged tools that cause errors.
- Use a steel ruler or tape measure with clear markings
- Check your square for true 90-degree angles
- Mark lines with a sharp pencil or knife for fine accuracy
- Keep tools clean and free from rust or debris
Marking Reference Lines
Reference lines guide your cuts and joints. Mark them clearly on the wood surface. Double-check measurements before drawing lines to avoid errors.
| Type of Line | Purpose | Best Tool |
|---|---|---|
| Cut Line | Shows where to saw | Sharp pencil or marking knife |
| Layout Line | Defines joint edges | Combination square |
| Center Line | Marks symmetry or alignment | Marking gauge |
Aligning Measurement Points
Align your measurement points carefully to keep pieces consistent. Use clamps or stops to hold wood steady. Measure from fixed edges to avoid shifting marks.
- Start measuring from the same edge on all pieces
- Use a marking gauge to transfer points evenly
- Check alignment by dry fitting pieces before final cuts
- Mark all points clearly to avoid confusion
Clamping Strategies
Aligning wood precisely is key for strong joinery. Clamps hold pieces steady while glue dries.
Choosing the right clamping method helps avoid gaps and misalignment in joints.
Choosing The Right Clamps
Select clamps that fit your project size and wood type. Different clamps offer different pressure points.
Bar clamps work well for wide boards. C-clamps suit small pieces. Spring clamps hold light parts.
- Bar clamps for large panels
- C-clamps for sturdy hold on small parts
- Spring clamps for quick, light pressure
- Pipe clamps for long or uneven wood pieces
Applying Even Pressure
Apply pressure evenly across the joint to avoid gaps. Uneven force can cause misalignment.
Use multiple clamps spaced evenly. Tighten each clamp gradually for balanced pressure.
- Place clamps at equal distances
- Tighten clamps little by little
- Check joint alignment before full tightening
Preventing Wood Movement
Wood can shift during glue drying. Secure it well to keep pieces from moving.
Use cauls or scrap wood to spread pressure and stop dents. Keep clamps tight but not too tight.
- Use cauls to protect wood surface
- Check clamps often for tightness
- Work in a stable environment to reduce wood expansion
Cutting For Perfect Fit
Aligning wood precisely is key for strong, clean joints. Cutting wood carefully helps pieces fit together well.
Small errors in cutting can cause gaps or weak joints. Take time to make each cut exact for best results.
Using Sharp Blades
Sharp blades cut cleanly and reduce splintering. Dull blades can tear wood fibers and ruin the edge.
Always check blade sharpness before cutting. Change or sharpen blades to keep cuts precise and smooth.
Maintaining Consistent Angles
Cutting wood at steady angles is vital for tight joints. Uneven angles cause gaps and weak connections.
Use tools like angle guides or miter saws. Mark angles clearly on wood before cutting.
- Measure angles carefully with a protractor
- Secure wood firmly to prevent movement
- Cut slowly and steadily for accuracy
Test Fitting Joints
Try fitting the pieces together before final assembly. This helps spot any fit problems early.
Adjust cuts if joints are too tight or loose. Small sanding or trimming can improve the fit.
- Fit pieces without glue first
- Check for gaps or loose areas
- Mark spots needing adjustment
- Make small corrections and retest
:max_bytes(150000):strip_icc()/101205162_2-0f3a8567274d435ba835b74a4a8f91b7.jpg)
Credit: www.woodmagazine.com
Dry Assembly Techniques
Dry assembly helps you fit wood pieces before applying glue. This step reduces mistakes in joinery.
It lets you check the fit and alignment of the parts. You can adjust and fix issues early on.
Checking Alignment Before Gluing
Place all wood parts together without glue. Look closely at edges and joints. Make sure all parts line up evenly.
- Ensure edges match with no overhang
- Check that the joint surfaces sit flush
- Test that parts slide together without force
- Look for any twisting or warping
Adjusting For Gaps
Small gaps can weaken joints and ruin the look. Use fine sanding or a chisel to fix gaps. You want tight contact between pieces.
| Gap Size | Adjustment Method |
|---|---|
| Less than 1 mm | Light sanding |
| 1 to 3 mm | Careful planing or chiseling |
| More than 3 mm | Re-cut or reshape the joint |
Ensuring Squareness
Use a square tool to check corners. All joints should meet at 90 degrees unless the design says otherwise. Squareness keeps the project stable.
- Place a carpenter’s square at each corner
- Adjust the wood until the square fits perfectly
- Clamp pieces during dry fit to hold position
- Re-check squareness before gluing
Advanced Joinery Tips
Precise joinery requires careful wood alignment. Small errors can weaken joints or ruin the project.
Use tools and techniques that improve accuracy. These tips help you align wood better for strong joints.
Using Jigs And Fixtures
Jigs and fixtures hold wood pieces in place during cutting or assembly. They help keep angles and edges exact.
- Use a corner clamp jig to hold boards at 90 degrees.
- Employ dowel jigs to drill perfectly spaced holes for dowels.
- Make custom fixtures to fit unique joinery shapes.
- Secure wood firmly to prevent movement while working.
Incorporating Dowels And Biscuits
Dowels and biscuits add strength and alignment to joints. They create tight fits that resist shifting.
| Joinery Type | Purpose | Alignment Benefit |
| Dowels | Reinforce edge joints | Keep boards flush and aligned |
| Biscuits | Join panel edges | Control flatness and positioning |
| Combination | Strengthen large frames | Prevent twisting and gaps |
Leveraging Router Guides
Router guides help make precise cuts along wood edges. They ensure straight and repeatable results.
Effective router guide tips:
- Choose a guide that fits your router model securely.
- Set the guide distance carefully for exact cut width.
- Use clamps to hold the guide steady on the workpiece.
- Practice on scrap wood before cutting the final piece.

Credit: www.findbuytool.com
Frequently Asked Questions
How Do I Ensure Wood Pieces Are Perfectly Aligned?
Use clamps and a flat surface to hold wood tightly. Check edges with a square for accuracy. Measure twice before gluing or screwing pieces together.
What Tools Help With Precise Wood Alignment?
Common tools include clamps, carpenter’s squares, marking gauges, and dowel jigs. These tools ensure tight joints and accurate measurements for joinery.
Why Is Wood Alignment Important In Joinery?
Proper alignment prevents gaps and weak joints. It ensures structural strength and a professional finish. Misalignment leads to poor fit and reduced durability.
Can Wood Moisture Affect Alignment Accuracy?
Yes, wood expands or contracts with moisture changes. Always dry wood properly before joinery. This prevents warping and misalignment after assembly.
Conclusion
Aligning wood correctly is key for precise joinery. Always measure twice to ensure accuracy. Use quality tools for best results. Practice makes perfect, so keep trying. Pay attention to details like grain direction. Small adjustments can make a big difference.
Consistency in your technique is important. Remember, patience is part of the process. Understanding wood behavior helps in achieving perfect joints. Keep learning and improving your skills. With time, your joinery will improve. Enjoy the satisfaction of creating strong and beautiful woodwork.
Happy woodworking!