If you’ve ever struggled to drive a nail straight or pull one out without damaging your wood, this guide is for you. Using a claw hammer might seem simple, but mastering the right technique can save you time, effort, and frustration.
Whether you’re fixing something around the house or starting a DIY project, knowing how to handle your hammer like a pro will make all the difference. Keep reading, and you’ll discover tips and tricks that turn a basic tool into your best ally for every nail job.

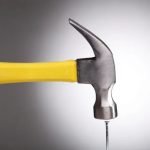
Credit: www.safetyandhealthmagazine.com
Choosing The Right Claw Hammer
Using a claw hammer correctly starts with choosing the right one. The right hammer makes driving and removing nails easier and safer.
Picking a hammer depends on the type, weight, handle, and size. These factors affect how well it works for your nail jobs.
Types Of Claw Hammers
There are different types of claw hammers. Each type suits different tasks and nail sizes.
The most common claw hammer is the curved claw. It helps pull out nails easily. A straight claw hammer works well for demolition and framing.
- Curved claw: Best for general use and nail removal
- Straight claw: Good for heavy work and prying
- Milled face: Has a textured face to prevent slipping
- Rip claw: Designed for breaking apart wood
Hammer Weight And Handle Materials
Hammer weight affects control and power. A light hammer is easier to swing but has less force. A heavier hammer drives nails faster but can tire your arm.
Handles come in wood, fiberglass, and steel. Wood handles absorb shock well. Fiberglass handles are strong and reduce vibration. Steel handles are very durable but can cause more vibration.
- Lightweight (8-12 oz): Good for small nails and detail work
- Medium weight (16 oz): Most common for general use
- Heavyweight (20+ oz): Best for large nails and framing
- Wood handles: Comfortable but can break
- Fiberglass handles: Durable and shock-absorbing
- Steel handles: Strong but less shock absorption
Selecting Hammer Size For Nails
The hammer size should match the nail size you use. Small nails need a smaller hammer for control. Large nails need a bigger hammer for power.
Using the right hammer size helps prevent bent nails and makes your work faster. It also reduces the chance of missing the nail head.
- Small nails (1-2 inches): Use an 8-12 oz hammer
- Medium nails (2-3 inches): Use a 16 oz hammer
- Large nails (3+ inches): Use a 20 oz or heavier hammer
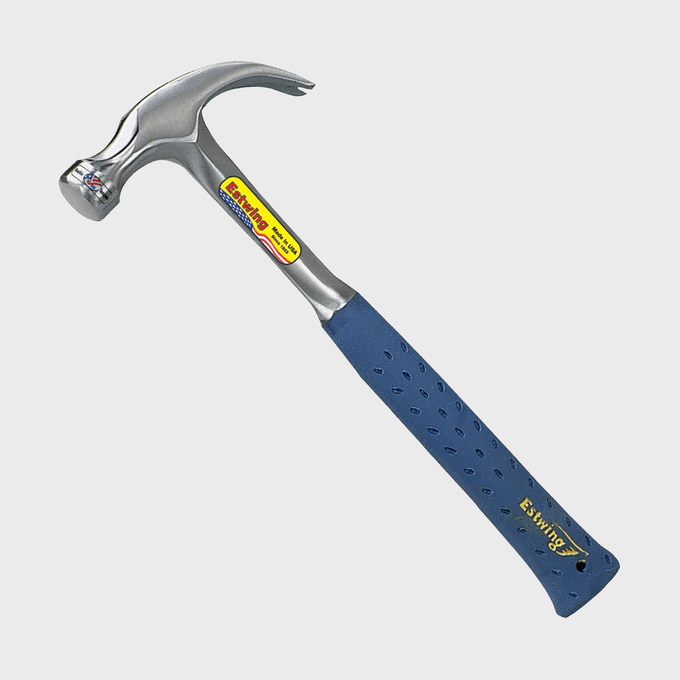
Credit: www.familyhandyman.com
Preparing For Hammering
Using a claw hammer to drive nails needs some preparation. Getting ready helps you work safely and efficiently.
Before you start, check your tools and workspace. This makes the job easier and safer.
Safety Gear And Precautions
Wear safety gear to protect yourself from injury. Always keep your work area clear and stay alert.
- Wear safety glasses to protect your eyes.
- Use gloves to protect your hands.
- Wear closed-toe shoes to protect your feet.
- Keep your fingers away from the hammer’s path.
- Make sure the hammer handle is dry and not slippery.
Positioning Nails Correctly
Place nails where you want them to hold material firmly. Start nails with a light tap to hold them in place.
Hold the nail near its head and keep it straight. This helps the nail go in smoothly without bending.
- Hold nails at a right angle to the surface.
- Tap lightly at first to set the nail.
- Check the nail’s position before hitting hard.
- Use a nail holder if your fingers need extra protection.
Setting Up Your Workspace
Clear your workspace of clutter and hazards. Make sure your work surface is steady and at a good height.
Good lighting helps you see nails clearly. Arrange your tools within easy reach to save time.
- Use a stable workbench or table.
- Keep your work area clean and organized.
- Ensure good lighting on the workspace.
- Place your hammer and nails nearby.
- Remove any objects that can cause tripping.
Mastering The Grip And Swing
Using a claw hammer to drive nails is a common skill for many projects. Getting the right grip and swing helps you work safely and efficiently.
This guide explains how to hold the hammer and swing it with control. You will learn ways to avoid mistakes that can slow you down.
Proper Hand Placement
Hold the hammer near the end of the handle for more power. Your grip should be firm but not too tight. This helps you swing smoothly.
Place your thumb along the handle, not wrapped around it. This improves control and reduces hand fatigue during use.
- Hold near the bottom of the handle
- Keep a firm but relaxed grip
- Place thumb along the handle
Controlled Swing Techniques
Swing the hammer with a smooth motion. Use your elbow and shoulder to guide the swing, not just your wrist. This gives better accuracy.
Start with small swings to tap the nail in place. Then use longer swings to drive the nail fully into the wood.
- Swing smoothly using elbow and shoulder
- Begin with light taps to position the nail
- Use longer swings to drive the nail
Avoiding Common Mistakes
Do not hold the hammer too close to the head. This reduces your swing power and control. Avoid gripping too tightly, which causes hand strain.
Watch your aim to avoid hitting your fingers or the wrong spot on the nail. Keep your eye on the nail head during each swing.
- Keep grip near the handle end
- Do not grip too tight
- Focus on the nail head when swinging
- Protect your fingers from the hammer
Driving Nails Efficiently
Using a claw hammer to drive nails needs control and practice. Proper technique helps nails go in straight and fast.
Good hammering saves wood and avoids bending nails. It also keeps your work safe and neat.
Starting Nails With Light Taps
Hold the nail steady with your fingers. Use light taps to set the nail tip into the wood surface.
Light taps stop the nail from bending. They also help you keep control before full hammering.
Increasing Force For Deep Drives
After the nail is steady, hit it with stronger swings. Use your wrist and arm to add power.
Aim for smooth, clean strikes. Avoid hitting the nail at an angle to prevent bending.
- Start with light taps to set the nail
- Use steady, stronger hits for depth
- Keep your wrist firm but flexible
- Strike the nail head squarely each time
Handling Different Nail Types
Thin nails need gentle force to avoid bending. Thick nails require harder hits to drive fully.
Special nails like finishing nails need careful tapping. Use a nail set tool to avoid damage.
- Small nails: start light, increase force slowly
- Large nails: use firm, strong hits
- Finishing nails: tap gently, use a nail set
- Coated nails: may need extra force for wood grip
Removing Nails Safely
Removing nails with a claw hammer needs care to avoid injury and damage. Using the right method helps protect surfaces and your hands.
Follow safe steps to pull nails out smoothly and keep your work area clean.
Using The Claw For Extraction
Place the claw end of the hammer under the nail head. Pull the handle back slowly to lift the nail. Keep your grip firm to control the movement.
Leverage Techniques To Minimize Damage
Using leverage reduces damage to wood or walls. Support the surface near the nail to spread the force evenly. You can use a small block of wood as a fulcrum.
- Place a wooden block under the hammer’s claw.
- Pull the hammer handle slowly and steadily.
- Move the block closer to the nail to increase leverage.
- Use smooth, controlled motions to avoid splintering.
Dealing With Stubborn Nails
Some nails are hard to remove because they are rusted or deeply embedded. Use gentle tapping to loosen the nail before pulling.
| Problem | Solution |
| Nail head breaks off | Use pliers to grip remaining nail |
| Nail is rusted | Apply penetrating oil and wait 10 minutes |
| Nail is deep in wood | Widen gap under claw with a small wedge |

Credit: www.thisoldhouse.com
Maintaining Your Claw Hammer
Keeping your claw hammer in good shape makes it last longer. Proper care also ensures safety while you work.
Regular maintenance is simple and takes little time. Follow these tips to keep your hammer ready for use.
Cleaning And Storage Tips
Clean your hammer after each job to remove dirt and debris. Wipe the metal head with a dry cloth to prevent rust.
- Use a wire brush to clean stuck-on material.
- Apply light oil on the metal parts to stop rust.
- Store the hammer in a dry place away from moisture.
- Hang it on a tool rack or keep it in a toolbox.
Checking For Wear And Damage
Inspect your claw hammer often. Look for cracks, loose handles, or worn claw edges.
| Part | What to Check | Signs of Damage |
| Handle | Stability and cracks | Loose grip, splinters, or breaks |
| Hammer Head | Surface and edges | Rust, dents, or chips |
| Claw | Sharpness and shape | Rounded or bent claws |
When To Replace Your Hammer
Replace your hammer if it shows serious damage. Using a broken tool can cause injury or poor work.
- Handle cracks that grow or cause looseness
- Hammer head that is loose or severely damaged
- Claw bent out of shape or dull beyond repair
- Rust that cannot be removed easily
Frequently Asked Questions
What Is The Best Way To Hold A Claw Hammer?
Hold the claw hammer near the end of the handle. This grip gives better control and maximum swinging power. Keep your wrist firm but relaxed to avoid strain.
How Do I Remove Nails Using A Claw Hammer?
Place the claw under the nail head. Pull the handle back slowly to lift the nail out. Use a wooden block for leverage if needed.
Can A Claw Hammer Damage Wood When Pulling Nails?
Yes, it can damage wood if used carelessly. Use gentle pressure and a wooden block to protect surfaces. Always pull nails straight out to minimize damage.
What Safety Tips Should I Follow When Using A Claw Hammer?
Wear safety goggles to protect your eyes. Check the hammer for damage before use. Keep your fingers clear from the striking area. Use controlled, steady swings.
Conclusion
Using a claw hammer for nails is simple. Start by picking the right hammer. Hold it firmly with your hand. Position the nail correctly on the surface. Begin tapping the nail gently. Increase your force gradually. Watch your fingers closely.
If you make a mistake, use the claw to remove the nail. Practice makes you better. Safety is most important. Wear protective gloves if needed. Now, you know the basics of using a claw hammer. Happy hammering!