Are you ready to tackle your next DIY project with confidence? Using a hand saw might seem simple, but mastering a few key tips can make your cuts cleaner, safer, and faster.
Whether you’re a beginner or just looking to sharpen your skills, these hand saw tips will help you work smarter—not harder. Keep reading to discover easy tricks that will transform your woodworking and make every cut count.
Choosing The Right Hand Saw
Using the right hand saw makes your DIY projects easier and safer. Picking a saw that fits your task helps you cut wood more smoothly.
There are many types of hand saws. Each type has a special use. Knowing the differences helps you choose well.
Types Of Hand Saws
Hand saws come in many shapes and sizes. Each saw works best for certain cuts and materials.
- Crosscut saw:Cuts across the grain of wood for clean edges.
- Rip saw:Cuts along the grain, good for splitting wood.
- Back saw:Has a stiff spine for precise, straight cuts.
- Keyhole saw:Small saw for cutting curves and shapes.
- Bow saw:Has a metal frame for cutting branches and logs.
Blade Selection Tips
Choosing the right blade helps you cut faster and cleaner. Blade size and teeth count matter a lot.
| Blade Feature | Use | Tip |
|---|---|---|
| Teeth per inch (TPI) | Fine or rough cuts | Higher TPI for fine cuts, lower for rough cuts |
| Blade length | Cut depth | Longer blades cut thicker wood |
| Blade material | Durability | Look for hardened steel for long life |
Handle Comfort And Grip
A good handle feels comfortable and helps you hold the saw firmly. This reduces hand pain and slips.
- Choose handles with smooth edges to avoid blisters.
- Wooden handles offer a classic feel and good grip.
- Plastic handles are lighter and resist water damage.
- Look for ergonomic shapes that fit your hand size.
- Check if the handle fits tightly to the blade without wobbling.

Credit: www.youtube.com
Preparing For The Cut
Using a hand saw for DIY projects requires good preparation. Proper setup helps you cut clean and straight.
Taking time before the cut improves safety and results. Follow simple steps to get ready.
Marking Your Cut Line
Mark the line clearly on your workpiece. Use a pencil and a ruler or square for accuracy.
Check the line from different angles to ensure it is straight. A clear line guides your saw blade well.
Securing The Workpiece
Hold the material firmly before cutting. Use clamps or a vise to keep it steady.
A moving workpiece can cause mistakes or injuries. Secure it on a stable surface to work safely.
- Place the workpiece on a flat bench
- Attach clamps tightly but avoid damage
- Test stability by trying to move it gently
Safety Gear Essentials
Wear safety gear to protect yourself. Eye protection and gloves are important when sawing.
Use ear protection if you work long hours. Proper gear prevents accidents and keeps you safe.
- Safety glasses to shield your eyes
- Work gloves for better grip and hand protection
- Ear plugs if noise is loud or constant
Mastering The Cutting Technique
Using a hand saw for DIY projects takes practice and focus. The right technique helps you cut clean and safe. This guide covers key tips to improve your sawing skills.
Pay attention to your posture, grip, and motion. These details make your work easier and your cuts better. Let’s explore how to start, keep steady, and control your saw.
Starting The Cut Smoothly
Starting the cut is the hardest part for many people. Use a gentle back-and-forth motion to create a shallow groove. This groove guides the saw for the rest of the cut.
- Mark your cutting line clearly with a pencil.
- Hold the saw handle firmly but not too tight.
- Place the saw’s teeth at the edge of the wood.
- Use short, slow strokes to begin the groove.
- Check that the saw is aligned with your line.
Maintaining A Steady Stroke
A steady stroke helps you cut evenly and prevents mistakes. Keep a smooth rhythm and avoid rushing. Let the saw do the work by applying gentle force.
| Tip | Why It Helps |
| Keep your arm relaxed | Reduces fatigue and improves control |
| Use your shoulder and elbow | Gives power without straining your wrist |
| Keep the blade straight | Ensures a clean, accurate cut |
| Focus on long, even strokes | Maintains consistent speed and depth |
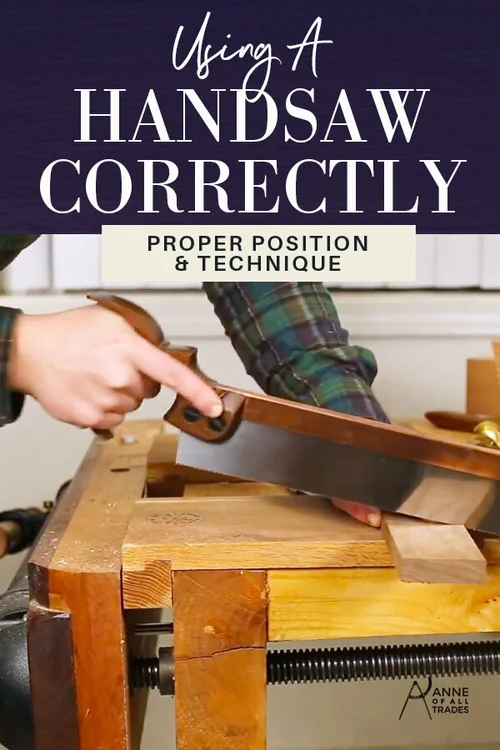
Controlling Saw Angle And Pressure
Proper angle and pressure prevent the saw from binding or wandering. Adjust the angle to match your cut type. Use firm but gentle pressure to keep the blade moving smoothly.
- For crosscuts, hold the saw at about 45 degrees.
- For rip cuts, keep the saw closer to 60 degrees.
- Press lightly on the push stroke.
- Release pressure on the pull stroke.
- Check the cut line often to adjust angle as needed.

Credit: www.anneofalltrades.com
Common Mistakes To Avoid
Using a hand saw for DIY projects can be easy if you avoid some common mistakes. These mistakes can make your work harder or damage your materials.
Knowing what to watch out for helps you get cleaner cuts and better results. Here are some key mistakes to avoid when using a hand saw.
Saw Binding Issues
Saw binding happens when the saw blade gets stuck in the material. This makes cutting slow and can damage the saw or wood.
Binding usually happens if the cut is too tight or the wood pinches the blade. Keep the cut line open and use the right saw for the material.
- Use steady, even pressure when cutting.
- Do not force the saw if it binds.
- Keep the saw blade sharp and clean.
- Choose a saw with the correct tooth type.
- Support the wood properly to prevent pinching.
Uneven Cuts
Uneven cuts happen when the saw blade moves off the line or tilts during cutting. This makes your project look unprofessional.
To avoid uneven cuts, mark clear lines and keep your saw steady. Use slow, controlled strokes and check your progress often.
- Draw straight, visible cutting lines.
- Hold the saw handle firmly but not too tight.
- Keep the saw blade straight and aligned with the line.
- Practice cutting on scrap wood before working on your project.
- Use clamps to hold your material steady.
Damaging The Material
Damaging the material can happen if the saw slips or if you cut too fast. This can cause splinters, cracks, or rough edges.
Take your time and use the right technique to protect your project. Use a backing board and support thin pieces carefully.
- Cut slowly to maintain control.
- Use a fine-tooth saw for delicate materials.
- Place a scrap piece behind the cut line to reduce splintering.
- Secure the material so it does not move.
- Inspect your saw for any damage before use.
Maintaining Your Hand Saw
Keeping your hand saw in good shape helps it work well and last longer. Regular care makes cutting easier and safer.
Follow simple steps to clean, sharpen, and replace parts when needed. This keeps your saw ready for any DIY project.
Cleaning And Storage
After each use, clean your saw to remove dirt and sap. Use a brush or cloth to wipe the blade. Dry it well to stop rust.
- Wipe the blade with a dry cloth
- Use light oil to protect metal parts
- Store in a dry place away from moisture
- Keep the saw in a protective case or cover
Sharpening Blades
Dull blades make cutting hard and unsafe. Sharpen the teeth to keep clean, straight cuts. Use a file that fits the tooth size.
- Secure the saw in a clamp or vise
- File each tooth with even strokes
- Keep the original angle of the teeth
- Check blade sharpness before use
Replacing Parts When Needed
Check your saw for worn or damaged parts like the handle or blade. Replace parts to keep the saw safe and effective.
| Part | When to Replace |
| Blade | Rusty or badly bent |
| Handle | Cracked or loose |
| Screws | Stripped or missing |

Credit: www.anneofalltrades.com
Advanced Tips For Precision
Using a hand saw with precision is key for good DIY projects. Small mistakes can ruin your work.
These tips help you cut more accurately and get cleaner results every time.
Using Guides And Jigs
Guides and jigs keep your saw straight and steady. They help you make exact cuts without slipping.
Use clamps to hold guides firmly in place. This avoids movement while sawing.
- Try a straight edge or metal ruler as a guide
- Build simple jigs with scrap wood for repeated cuts
- Use a miter box for angled cuts
- Secure guides with clamps before cutting
Cutting Different Materials
Different materials need different saw teeth and cutting styles. Choose the right saw for the job.
Cut wood with a saw that has larger teeth. Use finer teeth for plastic and metal.
- Softwood: Use saw with bigger, spaced teeth
- Hardwood: Use saw with medium tooth count
- Plastic: Use fine-toothed saw to avoid cracking
- Metal: Use special saw blades made for metal
Improving Speed Without Sacrificing Quality
Work faster by keeping a steady rhythm. Don’t rush or force the saw.
Use smooth, even strokes. Let the saw do the work to avoid rough edges.
- Mark your cut line clearly before starting
- Keep your saw clean and sharp
- Hold your workpiece firmly to prevent movement
- Practice your sawing motion for smooth cuts
Frequently Asked Questions
What Safety Gear Is Essential When Using A Hand Saw?
Always wear safety goggles and gloves to protect your eyes and hands. Use ear protection if working in noisy environments. Ensure you have a stable work surface to prevent accidents. Proper safety gear minimizes injury risks during DIY hand saw projects.
How Do I Choose The Right Hand Saw For Projects?
Select a hand saw based on the material and cut type. For wood, use a crosscut or rip saw. Choose blade length and teeth per inch (TPI) according to the project’s precision and thickness. The right saw improves efficiency and results.
What Is The Best Technique For Cutting Straight Lines?
Mark the cutting line clearly with a pencil or chalk. Use steady, even strokes while keeping the saw blade aligned. Start slowly to create a groove, then increase speed for smooth cuts. Practice ensures accuracy and cleaner cuts in DIY projects.
How Often Should I Sharpen My Hand Saw Blade?
Sharpen your hand saw blade after every few projects or when cutting becomes difficult. Dull blades cause uneven cuts and increase effort. Regular sharpening maintains cutting efficiency and prolongs the saw’s lifespan.
Conclusion
Using a hand saw can be easy with practice. Start with simple projects. Choose the right saw for your task. Keep your saw sharp for better cuts. Safety should always be a priority. Wear gloves and goggles. Make sure your workspace is clean.
Measure twice, cut once. This saves time and materials. Follow these tips, and your DIY projects will improve. You’ll feel more confident with each project. Happy sawing and enjoy your creative journey!