Are you ready to take your woodworking skills to the next level? Knowing how to use a mallet correctly can make a huge difference in the quality of your work and the ease of your projects.
Whether you’re assembling joints, carving, or adjusting pieces, the right mallet technique helps you work smarter, not harder. In this guide, you’ll discover simple tips and tricks that turn this basic tool into your woodworking best friend. Keep reading, and you’ll soon handle your mallet with confidence and precision.
Choosing The Right Mallet
Using a mallet correctly is important for woodworking projects. Picking the right mallet makes your work easier and safer.
This guide helps you understand different mallets and how to choose one for your needs.
Types Of Woodworking Mallets
Woodworking mallets come in several types. Each type fits different tasks and tools.
- Wooden Mallets: Traditional and gentle on chisels
- Rubber Mallets: Good for delicate work without damage
- Rawhide Mallets: Soft striking surface, great for fine work
- Plastic Mallets: Lightweight and durable for light tasks
Materials And Weight Considerations
Mallets come in different materials. Each material affects the weight and how it feels.
Wooden mallets are heavier and absorb shock. Rubber and plastic mallets are lighter and cause less damage to tools.
- Wood: Durable, heavier, good for strong hits
- Rubber: Soft, light, reduces tool damage
- Plastic: Lightweight, good for light tapping
- Rawhide: Soft, protects delicate surfaces
Selecting Based On Project Needs
Choose a mallet that fits the type of woodworking you do. Harder mallets work well for rough work.
Softer mallets protect fine tools and delicate wood. Pick weight and size based on control and power needed.
- For carving: Use wooden or rawhide mallets
- For assembling joints: Rubber or plastic mallets work best
- For heavy chopping: Choose heavier wooden mallets
- For delicate tasks: Pick softer, lighter mallets

Credit: www.reddit.com
Preparing For Safe Use
Using a mallet for woodworking needs care and attention. Preparing well helps you work safely and avoid injuries.
Before you start, check your tools and workspace. Follow safety steps to keep yourself protected.
Inspecting The Mallet And Tools
Look over your mallet for cracks or damage. A damaged mallet can break and cause accidents.
Check the handle to make sure it is tight and not loose. Make sure the head is firmly attached.
- Look for cracks or splits in the mallet head
- Check the handle for looseness or damage
- Ensure the mallet head fits tightly on the handle
- Inspect other woodworking tools for sharpness and safety
Setting Up Your Workspace
Clear your workspace from clutter to avoid tripping or knocking tools over. Work in a well-lit area.
Make sure your workbench is stable. Secure your wood piece so it does not move while you work.
- Remove unnecessary items from your work area
- Use good lighting to see your work clearly
- Check that your workbench is steady
- Clamp or secure wood pieces firmly
Personal Safety Measures
Wear safety glasses to protect your eyes from flying wood chips. Use ear protection if noise is loud.
Wear gloves to protect your hands but make sure they do not get caught in tools. Use proper footwear.
- Wear safety glasses to protect your eyes
- Use ear protection if working in noisy places
- Wear gloves to protect your hands
- Use closed-toe shoes to protect your feet
- Keep long hair tied back and avoid loose clothes
Basic Mallet Techniques
Using a mallet in woodworking helps you control your tools better. It lets you tap chisels and shape wood without damage.
Learning the right techniques keeps your work safe and precise. Let’s look at the basics of using a mallet.
Proper Grip And Stance
Hold the mallet handle firmly but not too tight. Your grip should be relaxed to avoid hand strain.
Stand with your feet shoulder-width apart. This stance gives you balance and control for each strike.
- Grip the mallet near the end of the handle
- Keep your wrist straight
- Face your work directly with a stable stance
- Bend your knees slightly for comfort
Striking Angles And Force Control
Strike the wood at a slight angle to guide the tool smoothly. Avoid hitting straight down all the time.
Use gentle taps for fine work and stronger hits for rough shaping. Control the force to keep your work clean.
- Start with light taps to test the wood
- Increase force gradually if needed
- Keep the mallet face flat against the tool handle
- Avoid twisting your wrist during strikes
Common Mistakes To Avoid
Do not grip the mallet too tightly. This causes fatigue and less control.
Avoid striking at sharp angles or with excessive force. This can damage your wood or tools.
- Do not hold the mallet too close to the head
- Avoid swinging wildly or losing balance
- Never strike with a damaged mallet
- Do not ignore your body posture

Credit: www.youtube.com
Advanced Mallet Skills
Using a mallet correctly improves your woodworking projects. It helps control force and protects your tools.
Advanced mallet skills make tapping, chiseling, and delicate tasks easier and more precise.
Tapping Joints And Fittings
Tapping joints requires gentle but firm hits to fit parts together. Use the mallet to avoid damage.
Tap evenly around the joint to ensure a tight fit without cracking the wood.
- Hold the mallet near the end of the handle for control
- Use light taps first to check alignment
- Increase force slowly if needed
- Tap on wood blocks for extra protection
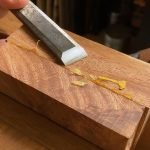
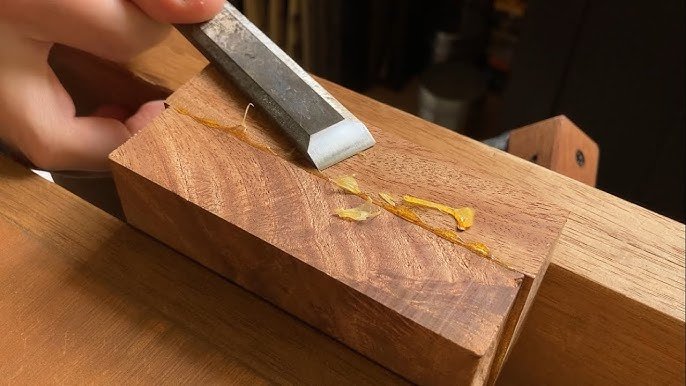
Chisel Assistance Techniques
The mallet helps drive the chisel into the wood with controlled force. Hold the chisel steady and strike the handle.
Use short, firm hits to avoid slipping and damaging the wood surface.
- Strike the chisel handle at the center for even force
- Keep your hand clear of the chisel blade
- Use a wooden or rubber mallet to protect the chisel handle
- Adjust your strikes based on the wood hardness
Adjusting Force For Delicate Work
Delicate woodworking needs soft, controlled taps with the mallet. Too much force can crack thin wood.
Practice light taps and feel the wood’s response before adding more power.
- Hold the mallet closer to the head for softer hits
- Use wrist motion instead of full arm swings
- Tap on a scrap piece to test force
- Stop immediately if wood shows signs of splitting
Maintaining Your Mallet
Keeping your woodworking mallet in good shape helps it last longer. Proper care keeps it safe and effective.
Learn simple ways to clean, store, and fix your mallet. Know when it is time to replace it.
Cleaning And Storage Tips
Clean your mallet after each use to remove dirt and wood dust. Use a dry cloth or soft brush.
- Wipe the mallet head and handle with a dry cloth.
- Use mild soap and water for stubborn dirt, then dry immediately.
- Store the mallet in a dry place away from extreme heat or moisture.
- Keep it on a shelf or hang it to avoid damage.
Repairing Damage
Small cracks or dents can be repaired to extend your mallet’s life. Sand rough spots gently.
- Check the mallet head for cracks or chips.
- Use wood glue to fix small cracks and clamp until dry.
- Sand any rough or splintered areas smoothly.
- Replace the handle if it is loose or broken.
When To Replace Your Mallet
| Signs Your Mallet Needs Replacing | Reason |
|---|---|
| Large cracks or splits in the head | Can cause breakage and injury |
| Loose or broken handle | Unsafe and hard to control |
| Head has worn down too much | Reduces striking power |
| Excessive dents or damage | Can damage your workpieces |
Enhancing Woodworking Results
Using a mallet correctly can improve your woodworking projects. It helps you shape wood carefully and avoid damage.
Learning how to combine mallet use with other tools can save time and increase accuracy. Customizing your mallet also fits different tasks.
Combining Mallet Use With Other Tools
A mallet works well with chisels, carving knives, and gouges. It delivers soft but firm hits to shape wood.
- Use a mallet with a chisel to cut joints cleanly.
- Tap carving knives gently for delicate designs.
- Hold gouges firmly and strike with a mallet for smooth curves.
- Pair a mallet with clamps to keep wood steady.
Improving Accuracy And Efficiency
Practice steady strikes with your mallet to avoid mistakes. Use controlled force to shape wood precisely.
| Tip | Benefit |
| Hold mallet firmly | Better control of each hit |
| Strike at right angle | Prevents slipping and damage |
| Use smooth, even hits | Creates clean cuts and shapes |
| Work slowly at first | Improves accuracy over time |
Customizing Mallets For Specific Tasks
Choose mallet heads made of wood, rubber, or rawhide. Each suits different woodworking needs.
Common mallet customizations:
- Wooden heads for carving and joinery
- Rubber heads for delicate assembly work
- Rawhide heads for finishing tasks
- Handle length adjusted for comfort and leverage

Credit: toolguyd.com
Frequently Asked Questions
What Is The Best Wood Mallet For Woodworking?
A hardwood mallet, like beech or maple, is ideal. It offers durability and a solid strike without damaging wood surfaces. Choose one with a comfortable handle for better control and reduced fatigue during use.
How Do You Hold A Mallet For Woodworking?
Grip the mallet handle firmly near the end for maximum leverage. Keep your wrist straight and use your forearm to swing. This ensures controlled, powerful strikes and reduces the risk of injury or inaccurate hits.
When Should You Use A Mallet Instead Of A Hammer?
Use a mallet for woodworking when you need gentle, controlled force. It prevents damaging wooden joints and delicate tools like chisels. Avoid metal hammers on wood to reduce dents and splits.
Can A Mallet Damage Wood During Woodworking?
A wooden or rubber mallet minimizes damage compared to metal hammers. Proper technique and striking surface help prevent dents or marks. Always use the right mallet type for your specific woodworking task.
Conclusion
Using a mallet in woodworking is simple and effective. It helps shape and join pieces with precision. Practice the right grip and striking force. Always choose the right mallet for your task. This ensures better results and fewer mistakes. Remember to maintain your tools for longer use.
A well-cared-for mallet works better and lasts longer. Keep practicing to improve your skills. Enjoy the process and watch your projects come to life. Happy woodworking!