Measuring wood accurately is the key to making your joinery projects look professional and fit together perfectly. If you’ve ever struggled with pieces that don’t align or end up wasted, this guide is for you.
You’ll learn simple, practical steps to measure wood like a pro, saving you time, money, and frustration. Keep reading to discover the secrets that will take your woodworking skills to the next level. Your projects deserve precision, and you’re just one step away from mastering it.
Choosing The Right Tools
Measuring wood correctly is key to good joinery projects. Using the right tools helps you get exact cuts and fits.
Choosing tools that match your project needs saves time and reduces mistakes. Let’s look at what tools you need and how to keep them accurate.
Essential Measuring Instruments
Different tools suit different measuring jobs in joinery. Here are the main instruments you should have:
- Tape Measure – for quick length checks and longer pieces
- Combination Square – to mark and check right angles
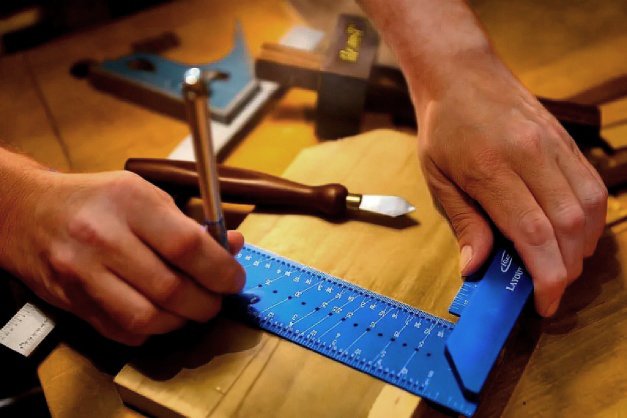
- Marking Gauge – to score consistent lines parallel to edges
- Caliper – for precise thickness and diameter measurements
- Spirit Level – to ensure surfaces are flat and even
- Pencil or Marking Knife – to make clear measurement marks
Calibrating Your Tools
Tools can lose accuracy over time. Regular calibration keeps your measurements correct. Follow these steps:
- Check tape measure against a known ruler or metal scale.
- Adjust the combination square’s blade to sit perfectly at 90 degrees.
- Test the marking gauge on scrap wood to confirm line placement.
- Verify caliper readings with gauge blocks or known standards.
- Use a spirit level on a flat surface to confirm it reads level.
- Replace or sharpen pencils and knives for clear, precise lines.
| Tool | Calibration Check | Frequency |
| Tape Measure | Compare to metal ruler | Monthly |
| Combination Square | Check right angle | Monthly |
| Marking Gauge | Test on scrap wood | Before each project |
| Caliper | Use gauge blocks | Monthly |
| Spirit Level | Place on flat surface | Before use |

Credit: www.familyhandyman.com
Preparing Your Wood
Preparing your wood is the first step in any joinery project. It helps you get accurate cuts and strong joints.
Good preparation saves time and reduces mistakes. It also ensures your project looks clean and professional.
Selecting Quality Lumber
Choose lumber that is straight and free of large knots. Avoid wood with cracks or warping.
Check for moisture content. Wood that is too wet or dry can cause problems later.
- Look for wood with a consistent grain pattern
- Avoid pieces with splits or large holes
- Pick lumber that fits the size you need
- Use a moisture meter to check dryness
Marking Reference Points
Mark clear reference points on your wood before cutting. These marks guide your measurements and cuts.
Use a pencil and a square for straight, accurate lines. Mark both edges to avoid confusion.
- Measure twice, mark once to avoid errors
- Mark the wood’s face and edge for clarity
- Use light pencil marks to keep them easy to remove
- Label each piece to match your project plan
Accurate Measuring Techniques
Measuring wood correctly is essential for joinery projects. Accurate measurements help avoid mistakes and waste.
Using the right tools and methods ensures your pieces fit together well. This guide covers measuring length, width, thickness, and depth.
Measuring Length And Width
Use a tape measure or ruler to find the length and width of your wood. Always measure from the very edge for best results.
- Place the tape measure flat against the wood surface.
- Read the measurement at the wood’s edge or mark.
- Double-check by measuring twice to avoid errors.
- Mark the measurement clearly with a pencil.
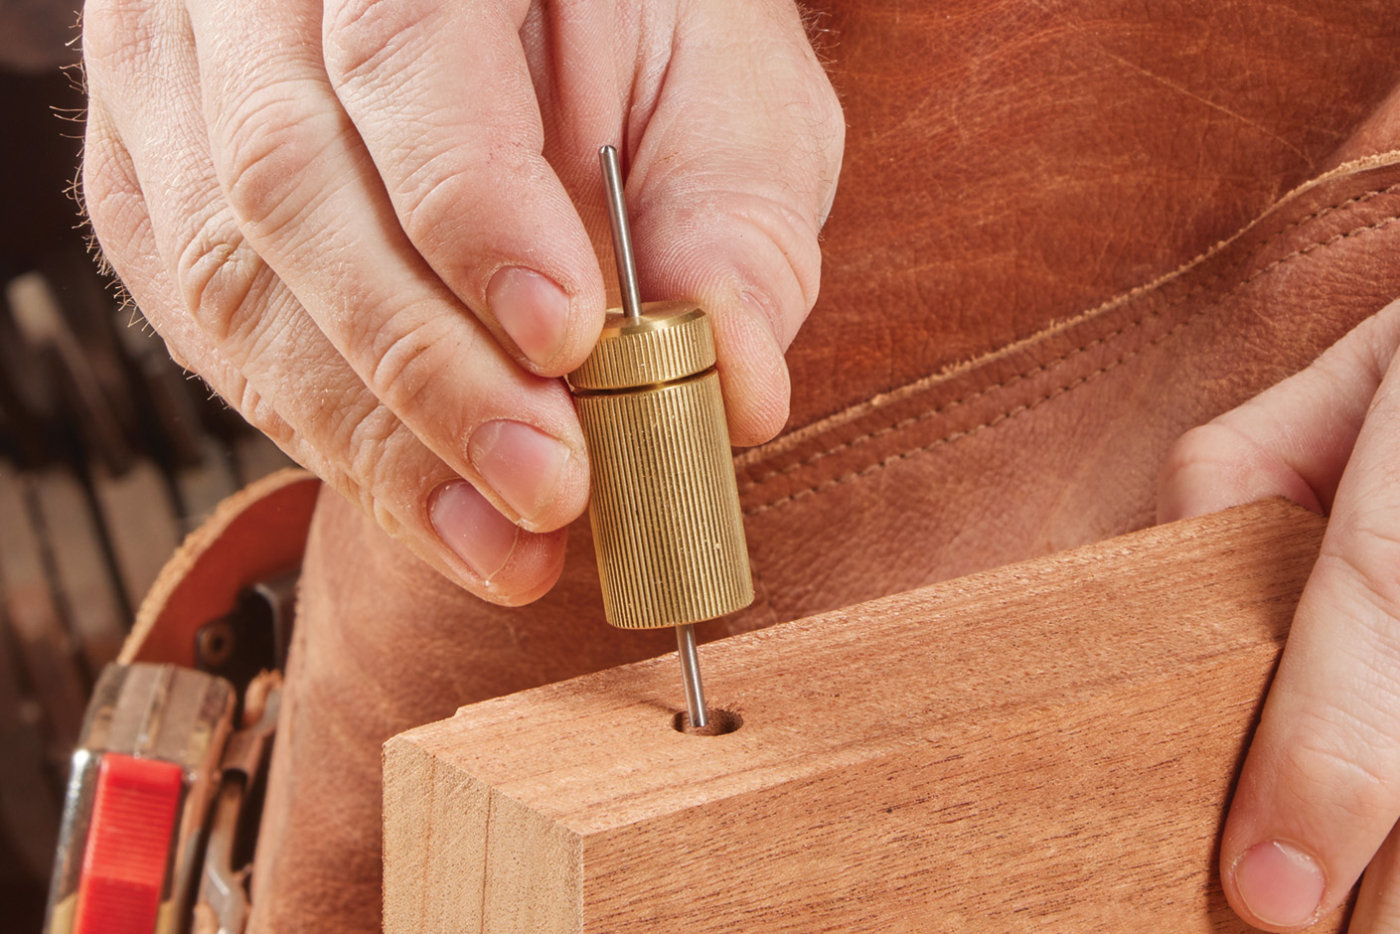
Checking Thickness And Depth
Thickness and depth are important for joint strength and fit. Use calipers or a thickness gauge for precise readings.
| Tool | Use | Tip |
|---|---|---|
| Calipers | Measure thickness and depth accurately | Keep jaws parallel to wood surface |
| Thickness Gauge | Check thin boards or veneers | Use gentle pressure to avoid damage |
| Ruler or Tape | Estimate thickness if no special tool | Measure at multiple points for consistency |
Common Measurement Mistakes
Measuring wood for joinery needs care and attention. Small errors can cause parts to not fit well.
Many beginners make simple mistakes that affect the whole project. Learning to avoid these helps get better results.
Avoiding Parallax Errors
Parallax error happens when you do not look straight at the measuring mark. This makes the reading wrong.
Always position your eye directly above the ruler or tape measure. This way, you get the true measurement.
- Keep the ruler flat on the wood.
- Look straight down at the mark, not from an angle.
- Use a square to help align your measuring tool.
Accounting For Wood Movement
Wood expands and shrinks with changes in moisture and temperature. This can change your measurements over time.
Leave a little extra space in your joints to allow wood to move. This prevents cracks and tight fits later.
- Measure wood in the environment where you will use it.
- Allow about 1/16 inch for seasonal changes.
- Use stable wood types when possible.
Using Jigs And Templates
Jigs and templates help woodworkers make accurate cuts and shapes. They save time and reduce mistakes in joinery projects.
These tools guide your saw or chisel to create the same cut repeatedly. This consistency is key for strong wood joints.
Creating Repeatable Cuts
Jigs and templates let you cut the same size and shape many times. This is useful for parts like tenons or dovetails.
You can build a simple jig from scrap wood. It holds your workpiece steady and guides your tool along a fixed path.
- Mark the shape on a piece of plywood to make a template.
- Clamp the template to the wood before cutting.
- Use the jig to guide your saw or router blade.
- Check each cut against the template to keep sizes uniform.
Enhancing Precision
Templates improve accuracy by removing guesswork. They keep tools aligned and steady during cutting or shaping.
Good jigs reduce errors and make your joinery stronger. Precise cuts fit better and hold together longer.
- Use clamps to hold jigs firmly in place.
- Double-check measurements before cutting.
- Test cuts on scrap wood to confirm accuracy.
- Keep templates clean and free from damage.
Tips For Complex Joinery
Measuring wood accurately is key for strong, neat joints. Complex joinery needs careful attention to details.
Use the right tools and take your time. This will help you avoid mistakes and fit pieces perfectly.
Measuring Angles And Miters
Use a protractor or angle finder to measure angles precisely. Check angles twice before cutting.
Mark the wood clearly with a pencil. Keep your measuring tool steady to avoid errors.
- Place the angle finder flat on the wood surface
- Read the angle and write it down
- Transfer the angle to your cutting tool
- Cut slowly, following the line exactly
Handling Dovetail Layouts
Draw the dovetail shapes on your wood piece before cutting. Use a dovetail marker for even spacing.
Measure the width of tails and pins carefully. Mark each cut line clearly to avoid confusion.
- Start by marking the baseline on both pieces
- Use a ruler to space tails evenly
- Mark pins by fitting one piece to the other
- Cut slowly and check fit often
Final Checks Before Cutting
Before cutting wood for joinery projects, it is important to do final checks. These checks help avoid mistakes and save material.
Taking a little extra time to review measurements and test fits can make your project go smoothly.
Double-checking Measurements
Measure each piece of wood twice or more before cutting. Use a reliable tape measure or ruler.
Check both length and width to make sure they match your plan exactly.
- Mark measurements clearly with a pencil
- Compare measurements with your project plans
- Measure from a fixed edge or point
- Ask someone else to verify your numbers
Dry Fitting Components
Before gluing or fastening, assemble the wood pieces without adhesive. This is called dry fitting.
Dry fitting helps you see if parts fit well and align properly.
- Place all pieces together as in the final assembly
- Check for gaps, tightness, or misalignments
- Adjust parts by sanding or trimming if needed
- Confirm everything fits before cutting more wood
Credit: pebblesandthorns.com
Credit: www.popularwoodworking.com
Frequently Asked Questions
How Do I Accurately Measure Wood For Joinery?
Use a reliable tape measure and mark clearly. Measure twice to avoid mistakes and ensure precise cuts for joinery projects.
What Tools Are Best For Measuring Wood In Joinery?
A tape measure, combination square, and marking gauge are essential. These tools provide accuracy and help maintain consistent measurements.
Why Is Measuring Wood Correctly Important In Joinery?
Accurate measurements prevent gaps and misfits. Proper measuring ensures strong joints and a professional finish in woodworking projects.
How Do I Measure Wood Thickness For Joinery?
Use a caliper or thickness gauge. Measure at multiple points for consistency and mark the exact thickness for precise cuts.
Conclusion
Measuring wood is crucial for successful joinery projects. Precise measurements ensure a good fit. Use a tape measure for accuracy. Record each dimension carefully. Double-check your numbers before cutting. Mistakes can waste materials and time. Remember, practice improves your measuring skills.
Keep tools in good condition. They help maintain accuracy. Invest time in learning measurement techniques. They form the foundation of your project. Proper measurement leads to quality joinery. Aim for accuracy every time. Happy woodworking!