Are you struggling to make straight cuts with your hand saw? You’re not alone.
Even experienced DIYers sometimes find it tricky to get that perfect, clean line. But imagine how satisfying it would feel to slice through wood smoothly, every single time. You’ll discover simple, effective tips that make using your hand saw easier and more precise.
Whether you’re a beginner or just want to improve your skills, these tricks will help you achieve straight cuts with confidence. Keep reading, and unlock the secrets to mastering your hand saw today.

Credit: www.youtube.com
Choosing The Right Hand Saw
Using a hand saw for straight cuts is easier with the right tool. Picking the correct saw helps you cut clean and straight lines.
Not all hand saws work for every job. Understanding your options makes your work smoother and safer.
Types Of Hand Saws
There are many hand saw types for different tasks. Each type has a shape and tooth style for specific cuts.
- Coping Saw: Good for curves and detailed cuts.
- Back Saw: Has a stiff spine for straight, fine cuts.
- Crosscut Saw: Cuts across wood grain cleanly.
- Rip Saw: Cuts along wood grain quickly.
- Panel Saw: A general saw for many jobs.
Blade Teeth And Their Uses
Saw teeth differ in size and shape. The teeth design affects cut speed and smoothness.
- Crosscut Teeth: Small, angled teeth for smooth cross-grain cuts.
- Rip Teeth: Large, chisel-like teeth for fast cutting along grain.
- Dovetail Teeth: Fine teeth for precise, clean cuts in joinery.
- Combination Teeth: Mix of rip and crosscut teeth for versatility.
Selecting Based On Material
Choose a saw based on the material you cut. Different woods and materials need specific saw types.
- Softwood: Use saws with larger teeth for faster cuts.
- Hardwood: Use saws with finer teeth for smooth cuts.
- Plywood or MDF: Use fine teeth to avoid splintering.
- Plastic or metal: Use special saws made for those materials.
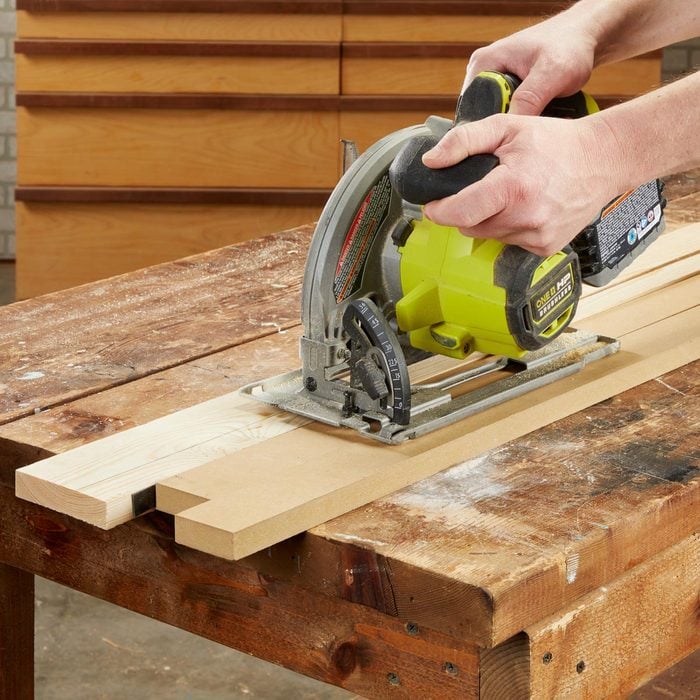
Credit: www.familyhandyman.com
Preparing For The Cut
Using a hand saw for straight cuts needs careful preparation. Proper setup helps you cut safely and accurately.
Before you saw, focus on marking, securing, and positioning yourself. These steps make the work easier and cleaner.
Marking The Cut Line
Draw a clear line where you want to cut. This guides your saw and keeps the cut straight.
- Use a pencil or marker with good contrast on the wood.
- Measure twice to ensure the line is in the right place.
- Use a square or ruler for a straight edge.
- Mark both sides if you will cut through the thickness.
Securing The Workpiece
Hold the wood firmly to prevent movement. This safety step keeps your hands away from the saw blade.
| Method | Details |
|---|---|
| Clamps | Use strong clamps to fix the wood to a stable surface. |
| Workbench Vise | Place the wood in a vise to hold it tight and steady. |
| Helper | Ask someone to hold the wood while you saw, if clamps are not available. |
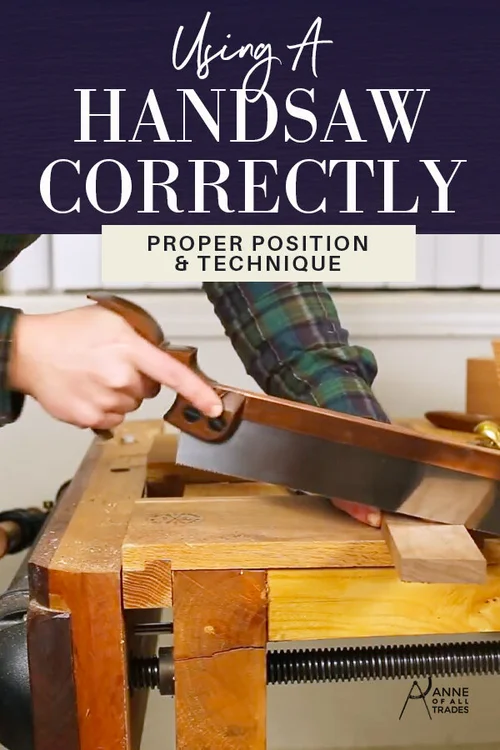
Proper Body Positioning
Stand in a comfortable and balanced way. Your body should support smooth, straight sawing.
- Keep your feet shoulder-width apart for balance.
- Place the workpiece at waist height to reduce strain.
- Hold the saw handle with a relaxed but firm grip.
- Use your arm and shoulder to move the saw, not just your wrist.
Sawing Techniques
Using a hand saw for straight cuts takes practice and the right technique. Good sawing skills help you cut wood cleanly and safely.
This guide covers key ways to improve your sawing, focusing on starting the cut smoothly, keeping a steady stroke, and controlling the saw angle.
Starting The Cut Smoothly
Begin your cut by marking the line clearly with a pencil or a knife. Hold the saw at a low angle and start with light, slow strokes to create a small groove.
This groove guides the saw and prevents it from slipping off the line as you cut deeper.
Maintaining A Steady Stroke
Keep your arm and wrist steady as you saw. Use long, even strokes that move the saw forward and backward along the cut line.
- Apply gentle pressure on the forward stroke
- Ease pressure on the return stroke
- Keep your body relaxed to avoid shaking
- Look down the cut line often to stay on track
Controlling Saw Angle
Hold the saw at the correct angle to control the cut’s depth and direction. Too steep an angle may slow you down; too shallow may cause the saw to skate.
| Type of Cut | Recommended Saw Angle |
| Crosscut (cutting across grain) | 45 degrees |
| Rip cut (cutting with grain) | 60 degrees |
| Starting cut | 20 to 30 degrees |
Common Mistakes To Avoid
Using a hand saw for straight cuts needs patience and care. Many people make simple mistakes that cause poor results.
Knowing what to avoid helps you cut cleaner and safer. Here are some common errors to watch out for.
Applying Excessive Pressure
Pushing too hard on the saw does not make it cut faster. It can bend the blade and cause rough edges.
- Use steady, gentle pressure.
- Let the saw teeth do the cutting.
- Keep the saw blade straight and aligned.
- Stop and adjust if the saw feels stuck.
Sawing Too Fast
Rushing the cut leads to jagged lines and splintered wood. It also tires your arm quickly.
Take slow, even strokes. Focus on accuracy rather than speed.
Ignoring Tool Maintenance
A dull or dirty saw blade makes cutting hard. It increases effort and reduces control.
| Maintenance Task | Why It Matters |
| Sharpening the blade | Keeps cuts smooth and easy |
| Cleaning saw teeth | Removes sap and debris |
| Checking handle tightness | Prevents wobbling and slips |
Finishing The Cut
Finishing the cut with a hand saw is important for a clean result. Proper finishing helps your work look neat and precise.
Take your time to check the cut and fix any rough spots. This improves the strength and appearance of your project.
Checking For Straightness
Look closely at the cut edge to see if it is straight. Use a ruler or a square tool to check the line.
A straight cut fits better and makes joining parts easier. Fix any curves or waves before moving on.
Smoothing The Cut Edge
Use sandpaper or a file to smooth the cut edge. This removes splinters and rough spots that can cause injury.
Smooth edges also help paint or stain stick evenly. Work slowly and check your progress often.
- Start with coarse sandpaper to remove big rough spots
- Switch to fine sandpaper for a smooth finish
- Wipe dust off with a cloth before painting or staining
Handling Imperfections
Small mistakes can happen when cutting with a hand saw. Fill gaps or chips with wood filler or putty.
After the filler dries, sand the area smooth. This hides flaws and makes the cut look clean.
- Apply wood filler with a putty knife
- Let it dry completely before sanding
- Use matching paint or stain to blend the repair
Safety Tips While Using A Hand Saw
Using a hand saw can be safe if you follow simple rules. Always focus on safety to avoid accidents.
These tips help you cut wood straight and keep your hands and body safe.
Wearing Protective Gear
Protective gear keeps your body safe from sharp blades and flying wood bits. Always wear the right gear before sawing.
Good gear reduces the risk of cuts and eye injuries while working.
- Wear safety glasses to protect your eyes.
- Use gloves to protect your hands from splinters.
- Wear a dust mask to avoid breathing sawdust.
- Wear long sleeves and pants to protect your skin.
Safe Handling Practices
Hold the saw firmly and use steady movements for straight cuts. Poor handling can cause slips and injuries.
Always cut away from your body and keep your fingers clear of the blade path.
- Check the saw blade for damage before use.
- Use both hands to control the saw.
- Keep the wood stable with clamps or a workbench.
- Cut slowly and carefully to maintain control.
- Stop sawing if you feel tired or lose focus.
Storing The Saw Properly
Store your hand saw in a safe place to keep it sharp and avoid accidents. Proper storage also extends the saw’s life.
Keep the saw out of reach of children and away from moisture to prevent rust.
- Use a blade cover or sheath for safety.
- Hang the saw on a wall hook or store in a toolbox.
- Clean the saw blade after each use.
- Apply light oil to the blade to stop rust.

Credit: www.familyhandyman.com
Frequently Asked Questions
How Do I Ensure A Straight Cut With A Hand Saw?
Use a sharp blade and steady hand. Mark your cut line clearly. Guide the saw slowly along the line. Keep consistent pressure and angle throughout the cut.
What Type Of Hand Saw Is Best For Straight Cuts?
A crosscut saw or a fine-toothed saw works best. These saws offer precision and control. They reduce splintering and produce cleaner cuts.
How Can I Prevent The Wood From Splintering?
Score the cut line with a utility knife first. Use painter’s tape along the cut edge. Saw slowly and avoid excessive force to minimize splintering.
What Safety Tips Should I Follow When Sawing?
Wear safety goggles and gloves. Secure the wood firmly before cutting. Keep fingers away from the blade. Work in a well-lit, clutter-free area.
Conclusion
Mastering straight cuts with a hand saw takes practice. Start with a sturdy workbench. Keep your saw sharp for clean cuts. Hold the saw firmly, but don’t apply too much force. Let the saw do its job. Use a guide if needed for precision.
Always measure twice before cutting. Safety should be your top priority. Wear protective gear. With these tips, your cutting skills will improve. Your projects will look better and neater. Enjoy the process and keep practicing. Your hand saw is a valuable tool.
Make the most of it in your woodworking endeavors.