Are you tired of struggling with uneven or messy pipe cuts that waste your materials and time? Using a pipe cutter can change everything for you.
It’s the tool that helps you make clean, precise cuts every single time, whether you’re working on plumbing, DIY projects, or repairs. You’ll discover simple tips to master your pipe cutter and achieve accuracy that saves you effort and frustration.
Keep reading to unlock the secret to perfect pipe cuts and take your skills to the next level.

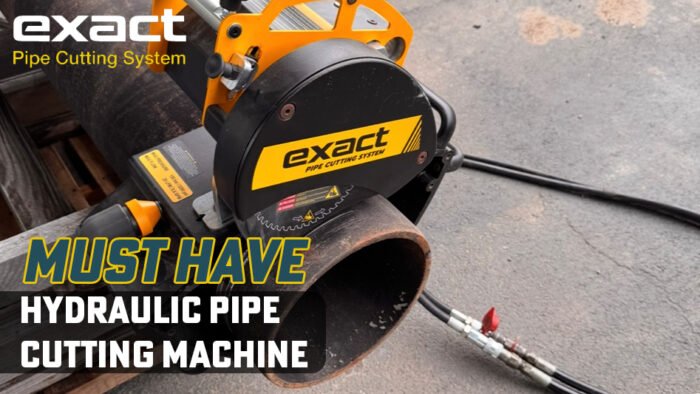
Credit: www.mutttools.com
Choosing The Right Pipe Cutter
Using a pipe cutter helps make clean and straight cuts. Picking the right pipe cutter is important for accuracy.
Different pipe cutters fit different pipe types and sizes. Knowing which one to use makes your work easier.
Types Of Pipe Cutters
There are several types of pipe cutters. Each type works best for certain pipes and jobs.
- Rotary pipe cutters use a sharp wheel to cut around the pipe.
- Plastic pipe cutters have a ratchet mechanism for smooth cuts.
- Hacksaw cutters are manual and good for metal pipes.
- Tubing cutters are small and fit in tight spaces.
Material Compatibility
Pipe cutters work best with certain materials. Choose one that matches your pipe type.
- Plastic pipe cutters suit PVC, CPVC, and PEX pipes.
- Rotary cutters work well on copper and aluminum pipes.
- Hacksaws can cut steel and iron pipes.
- Special cutters exist for cast iron and other thick pipes.
Size And Capacity
Pipe cutters come in different sizes. Check the cutter’s capacity before buying.
Use a cutter that fits the pipe diameter. Too small or too large cutters cause bad cuts.
- Small cutters fit pipes under 1 inch in diameter.
- Medium cutters handle pipes from 1 to 2 inches.
- Large cutters work on pipes over 2 inches.
Preparing For The Cut
Using a pipe cutter ensures clean and accurate pipe cuts. Proper preparation helps you get the best results. This guide covers how to measure, secure, and stay safe before cutting.
Taking time to prepare reduces mistakes and keeps you safe. Follow these steps carefully to make your pipe cutting easier.
Measuring And Marking
Measure the pipe length carefully before cutting. Mark the spot with a permanent marker or pencil. Double-check your measurements to avoid errors.
- Use a tape measure for accuracy
- Mark the pipe clearly on a flat surface
- Check the mark from different angles
- Allow a small extra length if fitting is tight
Securing The Pipe
Hold the pipe firmly to prevent movement during cutting. Use a pipe vise or clamp to keep it steady. Make sure the pipe is level and not tilted.
| Tool | Purpose | Tip |
|---|---|---|
| Pipe Vise | Holds pipe tightly | Place pipe so the mark is free for cutting |
| Clamp | Secures pipe on workbench | Check clamp tightness before cutting |
| Workbench | Provides stable base | Use rubber pads to avoid pipe slipping |
Safety Precautions
Wear safety glasses to protect your eyes from metal shards. Use gloves to avoid cuts and improve grip. Work in a well-lit area for better visibility.
- Keep hands away from the cutting blade
- Wear a dust mask if cutting plastic pipes
- Clear the workspace of any clutter
- Check the cutter blade for damage before use
Step-by-step Cutting Process
Using a pipe cutter ensures clean and accurate cuts on pipes. The process needs careful attention to get the best results.
Follow each step closely to position, apply pressure, and rotate the cutter for smooth cuts.
Positioning The Cutter
Place the pipe cutter on the pipe where you want to cut. Make sure the cutting wheel lines up with the mark on the pipe.
- Hold the pipe steady on a flat surface.
- Align the cutter’s wheel exactly on the cutting line.
- Check that the cutter grips the pipe firmly but not too tight yet.
Applying Pressure Correctly
Turn the knob to tighten the cutter’s wheel against the pipe. Apply just enough pressure for the wheel to cut without squeezing the pipe.
| Pressure Level | Effect |
| Too Loose | Wheel slips, no cut |
| Too Tight | Pipe deforms, rough edge |
| Just Right | Clean cut, no damage |
Rotating The Cutter Smoothly
Rotate the pipe cutter around the pipe. Turn it slowly and evenly to make a straight cut.
- Rotate the cutter 360 degrees around the pipe.
- After each rotation, tighten the knob slightly.
- Keep rotating and tightening until the pipe is cut through.
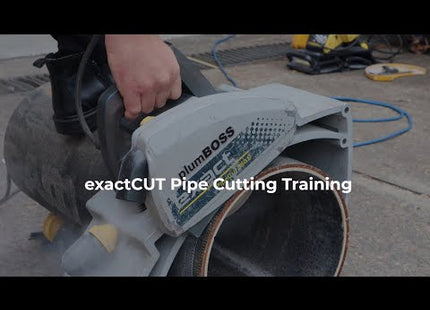
Credit: www.plumboss.com.au
Common Mistakes To Avoid
Using a pipe cutter helps you make clean and precise cuts. Avoid mistakes to get the best results.
Some errors can damage the tool or cause bad cuts. Learn what to watch out for when cutting pipes.
Over-tightening The Cutter
Turning the cutter too tight can crush the pipe. This makes the cut uneven or damages the pipe.
Apply steady pressure and turn the cutter slowly. Stop tightening when you feel resistance during the cut.
- Do not force the cutter onto the pipe
- Use gentle, steady pressure
- Check the pipe after each turn
Cutting At Incorrect Angles
Cutting the pipe at an angle can cause leaks or poor fitting. The cut should be straight across the pipe.
Keep the pipe and cutter aligned perfectly. Use a guide or mark the cut line before you start cutting.
- Check the pipe’s position before cutting
- Hold the cutter square to the pipe
- Use a marker to draw a straight line
Ignoring Tool Maintenance
Dirty or dull cutters do not cut well. They can damage the pipe or cause rough edges.
Clean the cutter after each use. Sharpen or replace the blade when it becomes dull.
- Wipe off dirt and debris after use
- Lubricate moving parts regularly
- Check blade sharpness before cutting
Maintaining Your Pipe Cutter
Keeping your pipe cutter in good shape helps you make clean and accurate cuts. Regular care improves its lifespan and performance.
Simple maintenance steps like cleaning, sharpening, and proper storage keep the tool ready for use.
Cleaning After Use
After cutting pipes, remove dirt and metal shavings from the cutter. This prevents rust and damage.
Use a dry cloth or brush to clean the blade and rollers carefully. Avoid water on parts that can rust.
- Wipe the blade and rollers to remove debris
- Use a small brush for hard-to-reach areas
- Keep the tool dry before storing
Sharpening The Blade
Keep the blade sharp for smooth and straight cuts. A dull blade can crush pipes instead of cutting them.
Use a fine file or sharpening stone to carefully sharpen the cutting edge. Follow the blade’s original angle.
- Remove the blade if possible before sharpening
- Sharpen with gentle, even strokes
- Check the blade for chips or damage
- Replace the blade if it is too worn
Storage Tips
Store the pipe cutter in a dry place to avoid rust. Keep it away from moisture and dust.
Use a protective case or wrap the cutter in a cloth to protect the blade and moving parts.
- Keep the cutter in a toolbox or drawer
- Avoid storing near corrosive chemicals
- Check the cutter regularly for rust or damage

Credit: www.temu.com
Tips For Mastering Precision Cuts
Using a pipe cutter can make your cuts clean and accurate. It helps to avoid rough edges and saves time on finishing.
To get precise cuts, you need to use the right methods and tools carefully. Small details matter for the best results.
Practice Techniques
Start by practicing on scrap pipes to get a feel for the cutter. Hold the pipe steady and apply even pressure while rotating.
- Keep your hands steady and avoid rushing.
- Rotate the cutter smoothly around the pipe.
- Check the cutter blade is sharp and clean.
- Practice cutting different pipe sizes.
Using Guides And Supports
Use guides or supports to hold the pipe straight while cutting. This prevents the pipe from moving and helps keep the cut straight.
| Type of Support | Purpose |
| Pipe Clamp | Holds pipe firmly in place |
| Cutting Guide | Keeps cutter aligned on pipe |
| Work Bench | Provides stable surface |
Checking Cut Accuracy
After cutting, check the pipe end for straightness and smoothness. Measure the length to confirm the cut is at the right spot.
Here are quick tips to check your cuts:
- Use a square to check if the cut is perpendicular.
- Look for even edges without burrs.
- Measure the pipe length with a ruler or tape.
- Test fit the pipe into connectors to confirm size.
Frequently Asked Questions
What Is The Main Purpose Of A Pipe Cutter?
A pipe cutter is designed to make clean, accurate cuts on pipes. It ensures smooth edges without deforming the pipe. This tool is essential for plumbing, HVAC, and DIY projects needing precise pipe measurements.
How Do I Use A Pipe Cutter Correctly?
Place the pipe cutter around the pipe and tighten the knob. Rotate the cutter around the pipe, tightening gradually. This method ensures a clean, straight cut without crushing or damaging the pipe.
Can A Pipe Cutter Cut Different Pipe Materials?
Yes, pipe cutters can cut materials like copper, PVC, and steel. Always use the correct type of cutter for the specific pipe material. This prevents damage and ensures accurate, clean cuts.
Why Choose A Pipe Cutter Over A Saw?
Pipe cutters provide cleaner, more precise cuts than saws. They reduce burrs and the need for extra finishing. Using a pipe cutter saves time and effort, especially in tight spaces.
Conclusion
A pipe cutter offers precision in plumbing tasks. It ensures clean, accurate cuts. This tool saves time and effort. Ideal for both beginners and pros. It’s easy to use and maintain. Remember to choose the right size for your needs.
Practice makes perfect, so keep trying. Enjoy smooth, hassle-free pipe cutting. Your projects will benefit from better results. Accuracy and precision are within reach. So, grab your pipe cutter and get started. Happy cutting!