Have you ever wondered how to check if a wire is working properly or if it’s causing problems in your circuit? Knowing how to measure wire resistance is key to finding out.
When you understand this simple skill, you can save time, avoid costly mistakes, and make sure your electrical projects run smoothly. You’ll learn easy, step-by-step methods to measure wire resistance accurately—even if you’re not an expert. Keep reading, and you’ll gain the confidence to handle your wires like a pro.

Credit: leetsacademy.blogspot.com
Basics Of Wire Resistance
Wire resistance is how much a wire slows down electric current. It is a key factor in electrical circuits.
Measuring wire resistance helps to check wire quality and performance in devices.
What Affects Wire Resistance
Several things change how much resistance a wire has. The first is the wire’s length. Longer wires have more resistance.
The second factor is thickness. Thinner wires have higher resistance than thick ones. The material of the wire also matters.
- Longer wires increase resistance
- Thinner wires have higher resistance
- Materials like copper have low resistance
- Higher temperatures increase resistance
Units And Symbols
Resistance is measured in ohms, symbolized by the Greek letter omega (Ω). Ohms tell how hard it is for current to flow.
The symbol for resistance in formulas is R. Electric current is I, and voltage is V. These help calculate resistance.
| Quantity | Symbol | Unit |
|---|---|---|
| Resistance | R | Ohm (Ω) |
| Current | I | Ampere (A) |
| Voltage | V | Volt (V) |

Credit: leetsacademy.blogspot.com
Tools For Measuring Resistance
Measuring wire resistance helps check electrical performance. You need special tools to get accurate results.
Different tools suit different levels of precision and wire types. This guide explains common options.
Multimeter Types
Multimeters measure voltage, current, and resistance. They are simple and widely used.
There are two main types: analog and digital multimeters.
- Analog multimeter:Uses a needle to show readings on a scale.
- Digital multimeter:Shows readings as numbers on a screen.
Digital multimeters are easier to read and more accurate for resistance tests.
Kelvin Bridge
The Kelvin Bridge measures very low resistances with high precision. It reduces errors from wire leads.
This tool uses a special four-wire connection to separate current and voltage paths.
- Applies current through one pair of wires
- Measures voltage with another pair
- Calculates resistance accurately
Four-wire Measurement Setup
The four-wire setup uses separate wires for current and voltage. This reduces measurement errors.
This method works well for very low resistance values like thin wires.
- Two wires carry test current through the wire
- Two wires measure voltage drop across the wire
- Eliminates resistance from test leads
- Improves accuracy for small resistance
Step-by-step Measurement Methods
Measuring wire resistance is important for checking electrical circuits and wire quality. There are several methods to do this accurately.
This guide explains three common ways to measure wire resistance with easy steps to follow.
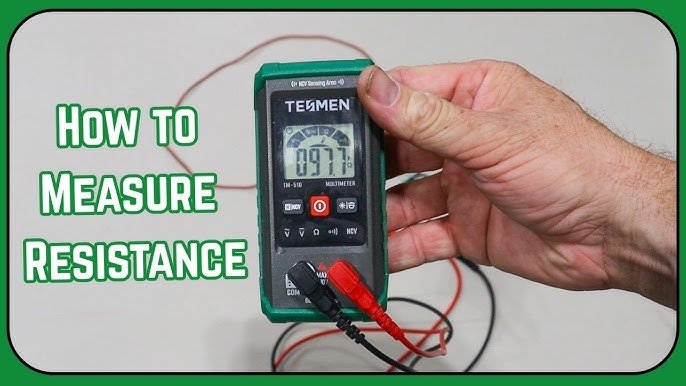
Using A Digital Multimeter
A digital multimeter is a simple tool to measure resistance. It shows the resistance value directly on its screen.
- Turn off power to the wire before measuring.
- Set the multimeter to the resistance (ohm) mode.
- Connect the multimeter probes to both ends of the wire.
- Read the resistance value displayed on the screen.
- Note the value for your records or troubleshooting.
Applying The Four-wire Technique
The four-wire method reduces errors from lead and contact resistance. It uses separate pairs of wires for current and voltage measurement.
| Step | Description |
| 1 | Attach two current-carrying probes to the wire ends. |
| 2 | Connect two voltage-sensing probes near the current probes. |
| 3 | Pass a known current through the wire using the current probes. |
| 4 | Measure voltage drop across the wire with the voltage probes. |
| 5 | Calculate resistance using Ohm’s law: Resistance = Voltage ÷ Current. |
Measuring With A Kelvin Bridge
A Kelvin bridge provides very precise resistance measurements, especially for very low values.
- Set up the Kelvin bridge circuit according to its instructions.
- Connect the wire to the bridge terminals.
- Adjust the bridge controls until the meter reads zero balance.
- Read the resistance value from the bridge scale.
- Record the resistance for analysis.
Factors Impacting Accuracy
Measuring wire resistance accurately is important for good results. Many factors can change the readings.
Knowing these factors helps you get better measurements. It also prevents mistakes when testing wire resistance.
Temperature Effects
Wire resistance changes as temperature changes. Higher temperature makes resistance go up. Lower temperature makes it go down.
This happens because heat makes atoms in the wire move more. This movement blocks the flow of electricity.
- Measure resistance at a stable temperature
- Use temperature compensation if possible
- Note temperature during measurement
Contact Resistance
Contact resistance is the extra resistance where the meter touches the wire. Dirty or loose contacts increase resistance.
Good contact points help get accurate readings. Use clean and tight connections for best results.
- Clean wire ends before measuring
- Use proper clamps or probes
- Check for corrosion or dirt
Wire Length And Diameter
Longer wires have more resistance than short ones. Thin wires have more resistance than thick wires.
Knowing the length and diameter helps predict resistance. This can help check if the measurement is correct.
| Wire Property | Effect on Resistance |
|---|---|
| Length | Resistance increases as length increases |
| Diameter | Resistance decreases as diameter increases |
Practical Tips For Reliable Results
Measuring wire resistance helps check if wires work well. Accurate readings depend on the right steps.
Use proper tools and techniques to get clear results. Small mistakes can cause wrong measurements.
Ensuring Good Connections
Good connections stop extra resistance from affecting your reading. Clean wire ends to remove dirt or rust.
Use firm contact points or clamps to hold wires tightly. Loose connections can cause unstable readings.
- Strip insulation carefully without damaging wire
- Clean wire tips with sandpaper or a wire brush
- Use proper test leads and connectors
- Check for secure contact before measuring
Calibration And Maintenance
Calibrate your measuring device often. This keeps results accurate and trustworthy.
Keep the tester clean and store it safely. Replace worn parts like probes or cables to avoid errors.
- Follow the device manual for calibration steps
- Check battery levels before use
- Clean probe tips regularly
- Store equipment in dry places
Handling Different Wire Materials
Wire materials affect resistance values. Copper and aluminum wires need different care during measurement.
Know the material type to compare readings correctly. Some metals have higher resistance than others.
| Wire Material | Resistance Characteristic | Tip |
|---|---|---|
| Copper | Low resistance | Standard probes work well |
| Aluminum | Higher resistance | Use clean connections to reduce error |
| Nickel | Moderate resistance | Check for oxidation before measuring |
Common Mistakes To Avoid
Measuring wire resistance may seem easy, but many people make mistakes. These errors lead to wrong results and confusion.
Knowing what to avoid helps you get better, more accurate readings every time you test wire resistance.
Incorrect Tool Usage
Using the wrong tool or not using it properly affects your resistance readings. Not all meters measure low resistance well.
For example, a standard multimeter may not detect very small resistance values. This leads to false results.
- Use a precise ohmmeter or micro-ohmmeter for low resistance.
- Check if your meter is set to the correct measurement mode.
- Always calibrate your tool before testing.
Ignoring Environmental Conditions
Temperature and humidity affect wire resistance. Ignoring these factors causes errors in your measurements.
Resistance increases as temperature rises. Moisture can also change how the wire conducts electricity.
- Measure wire resistance at a stable room temperature.
- Avoid testing in very humid or wet places.
- Note the temperature to adjust your results if needed.
Misinterpreting Readings
Reading the meter wrong is a common mistake. Sometimes people confuse units or ignore small but important details.
Resistance values might be very low, so it is easy to think the wire is broken or damaged when it is not.
- Understand the scale and units on your meter.
- Repeat the test to confirm your reading.
- Compare results with known values or wire specifications.

Credit: www.philipharris.co.uk
Frequently Asked Questions
What Tools Are Needed To Measure Wire Resistance?
To measure wire resistance, you need a digital multimeter or an ohmmeter. Ensure the device is calibrated for accurate readings. Connect the wire leads properly and set the meter to the resistance mode to get precise results.
How Does Wire Length Affect Resistance Measurement?
Wire resistance increases with length because electrons face more collisions. Longer wires have higher resistance, affecting measurement accuracy. Always consider wire length to calculate resistance correctly using the formula R = ρL/A.
Can Temperature Impact Wire Resistance Readings?
Yes, temperature affects resistance as metals expand and resistivity changes. Higher temperatures increase resistance, while lower temperatures decrease it. Measure resistance at a stable temperature for consistent and reliable results.
Why Is Wire Gauge Important In Resistance Measurement?
Wire gauge determines the wire’s thickness and cross-sectional area. Thicker wires have lower resistance, while thinner wires have higher resistance. Knowing the gauge helps calculate resistance accurately and choose the right wire for your application.
Conclusion
Measuring wire resistance is simple with the right steps. Use a reliable tool and follow safety rules. Check the wire’s length, thickness, and material for best results. Accurate readings help you avoid electrical problems. Practice these methods to get confident in measuring resistance.
Keep your tools clean and calibrated for precise results. Understanding wire resistance improves your electrical projects. Try these tips next time you work with wires. It saves time and keeps your circuits safe.