Are you ready to take your woodworking skills to the next level? Using a hand saw for detailed cuts can seem tricky at first, but with the right tips, you’ll be able to make clean, precise cuts every time.
Imagine turning rough pieces of wood into beautiful, intricate designs with ease. You’ll discover simple techniques that will help you control your saw like a pro, avoid common mistakes, and achieve flawless results. Keep reading, and you’ll soon master the art of detailed hand sawing with confidence and accuracy.
Choosing The Right Hand Saw
Using a hand saw for detailed cuts needs the right tool. Picking the correct hand saw helps you cut clean and precise.
Different saws suit different tasks. Choose a saw that fits your project and skill level for best results.
Types Of Hand Saws For Detail Work
There are many hand saws made for fine cutting. Each type works well for certain materials and cuts.
Common types include coping saws, fret saws, and back saws. They help make precise and small cuts.
- Coping Saw:Good for curves and shapes in wood.
- Fret Saw:Has a thin blade for very detailed cuts.
- Back Saw:Provides straight cuts with a stiff back.
Blade Selection And Tooth Count
Blade choice changes how smooth your cuts are. A blade with more teeth cuts finer and slower.
Fewer teeth per inch (TPI) cut faster but rougher. More TPI is better for delicate and clean cuts.
- High TPI (15-32) for detailed wood and thin materials
- Medium TPI (10-15) for general wood cutting
- Low TPI (6-10) for thick or soft wood
Handle Design And Comfort
A hand saw handle should feel good in your hand. Comfort helps you control the saw better and reduces fatigue.
Look for handles with smooth edges and a shape that fits your grip. Some handles have soft covers for extra comfort.
- Wooden handles offer a classic feel and good grip
- Plastic or rubber handles can add cushioning
- Ergonomic shapes reduce hand strain during long use

Credit: www.youtube.com
Preparing Your Workspace
Using a hand saw for detailed cuts needs a clean and organized workspace. A tidy area helps you focus and work safely.
Good preparation reduces mistakes and makes cutting easier. Let’s look at key steps to get ready.
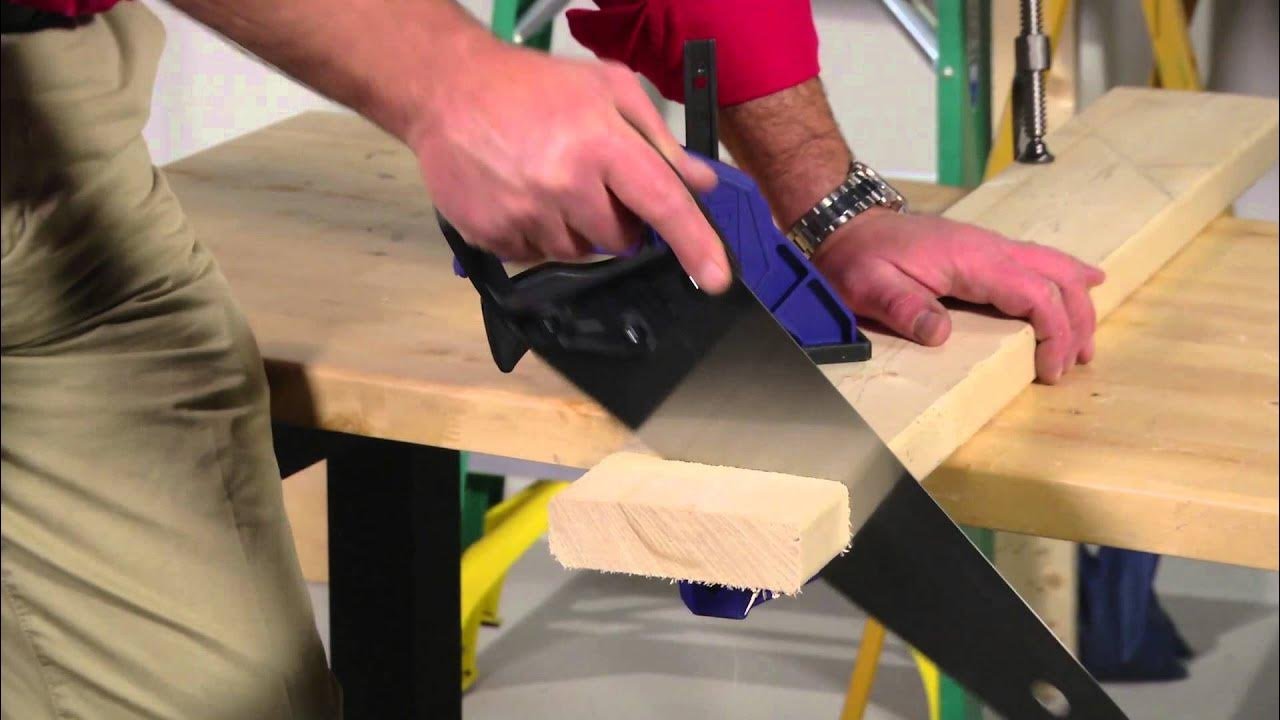
Securing The Workpiece
Keep the wood steady to get precise cuts. Use clamps or a vise to hold the piece firmly. Avoid moving parts while cutting.
- Place the workpiece on a flat surface
- Use clamps to hold it tight
- Check if it is stable before sawing
- Never hold wood by hand while cutting
Lighting And Visibility
Good light helps you see cut lines clearly. Bright light reduces eye strain and errors.
| Type | Benefit |
| Natural Light | Bright and even, best for daytime work |
| LED Work Light | Focused and adjustable, useful indoors |
| Headlamp | Keeps hands free and lights the exact spot |
Safety Gear Essentials
Wear safety gear to protect yourself from dust and sharp edges. Proper equipment keeps you safe during detailed cuts.
- Safety goggles to protect eyes from sawdust
- Dust mask to avoid breathing fine particles
- Work gloves for a better grip and hand protection
- Hearing protection if working near loud tools
Marking And Measuring For Precision
Using a hand saw for detailed cuts needs careful marking and measuring. Precise marks guide your saw for clean, accurate cuts.
Small mistakes in marking can make your work uneven or waste material. Follow these tips to improve your cutting accuracy.
Using Marking Tools Effectively
Choose the right tools to mark your wood clearly. A sharp pencil or marking knife gives thin, easy-to-follow lines.
- Use a ruler or straight edge for long marks
- Mark lightly at first, then darken if needed
- Try a marking gauge for consistent lines on edges
- Keep your tools clean and sharp for best results
Creating Clear Cut Lines
Clear cut lines help you saw exactly where planned. Avoid thick or smudged lines that hide the cut path.
| Marking Method | Best Use | Tip |
|---|---|---|
| Pencil | General marking on wood surface | Use hard pencils for fine lines |
| Marking Knife | Precise, thin lines on hardwood | Score the wood for exact cuts |
| Marking Gauge | Repeating lines on edges | Set once for uniform cuts |
Double-checking Measurements
Always measure twice before cutting. This saves wood and prevents mistakes in your project.
- Measure the length or width carefully with a tape or ruler
- Mark your cut line clearly on the wood
- Check the measurement again from both ends or edges
- Confirm the marked line matches your project plan
- Only then, start sawing along the line
Mastering Sawing Techniques
Using a hand saw for detailed cuts needs practice and care. Correct methods make your work cleaner and safer.
Learn key tips to hold the saw, start cuts well, keep your stroke steady, and control the saw’s angle and pressure.
Proper Grip And Stance
Hold the saw handle firmly but not too tight. Your fingers should wrap around the handle comfortably.
Stand with your feet shoulder-width apart. Keep your body balanced and aligned with the cut line.
- Grip the saw handle with your dominant hand.
- Place your other hand on the workpiece to guide the saw.
- Stand steady with one foot slightly forward.
- Keep your shoulders relaxed to avoid tension.
Starting The Cut Accurately
Mark the cut line clearly with a pencil or knife. This helps you follow the right path.
Begin the cut slowly using short strokes. This prevents the saw from slipping off the line.
- Place the saw’s teeth on the marked line.
- Use light pressure to start the cut.
- Make small, steady strokes to create a groove.
- Once the groove is set, increase stroke length gradually.
Maintaining A Steady Stroke
Keep your saw stroke smooth and even. Avoid jerky or fast motions that can damage the wood.
Use your whole arm, not just the wrist, to move the saw. This adds control and power.
| Tip | Why It Helps |
|---|---|
| Use long, even strokes | Reduces rough edges |
| Keep a relaxed grip | Prevents fatigue |
| Move your arm smoothly | Improves control |
| Keep saw blade straight | Ensures clean cuts |
Controlling Saw Angle And Pressure
Hold the saw at the right angle to the wood. Usually, a 45-degree angle works well for most cuts.
Adjust pressure depending on the wood type:
- Softwood: Use gentle pressure to avoid overcutting.
- Hardwood: Apply firmer pressure for better progress.
- Fine detail: Light pressure and slow motion help accuracy.
Handling Curves And Intricate Shapes
Cutting curves and detailed shapes with a hand saw needs care and skill. You must guide the saw gently along the lines.
Choosing the right technique helps you make smooth cuts without breaking the wood or bending the saw blade.
Making Relief Cuts
Relief cuts help when you cut tight curves. These cuts remove extra wood to stop the saw from binding.
Make short straight cuts inside the curve. Then saw slowly along the curve to connect them.
- Mark the curve line clearly
- Make small straight cuts inside the curve
- Use these cuts to ease the saw around the curve
- Cut gently to avoid splintering
Navigating Tight Turns
For sharp turns, slow down and control the saw carefully. Move the saw blade with small strokes.
Turn the wood, not the saw, to follow the curve. This keeps the cut smooth and accurate.
- Use small, gentle saw strokes
- Turn the wood, not the saw blade
- Keep your eye on the cutting line
- Pause often to check the cut
Adjusting Speed And Force
Slow your sawing speed when cutting curves. Fast cutting can cause mistakes and rough edges.
Use light pressure to keep the saw moving smoothly. Too much force bends the blade and ruins the cut.
- Saw slowly on curves
- Apply light, even pressure
- Let the saw do the work
- Stop if the blade feels stuck

Credit: www.dictum.com
Maintaining Your Hand Saw
Taking care of your hand saw keeps it sharp and safe. Good maintenance helps the saw last longer.
Regular cleaning, sharpening, and proper storage improve your cutting results. These simple steps protect your tool.
Cleaning And Lubrication
Remove sawdust and resin after each use. This stops buildup that can slow your saw down.
Use a stiff brush or cloth to clean the blade. Apply light oil to prevent rust and keep the blade smooth.
- Brush off dust and dirt
- Wipe the blade with an oily cloth
- Use machine oil or WD-40 sparingly
- Clean the handle to remove sweat and grime
Sharpening The Blade
Sharpen your saw blade when it feels dull or cuts slowly. Sharp teeth make clean, detailed cuts easier.
Use a triangular file to sharpen each tooth. Keep the file angle steady and follow the original tooth shape.
- Secure the saw in a clamp or vise
- File each tooth carefully and evenly
- Check for bent or damaged teeth and fix them
- Test the saw on scrap wood after sharpening
Storing For Longevity
Store your hand saw in a dry place to avoid rust. Keep it away from moisture and extreme temperatures.
Hang the saw or place it in a protective cover. Avoid stacking heavy tools on top of it.
- Use a wall hook or pegboard
- Cover the blade with a sheath or guard
- Keep the saw dry and dust-free
- Check the saw regularly for damage or rust
Troubleshooting Common Issues
Using a hand saw for detailed cuts can be tricky. You may face problems like binding, wandering cuts, or blade damage.
Knowing how to fix these issues helps you get clean, accurate cuts every time.
Avoiding Binding And Sticking
Binding happens when the saw blade gets stuck in the wood. This slows you down and can ruin your cut.
Keep the saw blade clean and sharp. Use steady, even pressure while cutting. Also, make sure the wood is well supported to prevent pinching.
- Keep blade teeth sharp and clean
- Use steady, even strokes
- Support the wood to avoid pinching
- Do not force the saw if it sticks
Fixing Wandering Cuts
A wandering cut happens when the saw blade moves off the line. This causes uneven edges and poor detail.
Start the cut carefully and use a guide if needed. Keep the saw at the correct angle and do not twist the blade during the cut.
- Mark your cut line clearly
- Use a straight edge or guide
- Hold the saw steady and straight
- Do not twist the blade while cutting
Dealing With Blade Damage
Blade damage like bent teeth or dullness makes cutting hard and unsafe. It also ruins your work.
Check your blade before use. Replace or sharpen damaged blades. Handle blades with care to avoid damage.
- Inspect blade teeth for damage
- Sharpen or replace dull blades
- Store saw properly to protect the blade
- Do not use damaged blades for detailed cuts

Credit: www.youtube.com
Frequently Asked Questions
What Type Of Hand Saw Is Best For Detailed Cuts?
A fine-toothed saw, like a dovetail or tenon saw, works best. It offers precision and control for intricate cuts. Choose a saw with a comfortable handle for better maneuverability and reduced hand fatigue during detailed work.
How Do I Prepare Wood For Detailed Hand Saw Cuts?
Secure the wood firmly using clamps to prevent movement. Mark your cut lines clearly with a pencil or marking knife. Ensure the wood surface is clean and smooth to guide your saw accurately.
What Technique Improves Accuracy In Detailed Hand Saw Cutting?
Use slow, controlled strokes with light pressure to maintain accuracy. Start with a shallow cut to create a guide groove. Keep the saw blade aligned with your cut line throughout the process.
How Can I Maintain My Hand Saw For Better Detailed Cuts?
Keep the blade clean and rust-free by wiping it after use. Sharpen the teeth regularly using a file to ensure smooth cutting. Store the saw in a dry place to prevent damage.
Conclusion
Mastering a hand saw takes patience and practice. Detailed cuts require focus and precision. Always choose the right saw for your task. Maintain a steady hand and firm grip. Ensure your saw is sharp for clean cuts. Safety is important; wear protective gear.
Regular breaks can prevent fatigue and mistakes. Over time, your skills will improve. The satisfaction of a job well done is worth it. Enjoy the process of learning and creating. With these tips, your hand saw skills will enhance. Keep practicing and you’ll see progress.
Happy sawing!