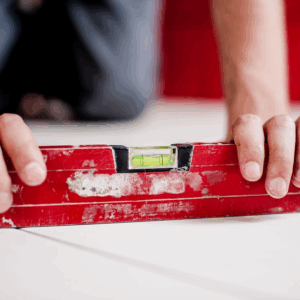
Getting an accurate reading with a spirit level can be tricky when the surface isn’t flat. If you’ve ever struggled to find the right angle or wondered if your measurement is off, you’re not alone.
But don’t worry—using a spirit level on uneven surfaces is easier than you think. In this guide, you’ll discover simple tips and tricks to get precise results every time. Keep reading, and you’ll learn how to master your spirit level no matter what surface you’re working on.

Credit: emiratesessential.com
Choosing The Right Spirit Level
Using a spirit level on uneven surfaces can be tricky. Choosing the right spirit level helps you get accurate results.
Different spirit levels have features that work better on rough or uneven areas. Knowing these helps you pick the best tool.
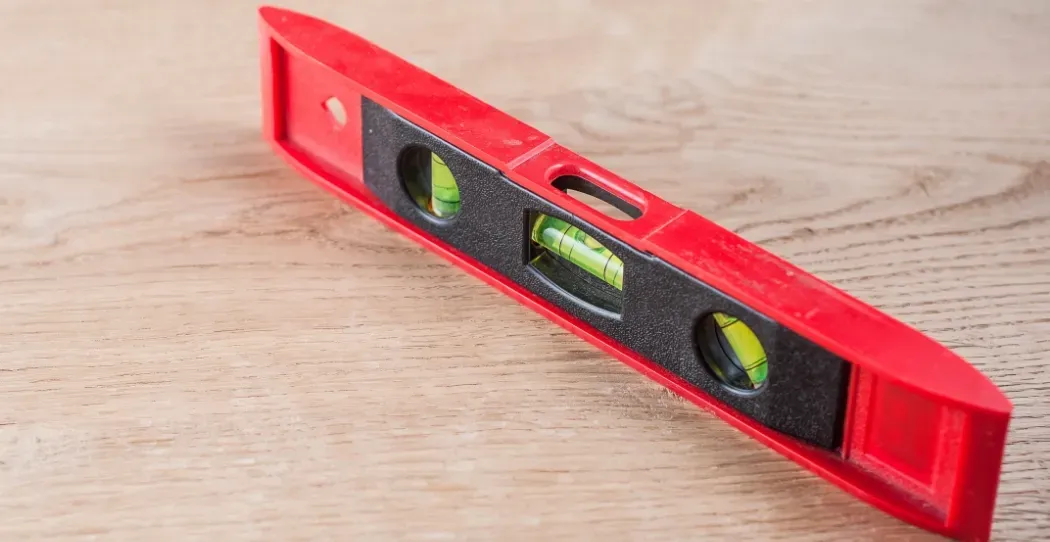
Types Of Spirit Levels
There are several types of spirit levels. Each type suits different jobs and surfaces.
- Box Beam Levels:Strong and heavy, good for construction work.
- Tube Levels:Lightweight and simple, often used for small tasks.
- Digital Levels:Show exact angle readings on a screen.
- Line Levels:Small and attach to a string for long distances.
For uneven surfaces, choose a level that can adjust or is easy to read from different angles.
Features For Uneven Surfaces
Spirit levels made for uneven surfaces have special features. These help give accurate readings even if the surface is not flat.
- Multiple Vials:Levels with more than one vial measure different angles.
- Flexible Frame:Frames that bend slightly fit uneven shapes better.
- Magnetic Base:Helps hold the level steady on metal surfaces.
- Shock-Resistant Build:Protects the tool if dropped on rough ground.
- Large Vials:Easier to see the bubble on uneven areas.
Choose a spirit level with these features to improve your work on bumpy or uneven surfaces.
Preparing The Surface
Using a spirit level on uneven surfaces needs careful preparation. A clean, clear, and well-understood surface gives better measurement results.
Before placing the spirit level, check the area for dirt, dust, or bumps that can cause errors.
Cleaning And Clearing Debris
Remove any loose dirt, dust, or objects from the surface. This helps the spirit level sit flat and gives accurate readings.
- Sweep the surface with a brush or broom.
- Wipe the area with a damp cloth if needed.
- Clear away small stones, leaves, or other debris.
- Dry the surface to avoid slipping.
Identifying High And Low Spots
Find uneven areas by feeling for bumps or dips on the surface. Mark these spots to adjust or avoid them.
| Surface Spot | How to Identify | What to Do |
| High Spot | Feels raised or bumps under your hand | Use sandpaper or a scraper to level it |
| Low Spot | Feels like a dip or hollow | Fill with putty or leveling compound |
| Flat Spot | Feels smooth and even | Ready for spirit level use |
Positioning The Spirit Level
Using a spirit level on uneven surfaces needs careful positioning. The goal is to get accurate readings despite the surface bumps.
Proper placement helps the bubble settle correctly and shows the true level of the object.
Finding Stable Contact Points
Look for spots on the uneven surface where the spirit level can rest firmly. These points should not rock or move when you place the level.
- Check for flat areas that touch the level evenly.
- Test by gently pressing the level down to feel if it shifts.
- Avoid sharp edges or loose debris that can cause instability.
- Use more than one contact point to spread the weight.
Using Shims And Supports
Shims and supports help balance the spirit level on rough or angled surfaces. They fill gaps and create a flat base for the level.
| Shim Type | Use Case |
| Wooden shim | For small gaps and minor unevenness |
| Plastic shim | Good for moist or outdoor areas |
| Cardboard pieces | Temporary support for quick checks |
| Metal spacer | For heavy-duty or precise leveling |
Place the shim under the spirit level at points where it does not touch the surface. Adjust the thickness until the level sits stable and the bubble centers.
Credit: www.woodcocks.us
Reading The Bubble Correctly
Using a spirit level on uneven surfaces can be tricky. You need to read the bubble carefully to get an accurate result.
The bubble shows if the surface is level. Understanding how to interpret its position helps you work better on any surface.
Interpreting Bubble Position
The bubble inside the tube moves to show if a surface is flat. When the bubble is centered between two lines, the surface is level.
If the bubble moves to one side, the surface tilts in that direction. You must notice how far the bubble is from the center to judge the tilt.
- Bubble centered = surface is level
- Bubble near one line = surface slopes toward that side
- Bubble far from center = larger slope angle
Adjusting For Surface Irregularities
Uneven surfaces can make the bubble hard to read. You should place the spirit level in different spots to find a stable area.
Check the bubble position at each spot. Use the average reading to estimate the surface’s overall level.
- Place level on several nearby points
- Note bubble position each time
- Calculate average or find most common bubble position
- Use that as your best guess for level
Techniques For Accurate Measurements
Using a spirit level on uneven surfaces can be tricky. You need to use the right methods to get correct readings.
Small errors can cause big problems in your project. Careful checks help avoid mistakes.
Multiple Point Checks
Check the level at several spots on the surface. This shows if the surface slopes or has bumps.
- Place the spirit level in one spot and note the bubble position.
- Move the level to another spot nearby and check again.
- Repeat this across the whole surface.
- Mark the points that are not level.
- Use these marks to understand how the surface changes.
Cross-referencing With Other Tools
Use other measuring tools to confirm your spirit level results. This reduces errors on uneven surfaces.
| Tool | Purpose | How to Use |
| Laser Level | Projects a straight line | Align it with the spirit level readings |
| Plumb Bob | Checks vertical alignment | Hold it to verify vertical surfaces |
| Measuring Tape | Measures height differences | Compare heights between points checked |

Credit: www.reddit.com
Common Mistakes To Avoid
Using a spirit level on uneven surfaces can be tricky. Many people make simple mistakes that lead to wrong readings.
Knowing these common errors helps you get accurate results every time.
Ignoring Surface Variations
Uneven surfaces can cause the spirit level to tilt. Ignoring this makes your measurements wrong.
- Do not place the level on rough or bumpy spots only.
- Look for low or high points that can affect the bubble’s position.
- Use a flat board as a base if the surface is very uneven.
- Check multiple spots to find the most even area.
Rushing The Process
Hurrying leads to mistakes. Taking your time improves accuracy.
| Common Rush Errors | How to Avoid Them |
| Not waiting for the bubble to settle | Hold the level steady until the bubble stops moving |
| Moving the level too quickly | Place the level gently and hold it firmly |
| Skipping double checks | Repeat measurements to confirm results |
| Ignoring tool calibration | Check the spirit level’s accuracy regularly |
Advanced Tips For Professionals
Using a spirit level on uneven surfaces can be tricky. Professionals need precise methods to get accurate readings every time.
This guide covers advanced tips on using digital spirit levels and maintaining them for top performance.
Using Digital Spirit Levels
Digital spirit levels give quick and accurate results on uneven surfaces. Use the following tips to improve your work:
- Place the level gently to avoid false readings.
- Use the hold function to lock the reading before moving the level.
- Check the angle display to adjust your surface precisely.
- Use a magnetic base for better stability on metal surfaces.
- Keep the sensor clean and free from dust.
Calibration And Maintenance
Regular calibration and maintenance keep your spirit level accurate and reliable.
| Maintenance Task | Frequency | Details |
|---|---|---|
| Calibration check | Monthly | Use a known flat surface to verify readings. |
| Clean sensor and vial | Weekly | Use a soft cloth to remove dirt and dust. |
| Battery replacement | As needed | Replace batteries before they run out to avoid errors. |
| Store properly | Always | Keep in a dry, stable case to prevent damage. |
Frequently Asked Questions
How Do I Use A Spirit Level On Uneven Surfaces?
Place the spirit level on the surface and note the bubble’s position. Adjust the surface or the level until the bubble centers. For uneven surfaces, use shims or wedges to stabilize the level for accurate readings.
What Tools Help Stabilize A Spirit Level On Uneven Ground?
Use shims, wedges, or small blocks to support the spirit level. These tools help create a flat base, ensuring the bubble gives a precise reading on uneven surfaces.
Can I Trust Spirit Level Readings On Rough Surfaces?
Spirit levels can give accurate readings if properly stabilized. Use supporting materials to level the tool. Without this, rough surfaces may cause false readings due to instability.
Why Is Using A Spirit Level Important On Uneven Surfaces?
It ensures accuracy when leveling structures or objects. Uneven surfaces can cause misalignment without correction. Using a spirit level helps achieve proper balance and alignment.
Conclusion
Using a spirit level on uneven surfaces is simple. Just follow the steps. First, ensure the level is clean. Next, place it on the surface. Adjust until the bubble centers. Repeat as needed. This ensures accuracy. Practice helps improve your skill.
Soon, you’ll feel confident. Don’t rush the process. Take your time. Each step matters. Accurate measurements lead to better results. Now, you’re ready to tackle uneven surfaces with ease. Happy leveling!
