Are you struggling to get perfect angles on your woodworking projects? A bevel gauge might be the simple tool that changes everything for you.
Whether you’re a beginner or an experienced woodworker, mastering how to use a bevel gauge will help you measure and transfer angles with ease and precision. In this guide, you’ll discover straightforward tips and tricks to make your cuts cleaner and your joints tighter.
Keep reading, and you’ll soon handle your woodworking tasks like a pro.

Credit: paulsellers.com
What Is A Bevel Gauge
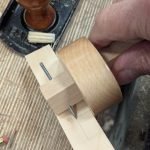
A bevel gauge is a simple tool used in woodworking. It helps measure and copy angles.
Woodworkers use it to transfer angles from one piece of wood to another. This ensures precise cuts.
Parts Of A Bevel Gauge
The bevel gauge has two main parts: the handle and the blade. The blade can move and lock at any angle.
- Handle:Usually made of wood or plastic. It holds the blade.
- Blade:A flat metal piece that measures the angle.
- Locking Mechanism:A screw or wing nut that fixes the blade at the chosen angle.
How A Bevel Gauge Works
You adjust the blade to match the angle you need. Then tighten the lock to keep it steady.
After setting the angle, you use the bevel gauge to draw or check the same angle on wood pieces.
Common Uses In Woodworking
- Copying angles from existing wood pieces
- Marking angles for cutting
- Checking angles during assembly
- Setting angles on saws or other tools
| Type | Description |
| Sliding Bevel | Blade slides and locks at any angle |
| Fixed Bevel | Has a set angle, no adjustment |
| Digital Bevel | Shows angle on a digital screen |
Types Of Bevel Gauges
A bevel gauge helps measure and transfer angles in woodworking. It is a useful tool for creating precise cuts and joints.
There are different types of bevel gauges. Each type suits various tasks and preferences in woodworking.
Sliding Bevel
The sliding bevel has a blade that moves along a handle. You can adjust the blade to any angle and lock it in place.
- Adjustable blade for custom angles
- Locking mechanism to keep the blade fixed
- Useful for transferring angles from one piece to another
- Common in many woodworking toolkits
Fixed Bevel
The fixed bevel has a blade set at a constant angle. This tool is simple and quick to use for repetitive cuts.
| Type | Angle | Use |
| Fixed Bevel | 45 degrees | Common angle for miter cuts |
| Fixed Bevel | 30 degrees | Used for chamfer edges |
| Fixed Bevel | 60 degrees | Used for specific joinery |
Combination Bevel
The combination bevel mixes features of sliding and fixed bevels. It offers preset angles and an adjustable blade.
This tool often includes:
- Common preset angles for easy selection
- An adjustable blade for custom angles
- Durable construction for frequent use
Choosing The Right Bevel Gauge
Using a bevel gauge helps you measure and transfer angles easily. Picking the right one makes your woodworking projects accurate and smooth.
Focus on the material, size, and locking features to find a gauge that fits your work style and needs.
Material And Build Quality
Choose a bevel gauge made from strong, durable materials. Metal or hardwood models last longer and stay accurate over time.
Look for smooth edges and tight joints. A well-built gauge feels solid and does not wobble when locked.
- Metal frames resist wear and damage
- Hardwood handles offer good grip and comfort
- Plastic parts may be cheaper but less durable
Size And Scale
Pick a size that matches your project scale. Small bevel gauges work well for fine details and small pieces.
Larger gauges are better for big projects and rough angle measurements. Choose one with clear, easy-to-read markings.
- Small gauges fit in tight spaces
- Large gauges provide better angle stability
- Clear scales help avoid measurement mistakes
Locking Mechanism
A strong locking mechanism keeps the angle fixed during use. This helps you transfer angles without errors.
Look for easy-to-use locks that hold tight but release smoothly. Some use thumbscrews, others use wing nuts or cam locks.
- Thumbscrew locks are quick and simple
- Wing nuts offer firm grip but need more effort
- Cam locks combine security with fast adjustment
Setting Up Your Bevel Gauge
A bevel gauge helps measure and transfer angles for woodworking projects. Setting it up correctly ensures your cuts are precise and fit well.
Learn how to adjust the blade angle, secure the lock, and calibrate your bevel gauge for the best results.
Adjusting The Blade Angle
Loosen the wing nut or locking screw on the bevel gauge. Move the blade to the angle you need. Use a protractor or angle guide to set the exact angle.
Check the blade position carefully before tightening the lock. Make small adjustments for accuracy.
Securing The Lock
Once the blade angle is correct, tighten the locking mechanism. This keeps the blade from moving while you work.
Do not overtighten, or you might damage the gauge. Tighten just enough to hold the angle firmly.
Calibrating For Accuracy
Check your bevel gauge against a known angle, like a square or protractor. Adjust if the blade does not match the angle perfectly.
- Place the blade on a 90-degree angle using a carpenter’s square.
- Tighten the lock and verify the blade stays in place.
- Make small tweaks to the blade if needed.
- Test the gauge regularly to keep it accurate.
Using A Bevel Gauge In Woodworking
A bevel gauge is a simple tool that helps you measure and transfer angles. It is useful for many woodworking tasks.
This tool lets you copy angles from one piece to another. It also helps check if joints fit correctly.
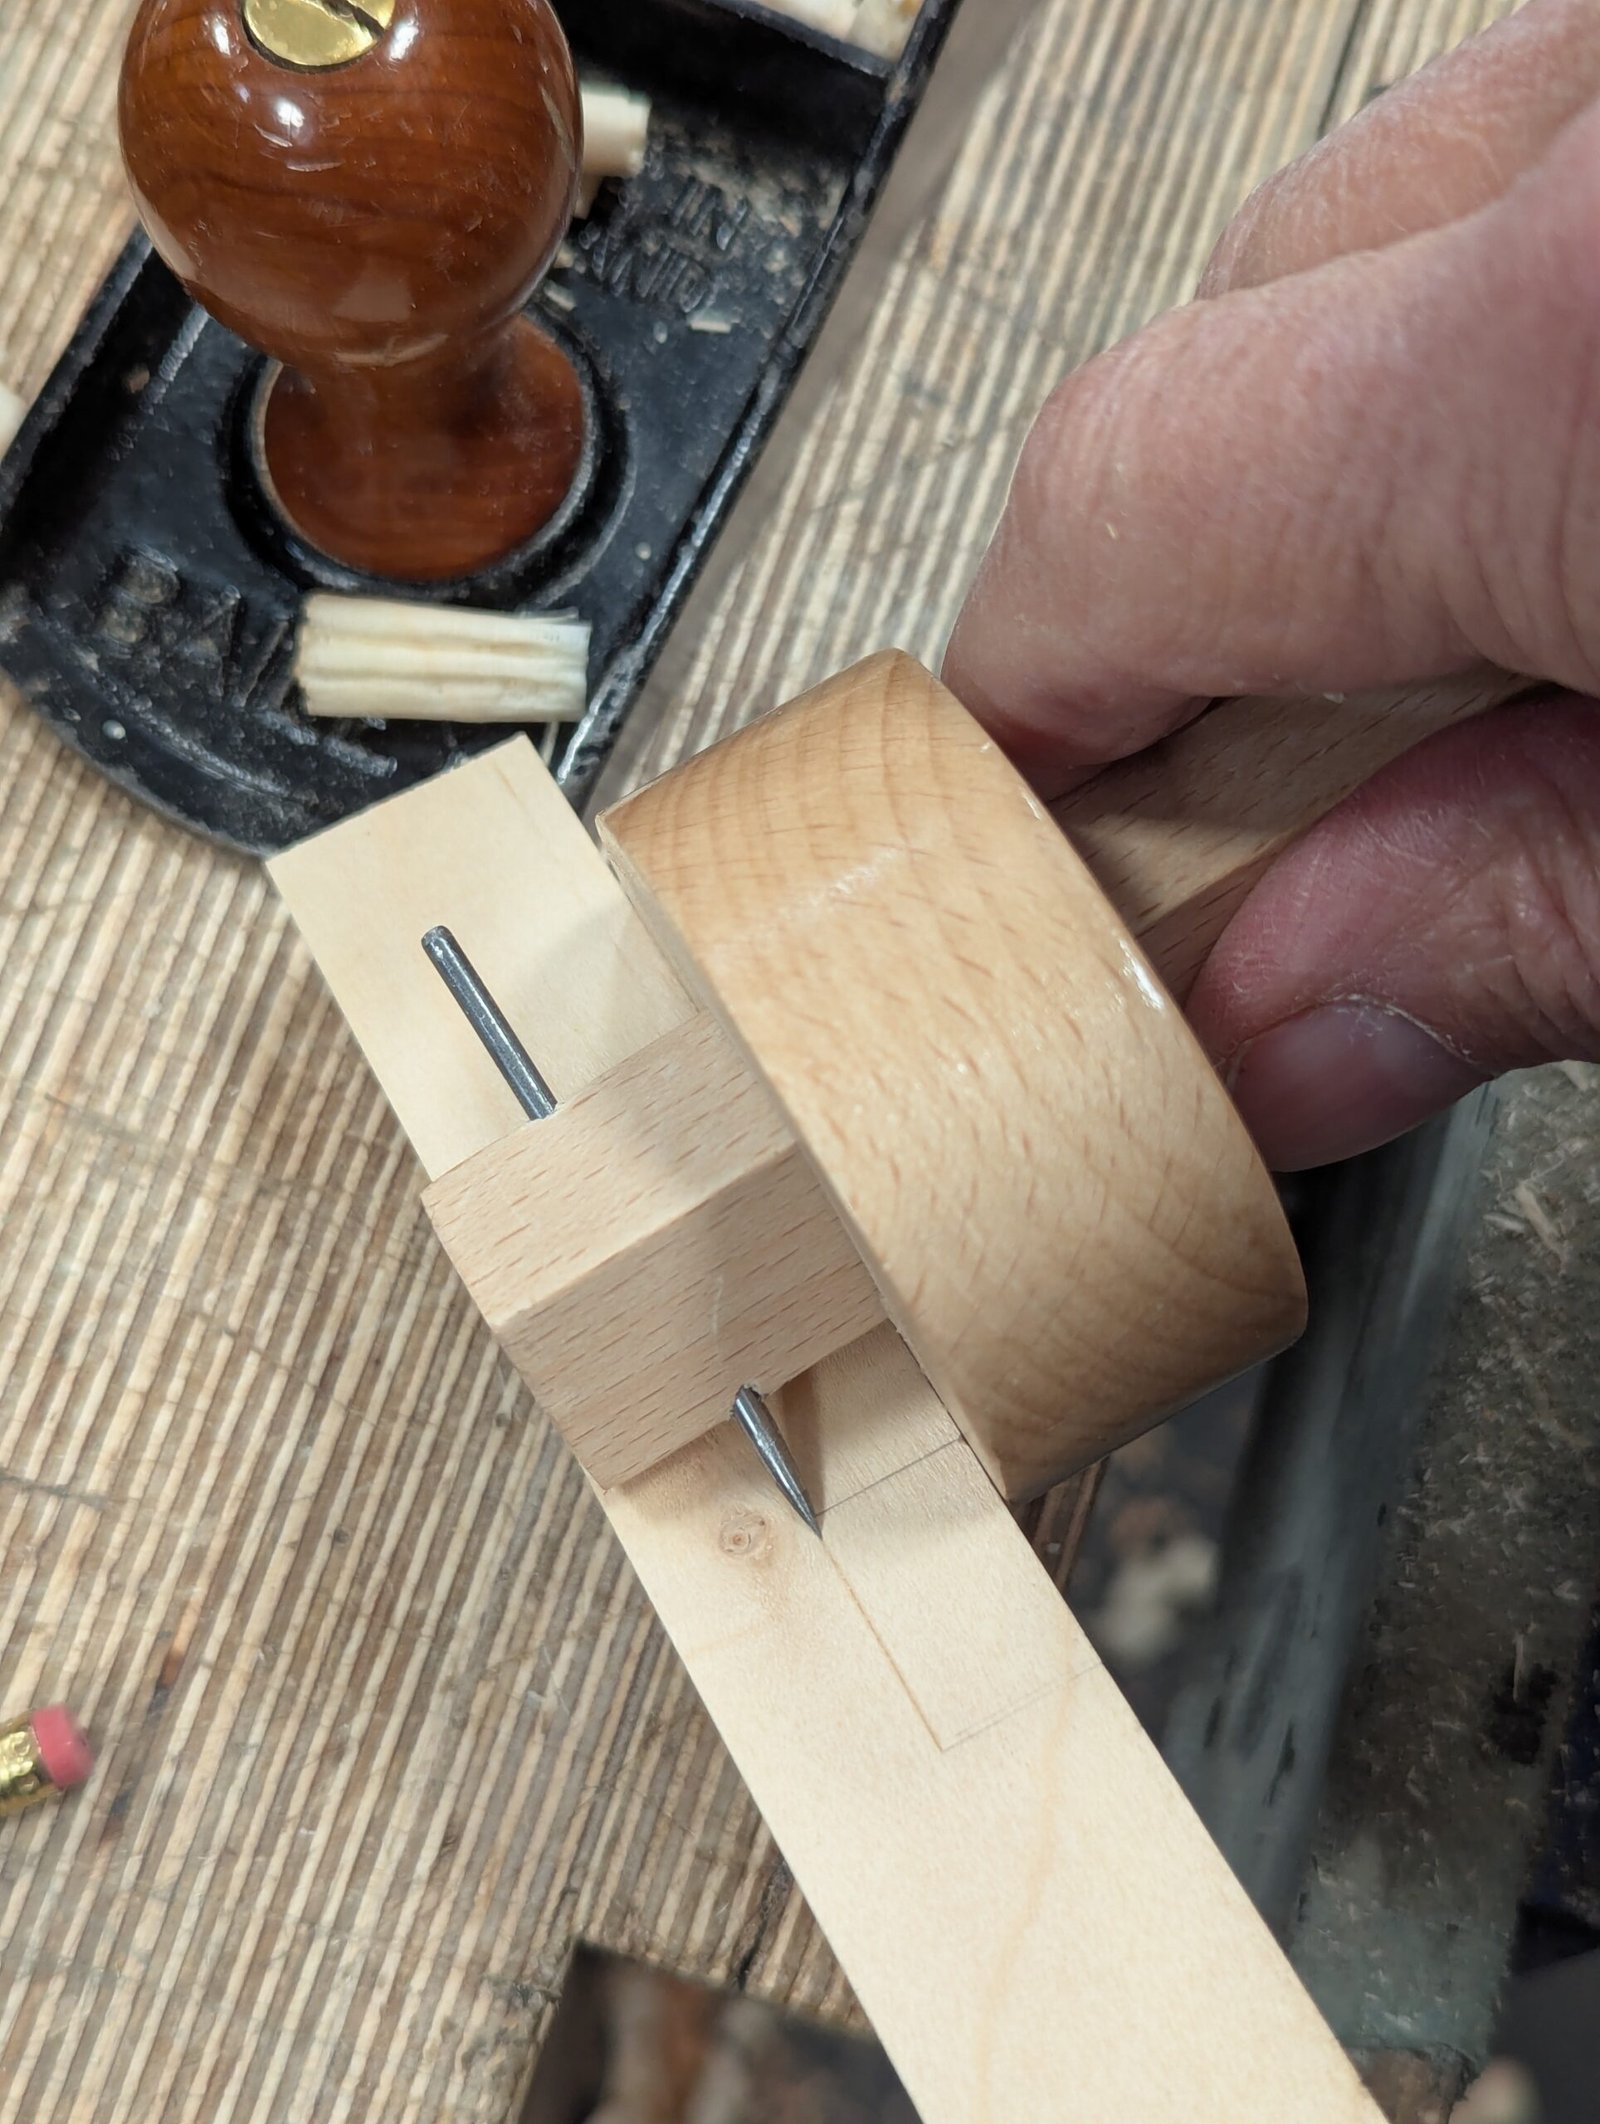
Transferring Angles
To transfer an angle, loosen the bevel gauge blade. Place the blade against the angle you want to copy.
Tighten the blade to lock the angle. Now, you can move the bevel gauge to your workpiece and mark the angle.
- Loosen the blade to adjust
- Align blade with the angle
- Tighten blade to keep angle
- Transfer angle to workpiece
Marking Cut Lines
After setting the bevel gauge to the correct angle, hold it firmly on the wood. Use a pencil to trace along the blade edge.
This line shows where to cut. It helps make sure your cut is accurate and matches the angle you need.
- Set the bevel gauge to the angle
- Hold the gauge steady on the wood
- Draw a line along the blade edge
- Cut along the marked line
Checking Angles On Joints
Use the bevel gauge to check if two wood pieces join at the right angle. Place the gauge blade against the joint angle.
If the blade matches the angle of the joint, the fit is good. Adjust the joint if the angle is off.
- Place blade on the joint angle
- Check if blade matches the joint
- Adjust wood pieces if needed
- Ensure tight and correct fit
Tips For Mastering Precision
Using a bevel gauge helps you measure and transfer angles in woodworking. Precision is key to making accurate cuts and joints.
These tips will help you get the best results from your bevel gauge every time you use it.
Consistent Angle Measurement
Always lock the bevel gauge tightly after setting the angle. This stops it from moving during use.
Check the angle against a known reference to ensure it is correct before marking your wood.
- Set the bevel gauge on a protractor for exact angles
- Use it on a flat surface to avoid errors
- Double-check the angle before cutting
Maintaining Tool Condition
Keep the bevel gauge clean and free from dust or glue. Dirty tools give inaccurate readings.
Check the locking mechanism regularly. Tighten any loose screws to keep the gauge steady.
- Wipe the blade and handle after use
- Store the tool in a dry place to avoid rust
- Lubricate moving parts if they get stiff
Practice Techniques
Practice setting and transferring angles on scrap wood before your main project. This builds confidence and skill.
Try measuring various angles and cutting along those lines to improve your accuracy with the bevel gauge.
- Use scrap pieces to test angle settings
- Mark and cut several different angles
- Compare your cuts to the set angles for accuracy
Common Mistakes To Avoid
Using a bevel gauge properly helps you get accurate angles in woodworking. Avoiding common errors saves time and material.
Here are some mistakes to watch out for when using a bevel gauge in your projects.
Loose Locking Mechanism
A loose locking mechanism causes the blade to move during measurement. This makes your angle inaccurate and affects the final cut.
- Check if the locking knob or screw is tight before use.
- Do not overtighten to avoid damaging the tool.
- Replace worn or broken locking parts immediately.
- Test the blade stability by holding it and shaking gently.
Incorrect Angle Transfer
Transferring the angle wrongly leads to parts that do not fit well. This mistake often happens when you do not align the bevel gauge properly.
| Common Transfer Errors | How to Avoid |
|---|---|
| Not placing the gauge firmly on the workpiece | Hold the gauge tight and steady before marking |
| Reading the wrong side of the blade | Check the blade side that matches your cut angle |
| Marking with a dull pencil | Use a sharp pencil for clear, precise lines |
Ignoring Tool Calibration
Ignoring calibration means your bevel gauge may show wrong angles. Regular checks keep your tool accurate.
- Use a protractor to compare the bevel gauge angle.
- Adjust the blade if your gauge has a calibration feature.
- Check calibration after any tool drop or heavy use.
- Keep your gauge clean to avoid dirt affecting readings.

Credit: paulsellers.com
Maintenance And Care
Taking care of your bevel gauge keeps it accurate and lasts longer. Simple maintenance helps avoid damage and wear.
Use proper cleaning and storage methods. Check the tool often. Replace parts if they wear out.
Cleaning And Storage
Clean your bevel gauge after each use. Remove dust and wood shavings with a soft cloth.
Store it in a dry place to stop rust and damage. Avoid leaving it in damp or hot areas.
- Wipe metal parts with a dry cloth
- Use a small brush for tight spots
- Keep it in a toolbox or drawer
- Apply light oil to metal to stop rust
Regular Inspection
Check your bevel gauge often for damage or wear. Look at the blade and locking mechanism closely.
Make sure the blade moves smoothly and locks firmly. Tighten screws if they are loose.
- Inspect blade edges for dents or bends
- Test locking knob or screw for firmness
- Ensure no parts are missing or broken
- Check for rust or corrosion on metal parts
Replacing Parts
Replace worn or broken parts to keep the bevel gauge accurate. Some parts wear faster than others.
Order parts from the tool maker or find similar replacements at hardware stores.
- Replace the blade if it is bent or damaged
- Change the locking screw or knob if it won’t hold
- Swap out any rusty parts to avoid damage
- Keep spare parts handy for quick fixes

Credit: www.amazon.com
Frequently Asked Questions
What Is A Bevel Gauge Used For In Woodworking?
A bevel gauge measures and transfers angles accurately in woodworking. It helps create precise joints and cuts by replicating angles from one piece to another. This tool is essential for tasks requiring angled cuts or layouts, improving project accuracy and finish quality.
How Do You Adjust A Bevel Gauge Correctly?
To adjust a bevel gauge, loosen the locking knob, set the blade to the desired angle, then tighten the knob securely. This ensures the blade stays fixed, allowing you to transfer or measure angles accurately without shifting during use.
Can A Bevel Gauge Measure Both Interior And Exterior Angles?
Yes, a bevel gauge can measure both interior and exterior angles. Its adjustable blade allows you to replicate any angle, making it versatile for various woodworking projects. This flexibility aids in creating complex joints and angled cuts with precision.
Why Is A Bevel Gauge Better Than A Protractor For Woodwork?
A bevel gauge offers more practical angle transfer on wood surfaces than a protractor. It locks angles firmly and adapts to irregular surfaces. This makes it more user-friendly and reliable for repetitive angle marking in woodworking.
Conclusion
Using a bevel gauge boosts precision in woodworking projects. It helps in creating accurate angles. This tool ensures your cuts are perfect every time. Practice using it regularly for better results. Remember, patience and practice make skills stronger. Woodworking becomes enjoyable with the right tools.
A bevel gauge is essential for every woodworker. Invest time in learning its use. Your projects will reflect your efforts. Enjoy the process, and watch your skills grow. Happy woodworking!