Are you struggling to get perfect angles when cutting wood or metal? Using a combination square might be the simple solution you’ve been missing.
This handy tool can help you measure and mark precise angles quickly and easily, saving you time and frustration. In this guide, you’ll discover step-by-step how to use a combination square to cut angles like a pro. Keep reading, and you’ll gain the confidence to tackle your next project with accuracy and ease.
Credit: commonwoodworking.com
Choosing The Right Combination Square
A combination square helps you measure and mark angles for cutting. Picking the right one makes your work easier and more accurate.
Look at the types, sizes, and features to find the best tool for your needs.
Types And Sizes
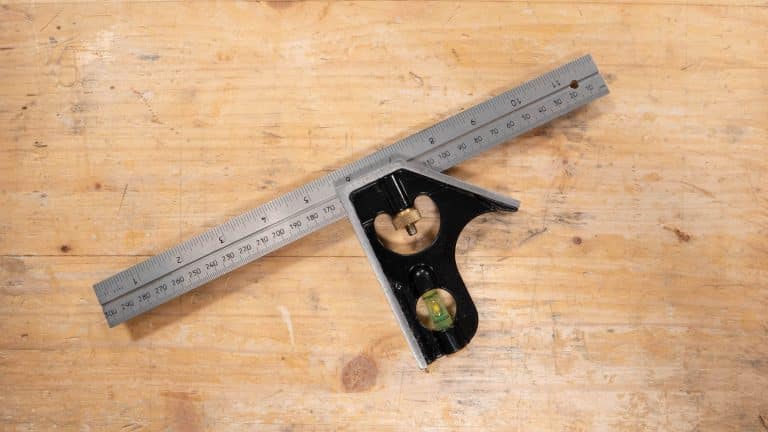
Combination squares come in different types based on their blade and head design. The most common type has a ruler and a movable head.
The size of the ruler affects how much you can measure. Smaller sizes are good for small projects. Larger sizes suit bigger work.
- 6-inch: Good for small, detailed cuts
- 12-inch: Standard size for most tasks
- 18-inch or 24-inch: Best for large pieces
Essential Features
Look for a square with a clear ruler and a strong locking mechanism. This keeps the blade steady when marking angles.
A stainless steel blade lasts longer and stays accurate. A solid metal head gives better stability and durability.
- Clear, easy-to-read markings on the ruler
- Locking screw to hold the blade in place
- Stainless steel blade for durability
- Solid metal head for stability
- Built-in level or protractor for extra functions

Credit: www.familyhandyman.com
Setting Up For Angle Measurement
Using a combination square helps you measure angles accurately. Setting it up right is important before cutting.
Follow simple steps to adjust the tool so you can mark the correct angle on your workpiece.
Adjusting The Blade
Start by loosening the blade so it can move freely. Slide the blade to the angle you want to measure.
Use the angle markings on the blade or a protractor to set the correct angle. Make sure the blade is straight and aligned.
- Loosen the locking screw to move the blade
- Align the blade to the desired angle
- Check the blade is flat and stable
Locking The Square
Once the blade is set, tighten the locking screw firmly. This keeps the blade from moving during use.
Double-check the blade angle after locking. A secure blade helps you make precise angle cuts every time.
- Tighten the locking screw carefully
- Ensure the blade does not shift
- Test the angle before marking your cut
Measuring Common Angles
A combination square is a handy tool for measuring and marking angles. It helps you make precise cuts for many projects.
This guide shows how to measure common angles using your combination square. You will learn to mark 45-degree, 90-degree, and custom angles.
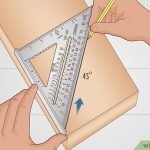
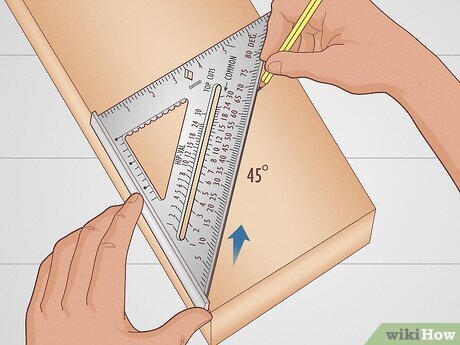
Marking 45-degree Angles
To mark a 45-degree angle, set the combination square’s blade to the 45-degree notch. Place the head of the square against the edge of your workpiece. Then, draw a line along the blade edge to create the angle.
Marking 90-degree Angles
Marking a 90-degree angle is simple with a combination square. Align the square’s head flush against the edge. The blade will be perpendicular. Draw your line along the blade for a perfect right angle.
- Place the square’s head firmly against the wood edge.
- Make sure the blade is tight and straight.
- Use a pencil to draw along the blade edge.
- Double-check the angle with a protractor if needed.
Creating Custom Angles
To create angles other than 45 or 90 degrees, use the combination square blade as a straight edge. Adjust the blade to the desired angle using a protractor or angle finder.
| Angle | Method |
| 30 degrees | Use protractor to set blade |
| 60 degrees | Mark with adjustable bevel gauge |
| Any angle | Align blade with angle finder tool |

Credit: www.familyhandyman.com
Techniques For Accurate Cuts
Using a combination square helps you cut materials at the right angle. It gives you a clear guide for straight and angled cuts.
Learning how to use the square well improves your cutting results. It saves time and reduces mistakes.
Aligning The Square On Material
Place the combination square firmly against the edge of the material. Make sure the ruler part lies flat and does not move.
Check that the square’s head touches the material’s edge fully. This alignment ensures your angle is correct before marking or cutting.
- Hold the square steady with one hand
- Keep the ruler flush against the surface
- Avoid gaps between the square and material
Using A Pencil For Clear Marks
Use a sharp pencil to mark your cut lines clearly. Thin lines help you follow the guide precisely.
Draw the line slowly along the ruler edge. Avoid pressing too hard to keep the mark neat.
- Choose a pencil with a fine tip
- Draw along the square’s ruler edge
- Keep lines thin and visible
Double-checking Measurements
Always measure twice before cutting. Double-check the angle and length to avoid errors.
Use the combination square again to confirm your marks. Recheck both sides of the material if needed.
- Measure the angle with the square again
- Verify the length matches your plan
- Confirm marks are clear and straight
Tips For Cutting Angles With Tools
Cutting angles accurately is important for many woodworking projects. A combination square helps you measure and mark the right angle before cutting.
Using the correct tools and techniques makes the cuts cleaner and safer. Here are some tips for cutting angles with common tools.
Using A Handsaw
Handsaws allow you to cut angles manually. Use the combination square to mark the angle clearly on the wood.
Hold the saw steady and follow the marked line slowly. Let the saw do the work without pushing too hard.
- Clamp the wood to keep it still.
- Start the cut with a small notch to guide the saw.
- Use smooth, even strokes for better control.
Using A Miter Saw
Miter saws make angle cuts faster and more precise. Set the saw’s angle using the combination square measurement.
Place the wood firmly against the saw’s fence to keep it steady during the cut.
- Check the saw angle before cutting.
- Secure the wood with clamps or hold it firmly.
- Lower the blade smoothly through the wood.
Safety Precautions
Safety is important when cutting angles. Always wear eye protection and keep your hands away from the blade.
Make sure your tools are sharp and in good condition to avoid slips. Work in a clean, well-lit area.
- Wear safety glasses and hearing protection.
- Use clamps to hold the wood securely.
- Keep fingers clear of the cutting path.
- Check that tools are working properly before use.
Maintaining Your Combination Square
A combination square is a useful tool for cutting angles accurately. Keeping it in good condition helps ensure precise measurements.
Regular care prevents damage and extends the life of your tool. Focus on cleaning, storage, and calibration checks.
Cleaning And Storage
Clean your combination square after each use. Dust and debris can affect its accuracy.
- Use a soft cloth to wipe the ruler and head.
- Remove rust with fine steel wool if needed.
- Apply a light coat of oil to metal parts to stop rust.
- Store the tool in a dry place away from moisture.
- Keep it in a protective case or box to avoid damage.
Calibration Checks
Check the tool’s accuracy regularly. Calibration ensures your measurements are correct.
| Check | How to Do It | What to Look For |
| Square Angle | Place the square against a known 90° edge. | The ruler should lie flat without gaps. |
| 45° Angle | Use the tool to mark a 45° line and verify with a protractor. | The angle should match exactly 45°. |
| Ruler Slide | Move the ruler through the head smoothly. | The ruler should lock firmly and not wobble. |
Frequently Asked Questions
What Is A Combination Square Used For?
A combination square measures and marks angles, depths, and lengths. It helps ensure precise cuts and accurate woodworking or metalworking projects. Its adjustable ruler and head allow versatile use for 45°, 90°, and other angle measurements.
How Do You Set A Combination Square For Cutting Angles?
Loosen the head of the combination square, slide it to the desired angle mark, and tighten it firmly. Use the ruler edge to mark the cutting line on your material accurately before making the cut.
Can A Combination Square Measure Angles Other Than 45° And 90°?
Combination squares primarily measure 45° and 90° angles. For other angles, use the protractor feature if available or combine with a miter gauge. However, it’s best suited for standard angle markings in most woodworking tasks.
How To Ensure Accurate Angle Cuts With A Combination Square?
Always calibrate the combination square before use. Mark clear lines on your material, hold the square firmly, and double-check measurements. Using sharp tools and stable work surfaces also helps achieve precise angle cuts.
Conclusion
Using a combination square simplifies cutting angles. It’s precise and user-friendly. Remember to measure carefully before each cut. This tool ensures accuracy every time. Perfect for both beginners and seasoned carpenters. With practice, you’ll gain confidence. Keep your tools clean and well-maintained.
This prolongs their life and enhances performance. Try different projects to improve your skills. Experiment with various materials too. Soon, you’ll handle complex tasks easily. Enjoy the process of learning and building. The combination square is your reliable companion. Happy crafting!