Are you struggling to get perfect angles in your woodworking projects? Using a protractor might seem tricky at first, but with the right tips, you can master it quickly and improve your craftsmanship.
Imagine cutting wood with precision every single time, saving both time and material. You’ll discover simple yet powerful tips that will help you use a protractor like a pro. Keep reading, and you’ll unlock the secret to sharper, cleaner, and more accurate woodworking results.
Choosing The Right Protractor
Using a protractor correctly can improve your woodworking projects. Picking the right protractor helps you measure angles accurately. This guide covers key points to consider before buying one.
Look at the types of protractors, the materials used, and the size that fits your work. Each factor affects how easy and precise your measurements will be.
Types Of Protractors For Woodworking
Woodworkers use different protractors based on the task. Some are simple, while others have special features to measure complex angles.
- Basic Protractor:A half-circle tool good for simple angle measuring.
- Adjustable Bevel Protractor:Has a movable arm for copying and setting angles.
- Digital Protractor:Offers precise readings on a screen, useful for detailed work.
Material And Durability
Protractors come in plastic, metal, or wood. The material affects how long the tool lasts and how easy it is to use.
| Material | Durability | Common Use |
| Plastic | Low | Light woodworking, beginners |
| Metal | High | Professional work, heavy use |
| Wood | Medium | Traditional woodworking |
Size And Scale Considerations
Choose a protractor size that matches your project. Larger tools work well for big pieces, while small ones suit fine detail work.
- Check if the scale is easy to read.
- Look for clear markings and numbers.
- Consider a protractor with both metric and imperial units.
- Think about the tool’s weight for comfort.
Preparing Your Workspace
Setting up your workspace properly helps you use a protractor with ease. A clean and organized area reduces mistakes. It also keeps your tools safe and ready.
Focus on creating a space that supports precision. This means paying attention to your surface, lighting, and how you hold your wood pieces.
Ensuring A Flat Surface
Use a flat workbench or table. Check for bumps or uneven spots. These can cause wrong angle readings on your protractor.
- Clear the surface of debris and dust.
- Use a level tool to test flatness.
- Place a sturdy board if your table is uneven.
Good Lighting Conditions
Good light helps you see the protractor markings clearly. Natural daylight is best. If not possible, use bright white lamps.
| Lighting Type | Advantages |
| Natural Daylight | True colors, soft light |
| LED Lamp | Bright, energy efficient |
| Fluorescent Light | Even spread, cool temperature |
Securing Your Wood Piece
Hold your wood steady to avoid slipping. This gives accurate angle measurements. Use clamps or a vise for safety and control.
- Place the wood flat on the work surface.
- Use clamps to fix it in place firmly.
- Check the wood does not move before measuring.
- Keep your hands clear of the clamp area.
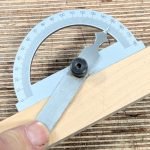
Basic Protractor Handling Techniques
Using a protractor correctly helps you measure and mark angles in woodworking. It improves the accuracy of your cuts and joints.
This guide covers simple ways to handle a protractor for better results. Learn how to align, mark, and read angles with ease.
Aligning The Baseline
Place the protractor flat on the wood surface. Make sure the baseline of the protractor lines up exactly with the edge or reference line.
Keep the center hole or pivot point of the protractor right at the corner or point where you want to measure the angle.
Marking Accurate Angles
After aligning the baseline, find the angle you need on the protractor scale. Use a sharp pencil to mark the spot precisely.
- Hold the protractor steady so it does not move.
- Look carefully at the degree marks on the scale.
- Draw a small dot or line at the angle mark.
- Double-check the mark before cutting or drilling.
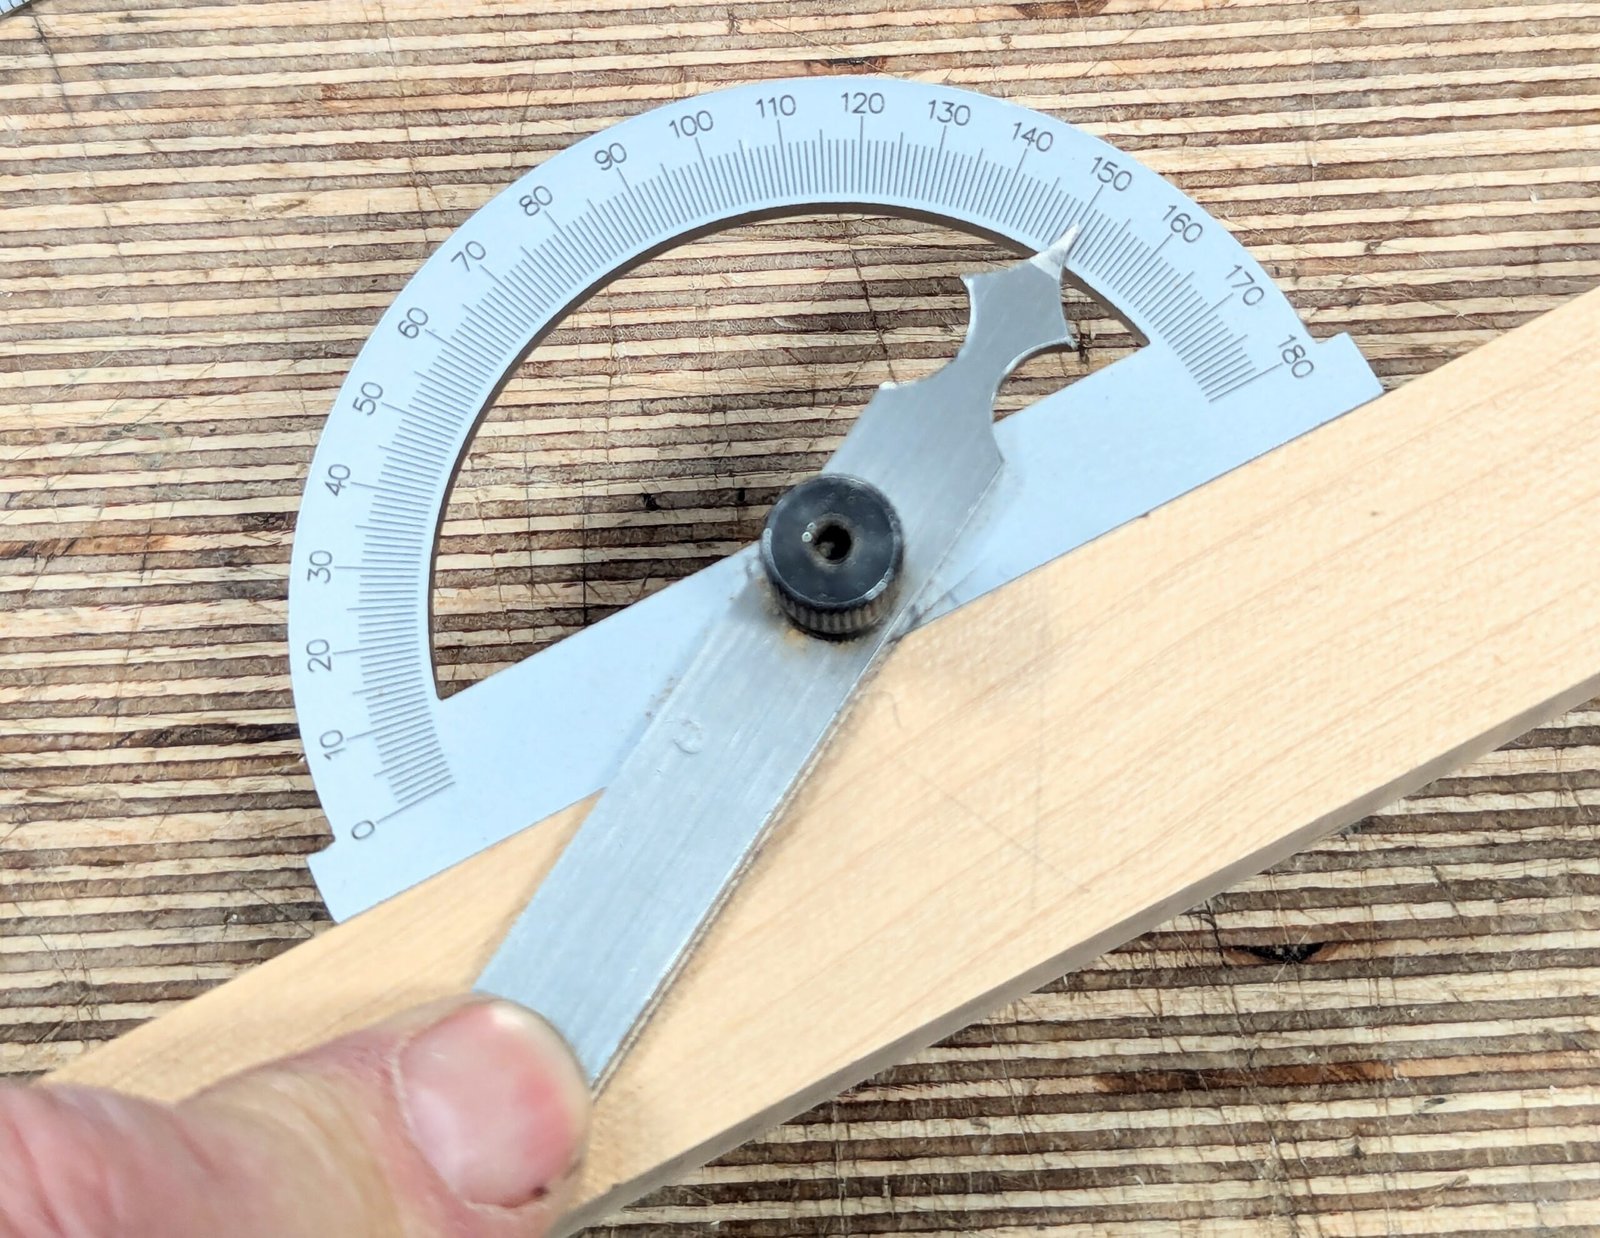
Reading The Scale Correctly
Protractors have two sets of numbers running in opposite directions. Choose the correct scale based on how your wood piece is oriented.
| Scenario | Which Scale to Use |
|---|---|
| Measuring an angle opening to the right | Use the outer scale (0° to 180° clockwise) |
| Measuring an angle opening to the left | Use the inner scale (0° to 180° counterclockwise) |
| Ensuring angle is less than 90° | Check both scales and pick the smaller number |

Credit: www.wikihow.com
Advanced Accuracy Hacks
Using a protractor in woodworking helps measure angles precisely. Small mistakes can cause big problems in your project.
These tips will help you get more accurate results with your protractor. Follow these hacks for better angle measurements.
Using A Centering Tool
A centering tool helps find the exact center of a piece of wood. This makes it easier to measure angles from the center point.
Place the centering tool on your wood and mark the center. Align your protractor using this mark for precise angle readings.
- Reduces errors from uneven wood edges
- Provides a stable reference point
- Improves repeatability on multiple pieces
Double-checking With A Combination Square
Use a combination square to confirm your protractor’s angle. This tool checks if your angle is true and not skewed.
Place the combination square along the wood edge. Compare its angle with your protractor’s reading to catch mistakes early.
- Ensures your angle is not off by a few degrees
- Helps verify angles on complex cuts
- Easy way to avoid costly errors
Marking Multiple Reference Points
Mark several points along your wood where the angle will be measured or cut. This avoids relying on one spot only.
Use your protractor to set the angle at each mark. Connect the points with a straight line before cutting for better accuracy.
- Reduces angle errors over long cuts
- Makes cutting lines clearer and straighter
- Helps check for consistency on large pieces
Common Mistakes To Avoid
Using a protractor correctly is key for accurate woodworking angles. Many woodworkers make simple mistakes that cause errors.
Knowing what to avoid helps you get better results with less waste of materials and time.
Misreading The Angle Scale
One common mistake is misreading the angle scale on the protractor. The numbers can be confusing, especially if the tool has two sets of angles.
- Always check which side of the scale you should use for your angle.
- Look closely at the zero mark to ensure you start measuring correctly.
- Double-check the angle reading before marking your wood.
Slipping During Marking
Slipping of the protractor or pencil during marking causes wrong angles. This mistake leads to cuts that do not fit well.
- Hold the protractor firmly against the wood.
- Use a sharp pencil for clear, thin marks.
- Mark slowly and steadily without rushing.
- Consider using masking tape to hold the protractor in place.
Ignoring Tool Calibration
Ignoring calibration causes errors even with careful measuring. Protractors can lose accuracy over time.
| Calibration Check | What to Do |
| Zero Alignment | Place the protractor on a flat surface and check if zero lines up perfectly. |
| Moving Arm Tightness | Ensure the protractor arm moves smoothly but stays firmly in place. |
| Visual Damage | Look for cracks or worn markings that affect reading. |
| Regular Testing | Measure known angles to verify accuracy before work. |
Maintaining Your Protractor
Keeping your protractor in good shape helps you get accurate angles. Regular care prevents damage and extends its life.
Use simple steps to clean, check, and adjust your protractor. This guide shares easy tips for maintenance.
Cleaning And Storage Tips
Remove dust and dirt after each use. Use a soft cloth to wipe the surface gently. Avoid harsh chemicals that may damage markings.
- Wipe with a dry or slightly damp cloth
- Keep away from moisture to prevent rust
- Store in a protective case or box
- Avoid placing heavy items on top
- Keep in a cool, dry place
Checking For Wear And Tear
Inspect your protractor regularly for cracks or faded markings. Damaged tools can cause wrong measurements and waste wood.
| Issue | Effect | Action |
| Scratches on scale | Hard to read angles | Replace or mark new scale |
| Loose pivot point | Unstable angle setting | Tighten or repair pivot |
| Rust spots | Corrosion weakens metal | Clean with rust remover |
| Broken parts | Tool unusable | Replace protractor |
Calibrating Your Tool
Calibration ensures your protractor measures angles correctly. Use a known angle or a set square to check accuracy.
- Place the protractor on a flat surface.
- Align the baseline with a known straight edge.
- Check if the zero mark lines up exactly with the edge.
- Rotate the arm to a common angle (like 45°) and verify with a set square.
- Adjust the pivot or arm if the readings do not match.
Integrating Protractor Use In Complex Projects
Using a protractor helps you measure angles accurately in woodworking. Complex projects need precise angle measurements to fit pieces well.
Combining the protractor with other tools and methods improves your work. It makes cutting and joining wood easier and more exact.
Combining With Other Measuring Tools
Use a protractor with rulers, squares, and calipers for better results. This helps check length, straightness, and angle all at once.
For example, mark an angle with the protractor, then measure the length with a ruler. Use a square to confirm the edges are straight before cutting.
- Mark angles with the protractor
- Measure lengths using a ruler or tape
- Check straight edges with a carpenter’s square
- Use calipers for small detailed measurements
Using Templates For Repeated Angles
Templates save time when you need the same angle many times. Cut a guide from scrap wood using the protractor to measure the angle once.
Place the template on your workpiece to trace or guide your saw. This keeps all your cuts consistent and accurate without measuring each time.
- Measure the angle with a protractor on scrap wood
- Cut the scrap to create a template
- Use the template to mark or guide cuts on new pieces
- Repeat as needed for consistent angles
Adjusting Angles For Compound Cuts
Compound cuts combine two angles, like tilt and bevel. Use your protractor to measure each angle carefully before cutting.
Adjust the protractor to mark the exact angle on your wood. Double-check each angle to avoid mistakes in complex joints.
- Identify the two angles needed for the compound cut
- Use the protractor to measure each angle precisely
- Mark the wood with both angle measurements
- Cut slowly and check angles during the process
Credit: mail.sadio.org.ar

Credit: www.wikihow.com
Frequently Asked Questions
How Do I Measure Angles Accurately With A Protractor?
Place the protractor’s center hole on the angle’s vertex. Align the baseline with one side. Read the measurement where the other side crosses the protractor’s scale for precise angle measurement.
What Type Of Protractor Is Best For Woodworking?
A clear, plastic 180-degree protractor with a center hole is ideal. It offers easy angle reading and precise alignment for accurate woodworking cuts.
How Can I Mark Angles On Wood Using A Protractor?
Align the protractor on the wood edge. Mark the desired angle at the protractor’s scale. Use a pencil and straight edge to draw the angle line for cutting.
Why Is Protractor Calibration Important In Woodworking?
Calibration ensures angle measurements are precise. Regularly check your protractor against a known angle to avoid cutting errors and maintain woodworking accuracy.
Conclusion
Mastering a protractor improves woodworking precision. These tips simplify your tasks. Practice regularly to boost your skills. A well-measured angle leads to better projects. Remember, patience is key. Small adjustments can make a big difference. Enjoy your woodworking journey. Stay safe and keep learning.
Tools like the protractor are your best friends. They help ensure your work is accurate. Always double-check your measurements for best results. Happy woodworking!