If you want your furniture projects to look sharp and professional, mastering the combination square is a must. This simple tool can transform the way you mark wood, helping you achieve precise measurements and clean lines every time.
Whether you’re a beginner or have some experience, learning how to use a combination square will save you time, reduce mistakes, and boost your confidence. Ready to take your furniture marking skills to the next level? Keep reading, and you’ll discover easy steps to use this versatile tool like a pro.
Choosing The Right Combination Square
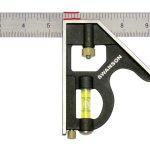
A combination square is a useful tool for marking furniture pieces. It helps you measure and draw straight lines with accuracy. Picking the right one makes your work easier and your cuts cleaner.
Many types of combination squares exist. You need to understand their features to choose the best one for your furniture projects.
Types Of Combination Squares
Combination squares come in different styles. Each type suits certain tasks better than others. Knowing the types helps you pick the right tool.
- Standard Combination Square:Has a ruler and an adjustable head for marking 90 and 45 degrees.
- Center Finder Square:Helps find the center of round objects like dowels.
- Protractor Combination Square:Can measure and mark angles besides 45 and 90 degrees.
Materials And Build Quality
The material affects the tool’s durability and accuracy. Look for a combination square made from strong materials. Good build quality means it will last long and stay precise.
- Steel:Very strong and resists bending. It keeps measurements accurate.
- Stainless Steel:Does not rust easily. Good for wet or humid environments.
- Aluminum:Lightweight but less durable. Can bend if dropped.
- Plastic:Cheapest but least durable. Best for light tasks only.
Size Considerations
Combination squares come in different sizes. Choose one that fits your projects and workspace. Size affects how easy it is to use and store the tool.
- 6-inch:Compact and good for small furniture pieces.
- 12-inch:Most common size. Fits many furniture marking tasks.
- 16-inch or larger:Best for big furniture parts and long measurements.
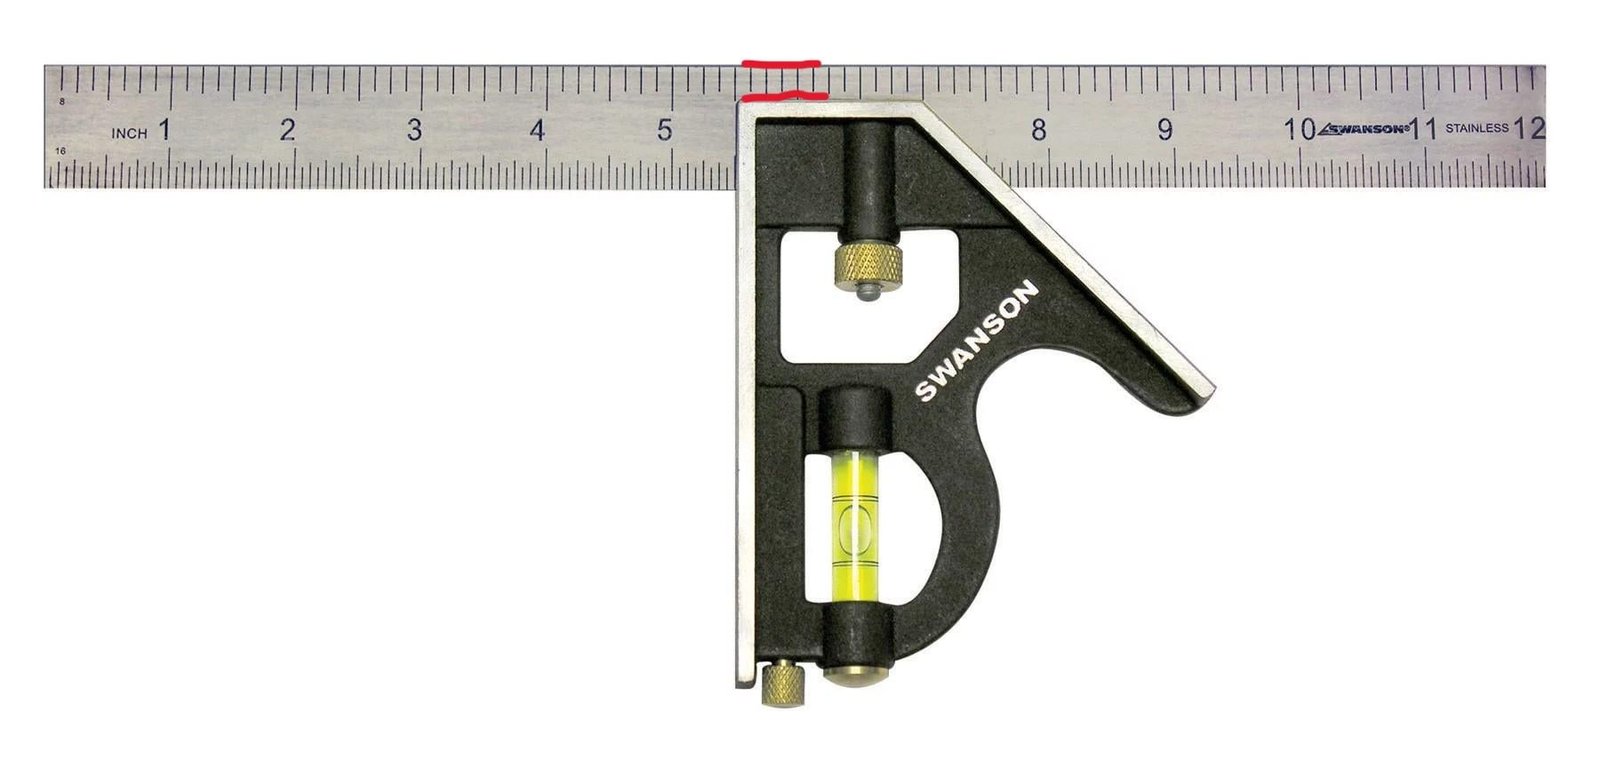
Basic Parts Of A Combination Square
A combination square is a useful tool for marking and measuring in furniture making. It helps ensure accuracy and straight lines.
Knowing the main parts of this tool will help you use it correctly and safely.
Blade And Ruler
The blade is a long, flat metal piece with measurement marks. It is also called the ruler. You slide it through the head to adjust length.
- Made of steel for durability
- Has clear markings in inches and centimeters
- Used to measure lengths and depths
- Can be locked in place on the head
Head And Bubble Level
The head is the square part attached to the blade. It holds the blade at a right angle. The bubble level is built into the head to check horizontals.
| Part | Function |
| Head | Keeps the blade at 90 degrees |
| Bubble Level | Shows if a surface is level |
| Locking Screw | Secures the blade in place |
Scriber Tool
The scriber is a small pointed tool stored inside the head. Use it to mark wood or metal precisely where you want to cut or drill.
Setting Up The Square For Marking
Using a combination square correctly helps you mark furniture pieces with precision. Setting up the square well ensures your measurements are accurate before cutting or assembling.
This guide explains how to adjust the blade, lock the head, and check the accuracy of your combination square.
Adjusting The Blade
First, slide the blade to the desired measurement on the ruler. Align the blade edge with the marking point on your furniture piece. Make sure the blade is straight and not twisted for an accurate line.
- Loosen the locking screw slightly
- Move the blade to the needed length
- Keep the blade flush against the ruler
- Tighten the screw to hold the blade firmly
Locking The Head
After adjusting the blade, secure the head of the square to prevent any movement. This step keeps the blade steady during marking and measuring tasks.
- Turn the locking knob clockwise until it feels tight.
- Check that the head does not move along the ruler.
- If loose, repeat tightening to avoid errors.
Checking Accuracy
Always verify that your combination square is accurate before marking. A small error can cause problems in your furniture assembly.
| Check | How to Do It | Why It Matters |
|---|---|---|
| Blade alignment | Place the blade against a known straight edge | Ensures straight, true markings |
| Square head | Test the head at a 90° angle to the ruler | Prevents angled or off cuts |
| Lock tightness | Confirm no movement after locking | Keeps measurements consistent |

Credit: www.reddit.com
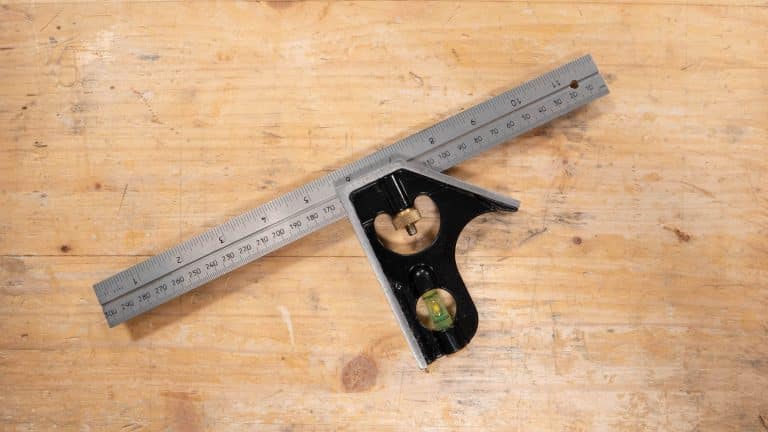
Marking Straight Lines
A combination square helps you draw straight lines on furniture pieces. It ensures your marks are accurate and neat.
Using this tool correctly saves time and improves the quality of your work.
Aligning With Edges
Place the combination square’s stock firmly against the edge of your wood. This keeps the ruler straight and steady.
Check that the stock is flush with the edge to avoid crooked lines. Hold it tightly to prevent slipping.
Using The Ruler For Measurements
Use the ruler part of the combination square to measure the distance from the edge. Slide the ruler until it reaches the correct length.
Lock the ruler in place using the screw. This keeps your measurement fixed while marking the line.
- Loosen the screw to adjust the ruler
- Set the ruler to the needed length
- Tighten the screw to secure the position
Ensuring Consistent Lines
Hold the combination square firmly on the wood. Use a sharp pencil or marking knife to draw the line along the ruler edge.
Check your lines often to make sure they are straight and at the right distance. Repeat the process on each piece for uniformity.
Marking Angles And Bevels
A combination square helps you mark angles and bevels on wood. It is useful for furniture making and woodworking.
You can use it to set common angles, use the protractor feature, and mark bevel cuts accurately.
Setting Common Angles
The combination square can set common angles like 45 and 90 degrees. These angles are used in many furniture joints.
To set the angle, loosen the blade lock, move the ruler to the angle mark, then tighten the lock.
- Use the 90-degree side for square lines
- Use the 45-degree side for miter joints
- Check the angle by placing the ruler on the wood edge
Using The Protractor Feature
The protractor feature on some combination squares helps mark custom angles. It is good for unusual cuts.
Rotate the blade to the desired angle on the protractor dial. Lock it in place to keep the angle steady.
- Read the angle on the protractor scale
- Use the blade to mark the angle line on the wood
- Double-check the angle before cutting
Marking Bevel Cuts
Bevel cuts are angled cuts on the edge of wood. The combination square helps mark these bevels precisely.
Adjust the blade to the bevel angle needed. Use the ruler edge to draw the bevel line across the wood surface.
- Set the blade to the bevel angle
- Place the square on the wood edge
- Draw a clear line for the bevel cut
- Verify the angle before making the cut
Checking Squareness And Flatness
A combination square is a useful tool for furniture marking. It helps check if corners are square and surfaces are flat. Accurate marking leads to better fitting parts.
This guide shows how to use a combination square to verify squareness and flatness. It also explains how to fix marking mistakes.
Verifying 90-degree Angles
To check a 90-degree angle, place the combination square’s blade against one edge. The handle should rest flat on the other edge. If the handle fits flush, the corner is square.
Mark a line along the blade to confirm the angle. Repeat this on both sides of the joint to ensure accuracy.
- Place blade on one edge
- Rest handle on adjacent edge
- Check for gaps or unevenness
- Draw a mark along the blade
- Repeat on opposite side
Testing Surface Flatness
Lay the combination square flat on the surface to test flatness. The blade should lie evenly without rocking or gaps. Move the tool along the surface to check for bumps or dips.
Use light to spot any spaces between the blade and surface. A flat surface ensures tight joints in furniture.
- Place blade flat on surface
- Look for rocking or gaps
- Move tool across the area
- Use light to find spaces
- Mark uneven spots if needed
Correcting Marking Errors
If your marks are off, erase them gently using a soft cloth or eraser. Avoid rough scraping that may damage the wood. Recheck the angle or flatness before marking again.
Measure twice and mark once. Correct marks improve the fit and finish of your furniture.
- Gently erase wrong marks
- Do not damage the wood surface
- Recheck angle or flatness
- Mark carefully after confirming
- Measure twice to avoid errors
Tips For Accurate Furniture Marking
Using a combination square helps you mark furniture pieces precisely. Accurate marking makes cutting and joining parts easier.
Follow simple tips to keep your marks clean and measurements correct. This saves time and avoids mistakes.
Maintaining Tool Cleanliness
Keep your combination square free from dust and wood chips. Dirt can cause wrong readings and uneven marks.
- Wipe the blade and ruler with a clean cloth after each use.
- Use a soft brush to remove sawdust from the tool’s edges.
- Store the square in a dry place to avoid rust.
- Check for any sticky residue and clean it with mild soap and water.
Using Sharp Marking Tools
Sharp pencils or marking knives create clear, fine lines. Blunt tools make wide or uneven marks that lead to errors.
| Tool Type | Best Use |
| Sharp Pencil | General marking on wood |
| Marking Knife | Precise lines for cutting |
| Fine-tip Marker | Temporary marks on rough surfaces |
Double-checking Measurements
Always measure twice before marking. This helps catch any mistakes early.
- Set the combination square to the needed dimension.
- Place it firmly on the wood surface.
- Mark the line clearly with your sharp tool.
- Remove the square and measure the line again with a tape measure.
- Confirm both measurements match before cutting.

Credit: www.familyhandyman.com
Common Mistakes To Avoid
Using a combination square for furniture marking requires care and attention. Small mistakes can cause inaccurate measurements and poor results.
Knowing the common errors helps you use the tool correctly. Avoid these mistakes to get precise and clean markings every time.
Misreading The Scale
One common error is misreading the scale on the combination square. The scale often has both metric and imperial units, which can confuse users.
- Check if you are reading the right side of the scale.
- Look carefully at the smallest lines to avoid errors.
- Use good lighting to see the numbers clearly.
- Double-check your reading before marking the wood.
Loose Head Adjustment
The head of the combination square must be tight and secure. A loose head can shift and cause wrong angles and measurements.
| Problem | Effect | Solution |
| Loose head | Inaccurate marking | Tighten the locking screw firmly |
| Slipping head | Uneven edges | Check and adjust before each use |
| Worn locking screw | Cannot hold position | Replace or repair tool parts |
Ignoring Tool Calibration
Ignoring the calibration of your combination square leads to wrong marks. Over time, the tool can become out of true.
Simple ways to check calibration:
- Place the square against a known 90-degree edge.
- Mark a line and flip the tool to mark again.
- If lines do not match, the tool needs adjustment.
- Do not use the tool until it is correctly calibrated.
Maintenance And Care
Taking care of your combination square helps it last longer. Proper maintenance ensures accurate measurements.
Regular cleaning, proper storage, and calibration keep the tool in good shape. Follow simple steps to maintain it.
Cleaning After Use
Clean your combination square after each use. Dirt and dust can affect its accuracy and function.
Use a soft cloth to wipe off sawdust and dirt. Avoid water to prevent rust on metal parts.
- Remove debris with a dry cloth or brush
- Use light oil to protect metal surfaces
- Do not soak the tool in water
- Dry thoroughly before storing
Storing Properly
Store your combination square in a dry place. Keep it away from moisture to avoid rust.
Use a toolbox or a protective case to prevent damage. Avoid placing heavy items on top of it.
- Keep the tool in a clean, dry box
- Use a padded case if possible
- Store in a stable place to avoid falls
- Keep away from direct sunlight
Periodic Calibration
Check your combination square regularly for accuracy. Small errors can affect your furniture marking.
Use a reliable reference surface or a known angle to test the tool. Adjust the square if needed.
- Test the 90-degree angle on a flat surface
- Check the 45-degree angle with a miter gauge
- Tighten or loosen the blade for precise settings
- Replace the tool if it cannot be calibrated
Credit: commonwoodworking.com
Frequently Asked Questions
What Is A Combination Square Used For In Furniture Marking?
A combination square helps mark precise angles, measure depths, and check surface flatness. It ensures accurate cuts and joints in furniture making.
How Do You Set A Combination Square For Marking?
Loosen the knob, slide the ruler to the desired measurement, then tighten the knob. This locks the ruler for consistent markings.
Can A Combination Square Measure Angles For Furniture Joints?
Yes, it measures 90-degree and 45-degree angles, essential for accurate furniture joints and edge markings.
How To Maintain Accuracy When Using A Combination Square?
Keep the ruler clean, tighten the locking knob firmly, and regularly check the tool’s calibration for precise markings.
Conclusion
A combination square is a valuable tool for furniture marking. It ensures accuracy and precision in measurements. Mastering its use can improve your woodworking projects significantly. With practice, marking becomes quicker and more precise. This tool simplifies the process, saving time and effort.
As you grow confident, your creations will reflect your skills. Remember to maintain your tools for longevity. A well-kept square guarantees consistent results. Embrace the learning curve; it pays off in quality work. Happy crafting, and may your projects shine with precision!