If you’ve ever struggled with putting together furniture, you know how tricky it can be to handle those tiny hex keys. But what if you could make the whole process easier and faster?
With the right tips, using a hex key can become second nature, saving you time and frustration. You’ll discover simple tricks that will help you tighten screws like a pro and get your furniture assembled without headaches. Keep reading to unlock the secrets that will make your next DIY project smooth and satisfying.
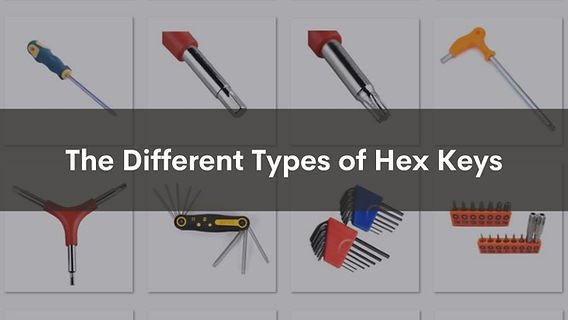
Choosing The Right Hex Key
Using the right hex key makes assembling furniture easier. It helps avoid damage to screws and parts.
Choosing the correct size and quality of hex key is important. This guide explains how to pick the best one.
Matching Sizes To Screws
Hex keys come in different sizes. Each size fits specific screw heads.
Using a wrong size can strip the screw or make it hard to turn. Always check the screw size first.
- Look at the screw head for size markings.
- Use a hex key that fits snugly into the screw.
- Try different sizes if unsure, but avoid forcing one.
Material And Quality Considerations
Hex keys are made from different materials. Stronger materials last longer and resist bending.
Choose a hex key with a good finish to prevent rust. Quality tools provide better grip and control.
- Steel hex keys are strong and durable.
- Chrome-plated keys resist rust and corrosion.
- Look for hex keys with smooth edges to avoid screw damage.
Preparing For Assembly
Using a hex key to assemble furniture is easier with good preparation. Getting ready helps avoid mistakes and saves time.
Before you start, gather everything you need. Check your workspace and tools to work smoothly.
Organizing Parts And Tools
Sorting your parts and tools before assembly keeps the process clear. Lay out all pieces and check the hex key size.
- Separate screws, bolts, and nuts by type and size
- Arrange parts on a flat surface in the order you will use them
- Keep your hex key and any additional tools nearby
- Use small containers to hold tiny pieces to avoid loss
Reading Assembly Instructions
Read the instructions fully before starting. Understanding the steps helps you avoid errors.
| Instruction Tip | Reason |
| Look for diagrams | Visuals show part placement clearly |
| Check for hex key size notes | Ensures you use the correct tool |
| Note the order of assembly | Following the sequence prevents mistakes |
| Identify special warnings | Prevents damage to parts or tools |
Proper Hex Key Handling
Using a hex key correctly helps you build furniture faster. It also stops damage to screws and tools.
Good handling keeps your hands safe and avoids slipping. Learn the right grip and pressure for best results.
Grip Techniques
Hold the hex key firmly but not too tight. A strong grip helps you turn screws easily and control the tool.
Use your thumb and fingers to wrap around the short arm of the hex key. This gives better leverage and control.
- Use your palm to press against the key for stability
- Keep your wrist straight to avoid strain
- Switch hands if you need more force or control
Applying The Right Pressure
Push the hex key into the screw head to avoid slipping. Pressure should be firm but not too hard.
Too much pressure can strip the screw or bend the key. Too little pressure makes turning difficult.
- Start with steady, even pressure
- Increase force slowly if the screw is tight
- Stop if the key or screw moves oddly

Credit: www.shutterstock.com
Efficient Assembly Tips
Using a hex key to assemble furniture can be quick and easy. Small tricks help save time and effort.
Following simple steps improves your work and keeps the pieces safe. This guide shares smart tips.
Starting With Loose Screws
Begin by placing all screws loosely in their holes. Do not tighten any screw fully at first.
This helps parts fit better and reduces stress on the wood or metal. It makes adjustments easier.
- Insert all screws just enough to hold parts together
- Check that pieces align correctly before tightening
- Make small changes if parts feel off
Tightening In Sequence
Tighten screws in a pattern, not all at once. This keeps pressure even on all sides.
Start with one screw, then move to one on the opposite side. Repeat until all are tight.
- Tighten screws gradually, avoiding over-tightening early
- Use a crisscross or opposite corner pattern
- Check alignment often while tightening
Troubleshooting Common Issues
Using a hex key to assemble furniture can sometimes be tricky. Problems like stripped or stuck screws slow down your work. Knowing how to fix these issues saves time and frustration.
This guide covers simple ways to deal with common hex key problems. Follow the tips to keep your furniture assembly smooth and easy.
Dealing With Stripped Screws
A stripped screw head makes it hard to turn the screw with a hex key. This happens when the tool slips or the screw is over-tightened. Here are ways to fix stripped screws.
- Use a rubber band between the screw and the hex key for better grip.
- Try a larger hex key if the screw head is damaged but still fits.
- Apply some penetrating oil to loosen rust or dirt in the screw.
- Tap the hex key lightly with a hammer to set it deeper into the screw.
- If the screw is badly stripped, use pliers to turn it out.
Handling Stuck Or Tight Screws
Stuck or tight screws can stop your progress. They may be over-tightened or caught by wood swelling or glue. Try these methods to loosen them carefully.
| Method | How to Use |
| Penetrating Oil | Apply oil around the screw and wait 10 minutes before turning. |
| Heat | Warm the screw with a hairdryer to expand metal slightly. |
| Tap with Hammer | Gently tap the screw head to loosen stuck parts. |
| Use Longer Hex Key | Use a longer hex key for more leverage and easier turning. |
| Turn Slowly | Turn the screw slowly back and forth to reduce tightness. |

Credit: www.familyhandyman.com
Maintenance And Storage
Taking care of your hex keys helps them last longer. Proper maintenance keeps them clean and ready. Safe storage prevents loss and damage.
Use simple methods to clean and organize your tools. This guide shows how to keep hex keys in good shape.
Cleaning Hex Keys
Regular cleaning removes dirt and rust from hex keys. Clean keys fit better and work smoothly. Use a soft cloth to wipe each key after use.
- Soak keys in warm, soapy water to loosen grime.
- Use a small brush to scrub hard spots gently.
- Dry keys completely to stop rust from forming.
- Apply a light oil coat to protect metal surfaces.
Organizing For Future Use
Keep your hex keys in order to find them fast. Organization saves time and keeps tools safe. Use storage options that fit your needs.
| Storage Method | Benefit | Tip |
| Tool Roll | Easy to carry and store | Label each slot by size |
| Magnetic Holder | Keeps keys visible and fixed | Mount near your workspace |
| Plastic Case | Protects from dust and damage | Choose a case with compartments |
| Wall Rack | Organizes many keys neatly | Group keys by size or use |

Credit: store.dekotools.com
Frequently Asked Questions
What Size Hex Key Is Best For Furniture Assembly?
The best hex key size depends on your furniture’s screws. Check the manual for the exact size. Common sizes range from 2mm to 8mm. Using the correct size prevents damage and ensures a secure fit during assembly.
How To Avoid Stripping Screws With A Hex Key?
Use the right hex key size and apply steady pressure. Turn screws slowly and avoid forcing them. Stripping often happens with worn or mismatched keys, so keep your tools in good condition.
Can I Use Any Hex Key For All Furniture Types?
No, furniture uses various hex key sizes. Always match the key size to the screw. Using the wrong key can damage screws and make assembly harder or impossible.
Should I Lubricate Screws Before Using A Hex Key?
Lubricating screws is optional but helpful. A small amount of lubricant reduces friction, making screws easier to turn. It also prevents rust and prolongs the lifespan of furniture hardware.
Conclusion
Using a hex key can make assembling furniture easy. Practice makes it easier. Follow the tips shared here for a smooth experience. Keep your hex keys organized and ready. This saves you time and effort. Handle each piece carefully to avoid damage.
Start with the right size hex key. This prevents any fitting issues. Remember, patience is key. Enjoy building your furniture with confidence. Happy assembling!