Are you noticing weak water pressure or slow drains in your home? Knowing how to test water flow in plumbing can save you time, money, and frustration.
When your water isn’t flowing properly, it can signal hidden problems that, if caught early, are easier to fix. You’ll discover simple, step-by-step methods to check your water flow quickly and accurately. By the end, you’ll feel confident spotting issues before they turn into costly repairs.
Keep reading to take control of your plumbing and ensure your water flows just the way it should.

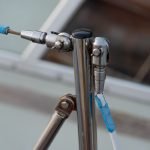
Credit: sunshoweronline.com.au
Tools Needed For Testing
Testing water flow in plumbing helps find problems early. You need the right tools to do this job well.
Each tool shows different details about your water flow. Using these tools together gives a clear view.
Flow Meter Types
A flow meter measures how much water passes through a pipe. It gives a number that shows flow rate.
There are several types of flow meters. Each works best in certain plumbing setups.
- Mechanical flow meters use moving parts to count water flow.
- Ultrasonic flow meters send sound waves to measure flow speed.
- Magnetic flow meters detect flow with magnetic fields, good for dirty water.
Pressure Gauges
Pressure gauges show the water pressure inside pipes. High or low pressure can cause flow problems.
These gauges are easy to use and help spot leaks or blockages. They connect to plumbing fixtures or pipes.
- Analog pressure gauges have a dial to show pressure.
- Digital pressure gauges give exact numbers on a screen.
Bucket And Stopwatch
A bucket and stopwatch help measure water flow without special tools. You catch water in the bucket and time it.
This method shows flow rate by how much water fills the bucket in seconds. It is simple and useful for quick checks.
- Use a bucket with known volume size.
- Start the stopwatch when water begins to flow.
- Stop the time when the bucket is full.
- Calculate flow rate by dividing bucket volume by time.
Preparing The Plumbing System
Testing water flow in plumbing requires preparing the system first. This helps get clear and accurate results. Proper preparation also protects your pipes and fixtures from damage.
Start by shutting off the main water supply. Then clear any water and debris from fixtures and pipes. These steps make sure the test goes smoothly.
Shutting Off Main Water Supply
Find the main water valve, usually near the water meter or where the pipe enters your home. Turn the valve clockwise to close it. This stops water flow to all pipes. It keeps you safe while testing.
- Locate the main water valve.
- Turn the valve clockwise to close it.
- Open a faucet to relieve pressure.
- Check no water flows from fixtures.
Clearing Fixtures And Pipes
Clear water from all fixtures and pipes to avoid false readings. Open taps and drain water completely. Remove any aerators or filters that block flow. This step ensures the system is ready for testing.
| Fixture | Action to Clear |
|---|---|
| Kitchen sink | Open faucet fully and remove aerator |
| Bathroom sink | Open faucet and drain water |
| Shower | Open valve and remove showerhead if needed |
| Toilet | Flush to empty tank and bowl |
Measuring Water Flow Rate
Testing water flow in plumbing helps find problems and check system health. Measuring the flow rate shows how much water moves through pipes.
You can measure flow rate using tools or simple household items. Two common ways are using a flow meter and the bucket and stopwatch method.
Using A Flow Meter
A flow meter is a tool that measures water flow rate directly. It attaches to the pipe and shows the amount of water passing through.
Flow meters give quick and accurate readings. They are good for checking flow in different pipes and systems.
- Attach the flow meter to the pipe
- Turn on the water
- Read the flow rate on the meter display
- Record the flow rate for your records
Bucket And Stopwatch Method
This simple method uses a bucket and a stopwatch to measure flow rate. It works well for faucets or outdoor spigots.
Measure how long it takes to fill the bucket, then calculate the flow rate using the bucket size and time.
- Use a bucket with a known volume (like 5 gallons)
- Place the bucket under the water source
- Turn on the water and start the stopwatch
- Stop timing when the bucket is full
- Calculate flow rate: volume ÷ time = gallons per minute (GPM)
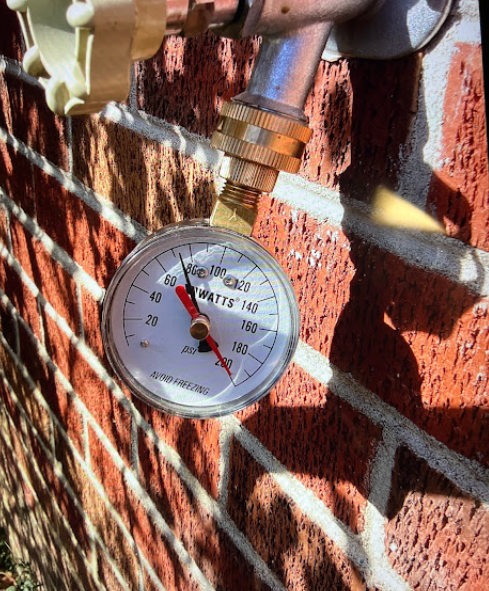
Checking Water Pressure
Testing water flow in plumbing starts with checking water pressure. Good pressure ensures pipes and fixtures work well.
Low or high pressure can cause problems like leaks or poor water flow. Use a pressure gauge to measure it accurately.
Attaching Pressure Gauge
First, find a faucet or hose bib where you can attach the pressure gauge. Most gauges fit standard garden hose threads.
Turn off all water-using devices in your home. This gives a clear pressure reading without interference.
- Remove any existing hose or attachment.
- Clean the faucet threads to avoid leaks.
- Screw the pressure gauge onto the faucet tightly.
- Open the faucet slowly to let water flow into the gauge.
Interpreting Pressure Readings
Check the gauge dial for the pressure number. Water pressure is usually measured in pounds per square inch (psi).
| Pressure Range | Meaning |
| 40-60 psi | Normal pressure for most homes |
| Below 40 psi | Low pressure; may cause weak flow |
| Above 80 psi | High pressure; risk of pipe damage |
If pressure is too low, check for leaks or clogged pipes. If too high, install a pressure regulator or call a plumber.
Identifying Flow Issues
Testing water flow in plumbing helps find problems early. Poor flow can cause damage and waste water.
This guide covers how to spot leaks and blockages to keep your plumbing working well.
Detecting Leaks
Leaks lower water pressure and raise water bills. Look for wet spots or mold near pipes and fixtures.
- Check under sinks for water puddles.
- Listen for dripping sounds inside walls.
- Watch your water meter for unexpected changes.
- Inspect exposed pipes for rust or damage.
Spotting Blockages
Blockages reduce water flow and cause backups. Slow drains and gurgling sounds are common signs.
| Sign | Possible Cause | Action |
| Slow Drain | Hair or debris buildup | Use a drain snake or cleaner |
| Water Backup | Clogged pipe | Clear blockage or call plumber |
| Gurgling Noises | Trapped air or blockage | Check vents and drains |

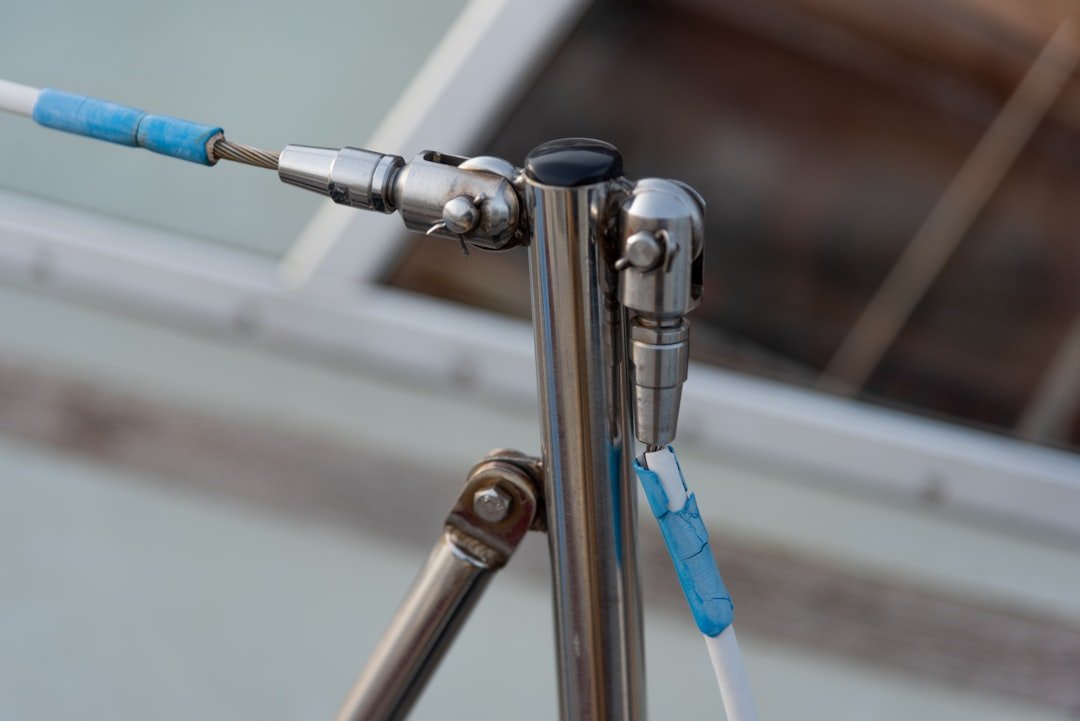
Credit: www.tapsuk.com
Improving Measurement Accuracy
Testing water flow in plumbing needs accuracy for correct results. Accurate measurements help detect issues early and save water.
Two key ways to improve accuracy are taking multiple readings and calibrating your tools properly.
Multiple Readings
Taking several measurements reduces errors from fluctuations or mistakes. It gives a clearer picture of the true water flow.
- Measure flow at different times of the day
- Repeat the test at least three times
- Use the average of the readings for the final value
- Note any unusual changes between readings
- Check that conditions are the same for each test
Calibrating Tools
Calibration ensures your measuring tools give correct values. Without calibration, results may be off and unreliable.
| Tool | Calibration Method | Frequency |
| Flow Meter | Compare with known flow source | Monthly |
| Pressure Gauge | Use a standard pressure tester | Every 6 months |
| Stopwatch | Check against digital timer | Before each use |
Safety Tips During Testing
Testing water flow in plumbing needs care and attention. Safety is important to avoid accidents and damage.
Use the right tools and follow safety steps. This helps keep you and your home safe.
Handling Tools Properly
Use tools correctly to avoid injury. Read instructions before using any plumbing tool.
Wear gloves and safety glasses to protect your hands and eyes during testing.
- Check tools for damage before use
- Hold tools firmly to prevent slips
- Keep tools away from children
- Turn off power if using electric tools
Avoiding Water Damage
Turn off the main water supply before testing. This stops water from flooding your home.
Use buckets or towels to catch any water spills during the test.
- Check pipes and joints for leaks after testing
- Work slowly to control water flow
- Have a mop or cloth ready for spills
- Notify others in the home about the test
Credit: www.pipewrenchplumbing.com
Frequently Asked Questions
How Do I Measure Water Flow In Plumbing?
Use a flow meter or a bucket and stopwatch. Measure how much water flows in a set time. This helps identify flow rate and detect plumbing issues.
What Causes Low Water Flow In Pipes?
Low water flow can be caused by clogs, leaks, corrosion, or faulty valves. Identifying these helps fix the problem and restore proper flow.
When Should I Test Water Flow In Plumbing?
Test water flow during new installations, after repairs, or if you notice pressure drops. Regular checks ensure efficient plumbing performance.
Can Water Flow Tests Prevent Plumbing Damage?
Yes, testing flow helps detect blockages and leaks early. This prevents damage and costly repairs by maintaining system health.
Conclusion
Testing water flow in plumbing is essential for home maintenance. It helps detect issues early, preventing costly repairs. Follow simple steps to ensure accurate flow measurements. Keep tools handy for quick checks. Regular testing promotes efficient water usage. It also ensures your plumbing system runs smoothly.
Be proactive to maintain your home’s health. Your water flow checks make a difference. Understanding these basics can save time and money. Remember to test periodically. Enjoy peace of mind knowing your plumbing is in good shape. Stay informed and protect your investment.
Happy plumbing!