Are you tired of guessing angles and making cuts that just don’t fit right? A bevel gauge could be the simple tool that changes your woodworking game forever.
Imagine being able to measure and transfer angles with ease and accuracy every single time. In this guide, you’ll discover how to use a bevel gauge step-by-step, so your angled cuts become precise and professional-looking. Keep reading to unlock the secret to perfect angles and take your projects to the next level.
What Is A Bevel Gauge
A bevel gauge is a tool used to measure and transfer angles. It helps woodworkers and metalworkers make precise angled cuts. The tool has a handle and a movable blade that locks at any angle.
Using a bevel gauge ensures the angles match perfectly for joints, trim, and other angled pieces. It is simple to use and very helpful in many projects.
Parts Of A Bevel Gauge
A bevel gauge has two main parts. The handle is usually made of wood or metal. The blade is thin and can move freely. A locking mechanism holds the blade at the chosen angle.
- Handle: The base part to hold the tool
- Blade: The adjustable arm used to measure angles
- Locking Screw: Tightens to fix the blade in place
How A Bevel Gauge Works
The blade moves around a pivot point inside the handle. You adjust the blade to match the angle you want to measure. Then, tighten the locking screw to hold the blade steady.
| Action | Purpose |
| Move blade | Match the angle needed |
| Lock blade | Fix the angle for transfer |
| Place gauge | Mark or check angle on material |
Common Uses Of A Bevel Gauge
Bevel gauges help with many tasks. They measure angles for cutting wood, metal, or plastic. Carpenters use them for molding and trim work. Metalworkers use them to check weld angles.
- Setting angles for saw blades
- Marking wood before cutting
- Checking existing angles on materials
- Transferring angles between pieces

Credit: paulsellers.com
Types Of Bevel Gauges
A bevel gauge helps you measure and transfer angles for cutting wood or metal. It has a handle and a blade that can be set to any angle.
There are several types of bevel gauges. Each type suits different tasks and materials.
Sliding Bevel Gauge
This is the most common bevel gauge. It has a fixed handle and a blade that slides and locks at any angle.
You can use the sliding bevel to copy existing angles or set new ones before cutting.
Digital Bevel Gauge
The digital bevel gauge shows the angle on a small screen. It is easy to read and very precise.
This type is perfect for users who want quick and accurate angle measurements.
Combination Bevel Gauge
This bevel gauge combines a sliding blade with additional tools like a protractor or ruler.
- Sliding blade for angle setting
- Protractor for measuring angles
- Ruler for straight measurements
It is useful for complex projects needing multiple measurements.
Fixed Bevel Gauge
This type has a blade fixed at a specific angle. It does not move.
Fixed bevel gauges are good for repeated cuts at the same angle.
T-bevel Vs. Sliding Bevel Comparison
| Feature | T-Bevel Gauge | Sliding Bevel Gauge |
| Blade Movement | Fixed at one angle | Blade slides and locks |
| Use | Repeat cuts at set angle | Measure and transfer many angles |
| Adjustability | No | Yes |
| Precision | High for fixed angle | High for many angles |
Choosing The Right Bevel Gauge
A bevel gauge helps you measure and transfer angles accurately. Choosing the right one makes your angled cuts precise and easy.
There are many types of bevel gauges. Each type fits different tasks and skill levels.
Material And Build Quality
Look for a bevel gauge made from strong materials like stainless steel or hardwood. These materials last longer and hold their shape well.
Locking Mechanism
A good locking mechanism keeps the angle steady while you work. Some gauges use thumbscrews, others use cam locks. Choose one that feels secure and easy to use.
Size And Scale Markings
Choose a size that fits your projects. Larger gauges cover big angles well. Smaller ones are better for detailed work. Clear scale markings help you read angles faster.
- Small (4-6 inches): Best for fine woodworking
- Medium (6-10 inches): Good for most projects
- Large (10+ inches): Ideal for big cuts and rough work
Type Of Bevel Gauge
| Type | Best Use | Pros | Cons |
| Fixed Bevel | Simple angle transfer | Easy to use | No angle measurement |
| Adjustable Bevel | Varied angles | Versatile | Can slip if lock is weak |
| Digital Bevel | Exact angle reading | Highly accurate | Needs battery |
Budget Considerations
Bevel gauges come in many price ranges. Basic models cost less but may lack features. Higher-priced ones offer better accuracy and durability.
Think about how often you will use the bevel gauge. If you work regularly with angles, invest in a good quality tool.

Credit: woodworkersinstitute.com
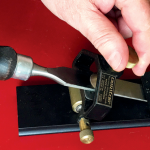
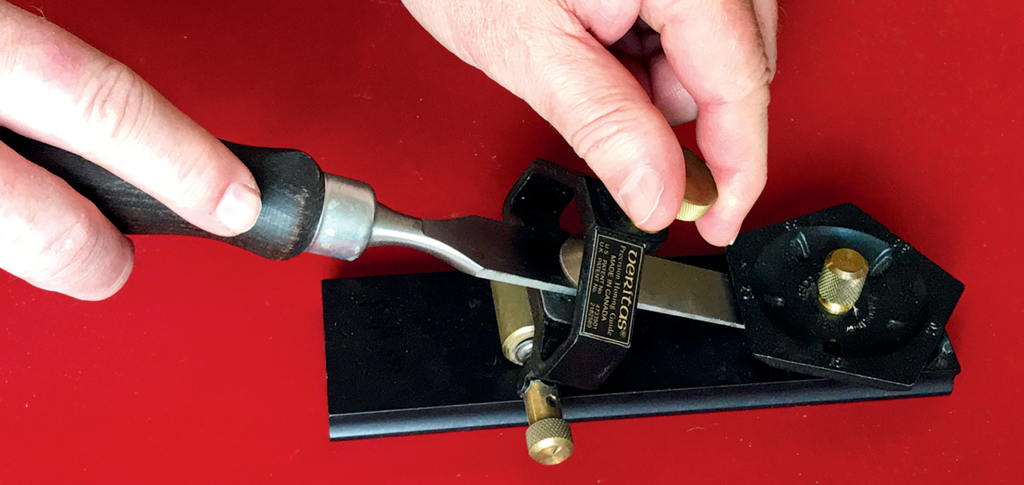
Setting Up The Bevel Gauge
A bevel gauge helps you measure and copy angles for cutting wood or metal. Setting it up correctly ensures your cuts are accurate.
Learn how to adjust the blade angle and lock the gauge in place for precise work.
Adjusting The Blade Angle
Hold the handle of the bevel gauge firmly. Move the blade until it matches the angle you want to copy or cut.
You can use a protractor or angle finder to help set the blade precisely. Make small movements for better control.
- Loosen the locking knob if needed
- Move the blade slowly to the desired angle
- Check the angle with a protractor or angle finder
Locking The Gauge In Place
After setting the angle, tighten the locking knob or screw. This holds the blade steady during use.
Make sure the blade does not move when you apply pressure. A locked bevel gauge gives you consistent and precise cuts.
- Tighten the locking mechanism securely
- Test the blade for any movement
- Adjust if the blade shifts before cutting
Measuring Angles Accurately
Using a bevel gauge helps you measure and transfer angles easily. It gives precise angled cuts for your projects.
Knowing how to use the bevel gauge right improves your work quality. It ensures parts fit well and look neat.
Aligning With Workpieces
Place the bevel gauge against the edge of your workpiece. Adjust the blade to match the angle you want to measure.
Lock the blade in place to keep the angle steady. This lets you mark or cut the same angle on other pieces.
- Hold the stock firmly to avoid movement
- Match the bevel blade edge with the workpiece angle
- Tighten the locking screw to fix the angle
- Transfer the angle safely to your cutting tool
Using Reference Angles
Use known angles like 45° or 90° as a guide with your bevel gauge. Set the blade to these angles for quick measuring.
This saves time and increases accuracy. You can compare unknown angles to the reference to check them precisely.
- Set the bevel blade to a standard angle
- Check the workpiece angle against this setting
- Adjust as needed to match the reference angle
- Lock and transfer the angle for cutting or marking

Credit: woodworkersinstitute.com
Marking Angled Cuts
Marking angled cuts accurately is important for neat woodworking or metalworking. A bevel gauge helps transfer exact angles to your material.
This guide shows how to use a bevel gauge to mark angled cuts clearly and precisely.
Setting The Bevel Gauge Angle
First, loosen the bevel gauge lock and adjust the blade to match the desired angle. Use a protractor or angle finder for accuracy.
Once set, tighten the lock to keep the blade steady during marking.
Aligning The Gauge On The Material
Place the bevel gauge blade on the edge of your workpiece. Hold the handle firmly against the material to prevent movement.
Make sure the blade is flush and touching the surface where you want to mark the cut.
Marking The Cut Line
Use a sharp pencil or marking knife along the bevel gauge blade edge. Draw a clear line to show where to cut.
Keep the pencil steady and close to the blade to ensure a precise line.
Double Checking The Angle
After marking, check the angle with a protractor or square. This avoids mistakes before cutting.
- Place protractor on the marked line
- Verify the angle matches your desired measurement
- Adjust and re-mark if needed
Common Mistakes To Avoid
Using a bevel gauge correctly helps you make angled cuts with precision. Many people make simple mistakes that cause errors in their work. Avoid these errors to get the best results.
Understanding these common mistakes will save time and material. Read on to learn what to watch out for when using your bevel gauge.
Not Securing The Bevel Gauge Properly
Many users do not tighten the bevel gauge enough. This causes the angle to shift during marking or cutting. Always lock the gauge firmly to keep the angle stable.
Incorrect Angle Reading
It is easy to misread the angle on your bevel gauge. Make sure to check the angle twice before transferring it to your workpiece. Use a protractor if needed to confirm the angle.
Using A Worn Or Damaged Gauge
A bevel gauge with worn edges or loose joints will give wrong measurements. Inspect your tool regularly and replace it if it shows signs of damage.
Ignoring The Workpiece Surface
Placing the bevel gauge on an uneven or rough surface causes inaccurate angle marking. Always place the gauge on a flat, clean surface before marking your cut line.
Rushing The Marking Process
Hurrying when marking angles leads to mistakes. Take your time to hold the gauge steady and mark carefully. This reduces the chance of errors in your angled cuts.
Common Mistakes Summary
- Failing to lock the bevel gauge tightly
- Misreading the angle measurement
- Using a damaged or loose gauge
- Placing the gauge on uneven surfaces
- Marking angles too quickly without care
Maintenance And Care Tips
Keeping your bevel gauge in good condition ensures accurate angled cuts every time. Regular care helps the tool last longer and work smoothly.
Follow these tips to maintain your bevel gauge and avoid common problems like rust and loose parts.
Cleaning The Bevel Gauge
Clean your bevel gauge after each use. Remove dust, dirt, and wood particles to keep the tool precise.
- Use a soft cloth to wipe the blade and handle.
- For stubborn dirt, use a mild soap solution and dry immediately.
- Avoid soaking the tool in water to prevent rust.
Lubricating Moving Parts
Lubricate the pivot point to keep the bevel gauge moving smoothly. This prevents stiffness and wear.
- Apply a small drop of light machine oil or WD-40.
- Move the blade back and forth to spread the oil evenly.
- Wipe off excess oil to avoid attracting dust.
Checking And Tightening Screws
Loose screws can affect the accuracy of your bevel gauge. Check and tighten them regularly.
| Part | Tool Needed | Frequency |
| Pivot Screw | Small screwdriver or Allen key | Every month |
| Locking Nut | Wrench or pliers | Every month |
Proper Storage
Store your bevel gauge in a dry place to avoid rust and damage. Use a protective case if possible.
- Keep it away from moisture and direct sunlight.
- Place it in a toolbox or drawer with other measuring tools.
- Use silica gel packets to reduce humidity.
Advanced Techniques For Precision
Using a bevel gauge improves your ability to make exact angled cuts. Advanced techniques help you transfer and combine angles more precisely.
This guide covers how to transfer angles and use the bevel gauge with other tools for better accuracy.
Transferring Angles
To transfer an angle, first loosen the bevel gauge’s wing nut. Place the blade against the angle you want to copy. Tighten the wing nut to lock the blade in place.
- Loosen the wing nut on the bevel gauge.
- Align the blade with the angle surface.
- Tighten the wing nut to fix the angle.
- Use the gauge to mark the cut on your workpiece.
This process helps you repeat the exact angle on multiple pieces without guessing.
Combining With Other Tools
Pair the bevel gauge with other tools like a protractor or combination square. This improves the precision of your measurements and cuts.
| Tool | Purpose | How to Use with Bevel Gauge |
| Protractor | Measure exact angles | Set bevel gauge to protractor angle, then transfer |
| Combination Square | Check 90° and other angles | Align bevel gauge blade to square for accuracy |
| Marking Gauge | Draw parallel lines | Use bevel gauge to set angle, then mark with gauge |
Using these tools together reduces mistakes and ensures your cuts are consistent.
Frequently Asked Questions
What Is A Bevel Gauge Used For In Woodworking?
A bevel gauge measures and transfers angles accurately. It helps woodworkers make precise angled cuts. This tool ensures your cuts match desired angles perfectly. It is essential for creating joints and fittings with exact measurements.
How Do You Set The Angle On A Bevel Gauge?
Unlock the bevel gauge’s locking mechanism first. Adjust the blade to match the desired angle. Tighten the lock to secure the blade in place. Now, the gauge is ready for marking or cutting precise angles.
Can A Bevel Gauge Improve Cutting Accuracy?
Yes, it improves accuracy by allowing precise angle measurements. It helps avoid guesswork and uneven cuts. Using a bevel gauge leads to better fitting joints and cleaner edges. This results in professional-quality woodworking projects.
Is A Bevel Gauge Suitable For Beginners?
Absolutely, it is user-friendly and easy to operate. Beginners can quickly learn to measure and transfer angles. It supports better cutting skills and confidence in woodworking. Using one enhances project quality from the start.
Conclusion
Mastering the bevel gauge takes practice. But the results are worth it. Precise angled cuts can improve your projects significantly. Remember to measure twice. Cut once. This tool enhances accuracy. Plus, it helps prevent costly mistakes. Perfect for woodworkers and DIY enthusiasts alike.
Keep your bevel gauge clean and well-maintained. This ensures accurate readings every time. Now, you’re ready to tackle any angled cut with confidence. Happy crafting!