Are you ready to master the skill that can make your electrical projects stronger and more reliable? Soldering electrical connectors might seem tricky at first, but once you get the hang of it, you’ll wonder how you ever worked without it.
This guide will walk you through every step, making sure you avoid common mistakes and get perfect connections every time. Whether you’re fixing a gadget or building something new, your confidence will grow with each joint you solder. Keep reading, and you’ll soon have the know-how to make your electrical work cleaner, safer, and more professional.
Soldering Basics
Soldering electrical connectors joins wires and parts with melted metal. It creates strong, lasting connections for electronics.
Good soldering helps devices work well and lasts a long time. Learning the basics makes the job easier and safer.
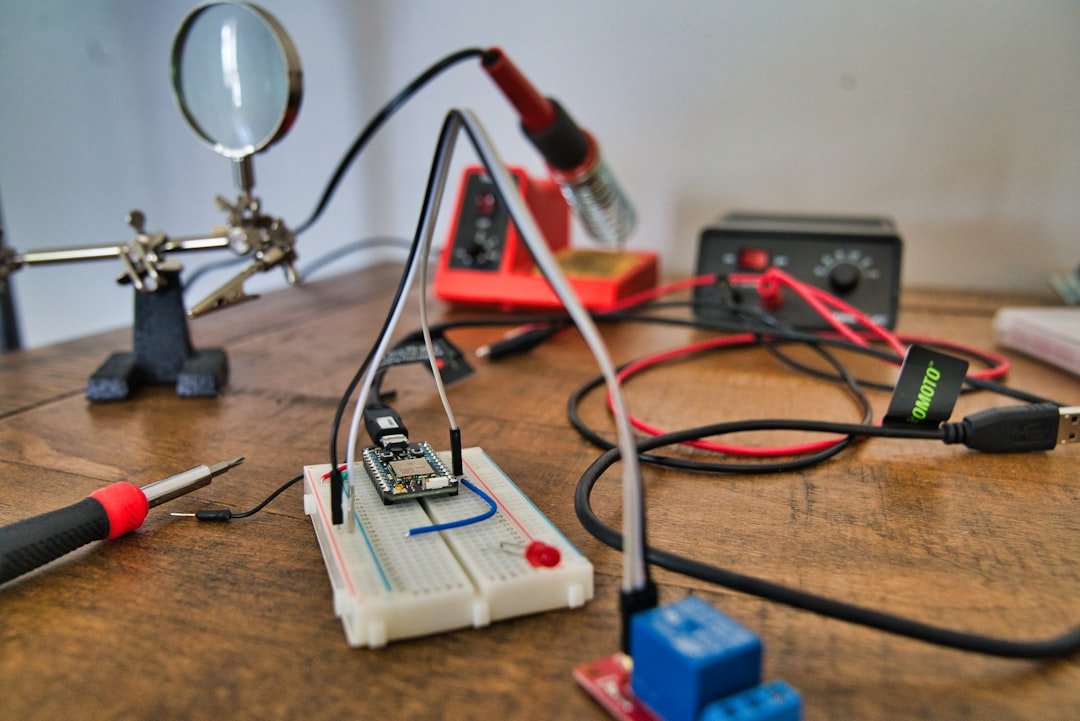
Essential Tools
Using the right tools makes soldering easier and safer. A soldering iron heats the metal to melt solder. Wire cutters trim wires for neat work.
Other tools help hold parts steady and clean the soldering tip for better heat transfer.
- Soldering iron with adjustable temperature
- Soldering iron stand
- Wire cutters and strippers
- Helping hands or clamps
- Soldering tip cleaner (wet sponge or brass wire)
- Heat shrink tubing or electrical tape
Types Of Solder
Solder comes in different types for various uses. Choose solder that melts easily and sticks well to metal parts.
Lead-free solder is safer and meets modern rules. Some solder has a core with flux to clean metal while heating.
- Lead-free solder (usually tin, copper, silver)
- Leaded solder (tin and lead mix, melts lower)
- Flux-core solder (helps clean and bond)
- Rosin-core solder (common for electronics)
Safety Precautions
Soldering uses hot tools and chemicals. Always work in a well-ventilated area. Avoid breathing fumes from melted solder and flux.
Wear eye protection to stop sparks or hot solder from hurting your eyes. Keep your workspace clean to avoid fires.
- Use a soldering iron stand to hold the hot iron
- Wear safety glasses or goggles
- Work near a window or use a fan for ventilation
- Wash hands after handling solder
- Keep flammable items away from the soldering area

Credit: avcsstechworld.com
Preparing Connectors
Preparing electrical connectors is important for a strong solder joint. Clean and prepare the parts well before soldering.
This guide covers cleaning surfaces, stripping wires, and tinning wires to get ready.
Cleaning Surfaces
Dirty surfaces can stop solder from sticking. Clean the connector and wire ends before soldering.
Use a small brush, sandpaper, or a cloth to remove dirt, oil, and oxidation.
- Use fine sandpaper to gently remove oxidation
- Wipe parts with isopropyl alcohol
- Make sure surfaces are dry before soldering
Stripping Wires
Remove the plastic cover from the wire ends. Expose enough metal to connect with the connector.
Use wire strippers to avoid cutting the wire strands. Cut about 1/4 inch of insulation.
- Choose the right size on the wire stripper
- Grip the insulation, not the wire strands
- Pull off the insulation cleanly without breaking wires
Tin The Wires
Tinning means coating the wire strands with solder before joining. It helps solder flow and stick better.
Heat the wire with a soldering iron and apply solder until the strands are shiny and covered.
- Use a clean, hot soldering iron
- Touch solder to the wire, not the iron tip
- Cover all wire strands evenly with solder
Soldering Techniques
Soldering electrical connectors requires careful technique. Proper skills ensure strong and reliable connections.
This guide covers key soldering methods for good electrical joints. Focus on heating, applying solder, and avoiding cold joints.
Proper Heating Methods
Heat the connector and wire evenly before applying solder. Use a soldering iron with the right temperature, usually between 350°C and 400°C.
Place the iron tip on the metal parts, not the solder. Let the parts get hot enough to melt the solder quickly.
- Keep the soldering iron tip clean and tinned.
- Avoid overheating to prevent damage to components.
- Heat both parts to be joined, not just one side.
- Work quickly to avoid overheating wires or connectors.
Applying Solder
Touch the solder to the heated metal parts, not the iron tip. The solder should flow smoothly onto the joint.
Use enough solder to cover the joint but avoid excess. A good solder joint looks shiny and smooth.
| Common Solder Types | Use | Melting Point |
|---|---|---|
| Sn63/Pb37 | Electronics | 183°C |
| Lead-Free (Sn/Ag/Cu) | RoHS compliant | 217°C |
| Rosin Core Flux | Flux inside solder | Varies |
Avoiding Cold Joints
Cold joints happen when solder does not melt properly. They cause weak electrical connections and may fail over time.
- Do not move the joint before solder cools.
- Ensure both parts are hot enough before soldering.
- Use clean surfaces and remove oxidation before soldering.
- Check joints for dull, cracked, or uneven solder.

Credit: avcsstechworld.com
Connector Types
Soldering electrical connectors is important for strong, safe connections. Choosing the right connector helps your project work well and last long.
This guide explains the types of connectors and how to pick the best one for your needs.
Crimp Vs Solder
Crimp connectors use pressure to join wires and terminals. Solder connectors use melted metal to create a bond. Each type has good and bad points.
- Crimp:Fast and easy, needs a crimping tool, good for vibration resistance.
- Solder:Strong electrical connection, needs heat and solder, better for small wires.
Common Electrical Connectors
| Connector Type | Description | Use |
|---|---|---|
| Butt Connectors | Join two wires end-to-end | Wire repairs, extensions |
| Ring Terminals | Ring-shaped end for screws or bolts | Ground or power connections |
| Spade Terminals | Forked shape for easy connection | Switches, relays |
| Bullet Connectors | Male and female plugs | Quick disconnects |
| Header Pins | Multiple pins in a row | PCBs and circuit boards |
Choosing The Right Connector
Pick a connector based on wire size, environment, and connection type. Using the wrong connector can cause failure or safety risks.
- Check wire gauge and match connector size.
- Use insulated connectors for safety.
- Choose waterproof connectors for outdoor use.
- Consider if you need a permanent or removable connection.
- Use connectors rated for your electrical load.
Troubleshooting Tips
Soldering electrical connectors is a skill that needs care and patience. Sometimes, connections may not work as expected. Troubleshooting helps find and fix these problems quickly.
Knowing how to spot bad joints, fix errors, and keep connections strong will improve your work quality. This guide covers simple tips for each step.
Identifying Bad Joints
Bad solder joints can cause poor electrical flow or failure. Look for cracks, dull surfaces, or blobs of solder. These signs mean the joint may not be good.
Test the connection by gently moving the wires. A loose joint often feels shaky or breaks easily. A good joint is smooth and shiny.
- Dull or grainy solder surface
- Cracks or gaps in the solder
- Excess solder forming blobs
- Wires moving inside the joint
- Burn marks or melted insulation
Fixing Mistakes
If a solder joint is bad, remove the old solder first. Use a solder sucker or braid to clean the area. Then reheat and apply fresh solder carefully.
Make sure the surfaces are clean and heated evenly. Avoid adding too much solder. Use just enough to cover and connect the wires well.
- Heat the joint before adding solder
- Use the right amount of solder
- Keep the soldering iron tip clean
- Remove old solder with a solder sucker or braid
- Let the joint cool without moving it
Maintaining Soldered Connections
Good soldered connections last longer with proper care. Avoid pulling or bending wires near the joint. Keep the area clean and dry to stop corrosion.
Check your connections regularly. Tighten or re-solder any joints that look weak or damaged. Proper maintenance prevents future problems.
- Handle wires gently around joints
- Keep connections free from dirt and moisture
- Inspect joints for cracks or corrosion
- Re-solder loose or weak joints
- Use heat shrink tubing for extra protection
Advanced Practices
Soldering electrical connectors requires skill and care. Advanced methods improve connection strength and reliability. These practices help avoid common problems.
This guide covers heat shrink application, multi-wire soldering, and using flux effectively. Each section explains key tips for better results.
Heat Shrink Application
Heat shrink tubing protects and insulates soldered joints. It also prevents corrosion and mechanical damage. Proper use extends the life of connections.
- Choose tubing size that fits snugly over the joint
- Slide tubing onto the wire before soldering
- After soldering, move tubing over the joint
- Apply heat evenly with a heat gun or lighter
- Allow tubing to shrink tightly around the connector
- Check for gaps or loose spots after cooling
Multi-wire Soldering
Soldering several wires together needs careful technique. This ensures solid electrical contact and strong mechanical bonds.
| Tip | Explanation |
| Strip wires evenly | Remove insulation to the same length on all wires |
| Twist wires tightly | Hold wires together to prevent separation during soldering |
| Use enough solder | Apply enough solder to cover all wires fully |
| Heat wires, not solder | Heat the wires first, then apply solder for better flow |
| Inspect joint | Check for cold joints or gaps and rework if needed |
Using Flux Effectively
Flux cleans surfaces and improves solder flow. Using it correctly avoids weak joints and corrosion.
- Apply flux before heating wires or connectors
- Use the right flux type for your solder and metals
- Clean excess flux residue after soldering
- Do not overuse flux; a small amount works best
- Flux helps heat reach all joint parts evenly

Credit: avcsstechworld.com
Frequently Asked Questions
What Tools Are Essential For Soldering Electrical Connectors?
Essential tools include a soldering iron, solder wire, flux, wire strippers, and heat shrink tubing. These tools ensure strong, reliable electrical connections. A good soldering iron with temperature control improves precision and safety during the process.
How Do I Prepare Connectors Before Soldering?
Strip the wire insulation to expose enough conductor for soldering. Clean connectors and wires to remove dirt or oxidation. Apply flux to promote better solder flow and improve joint strength.
What Is The Best Solder Type For Electrical Connectors?
Use rosin-core solder with a 60/40 tin-lead ratio or lead-free alternatives like SAC305. These solders melt at appropriate temperatures and provide excellent electrical conductivity and mechanical strength.
How Can I Avoid Cold Solder Joints?
Ensure the soldering iron is hot enough and heat both the wire and connector simultaneously. Apply solder after heating them adequately. Avoid moving parts until the solder cools to prevent weak connections.
Conclusion
Soldering electrical connectors is a useful skill to learn. It helps create strong and safe electrical connections. Always prepare your tools and work area well. Take your time to heat the connector and wire properly. Clean joints make the best connections.
Practice helps improve your technique and confidence. Remember to stay safe and work carefully. With patience, your soldering work will last long. This guide gives you the basics to start. Keep practicing and enjoy your electrical projects.