If you want your woodworking projects to look professional and fit together perfectly, knowing how to mark wood for rabbet and lap joints is a must. These joints are essential for creating strong connections, but getting the measurements right can be tricky.
In this guide, you’ll learn simple, step-by-step techniques to mark your wood accurately every time. By mastering this skill, you’ll save time, avoid costly mistakes, and build joints that hold tight. Ready to improve your woodworking skills and make your projects stand out?
Let’s dive in!
Credit: www.popularwoodworking.com
Tools For Marking Joints
Marking wood accurately is key to making strong rabbet and lap joints. Using the right tools helps you measure and mark clearly.
Good marking tools save time and reduce mistakes in your woodworking projects.
Essential Measuring Tools
Measuring tools let you get precise lengths and widths for your joints. Without them, your cuts may not fit well.
- Tape Measure: Measures long distances quickly and easily.
- Steel Ruler: Gives straight, accurate measurements for smaller pieces.
- Marking Gauge: Sets consistent widths for rabbets and lap joints.
Marking Instruments
Marking instruments help you draw clear lines on wood. Sharp, visible marks guide your saw or chisel.
| Tool | Description |
| Pencil | Common and easy to erase for general marks. |
| Marking Knife | Creates thin, sharp lines for precise cuts. |
| Scratch Awl | Scores wood surface for better cut guidance. |
Choosing The Right Square
Squares help you mark perfect right angles for joints. Pick one that fits your project size.
- Combination Square: Versatile for marking and measuring angles.
- Try Square: Simple and sturdy for checking 90 degrees.
- Speed Square: Quick angle marking and common on job sites.
Preparing The Wood Surface
Marking wood for rabbet and lap joints starts with a clean surface. Dirt and rough spots can cause mistakes in measuring and cutting. A smooth surface helps the pencil or marking knife make clear lines.
Careful preparation ensures your joints fit tightly. This guide covers cleaning and smoothing the wood and choosing the right face for marking.
Cleaning And Smoothing
Remove all dirt, dust, and grease before marking. Use a soft cloth or brush to clean the wood surface gently. Sand rough areas with fine-grit sandpaper until smooth.
- Start with a dry brush to clear loose dust.
- Wipe the surface with a slightly damp cloth if needed.
- Sand any rough or uneven spots carefully.
- Remove sanding dust with a tack cloth.
Selecting The Best Face
Pick the wood face that is flat and free of defects. This side gives the most accurate reference for your marks. Avoid faces with knots, cracks, or heavy grain patterns.
| Wood Face | Advantages | Disadvantages |
| Flat and smooth | Best for accurate marking | May need sanding |
| Rough or grainy | Natural look | Hard to mark lines clearly |
| Knotted or cracked | Strong character | Inaccurate marks, weak joints |
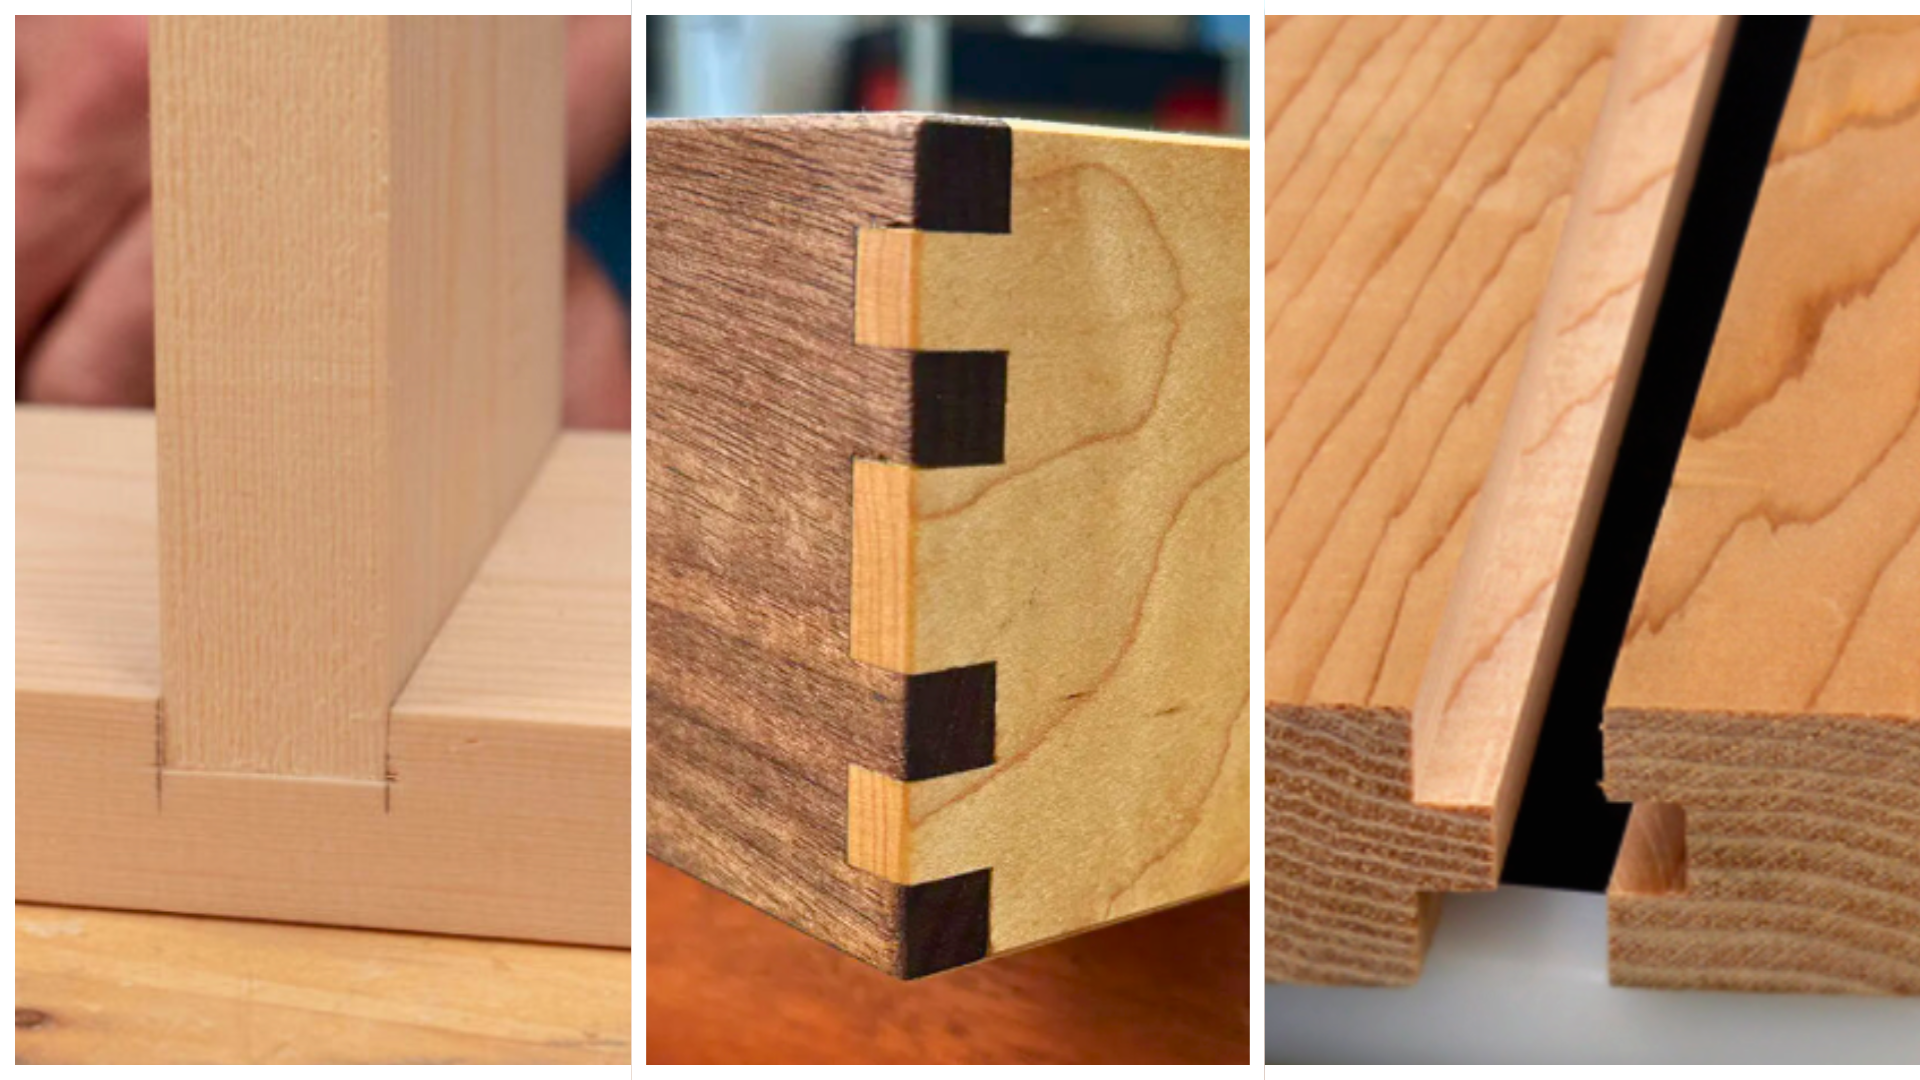
Marking Rabbet Joints
Marking rabbet joints helps you cut wood precisely. Accurate marks make fitting parts easier.
Using simple tools and clear methods ensures your rabbet joints are neat and strong.
Setting The Depth And Width
First, decide the rabbet’s width and depth. These measurements match the thickness of the wood piece that fits into the rabbet.
- Use a ruler or tape measure to find the correct width.
- Set a marking gauge to the desired depth.
- Check the measurements twice before marking.
Transferring Measurements Accurately
Transfer your measurements carefully to avoid mistakes. Use tools that help keep lines straight and clear.
| Tool | Purpose | Tip |
|---|---|---|
| Marking Gauge | Set depth for the rabbet | Adjust slowly to exact depth |
| Pencil or Knife | Mark lines on the wood | Use a sharp knife for thin lines |
| Square | Check right angles and width | Hold firmly for accurate lines |
Common Marking Techniques
Use these simple techniques to mark rabbet joints clearly and avoid confusion.
- Score the wood surface lightly with a marking knife for precise lines.
- Use a marking gauge for consistent depth marks along the wood edge.
- Draw lines with a sharp pencil when knife scoring is not possible.
- Double-check measurements before cutting to prevent errors.

Credit: www.reddit.com
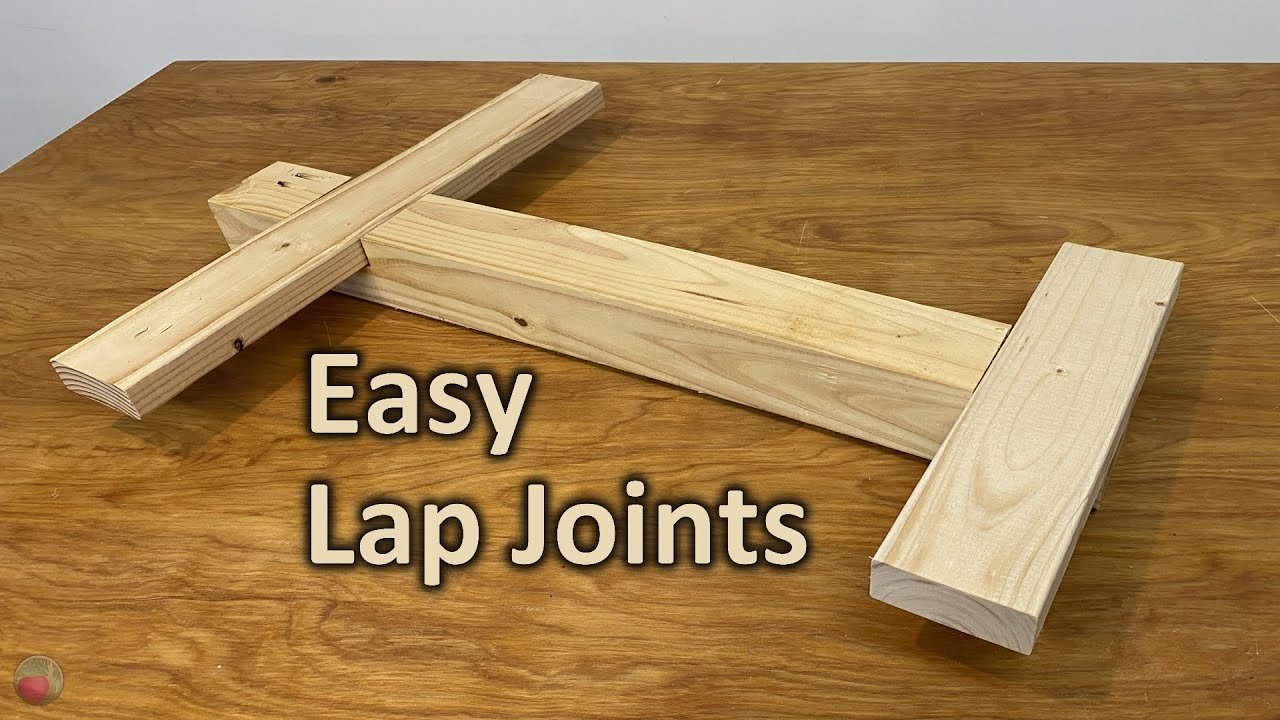
Marking Lap Joints
Lap joints connect two pieces of wood by overlapping them. Marking these joints clearly helps in making accurate cuts. This guide focuses on marking lap joints correctly.
Accurate marking ensures the joint fits tightly. It also saves time during assembly and improves the strength of the joint.
Determining Overlap Dimensions
First, decide how much wood will overlap. This depends on the thickness of the wood and the joint size needed. Measure both pieces carefully.
The overlap should be wide enough for a strong joint but not too large to weaken the wood. Usually, the overlap matches the wood thickness.
- Measure wood thickness on both pieces
- Mark overlap length equal to thickness
- Keep consistent overlap on both parts
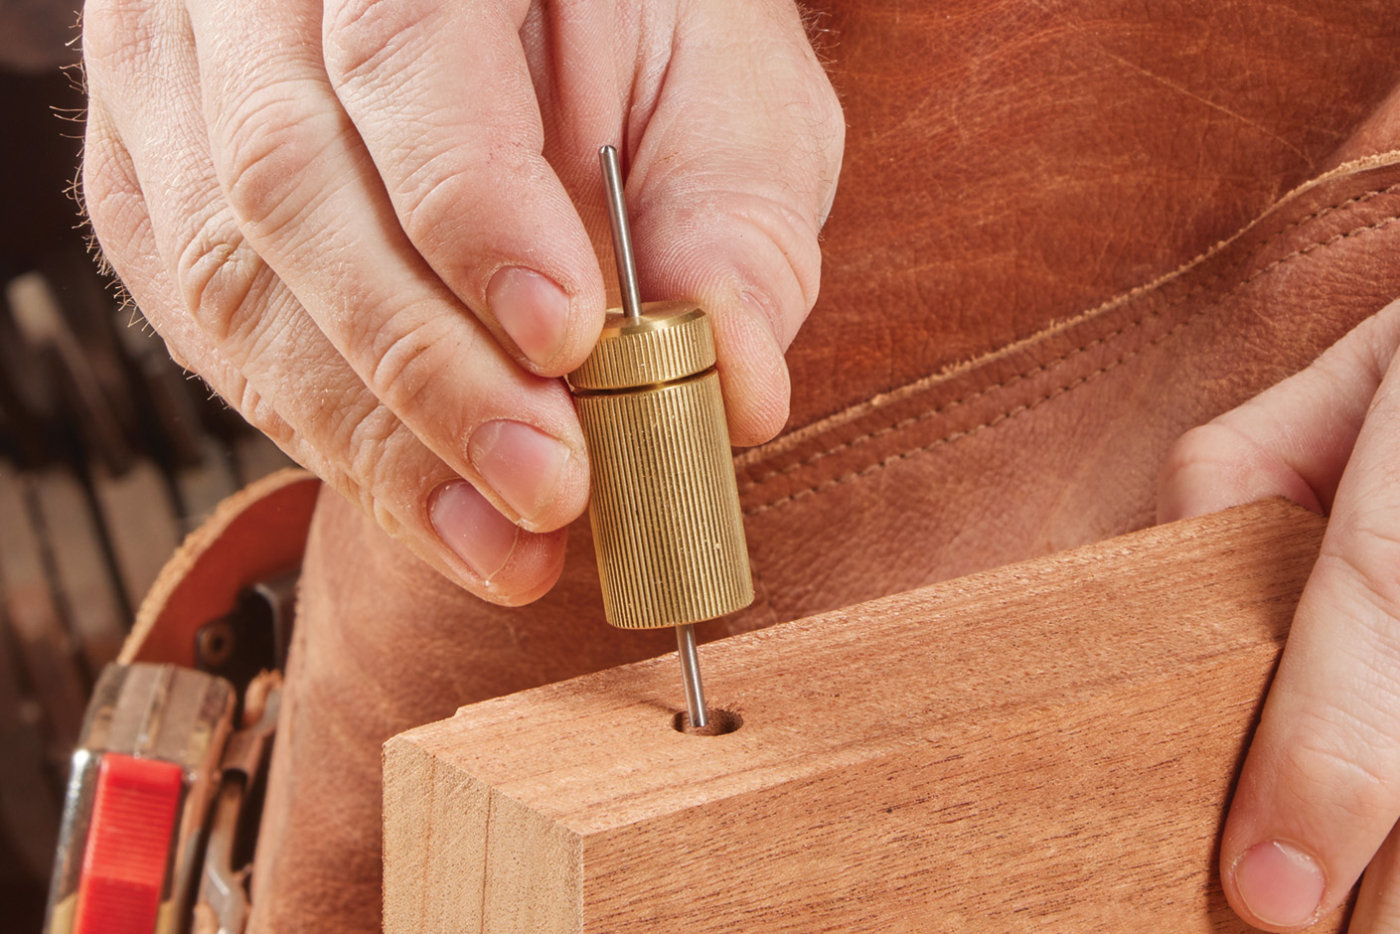
Using Gauges For Precision
Gauges help mark exact lines on the wood. Use a marking gauge or a combination square for straight, clear lines. This tool keeps marks consistent.
Set the gauge to the overlap dimension. Run the gauge along the edge to score a precise line. This line shows where to cut or chisel.
- Set gauge to overlap depth
- Press gauge firmly against wood edge
- Draw lines on both pieces for matching cuts
Aligning Marks For Fit
Align the marks on both wood pieces to check their fit. The lines should match perfectly to ensure a tight joint. Adjust marks if needed before cutting.
Use clamps to hold the pieces together when testing alignment. Check for gaps or misaligned edges. Correct marking improves the final joint strength.
- Place wood pieces in joint position
- Check if marks line up evenly
- Adjust and re-mark if gaps appear
- Confirm fit before cutting or chiseling
Tips For Accurate Marking
Marking wood correctly is very important for rabbet and lap joints. Accurate marks help you cut the wood pieces to fit well.
Using clear and precise marks will save time and reduce mistakes. Follow these tips to improve your marking skills.
Double-checking Measurements
Always measure twice before making any marks on the wood. This lowers the chance of errors and wasted material.
Use a reliable tape measure or ruler. Confirm your measurements from different points to be sure they match.
- Measure the length and width carefully
- Check the depth for rabbets and laps
- Mark only after confirming measurements twice
Using Sharp And Clear Marks
Use a sharp pencil or marking knife for clear lines. Faint marks can cause confusion during cutting.
Make thin, sharp lines on the wood surface. This helps you see the exact cut lines easily.
- Use a sharp pencil or marking knife
- Draw thin and clear lines
- Mark on the wood surface, not edges
Avoiding Common Mistakes
Do not rush marking. Rushing leads to uneven or wrong marks. Take your time to be precise.
Always mark on the waste side of the cut line. This keeps your final piece accurate and avoids cutting too short.
- Mark on the waste side of the line
- Do not use dull pencils or tools
- Keep your marking tools clean and sharp
Credit: ahouseinthehills.com
Advanced Marking Tricks
Marking wood for rabbet and lap joints needs precision and skill. Using simple methods can lead to mistakes and wasted material.
Advanced marking tricks help improve accuracy and save time. These techniques work well for both beginners and experienced woodworkers.
Using Marking Templates
Marking templates make it easy to repeat the same measurements. They reduce errors and speed up the marking process.
- Create templates from thin plywood or acrylic sheets.
- Cut out the exact shapes needed for your rabbet or lap joints.
- Use the template to trace lines directly onto your workpiece.
- Label each template clearly to avoid confusion.
Incorporating Digital Tools
Digital tools can improve marking accuracy. Tools like digital calipers and laser measures give exact dimensions quickly.
| Tool | Purpose | Benefit |
| Digital Caliper | Measure thickness and depth | Precise to 0.01 mm |
| Laser Measure | Measure length and distance | Fast and easy to use |
| CAD Software | Design joint templates | Customizable and repeatable |
Adapting For Different Wood Types
Different woods need different marking tools and methods. Hardwoods and softwoods react differently to pencils and knives.
Follow this guide to pick the best marking tools for your wood:
- Hardwoods:Use a sharp marking knife for clear, thin lines.
- Softwoods:A fine pencil or marking pen works well.
- Oily woods:Use wax pencils or soap-coated blades to avoid slipping.
- Rough-grain woods:Mark on the smoother side or sand lightly first.
Frequently Asked Questions
What Tools Are Needed To Mark Wood For Rabbet Joints?
To mark wood for rabbet joints, you need a marking gauge, pencil, square, and measuring tape. These tools ensure accurate and clear marking. Precision is key to cutting perfect rabbet joints. Using the right tools improves the joint fit and strength.
How Do You Measure Wood For Lap Joints Accurately?
Measure the width and depth of the lap joint carefully using a ruler or caliper. Mark the joint lines with a pencil and square. Double-check measurements to ensure a snug fit. Accurate measurements prevent gaps and ensure a strong lap joint.
What Is The Best Method To Mark Rabbet Joints Clearly?
Use a marking gauge set to the rabbet width for consistent lines. Mark along the wood edges with a sharp pencil. A square helps keep lines straight and precise. Clear markings guide accurate cuts and improve joint quality.
Can I Use A Pencil Or Knife For Marking Wood?
Both pencil and marking knife work well. A pencil is easy to see and adjust. A marking knife creates thin, precise lines for better accuracy. Choose based on the wood type and your cutting tools.
Conclusion
Marking wood for rabbet and lap joints is simple. Follow the steps carefully. Use the right tools. Precision is key. Accurate markings lead to better joints. Practice makes perfect. Start with small projects. Gain confidence. Soon, you’ll create strong joints.
Woodworking becomes easier with practice. Enjoy the process. Keep learning and improving. Your skills will grow. Happy woodworking!