If you want your woodworking projects to last, knowing the best practices for wood glue is a must. You might think that applying glue is simple, but a few small mistakes can weaken your bond and ruin your work.
Imagine spending hours crafting something only to have it fall apart later. That’s why getting it right from the start matters. You’ll discover easy tips and tricks that will help your wood glue work stronger and last longer. Keep reading, and you’ll learn how to make your projects solid, professional, and built to stand the test of time.
Choosing The Right Wood Glue
Wood glue helps join pieces of wood securely. Picking the right glue is important for a strong hold.
Different glues work best for different wood types and projects. Knowing the options helps you choose well.
Types Of Wood Glue
There are several types of wood glue available. Each type has its own strengths and best uses.
- PVA Glue:Common and easy to use. Works well for indoor projects.
- Polyurethane Glue:Waterproof and strong. Good for outdoor use.
- Epoxy:Very strong and gap-filling. Ideal for heavy-duty repairs.
- Hide Glue:Traditional glue that is reversible with heat. Used in fine woodworking.
- Cyanoacrylate (CA):Fast-drying glue for small repairs and crafts.
Factors To Consider
Choosing wood glue depends on many factors. Think about the wood type, environment, and project needs.
| Factor | Details |
| Wood Type | Softwoods may need flexible glue; hardwoods require strong bonding. |
| Moisture Resistance | Use waterproof glue for outdoor or wet conditions. |
| Drying Time | Faster drying glue saves time but allows less repositioning. |
| Gap Filling | Epoxy fills gaps; PVA needs tight-fitting joints. |
| Clean Up | PVA cleans with water; others may need solvents. |
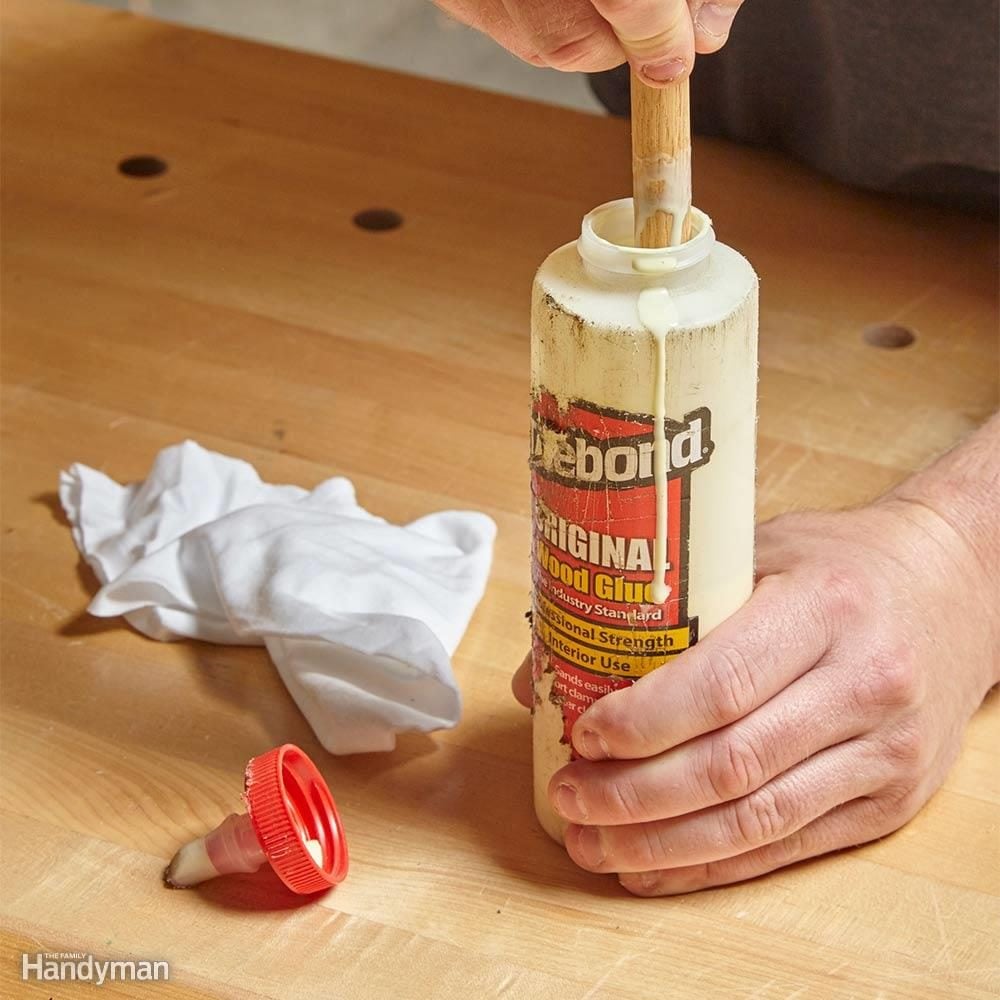
Credit: www.familyhandyman.com
Preparing Wood Surfaces
Good preparation of wood surfaces helps wood glue work better. Clean and smooth surfaces create strong bonds. Take time to prepare the wood before gluing.
Remove dirt, dust, and moisture to improve glue adhesion. Proper sanding also helps glue stick well. Follow these steps for best results.
Cleaning And Drying
Clean wood surfaces before gluing. Use a dry cloth or brush to remove dust and debris. Avoid using water or wet cloths that can add moisture.
Make sure wood is dry before applying glue. Damp wood can weaken the glue bond. Let wood air dry if it feels wet or damp.
- Remove dust with a soft brush or cloth
- Do not use water to clean glued areas
- Check wood for moisture before gluing
- Let wood dry in a warm place if needed
Sanding Techniques
Sanding smooths wood and opens pores for better glue grip. Use fine-grit sandpaper to avoid rough surfaces. Sand along the wood grain to prevent scratches.
After sanding, remove all dust with a brush or vacuum. Dust can stop glue from sticking well. Light sanding often works best for glued joints.
- Choose fine-grit sandpaper (150-220 grit)
- Sand with the grain, not across it
- Remove all sanding dust before gluing
- Light sanding improves glue contact
Applying Wood Glue
Applying wood glue correctly helps join pieces firmly. The right method keeps your project strong and neat.
Using the proper amount and spreading the glue evenly makes a big difference. Follow these tips to get the best results.
Correct Amount To Use
Use just enough glue to cover the surface without excess. Too much glue can cause messy squeeze-out and weak joints.
- Apply a thin, even layer on one surface only.
- For porous wood, use a little more to soak in.
- A small bead along the joint is enough for narrow edges.
- Avoid puddles of glue that take longer to dry.
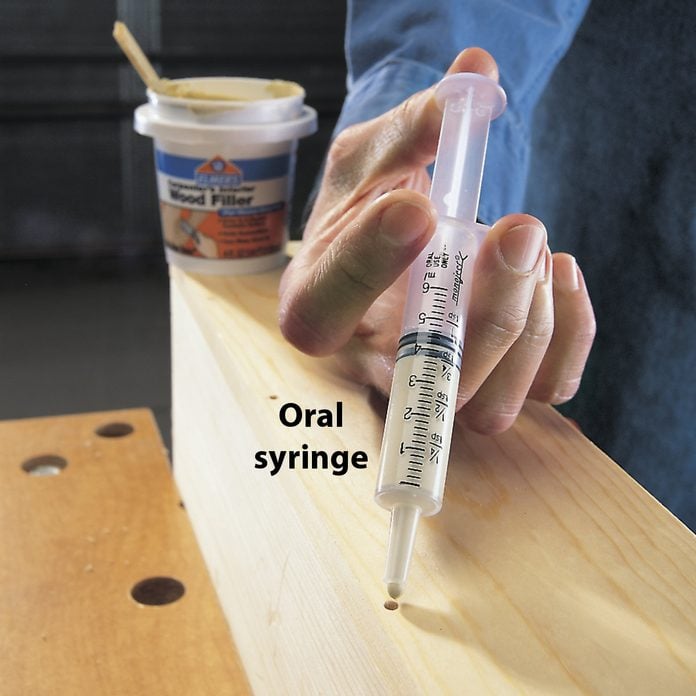
Even Spreading Methods
Spread the glue evenly to cover the entire joint surface. This ensures a strong bond and stops gaps from forming.
| Tool | Use | Notes |
| Brush | Spread glue thinly on flat surfaces | Good for large or smooth pieces |
| Plastic spreader | Evenly distribute glue on edges | Prevents glue clumps |
| Finger or cloth | Rub glue into wood grain | Useful for small or detailed parts |
| Roller | Apply glue quickly on wide surfaces | Best for panel gluing |
Clamping For Strong Bonds
Wood glue needs good clamping to create strong joints. Clamping holds the pieces tightly while the glue dries. This pressure helps the glue bond well with the wood.
Choosing the right clamp and applying correct pressure is key. Also, keeping the clamp on for the right time makes the bond last long.
Types Of Clamps
Different clamps work for different wood projects. The right clamp makes it easier to hold parts in place.
- Bar Clamps:Great for large panels and frames.
- C-Clamps:Strong grip but can leave marks if overtightened.
- Spring Clamps:Easy to use for small, quick jobs.
- Pipe Clamps:Adjustable for wide pieces, good for glue-ups.
- Corner Clamps:Help hold pieces at a right angle.
Clamping Pressure Tips
Too little pressure means weak glue joints. Too much pressure can squeeze out all the glue and dry the joint fast.
| Pressure Level | Effect on Glue Joint |
| Low | Weak bond, loose joint |
| Moderate | Strong bond, good glue spread |
| High | Glue squeezes out, dry joint |
Ideal Clamping Time
Clamping time depends on the glue type and wood. Usually, clamping for 30 minutes to 1 hour works well for most wood glues.
- Check glue instructions for exact drying time.
- Do not remove clamps too early or joints may fail.
- Leave clamps on longer in cold or humid conditions.
- After removing clamps, let glue cure fully before use.
Curing And Drying Tips
Wood glue needs time and the right conditions to cure properly. Good curing ensures strong bonds and lasting results.
Understanding how to care for glued wood helps avoid weak joints and damage.
Optimal Conditions
Keep wood pieces clamped firmly during curing. Temperature and humidity impact drying time.
- Clamp wood tightly to prevent movement.
- Keep the area warm, ideally between 65°F and 75°F (18°C to 24°C).
- Avoid high humidity; 40-60% is best.
- Allow at least 24 hours for full curing.
- Keep glued wood away from water until fully dry.
Avoiding Common Mistakes
Many problems happen because of rushing or poor preparation. Avoid these errors to get strong joints.
| Mistake | Effect | How to Avoid |
| Insufficient clamping | Weak bond, gaps | Use clamps that hold firmly |
| High humidity | Slow drying, glue failure | Work in a dry room |
| Touching glued surface too soon | Bond breaks | Wait full curing time before handling |
| Using too much glue | Longer drying, mess | Apply a thin, even layer |
Credit: www.familyhandyman.com
Cleaning And Maintenance
Using wood glue needs care to keep your tools and workspace clean. Proper cleaning helps avoid mess and damage.
Good maintenance also keeps the glue fresh and effective for future use.
Removing Excess Glue
Remove glue spills before they dry. Wet glue is easier to clean with a damp cloth.
If the glue has dried, gently scrape it off with a plastic scraper. Avoid metal tools to protect the wood.
- Wipe wet glue with a damp cloth quickly
- Use warm water to soften dried glue
- Scrape dried glue carefully with plastic tools
- Sand lightly if glue spots remain on wood
Storage Of Wood Glue
Store wood glue in a cool, dry place to keep it from drying out or thickening.
Always close the cap tightly after use to prevent air from entering the bottle.
- Keep glue away from direct sunlight and heat
- Store upright to avoid leaks
- Check the expiration date before use
- Shake well before applying if the glue separates
Troubleshooting Bond Issues
Wood glue can fail for different reasons. Fixing bond issues means finding the cause first. Then, you can make the right changes to get a strong hold.
This guide helps you understand why joints become weak and how to fix glue failures. Follow these tips to improve your woodworking projects.
Weak Joints Causes
Weak joints happen when glue does not stick well. Common causes include poor surface prep and wrong glue use.
- Dirty or oily wood surfaces stop glue from bonding.
- Using old or expired glue lowers adhesive strength.
- Applying too much or too little glue creates weak spots.
- Not clamping the joint tightly allows gaps.
- Wood moisture content is too high or too low.
- Wrong type of glue for the wood or project.
Fixing Glue Failures
Fixing glue failures starts with cleaning and preparing surfaces. Dry wood and use the right glue amount. Clamp joints firmly.
| Issue | Cause | Fix |
| Glue does not stick | Dirty surface | Sand and clean wood before gluing |
| Joint separates after drying | Insufficient glue or clamping | Apply enough glue and clamp tight |
| Glue dries too fast | High temperature or wrong glue | Work in cooler place, use correct glue type |
| Glue joint is brittle | Old or expired glue | Use fresh glue within shelf life |
| Wood swells or cracks | Wrong moisture level | Use wood with proper moisture content |

Credit: www.familyhandyman.com
Frequently Asked Questions
What Types Of Wood Glue Work Best For Different Projects?
PVA glue is ideal for indoor woodworking. Polyurethane glue suits outdoor projects due to water resistance. Epoxy works well for heavy-duty bonds and gaps. Choose glue based on wood type, project environment, and drying time.
How Should I Prepare Wood Surfaces Before Gluing?
Clean and dry surfaces for best adhesion. Lightly sand wood to remove finishes and smooth roughness. Ensure surfaces fit tightly without gaps. Proper preparation improves glue penetration and bond strength.
How Long Does Wood Glue Take To Fully Cure?
Most wood glues set within 30 minutes to an hour. Full curing may take 24 hours for maximum strength. Avoid stressing joints until glue fully cures to ensure durability.
Can Wood Glue Be Used On Painted Or Sealed Wood?
Glue bonds poorly on painted or sealed surfaces. Remove paint or finish where glue will be applied. For best results, glue should contact bare, clean wood.
Conclusion
Wood glue enhances your woodworking projects. Follow best practices for strong bonds. Clean surfaces before application. Apply evenly and clamp tightly. Allow ample drying time for best results. Choose the right glue for your material. This ensures durability. Always store glue properly to maintain quality.
These simple steps make a difference. Your woodworking projects will be successful. Enjoy creating with confidence and precision. Keep these tips in mind for every project. Happy crafting!