Are you struggling to get your ceiling perfectly aligned? Using a laser level can make this job much easier and more precise.
But if you’re new to this tool, it can feel a bit tricky at first. Don’t worry—this guide is here to help you master your laser level quickly. By following a few simple tips, you’ll save time, avoid costly mistakes, and achieve a flawless ceiling every time.
Keep reading to discover how to use your laser level like a pro and get the results you want.

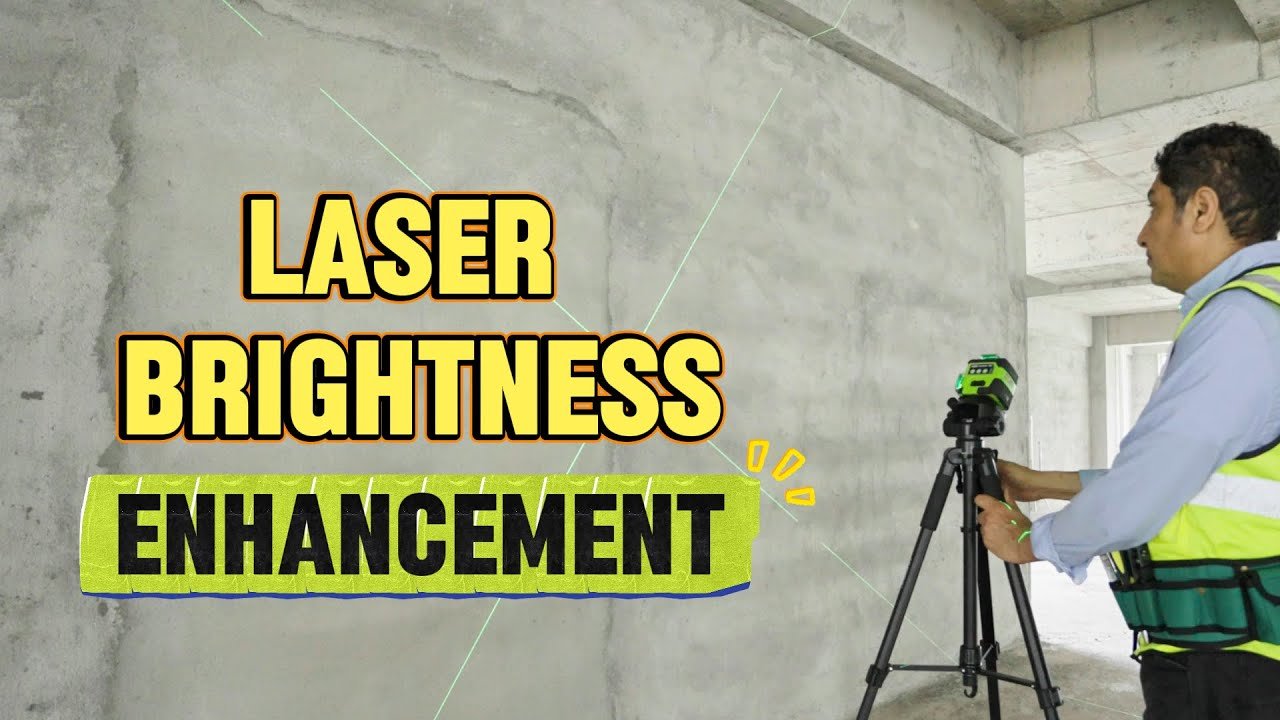
Credit: www.youtube.com
Choosing The Right Laser Level
Using a laser level helps you align ceilings with ease and accuracy. Picking the right tool is important for good results.
This guide covers different types of laser levels, key features to look for, and how to balance budget with quality.
Types Of Laser Levels
There are several types of laser levels. Each one suits different jobs and budgets.
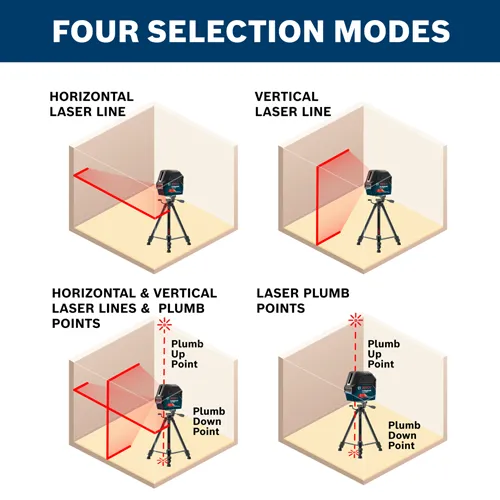
- Dot Laser Levels:Show points on surfaces. Good for simple marking.
- Line Laser Levels:Project straight lines. Useful for ceiling edges and borders.
- Rotary Laser Levels:Spin 360 degrees to cover large areas. Ideal for big rooms or floors.
- Combination Laser Levels:Include dot and line lasers in one tool. Offer more versatility.
Features To Consider
Look for features that make the laser level easy to use and accurate.
| Feature | Description |
| Self-Leveling | Automatically adjusts to find a level line. |
| Laser Color | Red lasers are common; green lasers are brighter in daylight. |
| Range | How far the laser can project its line or dot. |
| Mounting Options | Tripod or wall mounts for hands-free use. |
| Battery Life | Longer battery life means less interruption. |
Budget Vs Quality
Choosing between budget and quality depends on how often you will use the laser level.
- Cheaper models work for occasional use and small projects.
- Mid-range tools offer better accuracy and features for regular tasks.
- High-end laser levels provide top precision and durability for professionals.
- Consider warranties and customer support when buying expensive tools.
Preparing The Workspace
Using a laser level for ceiling alignment needs a clean and organized space. Proper preparation helps you work safely and get accurate results.
Start by clearing the area, setting good lighting, and marking key points. This makes the laser level easier to use and your job faster.
Clearing The Ceiling Area
Remove all obstacles from below the ceiling. This includes furniture, boxes, and tools. A clear area prevents accidents and allows the laser beam to reach the ceiling without interruption.
- Move large items away from the workspace
- Cover or protect furniture from dust
- Clear floor space for easy movement
- Check for hanging objects that may block the laser
Ensuring Proper Lighting
Good lighting helps you see the laser lines and any marks on the ceiling. Avoid very bright light that can wash out the laser beam. Use adjustable lights to control brightness.
| Lighting Type | Best Use |
| Natural Light | Use during daytime, avoid direct sunlight on ceiling |
| Soft LED Lights | Provide even lighting without glare |
| Spotlights | Use carefully to highlight specific areas |
Marking Reference Points
Mark points on walls or ceiling to guide your laser level. These marks help align the beam and check its accuracy. Use a pencil or tape that won’t damage surfaces.
- Mark corner points of the ceiling
- Note the center of the room if needed
- Use a level to make sure marks are straight
- Double-check marks before starting alignment
Setting Up The Laser Level
Using a laser level helps align ceilings accurately. Proper setup is key for good results.
Follow clear steps to mount, calibrate, and check power before starting your work.
Mounting And Positioning
Place the laser level on a stable surface or tripod. It must not move during use.
Position it so the laser beam hits the ceiling area you want to align. Adjust height as needed.
- Use a tripod for better height control
- Check the laser line is visible on the ceiling
- Avoid placing near edges or unstable spots
Calibrating The Device
Calibration ensures the laser line is level and accurate. Follow the device instructions carefully.
Check the bubble level or digital indicator on the device to adjust it properly.
- Use a flat surface for initial calibration
- Adjust screws or knobs to center the bubble
- Test by projecting the laser on walls or ceilings
Checking Battery And Power
Make sure the laser level has enough power before starting. Low battery causes errors.
Replace batteries or charge the device if needed. Keep spare batteries nearby.
- Check battery indicator on the device
- Use fresh batteries for long projects
- Charge rechargeable models fully before use
Credit: www.boschtools.com
Aligning The Ceiling With The Laser Level
Using a laser level helps you align ceilings quickly and accurately. It projects a clear, straight line as a guide.
This guide shares tips to project the laser line, adjust ceiling parts, and check the levelness.
Projecting The Laser Line
Set up the laser level on a stable surface or tripod. Make sure it is near the wall or area you want to align.
Turn on the laser and aim it at the ceiling height you want. Adjust the height until the line is visible across the whole space.
- Place the laser level where it covers the full room width.
- Use a wall mount if needed for better stability.
- Check that the laser beam is bright and clear.
- Mark the laser line points on the wall for reference.
Adjusting Ceiling Components
Use the laser line as a guide to move ceiling panels, joists, or tiles. Align each piece to match the laser’s position.
| Component | Adjustment Tip |
| Ceiling Tiles | Lift or lower tiles to meet laser line |
| Joists | Use shims or screws to raise or lower |
| Drywall | Sand or add joint compound to level edges |
Verifying Levelness
After adjusting, check the ceiling’s levelness with the laser line. Walk around and look for any gaps or uneven spots.
- Turn the laser level on and confirm the line is steady.
- Compare the ceiling surface to the laser line in several places.
- Use a spirit level on the ceiling for extra confirmation.
- Make small adjustments if you find any misalignment.
- Repeat checks until the ceiling is fully aligned.
Common Mistakes To Avoid
Using a laser level helps align ceilings accurately. Avoid mistakes to get the best results.
Small errors can cause big problems in your project. Learn what to watch out for.
Ignoring Calibration
Not calibrating your laser level can cause wrong measurements. Always check calibration before starting.
Calibration ensures the laser line is straight and level. Skipping this step leads to uneven ceilings.
- Calibrate on a flat surface
- Check calibration after moving the device
- Use the manufacturer’s instructions
Poor Device Placement
Placing the laser level in the wrong spot causes inaccurate lines. Find a stable and level spot for the device.
Avoid placing it near edges or uneven surfaces. The device must stay still during use.
- Use a tripod or mount for stability
- Check the surface is flat
- Keep the laser clear of obstacles
Overlooking Safety Precautions
Laser beams can harm your eyes. Never look directly into the laser line or beam.
Wear safety glasses if recommended. Keep the laser away from children and pets.
- Do not stare at the laser
- Use protective eyewear if needed
- Turn off the laser when not in use

Credit: www.wconline.com
Maintaining Your Laser Level
Keeping your laser level in good condition helps you get accurate ceiling alignment. Regular care extends the tool’s life and performance.
Learn simple steps to clean, store, calibrate, and handle your laser level safely.
Cleaning And Storage
Clean your laser level after each use to remove dust and dirt. Use a soft cloth and mild cleaner. Avoid harsh chemicals that can damage the lens or casing.
- Wipe the lens gently to keep it clear.
- Store the laser level in its case to protect it.
- Keep it in a dry place away from extreme temperatures.
- Remove batteries if you won’t use it for a long time.
Regular Calibration Checks
Calibration ensures your laser level stays accurate. Check it every few months or before important projects.
| Check Type | How to Do It | Frequency |
| Self-Leveling | Place on flat surface, verify laser line is level. | Monthly |
| Manual Calibration | Use a known level surface to adjust settings. | Every 3-6 months |
| Professional Calibration | Send to service center for full inspection. | Yearly or if accuracy drops |
Handling Tips
Handle your laser level carefully to avoid damage. Dropping or rough use can misalign the internal parts.
- Carry the tool in its protective case.
- Set it gently on surfaces to prevent shocks.
- Avoid touching the laser lens with fingers.
- Use a stable tripod or mount for steady readings.
Frequently Asked Questions
How Do I Set Up A Laser Level For Ceiling Alignment?
Place the laser level on a stable surface or tripod. Adjust it to project a horizontal line at ceiling height. Ensure it is calibrated properly for accurate alignment. This setup helps create a precise reference line for ceiling installation.
What Are The Best Laser Level Types For Ceiling Work?
Rotary and line laser levels are ideal for ceiling alignment. Rotary lasers provide 360-degree coverage, while line lasers project straight horizontal lines. Choose based on the room size and project complexity for optimal results.
How Can I Ensure Laser Level Accuracy On Uneven Ceilings?
Use a laser level with self-leveling features to adjust automatically. Mark high and low points before aligning. This method compensates for uneven surfaces, ensuring your ceiling alignment is precise and professional.
What Safety Precautions Are Needed When Using A Laser Level?
Avoid direct eye exposure to the laser beam. Use safety glasses if necessary. Keep the laser level stable to prevent falls. Follow manufacturer instructions to ensure safe and effective use during ceiling alignment.
Conclusion
Using a laser level makes ceiling alignment easier. It ensures precision. Even beginners can achieve straight lines. Just follow simple steps for best results. Practice improves your skills over time. A stable surface is crucial. Always check your level’s calibration.
Stay patient and focused during the process. Safety should be your priority. Wear protective gear if necessary. Proper handling extends your tool’s lifespan. Now, you’re ready to tackle ceiling projects. Enjoy the satisfaction of a job well done.
