If you’ve ever picked up a piece of rough wood, you know how tough it can be to get it smooth and ready for your project. Sanding rough wood surfaces might seem simple, but doing it the right way makes all the difference.
Imagine turning that rough, splintery wood into a smooth, beautiful canvas – ready for painting, staining, or finishing. In this guide, you’ll discover easy steps and smart tips to help you sand like a pro, avoid common mistakes, and save time.
Ready to transform your woodwork and get the perfect finish? Keep reading – your next project depends on it!

Credit: mrsander.co.uk
Choosing The Right Sandpaper
Sanding rough wood makes the surface smooth and ready for finishing. Picking the right sandpaper helps you work faster and better.
Different sandpapers suit different wood and tasks. Let’s look at grit sizes and sandpaper materials to help you choose well.
Grit Sizes And Their Uses
Sandpaper grit size shows how rough or fine it is. Lower numbers mean rough grit. Higher numbers mean fine grit.
- Coarse (40–60 grit):Remove paint or shape wood fast
- Medium (80–120 grit):Smooth rough surfaces and remove scratches
- Fine (150–180 grit):Prepare wood for finishing or between coats
- Very Fine (220–400 grit):Final sanding for a smooth finish
Types Of Sandpaper Materials
Sandpapers use different materials for grit. Each material works best on certain wood types or tasks.
| Material | Best For | Durability |
| Aluminum Oxide | Wood, metal, and general sanding | Long-lasting |
| Garnet | Softwood and fine finishing | Wears faster |
| Silicon Carbide | Hardwood and wet sanding | Very sharp but brittle |
| Ceramic | Heavy stock removal on hardwood | Very durable |

Credit: fastplus.eu
Preparing The Wood Surface
Before sanding rough wood, preparing the surface is very important. It helps you get a smooth and even finish. Proper preparation also protects the wood and makes sanding easier.
Start by cleaning the wood and then check for any damage or marks. These steps ensure you do not miss any spots when sanding.
Cleaning And Removing Debris
Remove all dirt, dust, and loose particles from the wood surface. Clean wood allows the sandpaper to work better and prevents scratches.
- Use a soft brush or broom to sweep off dust.
- Wipe the surface with a damp cloth to remove sticky dirt.
- Let the wood dry completely before sanding.
- Check corners and cracks for hidden debris.
Checking For Imperfections
Look closely for cracks, dents, or rough patches on the wood. Fixing these helps to get a smooth final surface after sanding.
| Type of Imperfection | How to Fix |
| Cracks | Fill with wood filler or glue |
| Dents | Use a damp cloth and iron to raise wood fibers |
| Rough patches | Smooth lightly with coarse sandpaper |
| Loose knots | Remove or glue down firmly |
Sanding Techniques For Rough Wood
Sanding rough wood is important to get a smooth finish. It removes bumps and splinters. Sanding also helps paint or stain stick better.
There are two main ways to sand wood. You can use your hands or power tools. Each way works well for different tasks.
Hand Sanding Tips
Hand sanding gives you control over the wood surface. It works well for small or detailed areas. Use the right grit sandpaper to avoid damage.
- Start with coarse grit to remove rough spots
- Use medium grit to smooth the surface
- Finish with fine grit for a polished look
- Sand along the grain of the wood
- Keep the sandpaper moving to avoid uneven spots
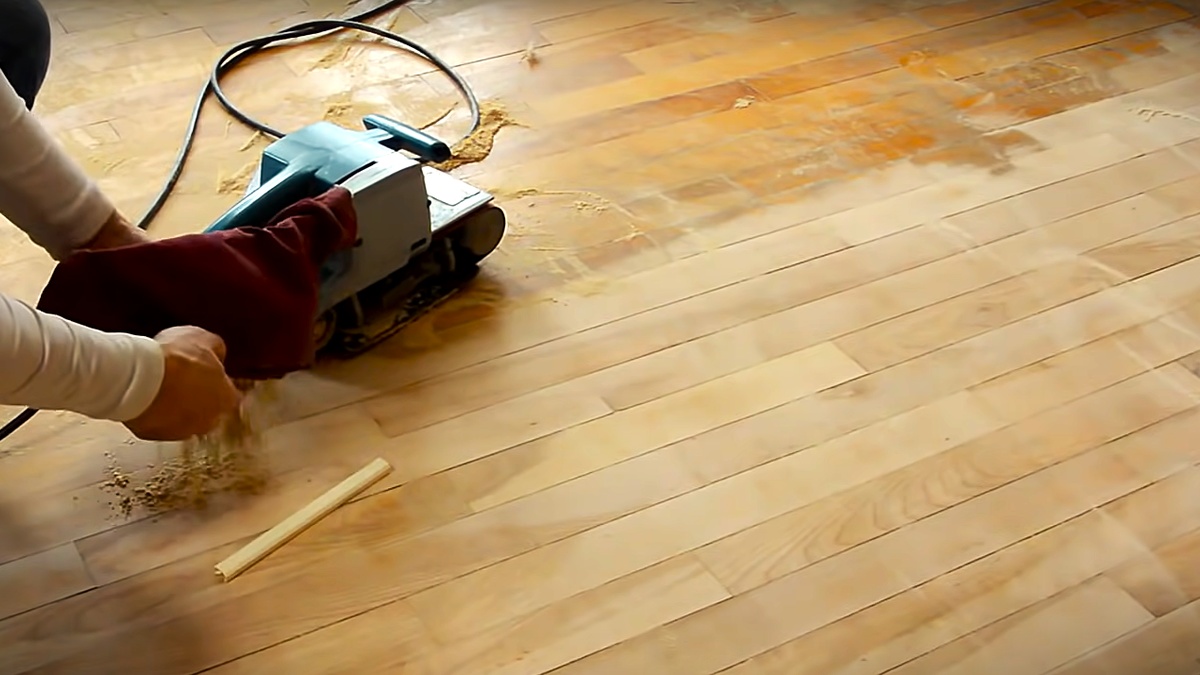
Using Power Sanders Effectively
Power sanders save time and effort on big projects. Choose the right sander for your wood and task. Always wear safety gear when using power tools.
| Type of Sander | Best Use | Grit Recommendation |
| Orbital Sander | General sanding and finishing | Start 80, finish 220 |
| Belt Sander | Quickly removing rough surfaces | Start 60, finish 120 |
| Detail Sander | Tight corners and small areas | Start 100, finish 220 |
Progressing Through Grits
Sanding rough wood surfaces is a process that needs patience. Using the right grit sandpaper in order helps get smooth results. Starting coarse and moving to finer grit removes scratches and evens the surface.
Understanding how to progress through grits makes sanding easier. It also helps prepare the wood for painting or staining. Let’s look at the steps to follow.
Starting With Coarse Grit
Coarse grit sandpaper is rough and removes large bumps or old finishes. It shapes the wood quickly but leaves deep scratches. Use grits like 40, 60, or 80 for this stage. Be careful not to press too hard or damage the wood.
- Use 40 grit for very rough or damaged wood
- Use 60 grit for moderately rough surfaces
- Use 80 grit for light roughness or removing old paint
- Sand evenly to avoid gouges
- Clean dust before moving to next grit
Transitioning To Medium And Fine Grit
After coarse grit, switch to medium grit to smooth scratches left behind. Grits like 120 and 150 work well here. Then move to fine grit sandpaper such as 180 or 220 to get a very smooth finish. This step prepares wood for finishing.
| Grit Level | Purpose | Common Uses |
|---|---|---|
| 120 | Remove coarse scratches, smooth surface | Wood furniture, doors |
| 150 | Refine surface, prep for finishing | Trim, cabinets |
| 180 | Final smoothing before finish | Hardwood floors, fine furniture |
| 220 | Very smooth surface, ready for paint or stain | Wood crafts, detailed work |
Dealing With Difficult Areas
Sanding rough wood can be tricky in hard-to-reach places. These areas need special care to avoid damage.
Using the right tools and techniques helps smooth these spots safely and evenly.
Corners And Edges
Corners and edges are easy to sand too much or too little. They often have sharp angles that need gentle work.
Use sanding blocks or folded sandpaper to keep control. Sand lightly to keep the shape crisp and clean.
- Wrap sandpaper around a small block for better grip
- Smooth edges with gentle, even strokes
- Check corners often to avoid rounding them off
Curved And Intricate Surfaces
Curved and detailed surfaces need flexible sanding tools. Sandpaper strips or sponges work well here.
Move in small circles to follow the shape. Take your time to reach all small spots without damage.
- Use sanding sponges to fit curves easily
- Try sanding sticks for tight, detailed spots
- Work slowly to avoid removing too much wood
Checking Smoothness And Surface Quality
After sanding rough wood surfaces, it is important to check their smoothness. This helps ensure the surface is ready for finishing or painting.
Evaluating surface quality prevents problems like uneven finishes or splinters. Use simple inspection techniques for best results.
Visual And Tactile Inspection
Look closely at the wood surface under good light. Check for scratches, dents, and rough spots that sanding missed.
Run your hand gently over the wood. Feel for bumps or rough patches that need more sanding.
- Use bright light to see imperfections
- Touch the surface with your fingertips
- Mark rough areas for re-sanding
Using Wood Conditioner
Wood conditioner helps smooth the surface before staining. It evens out the wood’s absorption for a better finish.
Apply the conditioner with a clean cloth. Let it soak in and dry as the instructions say.
- Choose the right conditioner for your wood type
- Apply evenly to avoid blotches
- Wait for the recommended drying time
Final Touches Before Finishing
Sanding rough wood surfaces smooths the wood and prepares it for finishing. The last steps ensure the surface is clean and ready for stain or paint.
These final touches help the finish stick better and look nicer. Take your time to do them carefully.
Removing Dust And Residue
After sanding, dust and tiny wood particles cover the surface. Removing these helps the finish go on evenly.
Use a soft brush or vacuum to clear away the dust. Then wipe the wood with a damp cloth or tack cloth to pick up fine particles.
- Brush or vacuum all surfaces thoroughly
- Use a tack cloth to remove leftover dust
- Wipe with a slightly damp cloth if needed
- Let the wood dry completely before finishing
Preparing For Stain Or Paint
Wood needs to be ready to absorb stain or hold paint well. Check for scratches or rough spots and sand them smooth.
If the wood is very dry, apply a wood conditioner before staining. This helps the stain soak in evenly. For paint, use a primer to protect the wood.
- Sand rough areas lightly
- Apply wood conditioner for stain on dry wood
- Use primer before painting
- Allow conditioner or primer to dry fully
Credit: www.ecohome.net
Frequently Asked Questions
What Grit Sandpaper Is Best For Rough Wood?
Start with coarse grit (40-60) to remove roughness. Then move to medium (80-120) for smoothing. Finish with fine grit (150-220) for a polished surface.
How To Sand Rough Wood Without Damaging It?
Use gentle, even pressure and follow the wood grain. Start with coarse grit, then progress to finer grits to avoid scratches and damage.
Can Sanding Rough Wood Improve Paint Adhesion?
Yes, sanding creates a smooth, clean surface. It removes old finishes and splinters, helping paint stick better and last longer.
How Long Does It Take To Sand Rough Wood?
Time depends on wood size and roughness. Small projects take 15-30 minutes; larger ones may require hours.
Conclusion
Sanding rough wood surfaces transforms your project. Smooth wood feels great to touch. Follow the guide’s steps for best results. Use the right tools for efficiency. Safety is important; always wear protective gear. Patience and practice lead to perfection. Regular maintenance keeps wood surfaces smooth.
Enjoy the process and the final look. Sanding can be satisfying and rewarding. Now, you’re ready to tackle wood projects with confidence. Happy sanding!