Are you ready to take your plumbing skills to the next level? Learning how to use a pipe threader can save you time, money, and frustration on your projects.
Whether you’re fixing pipes at home or working on a bigger job, mastering this tool puts control in your hands. In this guide, you’ll discover simple, step-by-step instructions that make threading pipes easier than you think. Keep reading, and you’ll soon handle pipe threading like a pro—no guesswork, no costly mistakes.
Your next project just got a whole lot smoother.
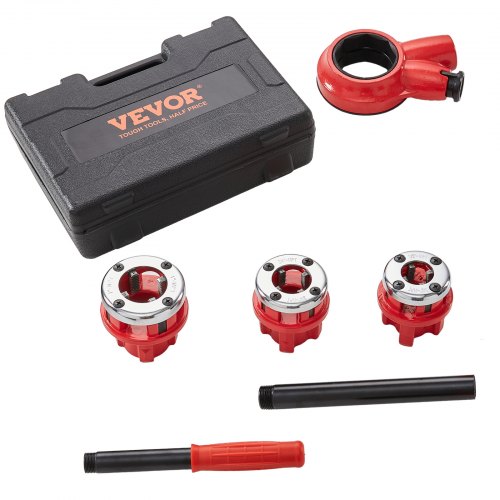
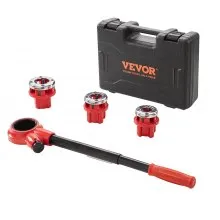
Credit: www.vevor.ca
Choosing The Right Pipe Threader
Using a pipe threader correctly starts with choosing the right tool. Picking the right type and size helps you work safely and efficiently. This guide covers key points to consider before threading pipes.
Knowing the differences between manual and electric threaders, selecting the correct die size, and using proper safety gear will make your job easier.
Manual Vs. Electric Threaders
Manual pipe threaders need physical effort. They are good for small jobs and tight spaces. Electric threaders use a motor and save time on big projects. They work well with thick pipes and frequent use.
- Manual threaders cost less and are easy to carry.
- Electric threaders give faster and more consistent threads.
- Manual tools require more skill and strength.
- Electric threaders need power and more maintenance.
Selecting The Correct Die Size
Choose a die size that matches your pipe diameter. Using the wrong size can damage the pipe or tool. Dies come in standard sizes for different pipes like steel, iron, or copper.
| Pipe Diameter | Common Die Size |
|---|---|
| 1/2 inch | 1/2 inch die |
| 3/4 inch | 3/4 inch die |
| 1 inch | 1 inch die |
| 1 1/4 inch | 1 1/4 inch die |
| 1 1/2 inch | 1 1/2 inch die |
Safety Gear Essentials
Wear safety gear to protect yourself from sharp metal and flying debris. Proper gear reduces injury risk and keeps you comfortable.
- Safety glasses or goggles to protect eyes
- Heavy-duty gloves to guard hands
- Long sleeves and pants to prevent cuts
- Hearing protection if using electric threaders
- Non-slip boots for steady footing

Credit: www.amazon.ca
Preparing The Pipe
Preparing the pipe correctly is important before using a pipe threader. It ensures clean and accurate threads. This guide covers measuring and cutting, cleaning and deburring, and marking the thread length.
Taking time in these steps makes threading easier and the final connection stronger. Follow each part carefully for the best results.
Measuring And Cutting The Pipe
First, measure the pipe length you need for your project. Use a tape measure and mark the cut point clearly. Cut the pipe straight using a pipe cutter or saw to avoid uneven edges.
- Measure the pipe length accurately.
- Mark the cut point with a pencil or marker.
- Use a pipe cutter or saw to cut the pipe straight.
- Check the cut edge for evenness.
Cleaning And Deburring
After cutting, clean the pipe inside and out. Remove dirt, oil, and metal shavings. Use a wire brush or cloth for cleaning. Deburr the cut edge to avoid damage to the threader and ensure smooth threading.
- Use a deburring tool or file to smooth the inside edge.
- Remove all sharp edges and metal scraps.
- Clean the pipe again after deburring.
Marking The Thread Length
Mark the pipe where the threads should end. This helps you control the threading depth and avoid over-threading. Use a ruler and a marker to make a clear line around the pipe.
| Thread Type | Typical Thread Length |
| NPT (National Pipe Thread) | 3/4 inch to 1 inch |
| BSP (British Standard Pipe) | 3/4 inch to 1 inch |
| Other Threads | Follow manufacturer guidelines |
Setting Up The Threader
Setting up a pipe threader correctly is important for safe and effective work. This guide covers the basic steps to prepare your threader for use.
Follow each section carefully to ensure your pipe threader is ready for threading tasks.
Installing The Die Head
First, attach the die head to the threader. Make sure it fits tightly to avoid slipping during use.
- Turn off the power before installation
- Align the die head with the threader’s mount
- Secure the die head with the locking mechanism
- Check for a firm hold by gently moving the die head
Adjusting The Threader For Pipe Size
Adjust the threader to match the pipe diameter. This ensures clean and accurate threads.
| Pipe Size (Inches) | Die Head Setting |
| 1/2″ | Small |
| 3/4″ | Medium |
| 1″ | Large |
| 1 1/4″ | Extra Large |
Use the adjustment dial or screws to set the correct size. Confirm the setting before starting the threading.
Lubricating The Threading Area
Apply lubricant to the pipe and die head to reduce friction. This helps the threader work smoothly and prolongs its life.
- Use pipe thread cutting oil or suitable lubricant
- Apply evenly on the pipe section to be threaded
- Also add a small amount to the die head blades
- Reapply lubricant during long threading jobs
Threading The Pipe
Threading a pipe creates a tight connection for plumbing or mechanical use. It requires careful handling to ensure clean, accurate threads.
This guide explains key points on positioning, pressure, and alignment for threading pipes with a pipe threader.
Positioning The Pipe And Threader
Place the pipe securely in a vise to keep it steady. Position the threader squarely on the pipe end to start the cut evenly.
- Clamp the pipe tightly to avoid movement.
- Align the threader so it sits straight on the pipe.
- Check that the threader teeth contact the pipe surface evenly.
- Use a threader size that matches the pipe diameter.
Applying Steady Pressure
Apply constant, even pressure while turning the threader. Avoid pushing too hard, which can damage threads or the tool.
| Pressure Level | Effect |
| Too Light | Threads may be incomplete or uneven. |
| Steady Moderate | Clean, consistent threads form. |
| Too Hard | Threads may strip or tool can break. |
Maintaining Alignment
Keep the threader aligned with the pipe axis throughout the process. Misalignment causes crooked threads and poor connections.
Tips for maintaining alignment:
- Check alignment after every full turn.
- Adjust the threader position if it starts to tilt.
- Keep the pipe and threader level on a flat surface.
Finishing The Threads
Finishing the threads on a pipe is a crucial step for a strong and leak-free connection. It involves removing the threader, cleaning the threads, and checking their quality. These actions ensure the threads fit well and last long.
This guide explains each part of the process clearly and simply. Follow these steps to complete the threading safely and correctly.
Removing The Threader
After cutting the threads, carefully remove the pipe threader tool. Hold the pipe steady to avoid damage. Turn the threader backward slowly until it comes off the pipe completely.
Cleaning The Threads
Clean the newly formed threads to remove metal shavings and dirt. Use a wire brush or a soft cloth to wipe the threads gently. Do not use water as it may cause rust.
- Use a wire brush to clear metal bits
- Wipe threads with a dry cloth
- Check for any debris stuck between threads
- Apply thread sealant if needed
Inspecting Thread Quality
Check the threads for any defects or damage. Threads should be even, sharp, and free of cracks. Poor quality threads can cause leaks or weak joints.
| Aspect | What to Look For | Action if Problem Found |
|---|---|---|
| Thread Uniformity | Even and consistent thread peaks and valleys | Re-thread or discard pipe |
| Thread Sharpness | Clear and defined edges | Sharpen with a die or re-thread |
| Surface Damage | No cracks, burrs, or dents | Polish or replace pipe |
Common Threading Issues
Using a pipe threader can lead to some common problems. These issues affect the quality and fit of the threads.
Understanding how to fix these problems will save time and prevent leaks in your piping system.
Dealing With Cross-threads
Cross-threading happens when the pipe is not aligned correctly with the threader. This causes the threads to be cut at the wrong angle.
- Stop threading immediately if you feel resistance.
- Remove the pipe and check the threads for damage.
- Realign the pipe with the threader carefully before trying again.
- Use a thread lubricant to help the pipe turn smoothly.
- Start threading slowly to ensure proper alignment.
Fixing Incomplete Threads
Incomplete threads occur when the threader does not cut all the way around the pipe. This can cause poor connections and leaks.
| Cause | Solution |
| Threader not set to correct size | Adjust the threader to match pipe diameter |
| Threader dull or damaged | Sharpen or replace cutting dies |
| Pipe not rotated fully | Turn pipe evenly and completely during threading |
| Insufficient lubrication | Apply thread oil before cutting |
Handling Thread Damage
Thread damage happens from rough handling or poor threading technique. Damaged threads cause leaks and make connections weak.
To repair thread damage:
- Use a thread file to carefully remove burrs and rough edges.
- Check the threads with a gauge to ensure they are correct size.
- If threads are too damaged, consider cutting a new thread section.
- Always use proper lubrication during threading to reduce damage.
- Wear gloves and handle pipes gently to avoid dents and scratches.
Maintenance And Storage Tips
Keeping your pipe threader in good shape helps it work well for a long time. Proper care after each use stops damage and wear.
Follow these tips on cleaning, lubricating, and storing your pipe threader safely.
Cleaning The Threader After Use
Remove dirt and metal shavings from the threader after every job. This stops buildup that can harm the tool.
Use a brush or compressed air to clean hard-to-reach spots. Wipe the surfaces with a dry cloth to remove moisture.
- Brush off debris from the dies and threading parts
- Blow compressed air into tight areas
- Wipe with a dry cloth to prevent rust
Lubricating Moving Parts
Lubricate the moving parts of the pipe threader regularly. This reduces friction and keeps the tool running smoothly.
Use light machine oil or the recommended lubricant for your threader. Apply it to gears, joints, and other moving parts.
- Check all moving parts for dryness
- Apply a few drops of oil on gears and joints
- Wipe off any extra oil to avoid dirt buildup
Safe Storage Practices
Store the pipe threader in a dry place to prevent rust and damage. Keep it away from moisture and dust.
Use the original case or a sturdy toolbox. Make sure the threader is clean and dry before storing.
- Keep the threader in a dry, cool location
- Store in a protective case or toolbox
- Check the tool regularly for signs of rust or damage

Credit: www.youtube.com
Frequently Asked Questions
What Tools Do I Need To Use A Pipe Threader?
You need a pipe threader, dies, cutting oil, and a pipe cutter. Safety gloves and eye protection are also essential. These tools ensure clean, precise threads on pipes for secure fittings.
How Do I Prepare A Pipe Before Threading?
Cut the pipe squarely and remove burrs with a file. Clean the pipe surface to remove dirt and rust. Proper preparation prevents damage and ensures smooth threading.
What Is The Correct Way To Apply Cutting Oil?
Apply cutting oil generously on the pipe end before threading. It reduces friction and heat, prolonging tool life. Reapply oil frequently during threading for best results.
How Do I Maintain A Pipe Threader For Longevity?
Clean the threader after each use and store it dry. Lubricate moving parts regularly and inspect for wear. Proper maintenance keeps the threader efficient and extends its lifespan.
Conclusion
Mastering the pipe threader takes practice and patience. Start with understanding the basics first. Choose the right tool for your pipe size. Secure your pipe firmly before threading. Use oil for smooth threading action. Check your threads for quality and precision.
Clean your tools after each use to maintain them. Follow safety tips to avoid accidents or injuries. With these steps, threading pipes becomes easier. You’ll save time and improve your skills over time. Happy threading!