Are you ready to make your furniture projects look professional and precise? Using a try square might be the simple trick you’re missing.
This handy tool helps you check and mark perfect right angles, so every joint and edge fits just right. Whether you’re building a table, a cabinet, or a bookshelf, knowing how to use a try square can save you time, reduce mistakes, and boost your confidence.
Stick with me, and you’ll learn exactly how to master this essential skill—making your furniture stronger and your work easier.
Choosing The Right Try Square
A try square is a simple tool used to check right angles in furniture making. Picking the right try square helps make accurate cuts and fits.
Not all try squares are the same. You should consider types, material, and size before buying one for your projects.
Types Of Try Squares
Try squares come in different styles for various woodworking needs. Each type has its own use and advantage.
- Steel try squares are common and durable.
- Wood try squares have a traditional look but may wear faster.
- Combination squares offer extra features like measuring depth.
- Carpenter squares are larger and good for big projects.
Material And Build Quality
The material affects the tool’s strength and accuracy. A good try square stays true and does not bend easily.
Look for smooth edges and a solid handle. Rust-resistant steel or brass parts last longer and keep measurements precise.
- Stainless steel blades resist rust and damage.
- Wood handles feel comfortable but may warp.
- Plastic parts are lightweight but less durable.
- Check for tight joints between blade and handle.
Size Considerations
Try squares come in different sizes. The size you choose depends on the furniture pieces you work on.
A larger blade helps with big boards. Smaller squares are easier for detailed work and tight spaces.
- 4 to 6 inches is good for small projects.
- 8 to 12 inches suits medium furniture pieces.
- 12 inches or more helps with large panels.
- Choose a size that feels comfortable in your hand.

Credit: www.reddit.com
Preparing Your Workspace
Using a try square for furniture needs a well-prepared workspace. A neat area helps you work safely and get accurate measurements.
Take time to set up your space before starting. This makes the process smoother and more effective.
Clean And Flat Surface
Choose a flat surface for your workbench or table. Clean off dust, dirt, and scraps that can cause mistakes.
- Wipe the surface with a damp cloth
- Remove any objects that block your tools
- Check for uneven spots and fix if possible
Proper Lighting
Good lighting helps you see the markings and edges clearly. It reduces eye strain and errors.
| Lighting Type | Benefits |
| Natural Light | Bright and clear view |
| Overhead Light | Even illumination without shadows |
| Task Lamp | Focuses light on small areas |
Organizing Tools
Keep your try square and other tools close and tidy. This saves time and avoids losing important items.
- Use a toolbox or tray
- Arrange tools by size or use
- Label compartments for quick access
Basic Try Square Techniques
A try square is a simple tool for woodworking. It helps check angles, mark lines, and measure thickness. Learning basic techniques makes furniture work easier and more accurate.
Using a try square correctly saves time and avoids mistakes. This guide covers three key uses: checking 90-degree angles, marking accurate lines, and measuring thickness and depth.
Checking 90-degree Angles
One main use of a try square is to check if two surfaces meet at a right angle. Place the try square’s stock firmly against one edge. The blade should touch the other edge without gaps. If there is a gap, the angle is not 90 degrees.
Checking angles helps ensure parts fit together well. It is important before gluing or screwing pieces in furniture making.
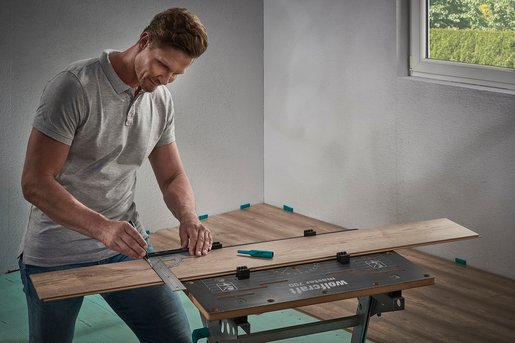
Marking Accurate Lines
Use the try square to draw straight lines at right angles. Place the stock against the edge of the wood. Hold the blade flat on the surface. Draw a pencil line along the blade’s edge for a precise mark.
- Hold the try square firmly to avoid movement.
- Keep the blade flat against the wood.
- Use a sharp pencil for clear lines.
- Mark multiple points if needed for long cuts.
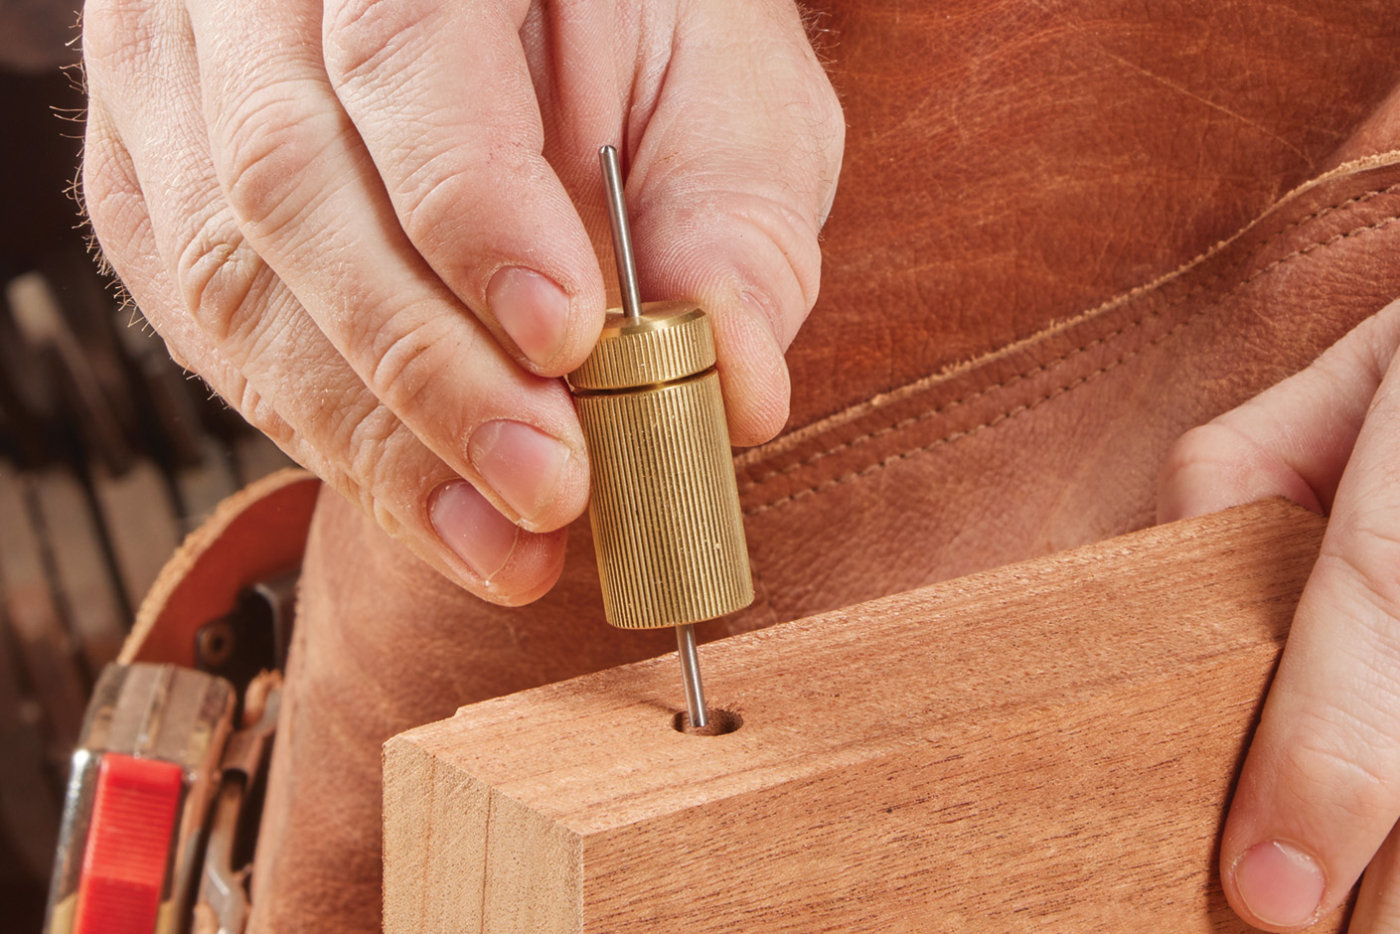
Measuring Thickness And Depth
The try square can also measure thickness or depth by using the length of its blade. Place the stock against the edge. The blade’s length shows the thickness or depth you need.
| Use | How to Measure | Tip |
| Wood Thickness | Place stock on edge, read blade length | Use a ruler to verify for accuracy |
| Cut Depth | Put stock on surface, blade marks depth | Mark the blade with pencil if needed |
| Rebate Depth | Fit blade into rebate, check flush with stock | Adjust blade position carefully |
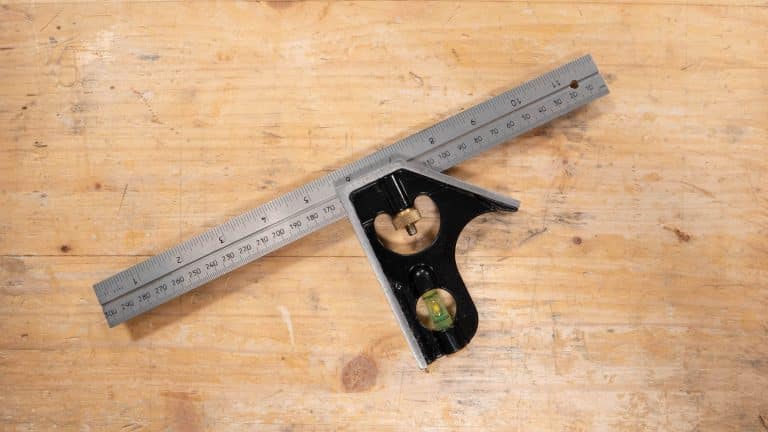
Credit: commonwoodworking.com
Advanced Uses In Furniture Making
A try square is a simple tool used in woodworking. It helps ensure parts are at right angles. In furniture making, it does more than basic measuring.
Using a try square correctly can improve the quality of your furniture. It helps keep joints tight and parts aligned perfectly.
Verifying Joint Accuracy
Check your joints with a try square before gluing or screwing. Place the square inside or outside the joint to see if corners are true.
If the joint is not square, adjust it by sanding or trimming. Accurate joints make furniture stronger and look better.
- Place the try square against the joint edge
- Look for gaps between the square and wood
- Mark areas that need adjustment
- Trim or sand until the joint fits tightly
Aligning Components
Use a try square to align different furniture parts. This helps ensure shelves, legs, and panels meet at correct angles.
Check alignment before fixing parts permanently. A well-aligned piece is easier to assemble and looks more professional.
- Set the try square on one component edge
- Adjust the other part to match the square’s angle
- Hold parts together and re-check alignment
- Clamp parts before final assembly
Ensuring Consistent Cuts
Use a try square to mark straight and square lines on wood. This guides your saw for clean, even cuts.
Consistent cuts help all parts fit well and keep the furniture balanced. Check your marks with the square before cutting.
- Place the try square on the wood edge
- Draw lines along the square’s blade
- Cut along the marked line carefully
- Re-check the cut edge with the square
Maintaining And Calibrating Your Try Square
A try square is a tool used to check right angles in furniture making. Keeping it clean and accurate is important. This helps you get precise measurements and good results.
Regular care and calibration make sure your try square stays reliable. Follow these steps to maintain it well.
Routine Cleaning
Dirt and dust can affect the tool’s accuracy. Clean your try square after each use to keep it in good shape. Use a soft cloth to wipe the blade and handle.
Avoid water or harsh chemicals. These can cause rust or damage the wood and metal parts.
- Wipe off sawdust and dirt
- Use a dry or slightly damp cloth
- Apply light oil to metal parts to prevent rust
- Store in a dry place
Checking For Squareness
Check your try square often to make sure it forms a perfect 90-degree angle. This ensures accurate marking and cutting.
Place the try square against a straight edge or surface. Mark along the blade, flip the square, and mark again. If the lines match, the tool is square.
- Use a flat, straight surface like a board
- Mark along the blade edge
- Flip the try square and mark again
- Compare the two lines for any gap
Adjusting And Repairing
If your try square is out of alignment, you can adjust or repair it. Some squares have screws to tighten or loosen. Wooden ones may need gentle sanding.
Be careful not to damage the tool. If it is badly bent or cracked, consider replacing it for safety and accuracy.
- Loosen screws to adjust metal blade
- Tighten screws after adjustment
- Sand wooden handle edges lightly if needed
- Replace if tool is cracked or bent
Common Mistakes To Avoid
Using a try square helps you make straight and accurate cuts in furniture making. Many people make simple mistakes that cause errors. Avoiding these mistakes saves time and keeps your work precise.
Here are some common mistakes to watch out for when using a try square. Fixing these will improve your furniture quality and reduce waste.
Misreading The Tool
One big mistake is reading the try square wrong. Some people look at the wrong edge or angle. This causes cuts to be off by small amounts, which adds up in furniture making.
Make sure you line up the blade against the wood edge correctly. The handle should rest flat on the surface. Check your view to avoid parallax errors, where the angle looks different from different eyes.
Applying Uneven Pressure
Pressing too hard or unevenly on the try square changes its position. This causes the tool to shift and gives false angles. Light, steady pressure keeps the tool steady and accurate.
Use your fingers to hold the handle firmly but gently. Avoid pushing hard on the blade side. Keep your hand steady to stop any movement during marking or measuring.
Ignoring Tool Wear
Try squares can wear out or get damaged over time. Worn edges or bent blades cause wrong measurements. Regularly check your tool for signs of wear or damage.
- Look for chips or dents on the blade edge
- Check if the blade is still at a perfect 90 degrees to the handle
- Replace or repair the tool if it shows signs of wear
Credit: www.popularwoodworking.com
Frequently Asked Questions
What Is A Try Square Used For In Furniture Making?
A try square ensures precise 90-degree angles in furniture joints. It helps check edges and corners for accuracy during assembly. This tool improves the quality and stability of your furniture projects.
How Do You Properly Hold A Try Square?
Hold the try square firmly by its handle, flush against the wood edge. Ensure the blade lies flat on the surface to get accurate angle measurements. A steady grip prevents shifting and errors.
Can A Try Square Measure Angles Other Than 90 Degrees?
No, a try square is designed solely for checking right angles. For other angles, use tools like a bevel gauge or protractor. The try square’s fixed 90-degree blade maintains consistency.
How To Maintain Accuracy Of A Try Square?
Keep the try square clean and store it in a dry place. Avoid dropping or bending the blade to maintain its precision. Regularly check against a known square surface for accuracy.
Conclusion
Using a try square enhances your furniture making. It ensures precise angles and clean cuts. With practice, it becomes intuitive. Always hold it firmly for accuracy. Double-check your lines for consistency. This tool simplifies your woodworking tasks. Even beginners can achieve professional results.
Keep your try square in good condition. Regular cleaning maintains its accuracy. It’s a must-have for any woodworking toolkit. Invest in a quality try square. It pays off in the long run. Enjoy your woodworking projects with confidence and precision.
Happy crafting!