Are you struggling with pipe fittings that just won’t seal properly? Mastering the right pipe flaring techniques can save you time, money, and frustration.
Whether you’re a DIY enthusiast or a professional, knowing how to create perfect flares ensures strong, leak-free connections every time. In this guide, you’ll discover simple steps and expert tips to help you flare pipes like a pro. Keep reading, and you’ll gain the confidence to tackle your next project with ease and precision.
Types Of Pipe Flaring
Pipe flaring is a way to shape pipe ends for tight connections. It helps prevent leaks and ensures strong joints.
There are several types of flaring techniques. Each type fits different pipe materials and uses.
Single Flare
The single flare is the most basic type. It forms a simple cone at the pipe end by flaring the metal outward.
- Used mainly on soft metals like copper.
- Requires less time and fewer tools.
- Good for low-pressure systems.
- Can leak if the flare is not even.
Double Flare
Double flare adds strength by folding the pipe end before flaring. This creates a thicker flare.
| Feature | Single Flare | Double Flare |
| Strength | Moderate | High |
| Leak Resistance | Lower | Better |
| Common Use | Low-pressure lines | Brake lines, high-pressure |
| Tool Complexity | Simple | More complex |
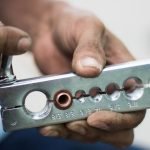
Bubble Flare
Bubble flare shapes the pipe end like a bubble. It is smooth and round, reducing stress points.
Benefits of bubble flare:
- Strong seal on soft and hard metals
- Good for high-pressure applications
- Requires special flaring tools
- Prevents cracks at the pipe end
Credit: procamlock.com
Essential Tools For Flaring
Flaring pipes needs the right tools to work well. Using proper tools helps create safe and tight connections.
This guide covers key tools used in flaring, cutters, deburring tools, and measuring instruments.
Flaring Tools
Flaring tools shape the pipe ends to fit with connectors. They hold the pipe steady and form the flare by pressing the pipe outward.
- Flare block: Holds the pipe securely while flaring
- Flaring cone: Presses the pipe end to shape the flare
- Yoke tool: Applies force evenly to create a smooth flare
Cutters And Deburring Tools
Cutter tools help make clean cuts on pipes before flaring. Deburring tools remove rough edges inside and outside the pipe after cutting.
| Tool | Purpose |
| Tube cutter | Cut pipes cleanly without crushing |
| Deburring tool | Remove sharp edges and burrs inside pipes |
| Reamer | Smooth inner pipe walls after cutting |
Measuring Instruments
Measuring tools ensure pipes are cut to the right length and flares are sized correctly. Accurate measurements prevent leaks and weak joints.
- Tape measure: Measures pipe length before cutting
- Caliper: Checks pipe diameter and flare size
- Ruler: Verifies precise flare dimensions
Step-by-step Flaring Process
Flaring is a way to shape the end of a pipe to connect it tightly with fittings. This process helps prevent leaks and ensures a strong join. Follow these simple steps to flare a pipe correctly.
Each step needs care and the right tools. This guide explains how to prepare, cut, and flare the pipe end for a secure fit.
Preparing The Pipe
Start by choosing the right pipe size for your project. Clean the pipe to remove dirt or oil. Mark the length where you want to flare.
Make sure the pipe is free of damage or cracks. A clean and straight pipe end will make flaring easier and safer.
Cutting And Deburring
Cut the pipe straight using a pipe cutter or saw. Keep the cut smooth and even to avoid weak spots.
Remove sharp edges inside and outside the cut with a deburring tool. This step prevents damage to the flare and fittings.
- Use a pipe cutter for clean cuts
- Remove burrs with a deburring tool or file
- Check the cut end for smoothness
Forming The Flare
Place the pipe end into a flaring tool clamp. Make sure the pipe sticks out just enough for the flare size you need.
Tighten the clamp and use the flare cone to press the pipe end outward. Turn the tool slowly until the flare forms evenly around the pipe.
- Secure the pipe in the clamp firmly
- Use the correct flare size for your fitting
- Turn the cone slowly for an even flare
- Check the flare for cracks or uneven edges
Common Flaring Mistakes To Avoid
Pipe flaring helps create tight seals in plumbing and gas lines. It is important to avoid common mistakes. These mistakes can cause leaks or damage.
Knowing what to watch for can save time and money. Below are key mistakes to avoid during pipe flaring.
Uneven Flares
Uneven flares cause poor seals and leaks. They happen when the pipe is not cut straight or the flare tool is misaligned.
Check that the pipe end is clean and straight before flaring. Make sure the tool is centered and tightened properly.
- Cut pipe squarely with a proper cutter
- Remove any burrs or rough edges
- Align the flare tool carefully
- Tighten the tool evenly to avoid tilt
Cracked Or Damaged Pipes
Flaring cracked pipes causes leaks and failures. Pipes can crack if bent too much or if the material is old.
Inspect pipes before flaring. Do not flare pipes with visible cracks or damage. Replace damaged sections first.
- Look for cracks or dents on the pipe
- Do not use pipes that feel weak or brittle
- Handle pipes gently to avoid bending
Improper Tool Usage
Using the wrong tool or wrong size can ruin the flare. It may also damage the pipe or tool.
Use a flare tool that fits the pipe size. Follow the tool instructions carefully to create good flares.
- Choose the correct size flare tool for your pipe
- Do not force the tool beyond its limits
- Keep tools clean and well maintained
- Practice on scrap pipes to improve skill
Material-specific Flaring Tips
Flaring pipes requires different methods depending on the material. Each metal reacts uniquely to heat and pressure.
Using the right technique helps make strong, leak-free connections. Below are tips for copper, aluminum, and steel pipes.
Copper Pipes
Copper is soft and easy to flare. Clean the pipe end before starting. Use a proper flaring tool to avoid cracks.
- Cut the pipe squarely with a pipe cutter.
- Remove burrs inside and outside the pipe.
- Clamp the pipe firmly to prevent movement.
- Use a flaring tool designed for copper.
- Apply gentle, even pressure to form the flare.
Aluminum Pipes
Aluminum is soft but prone to cracking if flared wrong. Work slowly and avoid over-tightening fittings.
| Tip | Reason |
|---|---|
| Use a specialized aluminum flaring tool | Prevents uneven flares and damage |
| Do not overheat aluminum pipes | Aluminum can weaken or deform |
| Support the pipe firmly during flaring | Reduces risk of cracks |
| Inspect flare edges for sharp cracks | Ensures a leak-proof seal |
Steel Pipes
Steel is hard and requires more force. Use a heavy-duty flaring tool and protect the pipe surface.
Follow these guidelines for steel pipes:
- Cut the pipe cleanly with a hacksaw or pipe cutter.
- Remove all burrs to prevent damage to the flare.
- Clamp the pipe securely in a sturdy flaring tool.
- Apply steady pressure to form the flare evenly.
- Use lubricant to reduce friction during flaring.
- Check the flare for cracks or uneven edges.
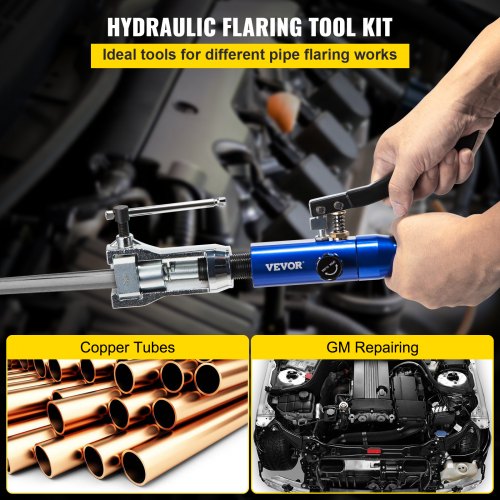
Credit: www.vevor.ca
Maintaining Flaring Tools
Proper care of flaring tools keeps them working well for a long time. Clean and inspect tools often to avoid problems.
Good maintenance also saves time and money by preventing damage and errors during pipe flaring.
Cleaning Techniques
Clean your flaring tools after each use to remove dirt and metal shavings. Use a soft brush or cloth to wipe parts gently.
- Use mild soap and water for cleaning metal parts.
- Dry the tools completely to stop rust from forming.
- Apply light machine oil to moving parts to keep them smooth.
- Avoid harsh chemicals that may damage tool surfaces.
Storage Tips
Store your flaring tools in a dry, cool place. Proper storage stops rust and keeps tools ready for use.
| Storage Advice | Reason |
| Use a toolbox or case | Protects from dust and damage |
| Keep away from moisture | Prevents rust and corrosion |
| Organize tools separately | Stops parts from scratching each other |
| Store in a dry room | Maintains tool condition |
Regular Inspections
Check your flaring tools often to find wear or damage. Early fixes keep the tools safe and working well.
- Look for cracks or bends in the metal parts.
- Check screws and bolts for tightness.
- Test moving parts for smooth action.
- Replace any worn or broken pieces right away.
Applications Of Pipe Flaring
Pipe flaring is a process that shapes the end of a pipe to fit securely with a fitting. It creates a tight seal that prevents leaks. This technique is useful in many fields.
Flaring works well with metal pipes and tubing. It improves the strength and durability of connections. Here are some common applications of pipe flaring.
Automotive Systems
In cars, pipe flaring is used for fuel lines, brake lines, and hydraulic systems. It ensures that fluids flow safely without leaks. The flare fitting allows easy disconnection for repairs.
- Fuel delivery lines
- Brake system tubing
- Hydraulic clutch lines
- Air conditioning pipes
Hvac Systems
Heating, ventilation, and air conditioning use pipe flaring for refrigerant lines. The flare joints keep the system sealed under pressure. This prevents refrigerant leaks and system failure.
| System Part | Purpose of Flaring |
| Refrigerant Tubing | Seals refrigerant flow |
| Gas Lines | Prevents gas leaks |
| Water Pipes | Provides strong connections |
Plumbing
Plumbers use pipe flaring to join water supply lines and gas pipes. Flares help make leak-free joints that are easy to maintain or replace. The flare shape fits tightly with compression fittings.
| Type of Pipe | Flaring Use | Benefit |
|---|---|---|
| Copper Pipes | Water supply lines | Prevents leaks and corrosion |
| Steel Pipes | Gas lines | Ensures safe gas flow |
| Aluminum Tubing | Drain lines | Provides strong, durable joints |
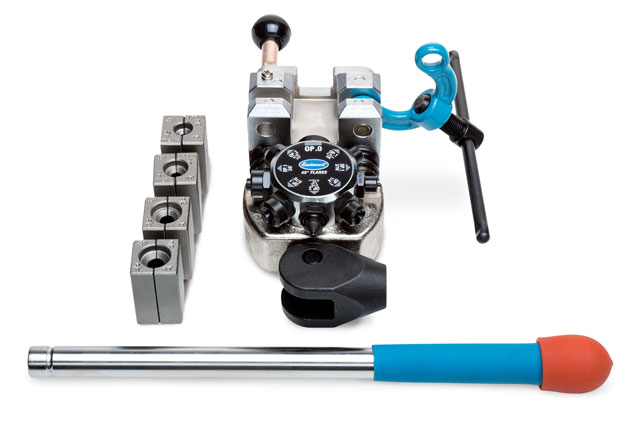
Credit: www.eastwood.com
Frequently Asked Questions
What Is Pipe Flaring And Why Is It Important?
Pipe flaring is shaping a pipe end to fit a flare fitting. It ensures a leak-proof seal in plumbing and automotive systems. Proper flaring prevents fluid leaks and maintains system pressure, increasing safety and efficiency.
Which Tools Are Best For Pipe Flaring?
Common tools include a flaring tool kit, tubing cutter, and deburring tool. These ensure precise cuts and smooth flares. Using the right tools improves flare quality and durability, reducing the risk of leaks.
How Do I Prevent Leaks During Pipe Flaring?
Ensure the pipe is clean, cut squarely, and deburred before flaring. Apply even pressure with the flaring tool. Proper technique creates a tight seal, preventing fluid or gas leaks in the system.
Can I Flare Different Pipe Materials?
Yes, metals like copper, aluminum, and steel can be flared. Each material may require specific techniques or tools. Understanding material properties helps achieve a strong, durable flare without cracking or deforming.
Conclusion
Mastering pipe flaring techniques is essential for any plumbing task. These methods ensure tight, leak-free connections. With practice, you can create precise flares. Always choose the right tools for the job. Quality tools make a big difference. Keep your tools clean and well-maintained.
This prolongs their life and effectiveness. Remember, patience and practice lead to better results. Safe practices protect you and your work. Now you’re ready to tackle flaring with confidence. Embrace the learning process. Every flare you make improves your skill.
Happy plumbing!