Are you struggling to make smooth, curved cuts with your hand saw? You’re not alone.
Cutting curves can feel tricky and frustrating, especially if your cuts come out jagged or uneven. But with the right tips, you can turn your hand saw into a precision tool that brings your creative projects to life. You’ll discover simple tricks to improve your control, accuracy, and confidence when making curved cuts.
Keep reading, and you’ll learn how to transform your skills and achieve clean, beautiful curves every time.
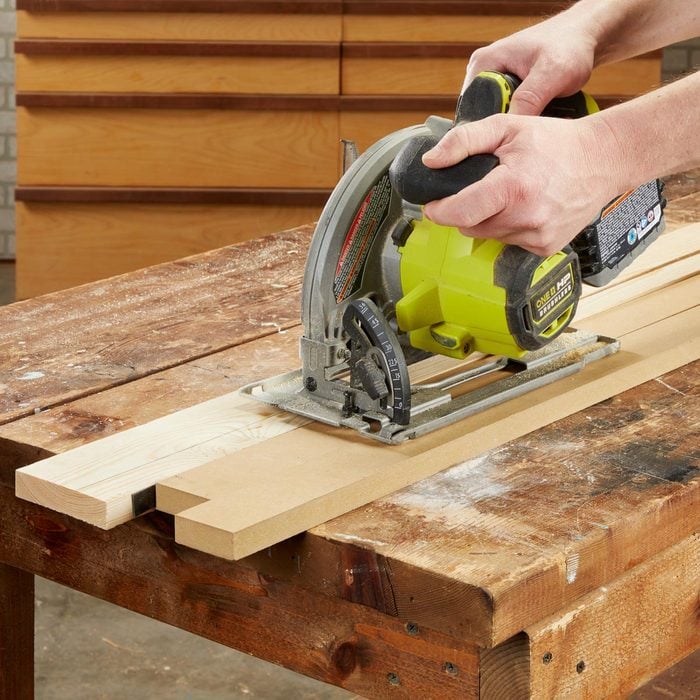
Credit: www.familyhandyman.com
Choosing The Right Hand Saw
Cutting curves with a hand saw needs the right tool. Picking the proper saw helps you work faster and get cleaner cuts.
Different hand saws suit different curved cuts. Knowing their features lets you choose the best one for your project.
Types Of Hand Saws For Curves
There are several saw types designed for curved cuts. Each has unique features that help with smooth and precise cutting.
- Keyhole Saw:Has a narrow blade for tight curves and small cuts.
- Fret Saw:Features a very thin blade to cut intricate shapes.
- Compass Saw:Offers a longer blade for larger curves.
- Cop Saw:Similar to fret saw but with a replaceable blade for detailed work.
Blade Thickness And Flexibility
Blade thickness affects how well the saw bends around curves. Thin blades flex more, making tight cuts easier.
| Blade Thickness | Flexibility | Use |
| Thin (0.3 – 0.5 mm) | High | Small and tight curves |
| Medium (0.5 – 0.7 mm) | Moderate | General curved cuts |
| Thick (0.7+ mm) | Low | Straight cuts and gentle curves |
Tooth Count And Shape
Teeth on the blade decide how smooth and fast the cut will be. Fine teeth give smooth cuts but cut slower.
- Fine Teeth (15-20 TPI):Best for delicate and clean curves.
- Medium Teeth (10-15 TPI):Good balance of speed and smoothness.
- Coarse Teeth (6-10 TPI):Cuts fast but leaves rough edges.

Credit: www.youtube.com
Preparing Your Workspace
Getting ready before cutting curved shapes with a hand saw helps you work better. A clean and organized space keeps you safe and makes cutting easier.
Take time to set up your tools and wood properly. This prevents mistakes and keeps your work steady.
Securing The Wood
Hold the wood firmly to avoid slips during cutting. Use clamps or a workbench to keep the wood steady and safe.
- Place the wood on a flat surface.
- Use clamps to fix the wood in place.
- Make sure the wood does not move before cutting.
- Keep your hands away from the cutting path.
Marking Curved Lines
Clear lines guide your saw and help you make smooth curves. Use a pencil and flexible ruler or a template for accuracy.
| Tool | Purpose |
| Pencil | Draw visible cutting lines |
| Flexible ruler | Follow smooth curves |
| Template | Copy exact shapes |
Safety Measures
Protect yourself while cutting. Wear safety gear and keep your workspace free of hazards.
- Wear safety goggles to protect your eyes.
- Use gloves to protect your hands.
- Keep your workspace clean and free of clutter.
- Make sure your saw is sharp and in good condition.
Techniques For Smooth Curved Cuts
Cutting curves with a hand saw can be tricky without the right techniques. Smooth curves require patience and steady hands.
Using the right method helps prevent rough edges and improves the final look of your project.
Starting The Cut
Begin by marking the curve clearly on your workpiece. Use a pencil or marker that contrasts well with the wood.
Make a small notch to guide the saw blade. This helps keep the saw from slipping as you start cutting.
Maintaining Control
Hold the saw firmly but not too tight. Let the saw do the work by moving it smoothly back and forth.
- Keep your wrist flexible to follow the curve naturally.
- Use slow, steady strokes to avoid jagged edges.
- Pause often to check your progress and adjust your path.
- Support the workpiece firmly to stop it from moving.
Adjusting Your Cutting Angle
Change the angle of the saw as the curve changes direction. This helps keep the blade on the line.
| Curve Type | Saw Angle | Tip |
| Gentle curve | 15° to 20° | Maintain steady, shallow cuts |
| Tight curve | 30° to 45° | Use shorter strokes and adjust hand position |
| Complex curve | Varies | Pause to plan each cut and keep control |

Credit: www.youtube.com
Handling Common Challenges
Using a hand saw for curved cuts can be tough. You may face some common problems.
Knowing how to handle these issues helps you get better results and saves time.
Avoiding Blade Binding
Blade binding happens when the saw blade gets stuck in the wood. This slows your work and can break the blade.
Keep the cut clean and smooth by using the right pressure and angle.
- Use slow, steady strokes to prevent jamming.
- Let the saw do the work; don’t push too hard.
- Keep your blade sharp for easier cutting.
- Clear sawdust from the cut regularly.
Dealing With Tight Curves
Tight curves need careful cutting to avoid mistakes. You should control the saw well to follow the curve.
Use a smaller blade or a saw meant for curves to make turning easier.
- Mark the curve clearly before cutting.
- Cut slowly and follow the line closely.
- Turn the workpiece, not the saw, for better control.
- Use a coping saw for very tight curves.
Correcting Mistakes
Mistakes happen during curved cuts. Fix them before moving on to the next step.
Use sanding or trimming tools to smooth out errors and keep the shape clean.
- Use a file or sandpaper to smooth rough edges.
- Trim small extra pieces with a chisel.
- Check your work often to catch mistakes early.
- Practice patience; fixing cuts takes time but improves results.
Finishing Touches
After making curved cuts with a hand saw, the edges need attention. Finishing touches help make the cut smooth and clean.
Proper finishing improves the look and safety of your project. Follow these tips to perfect your curved cuts.
Sanding Edges
Use sandpaper to smooth the saw marks on the edges. Start with coarse grit, then move to finer grit for a smooth finish.
Sanding helps remove rough spots that can cause splinters or uneven surfaces.
- Use 80-grit sandpaper to remove big rough spots
- Switch to 120-grit for a smoother surface
- Finish with 220-grit for a fine, clean edge
- Sand along the curve to keep its shape
Refining The Curve
Check the curve for any bumps or uneven areas after sanding. Use a file or rasp to shape the curve more accurately.
Work slowly and carefully to keep the curve smooth and even. Small corrections make a big difference.
- Use a round file for inside curves
- Use a flat file for outside curves
- Test the curve by running your finger along it
- Repeat sanding after filing to smooth edges
Protecting The Cut Surface
Apply a finish to protect the cut surface from damage and moisture. This keeps the wood strong and looking good.
Choose a finish that suits your project, such as paint, varnish, or oil.
- Clean dust off before applying finish
- Use a brush or cloth for even coverage
- Apply thin coats and let dry fully
- Lightly sand between coats for smoothness
Maintenance Of Your Hand Saw
Keeping your hand saw in good condition ensures smooth and accurate curved cuts. Regular care helps the blade stay sharp and the tool last longer.
Proper maintenance includes cleaning, sharpening, and storing your saw correctly. Each step protects the saw from damage and improves its performance.
Cleaning And Lubricating
Remove dust and resin from the blade after each use. Use a soft brush or cloth to clean the teeth carefully.
- Wipe the blade with a cloth dampened with mineral spirits.
- Dry the blade completely to prevent rust.
- Apply a light coat of machine oil or wax to the blade.
- Lubricate the handle if it is wooden to keep it smooth.
Sharpening The Blade
Keep the teeth sharp to cut curves cleanly and easily. Use a triangular file that fits the tooth size for sharpening.
| Sharpening Step | Description |
| Secure the Saw | Clamp the saw in a vice with the blade facing up. |
| File the Teeth | File each tooth evenly, keeping the original angle. |
| Check the Set | Adjust the tooth set to prevent the blade from binding. |
| Clean the Blade | Remove metal filings and oil the blade after sharpening. |
Proper Storage
Store your hand saw in a dry place to avoid rust and damage. Protect the blade edge to keep it sharp and safe.
- Use a blade cover or sheath for protection.
- Hang the saw on a pegboard or store flat in a toolbox.
- Keep the saw away from moisture and direct sunlight.
- Check the saw regularly and clean before storing long-term.
Frequently Asked Questions
What Type Of Hand Saw Is Best For Curved Cuts?
A coping saw or a keyhole saw is ideal for curved cuts. They have thin, flexible blades that easily navigate curves. Choose a saw with fine teeth for smoother edges and better control. This ensures precise and clean curved cuts in wood.
How Do I Maintain Control While Cutting Curves?
Keep a steady grip and use slow, deliberate strokes. Support the wood firmly to prevent movement. Follow the marked curve closely, adjusting your hand position as needed. Controlled cutting reduces mistakes and improves accuracy on curved lines.
Can I Use A Hand Saw On Hardwood For Curves?
Yes, but use a sharp blade designed for hardwood. Saw slowly to avoid splintering or blade damage. Hardwood requires more effort, so maintain steady pressure and take breaks if needed for better results.
How Do I Prepare Wood Before Cutting Curves?
Mark the curve clearly with a pencil or template. Secure the wood firmly using clamps or a workbench. Smooth rough edges to avoid snagging the saw blade. Proper preparation makes curved cutting easier and more precise.
Conclusion
Using a hand saw for curved cuts takes practice and patience. Start slow and follow the marked line carefully. Keep your hand steady and use smooth strokes. Choose the right saw for the curve size and wood type. Safety matters—wear gloves and protect your eyes.
With time, your cuts will look cleaner and more precise. Remember, every cut helps improve your skill. Enjoy the process and keep trying new shapes. You will see progress with each project.