If you want to fix or install copper pipes yourself, knowing how to solder plumbing joints is a skill that can save you time and money. Imagine being able to create strong, leak-proof connections with just a few simple tools and steps.
Whether you’re tackling a small repair or starting a bigger project, mastering this technique gives you control and confidence. Keep reading, and you’ll discover easy-to-follow tips that make soldering plumbing joints clear and manageable—even if you’ve never done it before.
Your next plumbing job just got a whole lot easier.
Credit: www.oatey.com
Tools And Materials Needed
Soldering plumbing joints requires the right tools and materials. Using the correct items makes the job easier and safer.
Below, you will find important tools and materials needed for soldering copper pipes.
Essential Tools
You need specific tools to prepare and join plumbing pipes. These tools help you cut, clean, and heat the pipes correctly.
- Pipe cutter – cuts copper pipes cleanly
- Wire brush or emery cloth – cleans pipe surfaces
- Propane torch – heats pipes for soldering
- Heat shield – protects nearby surfaces from flame
- Pipe fitting brush – cleans inside fittings
- Fireproof gloves – protect hands from heat
- Brush or flux applicator – applies flux to joints
Types Of Solder And Flux
Solder and flux help join pipes by melting and sealing the metal. Use types made for plumbing to ensure strong joints.
- Lead-free solder – safe for drinking water pipes
- Rosin-core solder – includes flux inside the solder
- Paste flux – cleans and prepares metal surfaces
- Liquid flux – easy to apply with a brush
Safety Equipment
Soldering involves heat and chemicals. Use safety gear to protect yourself during the process.
- Safety goggles – protect eyes from sparks and fumes
- Heat-resistant gloves – shield hands from burns
- Long-sleeve clothing – prevents skin contact with hot surfaces
- Fire extinguisher – ready in case of accidental fire
- Proper ventilation – avoid inhaling fumes
Preparing The Pipes
Preparing the pipes is an important part of soldering plumbing joints. Proper preparation helps create a strong, leak-free connection. This section explains how to cut and clean pipes and apply flux correctly.
Cutting And Cleaning Pipes
Start by cutting the pipes to the right length. Use a pipe cutter for a clean, straight cut. After cutting, clean the pipe ends to remove any dirt, grease, or oxidation. This helps the solder stick well.
- Use a pipe cutter to cut the pipe squarely.
- Remove burrs with a deburring tool or sandpaper.
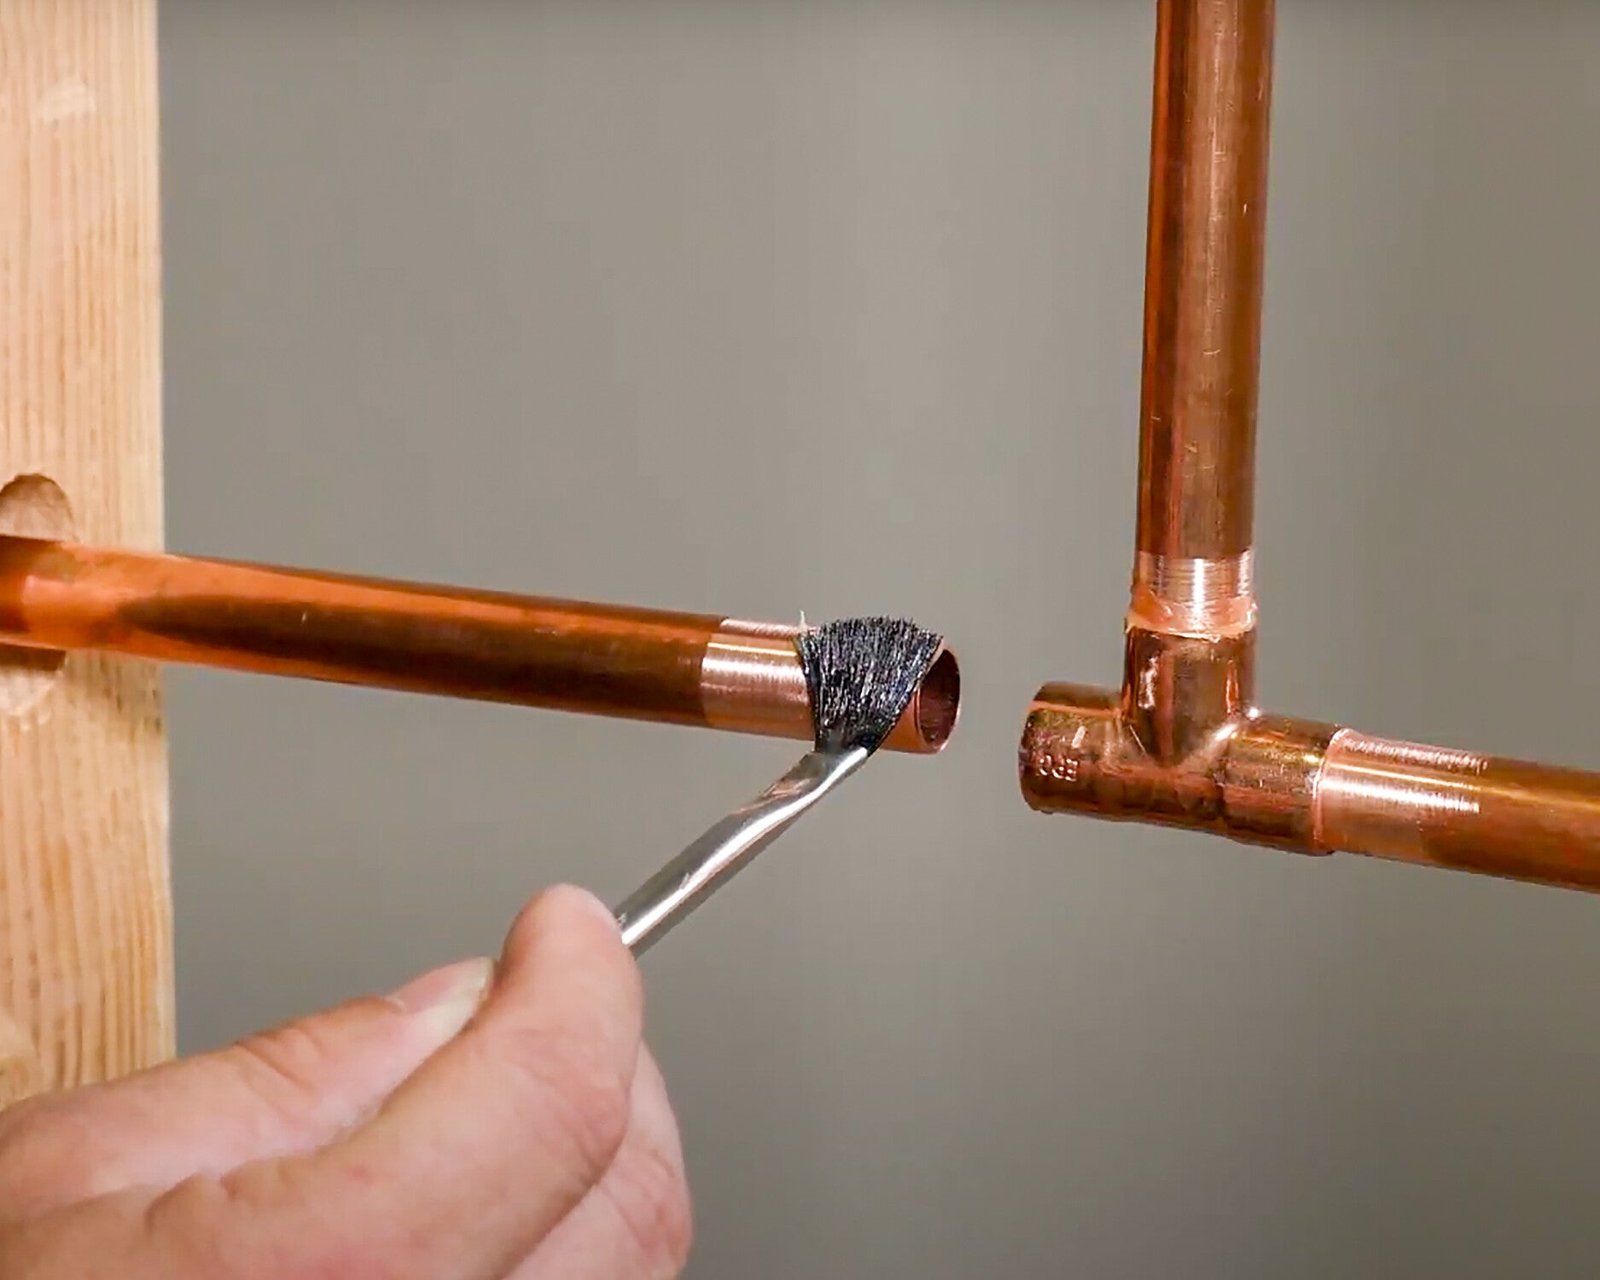
- Clean the outside of the pipe and inside of the fitting using a wire brush or emery cloth.
- Wipe all cleaned surfaces with a dry cloth to remove dust.
Applying Flux Properly
Flux helps clean the metal and allows solder to flow evenly. Apply flux evenly to both the pipe end and the inside of the fitting before joining them. Avoid using too much flux to prevent drips.
| Flux Application Tips | Reason |
| Apply a thin, even layer | Ensures good solder flow |
| Cover all joining surfaces | Prevents oxidation during heating |
| Remove excess flux after soldering | Prevents corrosion |
Heating The Joint
Heating the joint is a key step in soldering plumbing pipes. It helps the solder melt and create a strong seal.
You need to heat the joint evenly for the best results. Too much heat can damage the pipe or fittings.
Using The Torch Safely
Always wear safety glasses and gloves before using the torch. Keep flammable materials away from your work area.
Light the torch carefully and adjust the flame to a steady blue cone. Never leave the torch unattended while it is on.
- Wear protective gear
- Clear the workspace of flammable items
- Use a steady blue flame
- Never leave the torch on and unattended
Even Heat Distribution
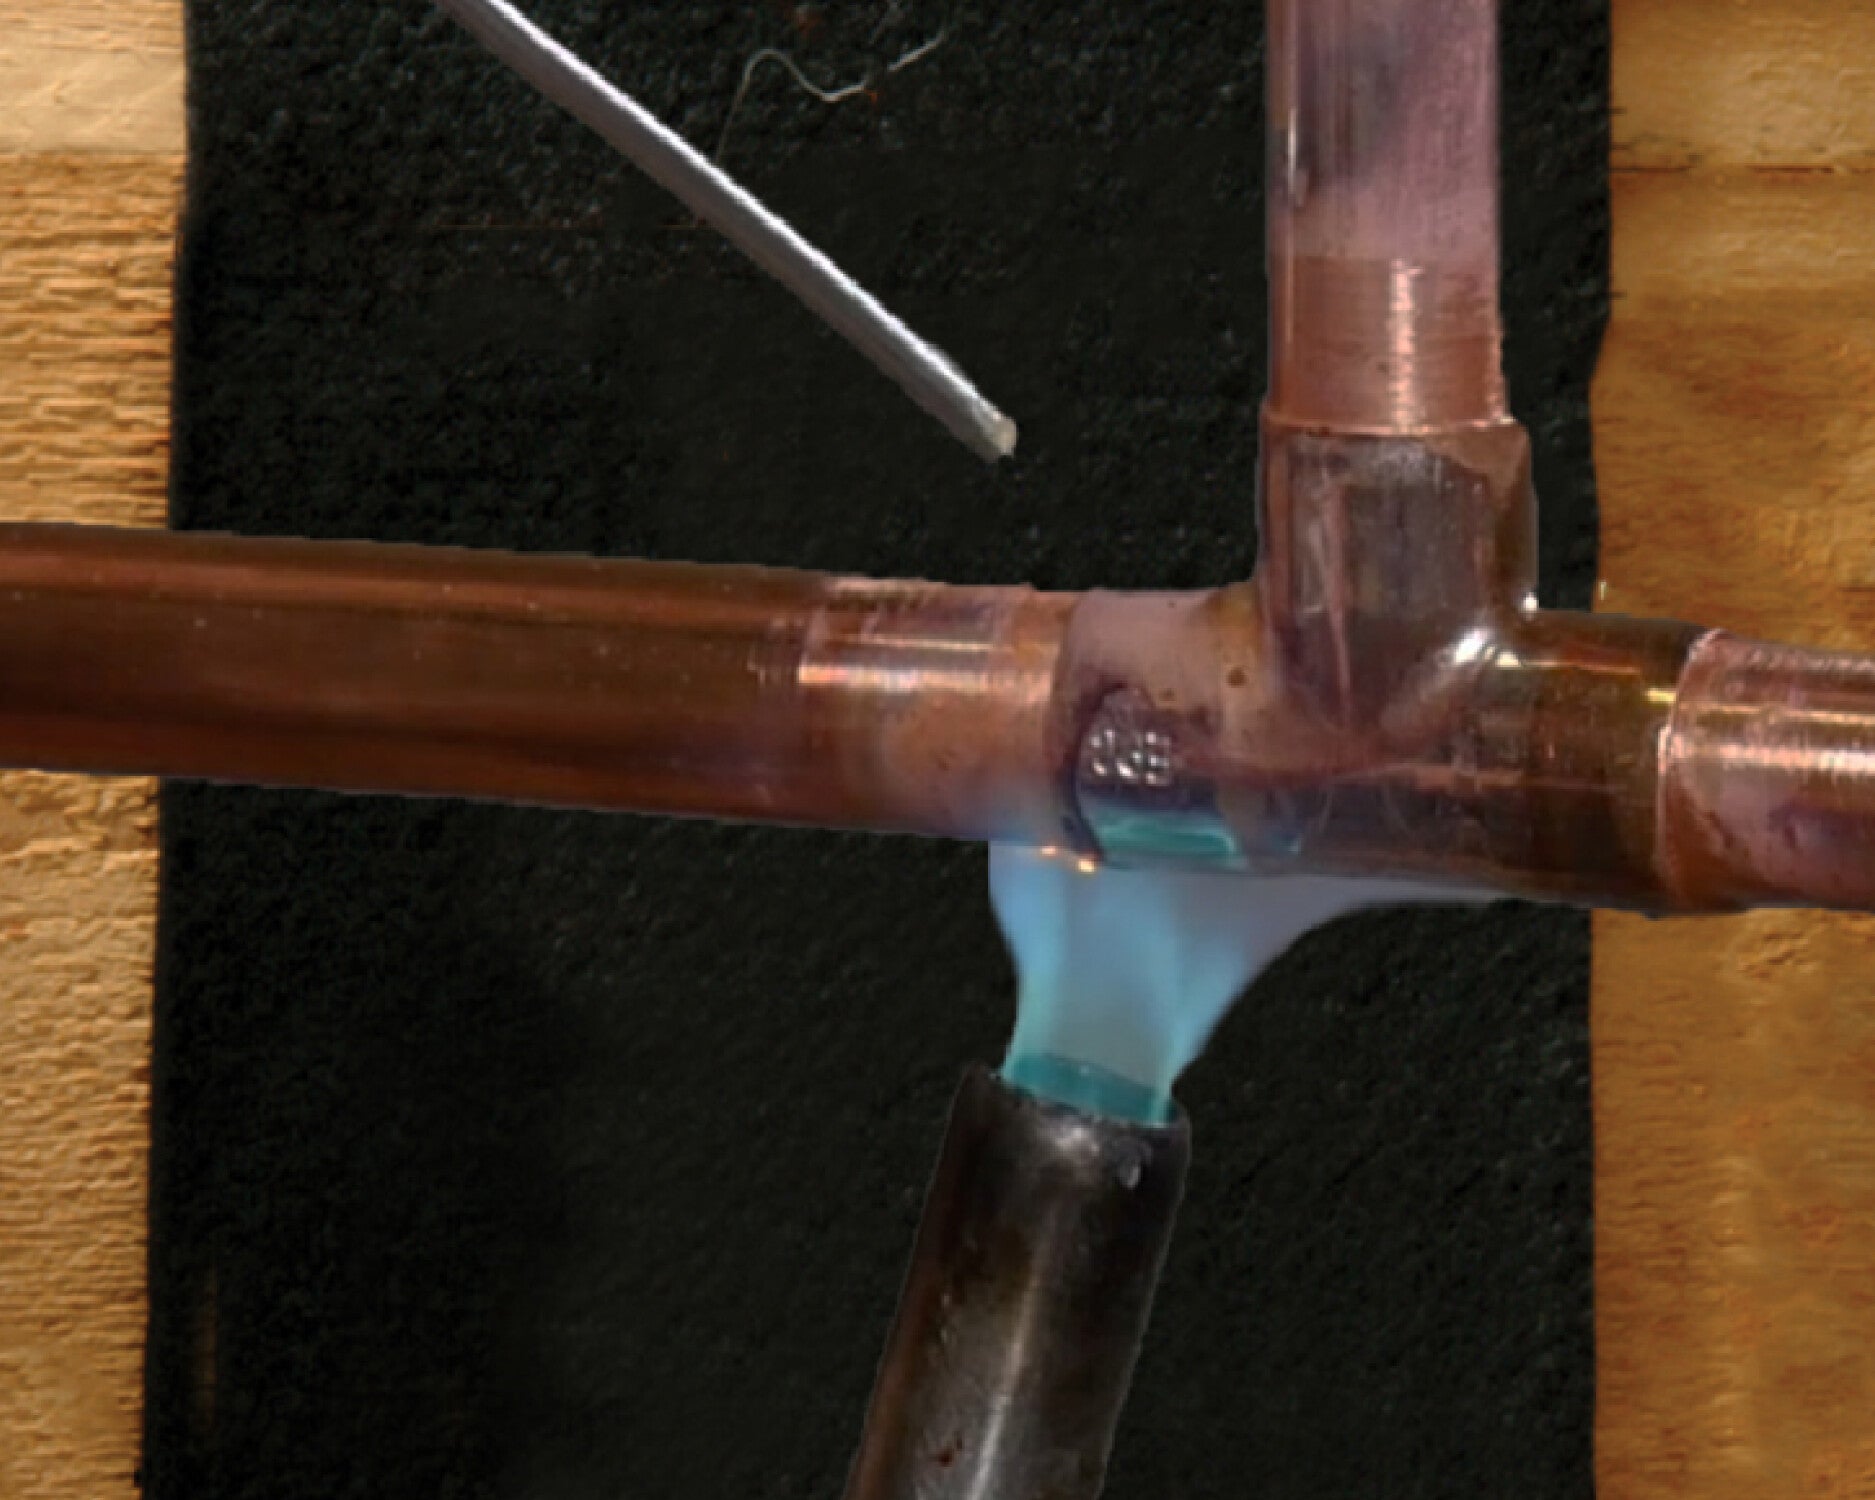
Move the torch flame around the joint to heat it evenly. Focus on the pipe and fitting, not just the solder.
Heat the joint until the solder melts on contact. This shows the joint is hot enough to create a good seal.
- Keep the flame moving to avoid hot spots
- Heat both pipe and fitting equally
- Test heat by touching solder to the joint
- Stop heating as soon as solder melts

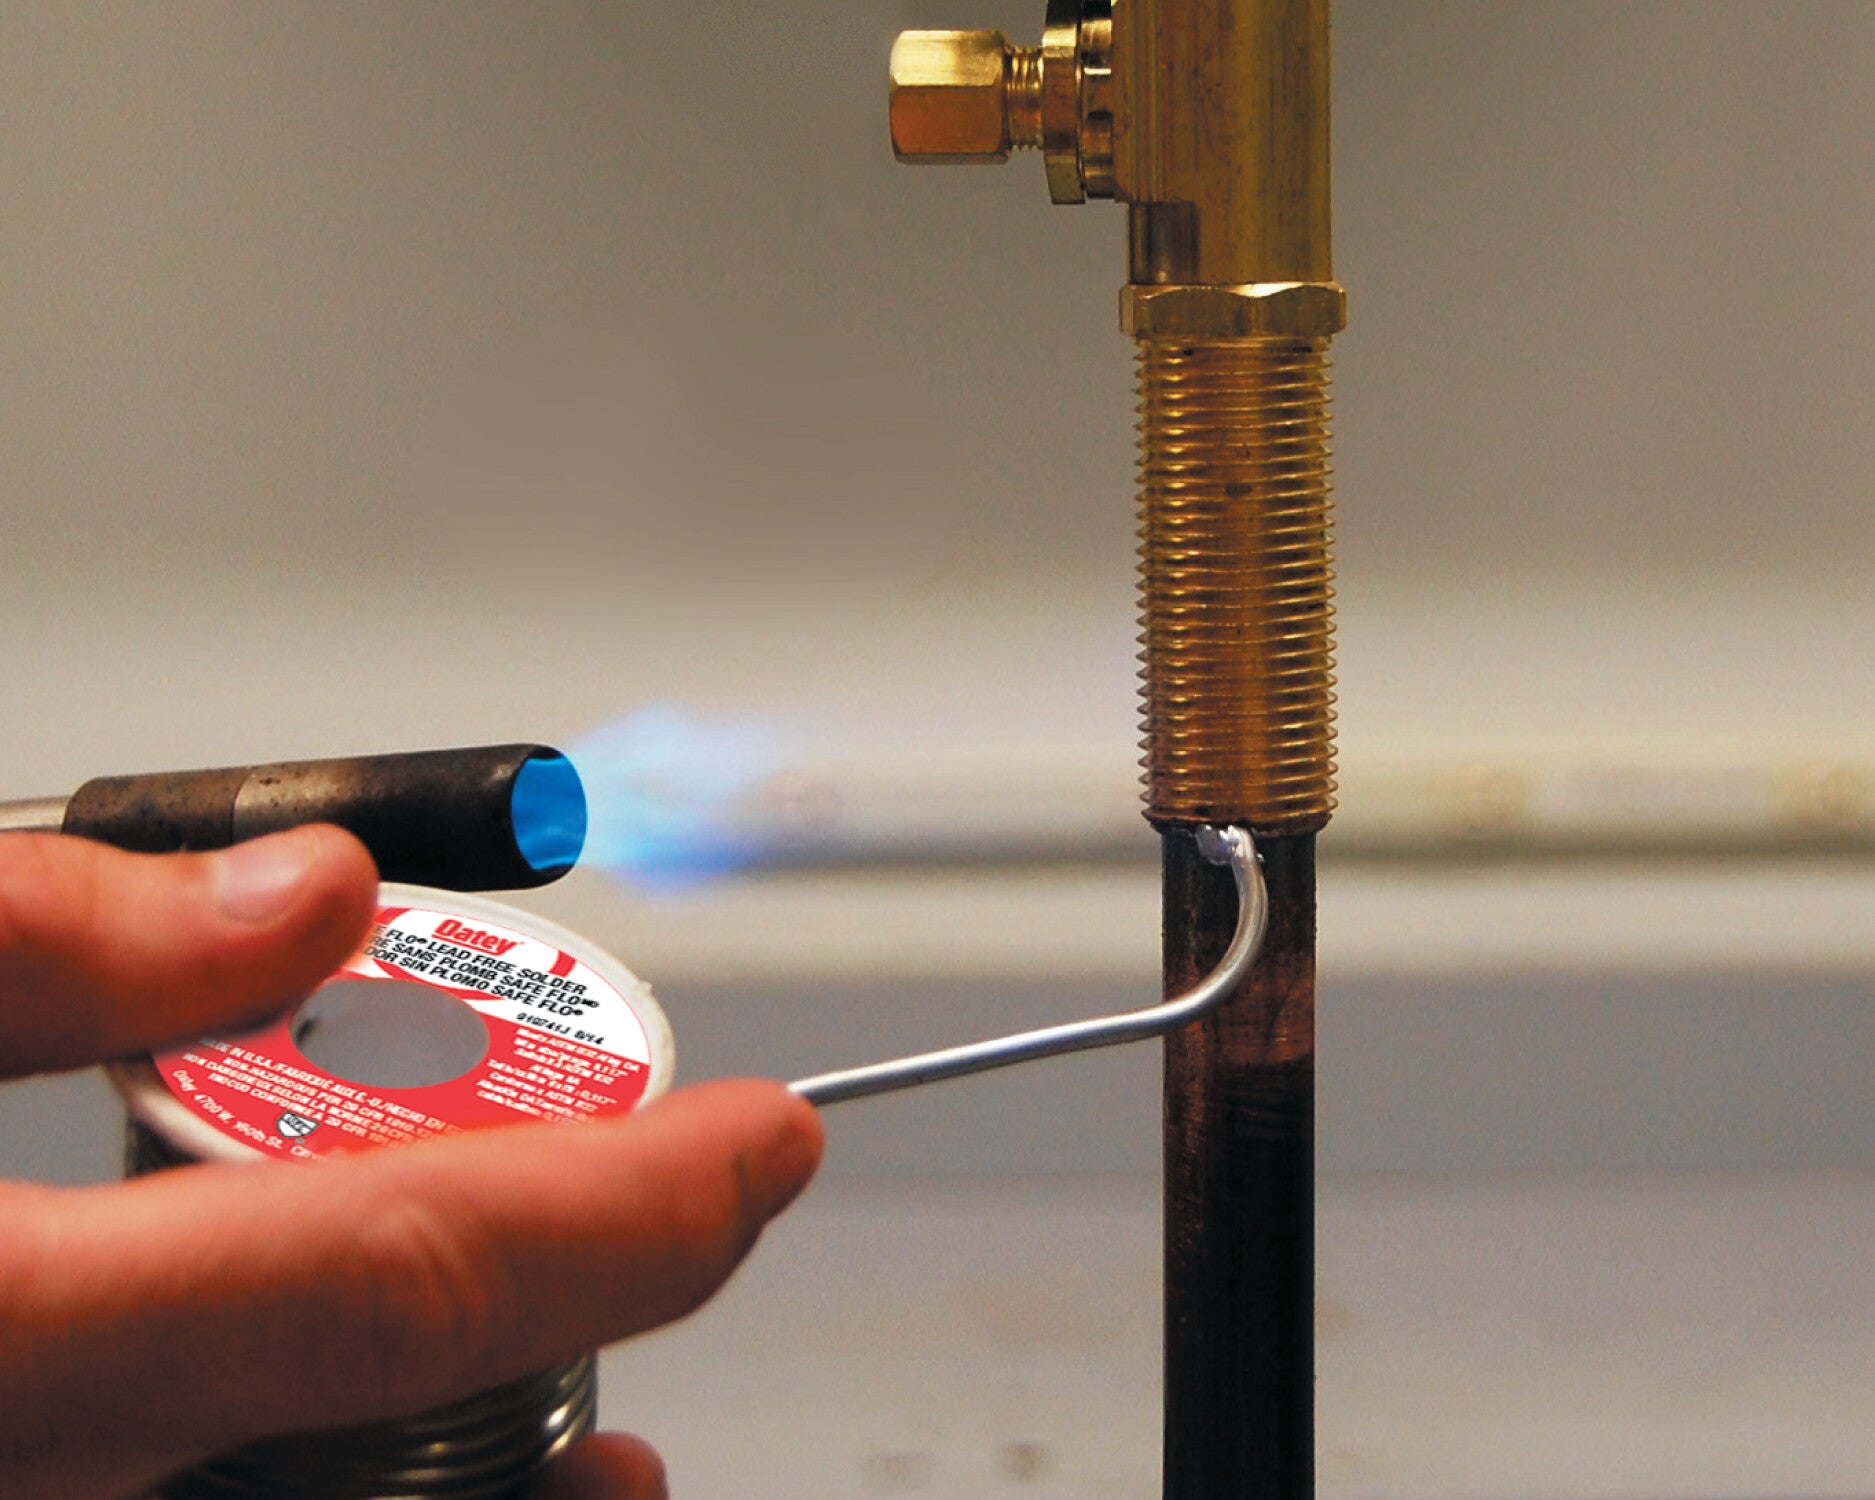
Credit: www.familyhandyman.com
Applying Solder
Applying solder correctly is key to making strong plumbing joints. The solder must melt evenly and cover the entire joint.
Using the right technique helps avoid leaks and ensures the joint lasts for years. Focus on melting the solder and covering the joint well.
Melting Solder Correctly
Heat the joint evenly with a torch before applying solder. The metal should be hot enough to melt solder on contact.
- Hold the flame on the pipe, not the solder.
- Touch the solder to the heated joint, not the flame.
- Let the solder melt and flow into the joint.
- Remove the solder and flame once the joint is filled.
Ensuring Complete Coverage
Full coverage of solder prevents leaks and strengthens the joint. Check all around the pipe after soldering.
| Check Point | What to Look For |
| Inside the joint | Solder should fill the seam completely |
| Outside the joint | Solder should create a smooth, shiny ring |
| Gaps or holes | None should be visible anywhere |
Cooling And Inspecting
After soldering plumbing joints, it is important to let the joints cool properly. This helps the solder set firmly. Once cooled, inspect the joints carefully to ensure a leak-free connection.
Proper cooling and inspection help maintain the strength and safety of your plumbing system. Follow the tips below to avoid damage or leaks.
Allowing Proper Cooling Time
Do not touch or move the pipes right after soldering. The solder needs time to harden and form a solid seal. Cooling too fast or disturbing the joint can cause cracks or weak connections.
- Wait at least 5 minutes for small joints to cool.
- For larger joints, wait 10 to 15 minutes.
- Avoid using water or any cooling methods on the joint.
- Keep the area dry and free from movement during cooling.
Checking For Leaks
After cooling, check the joints carefully for leaks. Even small leaks can cause water damage over time. Testing with water pressure helps confirm the joint’s integrity.
| Leak Test Method | Instructions |
| Visual Inspection | Look for any wet spots or discoloration around the joint. |
| Pressure Test | Turn on water supply and check for drips under normal pressure. |
| Soap Solution Test | Apply soapy water to the joint and watch for bubbles indicating leaks. |
| Dry Tissue Test | Wipe the joint with dry tissue; wet tissue shows leaks. |
Common Mistakes To Avoid
Soldering plumbing joints is a skill that needs care. Mistakes can cause leaks or damage pipes. Avoiding common errors helps ensure strong joints.
This guide covers key mistakes to watch for. Fixing these will improve your plumbing work and avoid costly repairs.
Overheating Pipes
Heating pipes too much can weaken them or cause burns. Overheated pipes may crack or lose shape. Use a moderate flame and move the torch evenly.
- Keep the flame moving to avoid hot spots.
- Do not hold the torch on one spot for long.
- Use heat shields to protect nearby materials.
- Check pipe temperature before applying solder.
Insufficient Cleaning
Dirty pipes stop solder from sticking well. Old flux, grease, or dirt can block solder flow. Clean pipes with a wire brush or sandpaper before soldering.
| Cleaning Method | Purpose |
| Wire brush | Removes oxidation and dirt |
| Sanding cloth | Smooths pipe surface |
| Flux application | Keeps area clean and helps solder flow |
| Dry cloth wipe | Removes dust and debris |
Using Wrong Materials
Using incorrect solder or flux can cause weak joints or leaks. Always pick materials made for plumbing pipes. Avoid general-purpose solder or flux not meant for plumbing.
- Use lead-free solder for drinking water lines.
- Select flux designed for copper pipes.
- Do not mix materials from different manufacturers.
- Check product labels for plumbing compatibility.
Tips For Long-lasting Seals
Soldering plumbing joints well is key to strong, leak-free pipes. Long-lasting seals prevent costly repairs.
Good habits before and after soldering help keep your joints solid for years. Learn how to care for materials and maintain pipes.
Proper Storage Of Materials
Store solder, flux, and pipes in a dry place. Moisture can ruin flux and cause weak joints.
- Keep solder rolls sealed and away from dust
- Store flux in tightly closed containers
- Protect copper pipes from bending or dents
- Place materials off the ground to avoid dampness
Routine Maintenance
Check your plumbing joints regularly. Spotting small leaks early prevents big problems.
| Maintenance Task | Frequency |
| Inspect joints for cracks or corrosion | Every 6 months |
| Clean pipes and fittings | Annually |
| Retighten or resolder loose joints | As needed |
| Replace damaged parts | Immediately |
Credit: www.oatey.com
Frequently Asked Questions
What Tools Are Needed To Solder Plumbing Joints?
You need a propane torch, solder, flux, pipe cutter, and a wire brush. These tools ensure clean, strong joints. Proper tools make soldering efficient and safe.
How Do You Prepare Pipes Before Soldering?
Clean pipes with a wire brush and apply flux evenly. This removes oxidation and helps solder flow smoothly. Proper prep ensures a leak-free joint.
What Safety Precautions Should Be Taken When Soldering?
Wear safety glasses, gloves, and work in a well-ventilated area. Keep flammable materials away. Always have a fire extinguisher nearby to prevent accidents.
How Long Does It Take For Soldered Joints To Cool?
Soldered joints typically cool within 5 to 10 minutes. Avoid moving the joint during this time to maintain a strong seal. Cooling time depends on pipe size.
Conclusion
Soldering plumbing joints is a valuable skill. It ensures leak-free connections. Start by gathering the right tools. Clean the pipe ends thoroughly. Apply flux to promote bonding. Heat the joint evenly with a torch. Watch for the solder to melt and flow.
Allow it to cool naturally. Practice makes perfect, so don’t rush. Follow these steps for strong, reliable joints. Your plumbing will thank you. With patience and care, you can succeed. Remember, safety is important. Always wear protective gear. Happy soldering!